2010 CHEVROLET CORVETTE display
[x] Cancel search: displayPage 291 of 472
Launch Control
A Launch Control feature is available, within
Competitive Driving Mode (except ZR1) or Performance
Traction Management (ZR1), on vehicles with a manual
transmission to allow the driver to achieve high levels of
vehicle acceleration in a straight line. Launch Control is
a form of traction control that manages tire spin while
launching the vehicle. This feature is intended for use
during closed course race events where consistent
zero to sixty and quarter mile times are desirable.
Launch Control is only available when the following
criteria are met:
.Competitive Driving Mode is selected (except ZR1)
or any of the Performance Traction Management
modes are selected (ZR1). The TCS light comes
on the instrument panel and the appropriate
DIC message displays.
.The vehicle is not moving.
.The steering wheel is pointing straight.
.The clutch is pressed and the vehicle is in
first gear.
.The accelerator pedal is rapidly applied to wide
open throttle. The Launch Control feature will initially limit engine
speed as the driver rapidly applies the accelerator pedal
to wide open throttle. A smooth, quick release of the
clutch, while maintaining the fully pressed accelerator
pedal, will manage wheel slip. Complete shifts as
described in
Manual Transmission Operation
on
page 3‑32.
After the vehicle is launched, the system continues in
Competitive Mode (except ZR1) or Performance
Traction Management (ZR1).
Competitive Driving Mode, Performance Traction
Management, and Launch Control are systems
designed for a closed course race track and not
intended for use on public roads. The systems are not
intended to compensate for lack of driver experience or
familiarity with the race track.
5-13
Page 293 of 472
Three Driver Information Center (DIC) messages
(SERVICE RIDE CONTROL, SHOCKS INOPERATIVE
and MAXIMUM SPEED 80 MPH (129 KM/H) display
when a malfunction occurs with the Selective Ride
Control system . Refer to DIC Warnings and Messages
on page 4‑52for more information.
ZR1
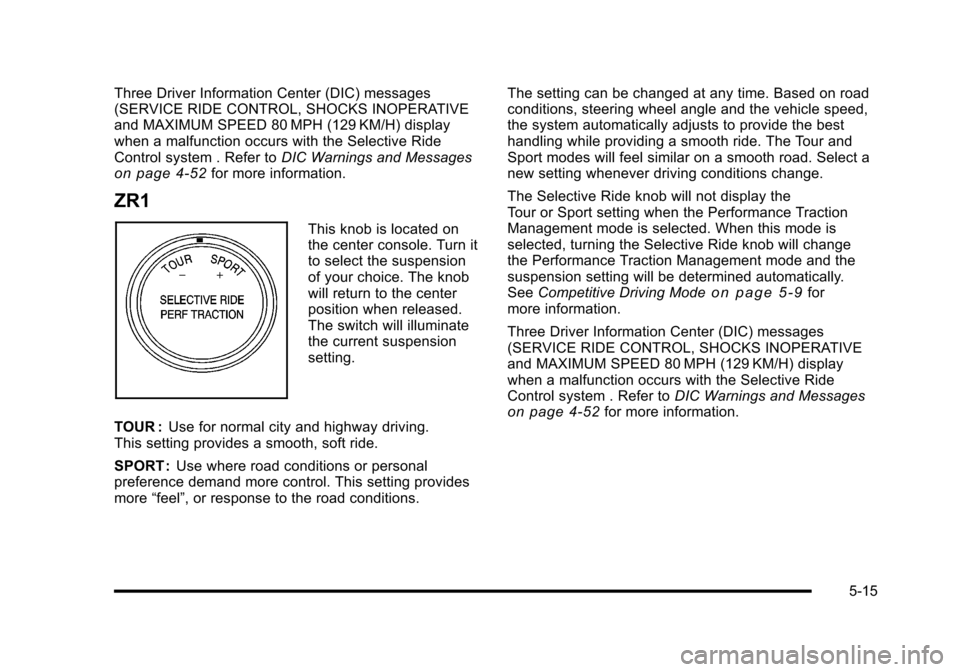
This knob is located on
the center console. Turn it
to select the suspension
of your choice. The knob
will return to the center
position when released.
The switch will illuminate
the current suspension
setting.
TOUR : Use for normal city and highway driving.
This setting provides a smooth, soft ride.
SPORT : Use where road conditions or personal
preference demand more control. This setting provides
more “feel”, or response to the road conditions. The setting can be changed at any time. Based on road
conditions, steering wheel angle and the vehicle speed,
the system automatically adjusts to provide the best
handling while providing a smooth ride. The Tour and
Sport modes will feel similar on a smooth road. Select a
new setting whenever driving conditions change.
The Selective Ride knob will not display the
Tour or Sport setting when the Performance Traction
Management mode is selected. When this mode is
selected, turning the Selective Ride knob will change
the Performance Traction Management mode and the
suspension setting will be determined automatically.
See
Competitive Driving Mode
on page 5‑9for
more information.
Three Driver Information Center (DIC) messages
(SERVICE RIDE CONTROL, SHOCKS INOPERATIVE
and MAXIMUM SPEED 80 MPH (129 KM/H) display
when a malfunction occurs with the Selective Ride
Control system . Refer to DIC Warnings and Messages
on page 4‑52for more information.
5-15
Page 323 of 472
{WARNING:
Fuel can spray out on you if you open the fuel cap
too quickly. If you spill fuel and then something
ignites it, you could be badly burned. This spray
can happen if the tank is nearly full, and is more
likely in hot weather. Open the fuel cap slowly and
wait for any hiss noise to stop. Then unscrew the
cap all the way.
Be careful not to spill fuel. Do not top off or overfill the
tank and wait a few seconds after you have finished
pumping before removing the nozzle. Clean fuel from
painted surfaces as soon as possible. See Washing
Your Vehicle on page 6‑94.
When replacing the fuel cap, turn it clockwise
until it clicks. Make sure the cap is fully installed.
The diagnostic system can determine if the fuel cap
has been left off or improperly installed. This would
allow fuel to evaporate into the atmosphere.
See Malfunction Indicator Lamp on page 4‑41. The CHECK GAS CAP message displays on the Driver
Information Center (DIC) if the fuel cap is not properly
installed. See
DIC Warnings and Messages
on
page 4‑52for more information.
{WARNING:
If a fire starts while you are refueling, do not
remove the nozzle. Shut off the flow of fuel by
shutting off the pump or by notifying the station
attendant. Leave the area immediately.
Notice: If you need a new fuel cap, be sure to get
the right type. Your dealer/retailer can get one for
you. If you get the wrong type, it may not fit
properly. This may cause the malfunction indicator
lamp to light and may damage the fuel tank and
emissions system. See Malfunction Indicator Lamp
on page 4‑41.
6-11
Page 331 of 472
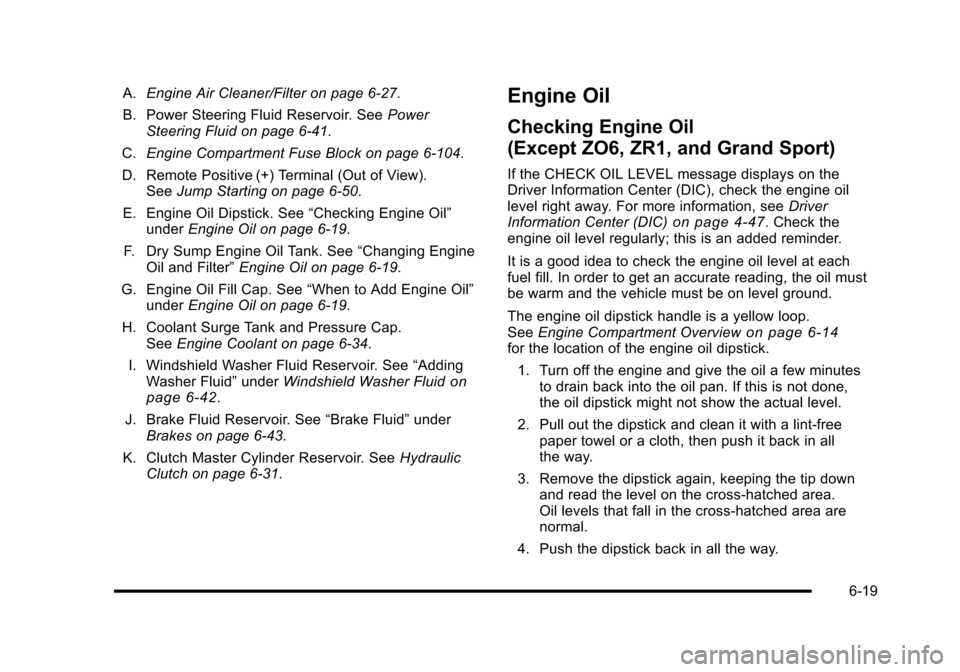
A.Engine Air Cleaner/Filter on page 6‑27.
B. Power Steering Fluid Reservoir. See Power
Steering Fluid on page 6‑41.
C. Engine Compartment Fuse Block on page 6‑104.
D. Remote Positive (+) Terminal (Out of View). See Jump Starting on page 6‑50.
E. Engine Oil Dipstick. See “Checking Engine Oil”
under Engine Oil on page 6‑19.
F. Dry Sump Engine Oil Tank. See “Changing Engine
Oil and Filter” Engine Oil on page 6‑19.
G. Engine Oil Fill Cap. See “When to Add Engine Oil”
under Engine Oil on page 6‑19.
H. Coolant Surge Tank and Pressure Cap. See Engine Coolant on page 6‑34.
I. Windshield Washer Fluid Reservoir. See “Adding
Washer Fluid” underWindshield Washer Fluid
on
page 6‑42.
J. Brake Fluid Reservoir. See “Brake Fluid”under
Brakes on page 6‑43.
K. Clutch Master Cylinder Reservoir. See Hydraulic
Clutch on page 6‑31.
Engine Oil
Checking Engine Oil
(Except ZO6, ZR1, and Grand Sport)
If the CHECK OIL LEVEL message displays on the
Driver Information Center (DIC), check the engine oil
level right away. For more information, see Driver
Information Center (DIC)
on page 4‑47. Check the
engine oil level regularly; this is an added reminder.
It is a good idea to check the engine oil level at each
fuel fill. In order to get an accurate reading, the oil must
be warm and the vehicle must be on level ground.
The engine oil dipstick handle is a yellow loop.
See Engine Compartment Overview
on page 6‑14for the location of the engine oil dipstick.
1. Turn off the engine and give the oil a few minutes to drain back into the oil pan. If this is not done,
the oil dipstick might not show the actual level.
2. Pull out the dipstick and clean it with a lint‐free paper towel or a cloth, then push it back in all
the way.
3. Remove the dipstick again, keeping the tip down and read the level on the cross‐hatched area.
Oil levels that fall in the cross‐hatched area are
normal.
4. Push the dipstick back in all the way.
6-19
Page 338 of 472
Z06, ZR1, and Grand Sport models have a
racetrack‐ready dry sump engine lubrication system.
This high‐performance system operates differently
than a standard engine lubrication system and requires
a special procedure when changing the engine oil and
filter. See Engine Oil on page 6‑19.
When the system has calculated that oil life has been
diminished, it indicates that an oil change is necessary.
A CHANGE ENGINE OIL message comes on. Change
the oil as soon as possible within the next 1 000 km
(600 miles). It is possible that, if driving under the best
conditions, the oil life system might not indicate that
an oil change is necessary for over a year. However,
the engine oil and filter must be changed at least once
a year and at this time the system must be reset.
Your dealer/retailer has trained service people who
will perform this work using genuine parts and reset
the system. It is also important to check the oil regularly
and keep it at the proper level.
If the system is ever reset accidentally, the oil must be
changed at 5 000 km (3,000 miles) since the last oil
change. Remember to reset the oil life system
whenever the oil is changed.How to Reset the Engine Oil Life
System
The Engine Oil Life System calculates when to
change the engine oil and filter based on vehicle use.
Whenever the oil is changed, reset the system so it
can calculate when the next oil change is required.
If a situation occurs where the oil is changed prior to
a CHANGE ENGINE OIL message being turned on,
reset the system.
To reset the CHANGE ENGINE OIL message after an
oil change: 1. Press the TRIP button so the OIL LIFE percentage is displayed.
2. Press RESET and hold for two seconds. OIL LIFE REMAINING 100% will appear.
If the CHANGE ENGINE OIL message comes back on
when the vehicle is started, the engine oil life system
has not reset. Repeat the procedure.
6-26
Page 350 of 472
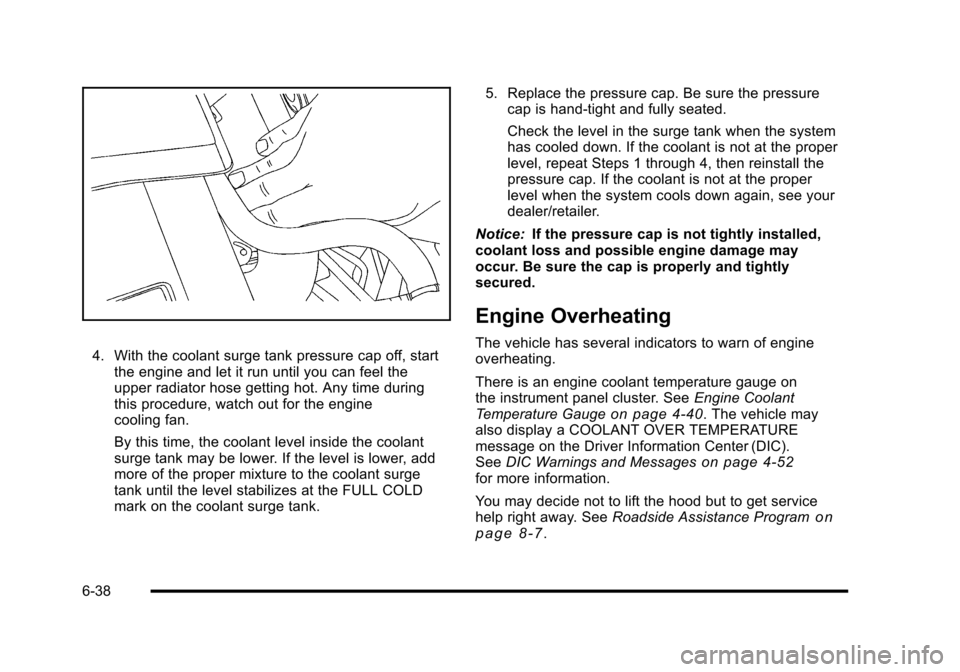
4. With the coolant surge tank pressure cap off, start the engine and let it run until you can feel the
upper radiator hose getting hot. Any time during
this procedure, watch out for the engine
cooling fan.
By this time, the coolant level inside the coolant
surge tank may be lower. If the level is lower, add
more of the proper mixture to the coolant surge
tank until the level stabilizes at the FULL COLD
mark on the coolant surge tank. 5. Replace the pressure cap. Be sure the pressure
cap is hand-tight and fully seated.
Check the level in the surge tank when the system
has cooled down. If the coolant is not at the proper
level, repeat Steps 1 through 4, then reinstall the
pressure cap. If the coolant is not at the proper
level when the system cools down again, see your
dealer/retailer.
Notice: If the pressure cap is not tightly installed,
coolant loss and possible engine damage may
occur. Be sure the cap is properly and tightly
secured.
Engine Overheating
The vehicle has several indicators to warn of engine
overheating.
There is an engine coolant temperature gauge on
the instrument panel cluster. See Engine Coolant
Temperature Gauge
on page 4‑40. The vehicle may
also display a COOLANT OVER TEMPERATURE
message on the Driver Information Center (DIC).
See DIC Warnings and Messages
on page 4‑52for more information.
You may decide not to lift the hood but to get service
help right away. See Roadside Assistance Program
on
page 8‑7.
6-38
Page 352 of 472
If No Steam Is Coming From Your
Engine
If an engine overheat warning is displayed but no steam
can be seen or heard, the problem may not be too
serious. Sometimes the engine can get a little too hot
when the vehicle:
.Climbs a long hill on a hot day.
.Stops after high-speed driving.
.Idles for long periods in traffic.
If the overheat warning is displayed with no sign of
steam: 1. Turn the air conditioning off.
2. Turn the heater on to the highest temperature and to the highest fan speed. Open the windows as
necessary.
3. If in a traffic jam, shift to N (Neutral) while stopped. If it is safe to do so, pull off the road, shift to
P (Park) or N (Neutral) and let the engine idle. If the temperature overheat gauge is no longer in
the overheat zone or an overheat warning no longer
displays, the vehicle can be driven. Continue to drive
the vehicle slow for about 10 minutes. Keep a safe
vehicle distance from the car in front of you. If the
warning does not come back on, continue to drive
normally.
If the warning continues, pull over, stop, and park the
vehicle right away.
If there is no sign of steam, idle the engine for
three minutes while parked. If the warning is still
displayed, turn off the engine until it cools down.
Also, see
“Overheated Engine Protection Operating
Mode” next in this section.
6-40
Page 353 of 472
Overheated Engine Protection
Operating Mode
This emergency operating mode lets the vehicle
be driven to a safe place, up to 50 miles (80 km),
in an emergency situation. If an overheated engine
condition exists and the messages COOLANT OVER
TEMPERATURE and REDUCED ENGINE POWER
are displayed, along with the check engine light, an
overheat protection mode which alternates firing groups
of cylinders helps prevent engine damage. In this
mode, there is a significant loss in power and engine
performance.
Driving extended distances in the overheat protection
mode should be avoided.
Notice: After driving in the overheated engine
protection operating mode, to avoid engine damage,
allow the engine to cool before attempting any
repair. The engine oil will be severely degraded.
Repair the cause of coolant loss, change the oil
and reset the oil life system. See Engine Oil
on
page 6‑19.
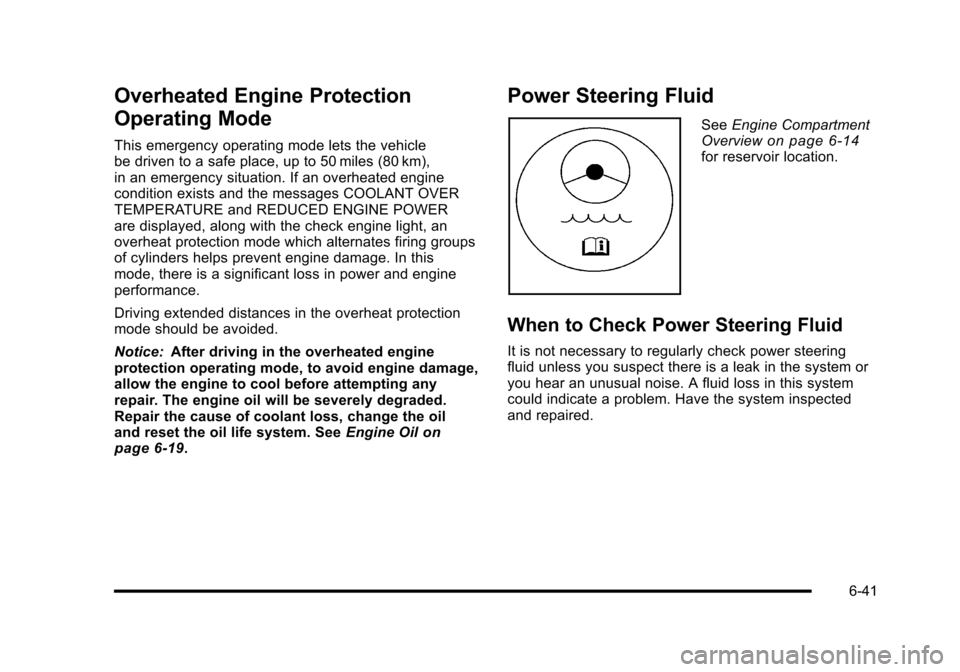
Power Steering Fluid
See Engine Compartment
Overviewon page 6‑14for reservoir location.
When to Check Power Steering Fluid
It is not necessary to regularly check power steering
fluid unless you suspect there is a leak in the system or
you hear an unusual noise. A fluid loss in this system
could indicate a problem. Have the system inspected
and repaired.
6-41