Page 28 of 414
2-2 Seats and Restraints
Head Restraints
The vehicle's front seats have
adjustable head restraints in the
outboard seating positions.
The vehicle's rear seats have
adjustable head rests in the
outboard seating positions.
{WARNING
With head restraints that are not
installed and adjusted properly,
there is a greater chance that
occupants will suffer a neck/
spinal injury in a crash. Do not
drive until the head restraints for
all occupants are installed and
adjusted properly.Adjust the head restraint so that the
top of the restraint is at the same
height as the top of the occupant's
head. This position reduces the
chance of a neck injury in a crash.
Front Seat
To raise or lower the head restraint,
press the release button located on
the side of the head restraint and
pull up or push the head restraint
down and release the button.
Pull and push on the head restraint
after the button is released to make
sure that it is locked in place.
Page 29 of 414
Seats and Restraints 2-3
Rear Seat
Pull the head rest up to raise it. To
lower the head rest, press the
release button, located on the head
rest post on the top of the seatback,
while you push the head rest down.
Push down on the head rest after
the button is released to make sure
that it is locked in place.
This vehicle's head restraints and
head are not designed to be
removed.
Front Seats
Seat Adjustment
Manual Seat Adjustment
{WARNING
You can lose control of the
vehicle if you try to adjust a
manual driver's seat while the(Continued)
WARNING (Continued)
vehicle is moving. The sudden
movement could startle and
confuse you, or make you push a
pedal when you do not want to.
Adjust the driver's seat only when
the vehicle is not moving.
To adjust the seat position:
1. Pull the handle located at the front of the seat.
2. Move the seat forward or backward to adjust the seat
position.
3. Release the handle to stop the seat from moving.
Page 31 of 414

Seats and Restraints 2-5
Using the Remote Keyless Entry
(RKE) transmitter to enter the
vehicle with the remote recall
memory feature on causes
automatic seat and mirror
adjustment associated with that
transmitter. There is no adjustment
when the position has not been
changed by another seating
position.
To stop recall movement of the
memory feature at any time, press
one of the power seat controls,
memory buttons, or power mirror
buttons.
If something has blocked the driver
seat while recalling a memory
position, the driver seat recall may
stop working. If this happens, press
the appropriate control for the area
that is not recalling for two seconds,
after the obstruction is removed.Then try recalling the memory
position again by pressing the
appropriate memory button. If the
memory position is still not being
recalled, see your dealer/retailer for
service.
Easy Exit Seat
With this feature, the driver seat
automatically moves back to give
the driver more room to exit when
the ignition is turned to OFF and the
driver door is opened.
Lumbar Adjustment
To increase or decrease lumbar
support, press and hold the front or
rear of the round control knob.
To raise or lower lumbar support,
press and hold the top or bottom of
the round control knob.
Release the control knob when the
seatback reaches the desired level
of lumbar support.
See
Power Seat Adjustment
on
page 2‑4for more information.
Page 33 of 414
Seats and Restraints 2-7
Manual Reclining Seatbacks
On vehicles with manual reclining
seatbacks, the control lever is
located on the outboard side of
the seat.To recline the seatback:
1. Lift the recline lever.
2. Move the seatback to the
desired position, then release
the lever to lock the seatback in
place.
3. Push and pull on the seatback to make sure it is locked.
To return the seatback to an upright
position:
1. Lift the lever fully without applying pressure to the
seatback and the seatback will
return to the upright position.
2. Push and pull on the seatback to make sure it is locked.
Power Reclining Seatbacks
On vehicles with power reclining
seatbacks the vertical control is
located on the outboard side of
the seat.
.To recline the seatback, press
the control toward the rear of the
vehicle.
.To raise the seatback, press the
control toward the front of the
vehicle.
Page 35 of 414

Seats and Restraints 2-9
There are three temperature
settings for each feature:
.High = three
.Medium = two
.Low = one
Press a button to turn the feature on
at the maximum setting. Each press
of the button changes the
temperature one setting.
Turn the feature off by pressing the
button until the display lights
turn off.
If the vehicle has remote vehicle
start and is started by using the
remote keyless entry transmitter, the
heated and ventilated seats turn on
at the maximum setting according to
the temperature outside. When the
key is inserted into the ignition and
the ignition is turned on, the heated
or cooled seat feature turns off. To
turn this feature back on, press the
desired button.
Rear Seats
The vehicle's rear seat can be
folded down to allow for more cargo
space or it can be placed back into
a locked upright position. Adjust the
seatback only when the vehicle is
not moving.
To fold the seatback down:
1. Be sure the safety belt is in the retainer clip.
2. Pull on the lever located on the
top of the of the seatback to
unlock it.
3. Fold the seatback down.
Page 36 of 414

2-10 Seats and Restraints
To raise the seatback:
1. Push the seatback up and pushit back to lock it into place. Make
sure the safety belt is in the
retainer clip and does not get
twisted or caught in the
seatback.
2. A tab on the handle pops down to indicate the seatback has
been locked.
3. Push and pull the top of the seatback to be sure it is locked
into position.Safety Belts
This section of the manual
describes how to use safety belts
properly. It also describes some
things not to do with safety belts.
{WARNING
Do not let anyone ride where a
safety belt cannot be worn
properly. In a crash, if you or your
passenger(s) are not wearing
safety belts, the injuries can be
much worse. You can hit things
inside the vehicle harder or be
ejected from the vehicle. You and
your passenger(s) can be
seriously injured or killed. In the
same crash, you might not be,
if you are buckled up. Always
fasten your safety belt, and check
that your passenger(s) are
restrained properly too.
{WARNING
It is extremely dangerous to ride
in a cargo area, inside or outside
of a vehicle. In a collision, people
riding in these areas are more
likely to be seriously injured or
killed. Do not allow people to ride
in any area of your vehicle that is
not equipped with seats and
safety belts. Be sure everyone in
your vehicle is in a seat and using
a safety belt properly.
This vehicle has indicators as a
reminder to buckle the safety belts.
See Safety Belt Reminders
on
page 4‑15for additional
information.
Page 40 of 414
2-14 Seats and Restraints
First, before you or your
passenger(s) wear a safety belt,
there is important information you
should know.
Sit up straight and always keep your
feet on the floor in front of you. The
lap part of the belt should be worn
low and snug on the hips, justtouching the thighs. In a crash, this
applies force to the strong pelvic
bones and you would be less likely
to slide under the lap belt. If you slid
under it, the belt would apply force
on your abdomen. This could cause
serious or even fatal injuries. The
shoulder belt should go over the
shoulder and across the chest.
These parts of the body are best
able to take belt restraining forces.
The shoulder belt locks if there is a
sudden stop or crash.
Q: What is wrong with this?
A:
The shoulder belt is too loose.
It will not give as much
protection this way.
Page 45 of 414

Seats and Restraints 2-19
Lap-Shoulder Belt
All seating positions in the vehicle
have a lap-shoulder belt.
The following instructions explain
how to wear a lap-shoulder belt
properly.
1. Adjust the seat, if the seat isadjustable, so you can sit up
straight. To see how, see “Seats”
in the Index.
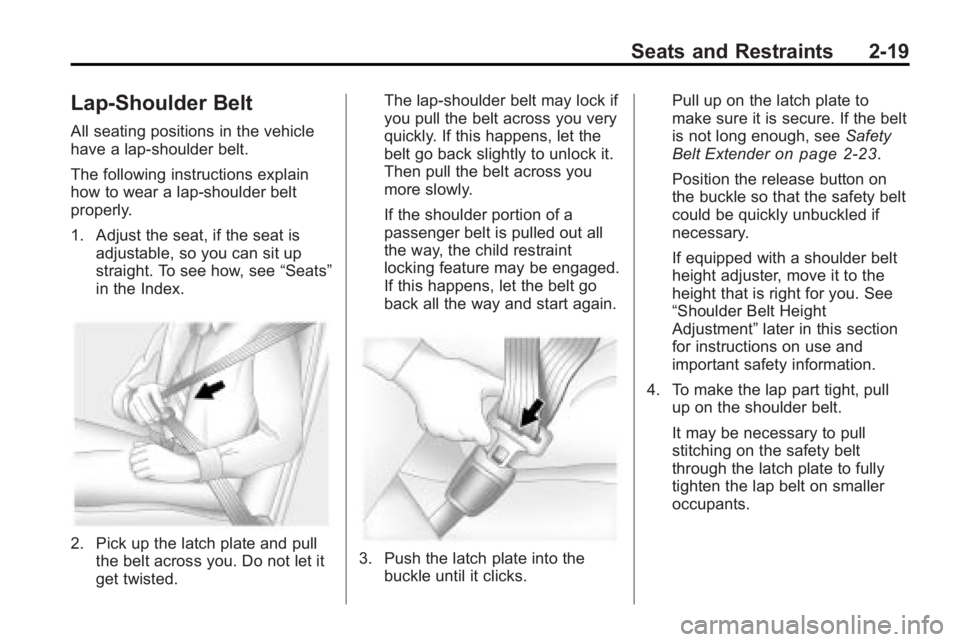
2. Pick up the latch plate and pull the belt across you. Do not let it
get twisted. The lap-shoulder belt may lock if
you pull the belt across you very
quickly. If this happens, let the
belt go back slightly to unlock it.
Then pull the belt across you
more slowly.
If the shoulder portion of a
passenger belt is pulled out all
the way, the child restraint
locking feature may be engaged.
If this happens, let the belt go
back all the way and start again.3. Push the latch plate into the
buckle until it clicks. Pull up on the latch plate to
make sure it is secure. If the belt
is not long enough, see
Safety
Belt Extender
on page 2‑23.
Position the release button on
the buckle so that the safety belt
could be quickly unbuckled if
necessary.
If equipped with a shoulder belt
height adjuster, move it to the
height that is right for you. See
“Shoulder Belt Height
Adjustment” later in this section
for instructions on use and
important safety information.
4. To make the lap part tight, pull up on the shoulder belt.
It may be necessary to pull
stitching on the safety belt
through the latch plate to fully
tighten the lap belt on smaller
occupants.