Page 2035 of 2453
5AT-19
General Description
AUTOMATIC TRANSMISSION
398527700 PULLER ASSY • Used for removing the extension case roller
bearing.
•Used for removing the extension oil seal.
•Used for removing the front differential side
retainer bearing outer race.
•Used for removing the front differential side
retainer oil seal.
498057300 INSTALLER Used for installing the extension oil seal.
498077000 REMOVER Used for removing the differential taper roller
bearing.
18630AA010 WRENCH COMPL
RETAINER
Used for removing and installing the differential
side retainer.
398487700 DRIFT Used for installing the front differential taper
roller bearing.
ILLUSTRATION TOOL NUMBER DESCRIPTION REMARKS
ST-398527700
ST-498057300
ST-498077000
ST18630AA010
ST-398487700
Page 2038 of 2453
5AT-22
General Description
AUTOMATIC TRANSMISSION
18482AA010 CARTRIDGE Troubleshooting for the electrical system.
22771AA030 SUBARU SELECT
MONITOR KIT
Tr o u b l e s h o o t i n g f o r t h e e l e c t r i c a l s y s t e m .
18675AA000 DIFFERENTIAL
SIDE OIL SEAL
INSTALLER
Used for installing the differential side retainer oil
seal.
18654AA000 INSTALLER Used for removing and installing the ball bearing.
28399SA010 OIL SEAL PROTEC-
TOR
Used for protecting oil seal when installing front
drive shaft.
ILLUSTRATION TOOL NUMBER DESCRIPTION REMARKS
ST18482AA010
ST22771AA030
ST18675AA000
ST18654AA000
ST28399SA010
Page 2041 of 2453
5AT-25
General Description
AUTOMATIC TRANSMISSION
2. GENERAL TOOL
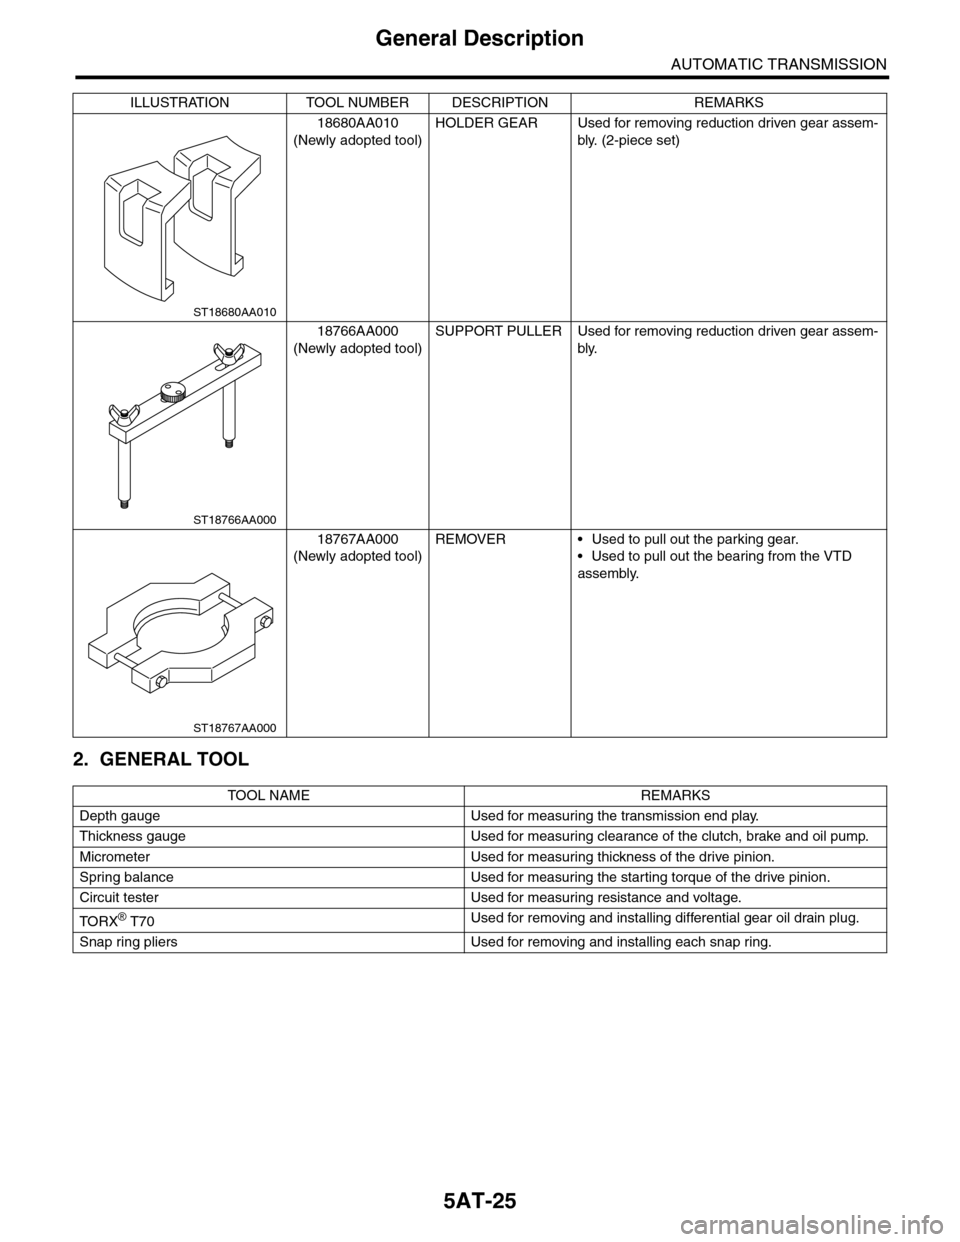
18680AA010
(Newly adopted tool)
HOLDER GEAR Used for removing reduction driven gear assem-
bly. (2-piece set)
18766AA000
(Newly adopted tool)
SUPPORT PULLER Used for removing reduction driven gear assem-
bly.
18767AA000
(Newly adopted tool)
REMOVER • Used to pull out the parking gear.
•Used to pull out the bearing from the VTD
assembly.
TO OL N AM E RE MA R KS
Depth gauge Used for measuring the transmission end play.
Thickness gauge Used for measuring clearance of the clutch, brake and oil pump.
Micrometer Used for measuring thickness of the drive pinion.
Spring balance Used for measuring the starting torque of the drive pinion.
Circuit tester Used for measuring resistance and voltage.
TO RX® T70Used for removing and installing differential gear oil drain plug.
Snap ring pliers Used for removing and installing each snap ring.
ILLUSTRATION TOOL NUMBER DESCRIPTION REMARKS
ST18680AA010
ST18766AA000
ST18767AA000
Page 2044 of 2453
5AT-28
Differential Gear Oil
AUTOMATIC TRANSMISSION
3. Differential Gear Oil
A: INSPECTION
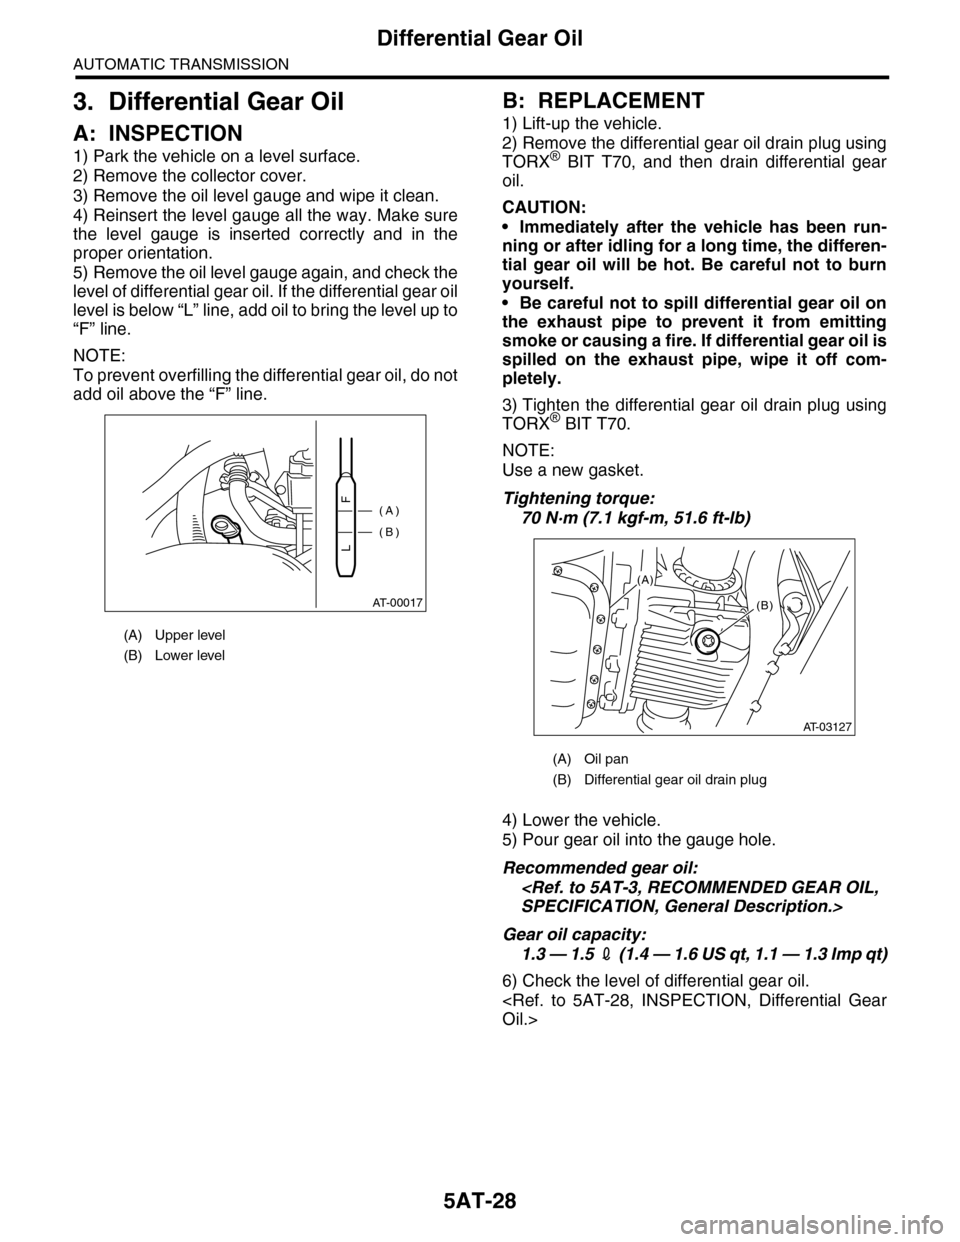
1) Park the vehicle on a level surface.
2) Remove the collector cover.
3) Remove the oil level gauge and wipe it clean.
4) Reinsert the level gauge all the way. Make sure
the level gauge is inserted correctly and in the
proper orientation.
5) Remove the oil level gauge again, and check the
level of differential gear oil. If the differential gear oil
level is below “L” line, add oil to bring the level up to
“F” line.
NOTE:
To prevent overfilling the differential gear oil, do not
add oil above the “F” line.
B: REPLACEMENT
1) Lift-up the vehicle.
2) Remove the differential gear oil drain plug using
TORX® BIT T70, and then drain differential gear
oil.
CAUTION:
•Immediately after the vehicle has been run-
ning or after idling for a long time, the differen-
tial gear oil will be hot. Be careful not to burn
yourself.
•Be careful not to spill differential gear oil on
the exhaust pipe to prevent it from emitting
smoke or causing a fire. If differential gear oil is
spilled on the exhaust pipe, wipe it off com-
pletely.
3) Tighten the differential gear oil drain plug using
TORX® BIT T70.
NOTE:
Use a new gasket.
Tightening torque:
70 N·m (7.1 kgf-m, 51.6 ft-lb)
4) Lower the vehicle.
5) Pour gear oil into the gauge hole.
Recommended gear oil:
SPECIFICATION, General Description.>
Gear oil capacity:
1.3 — 1.5 2 ( 1 . 4 — 1 . 6 U S q t , 1 . 1 — 1 . 3 I m p q t )
6) Check the level of differential gear oil.
Oil.>
(A) Upper level
(B) Lower level
AT-00017
(A)
(B)LF
(A) Oil pan
(B) Differential gear oil drain plug
(B)
AT-03127
(A)
Page 2046 of 2453
5AT-30
Stall Test
AUTOMATIC TRANSMISSION
5. Stall Test
A: INSPECTION
NOTE:
The stall test is extremely important in diagnosing
the condition of an automatic transmission and en-
gine. It should be conducted to measure the engine
stall speeds in “R” and “2nd of manual mode”.
Purposes of the stall test:
•Operational check of the automatic transmission
clutch
•Operational check of the torque converter clutch
•Engine performance check
1) Check that the throttle valve fully opens.
2) Check that the engine oil level is correct.
3) Check that the coolant level is correct.
4) Check that the ATF level is correct.
5) Check that the differential gear oil level is cor-
rect.
6) Raise the ATF temperature to 70 to 80°C (158 to
176°F) by driving a distance of 5 to 10 km (3 to 6
miles). Confirm the ATF temperature on Subaru
Select Monitor.
RENT DATA, OPERATION, Subaru Select Moni-
tor.>
7) Place the wheel chocks at the front and rear of
all wheels and apply the parking brake.
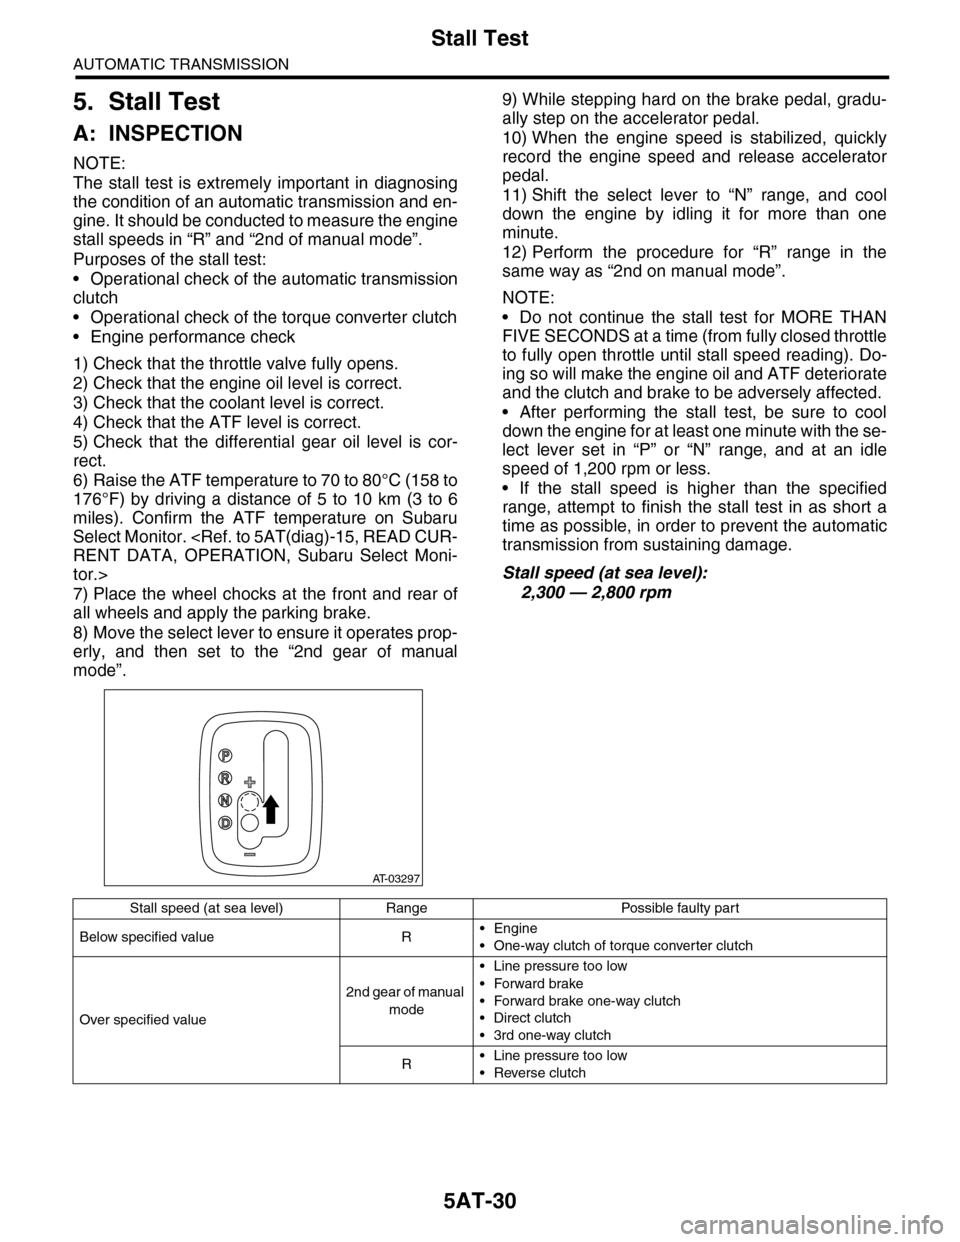
8) Move the select lever to ensure it operates prop-
erly, and then set to the “2nd gear of manual
mode”.
9) While stepping hard on the brake pedal, gradu-
ally step on the accelerator pedal.
10) When the engine speed is stabilized, quickly
record the engine speed and release accelerator
pedal.
11) Shift the select lever to “N” range, and cool
down the engine by idling it for more than one
minute.
12) Perform the procedure for “R” range in the
same way as “2nd on manual mode”.
NOTE:
•Do not continue the stall test for MORE THAN
FIVE SECONDS at a time (from fully closed throttle
to fully open throttle until stall speed reading). Do-
ing so will make the engine oil and ATF deteriorate
and the clutch and brake to be adversely affected.
•After performing the stall test, be sure to cool
down the engine for at least one minute with the se-
lect lever set in “P” or “N” range, and at an idle
speed of 1,200 rpm or less.
•If the stall speed is higher than the specified
range, attempt to finish the stall test in as short a
time as possible, in order to prevent the automatic
transmission from sustaining damage.
Stall speed (at sea level):
2,300 — 2,800 rpm
AT-03297
Stall speed (at sea level) Range Possible faulty part
Below specified value R•Engine
•One-way clutch of torque converter clutch
Over specified value
2nd gear of manual
mode
•Line pressure too low
•Forward brake
•Forward brake one-way clutch
•Direct clutch
•3rd one-way clutch
R•Line pressure too low
•Reverse clutch
Page 2054 of 2453
5AT-38
Automatic Transmission Assembly
AUTOMATIC TRANSMISSION
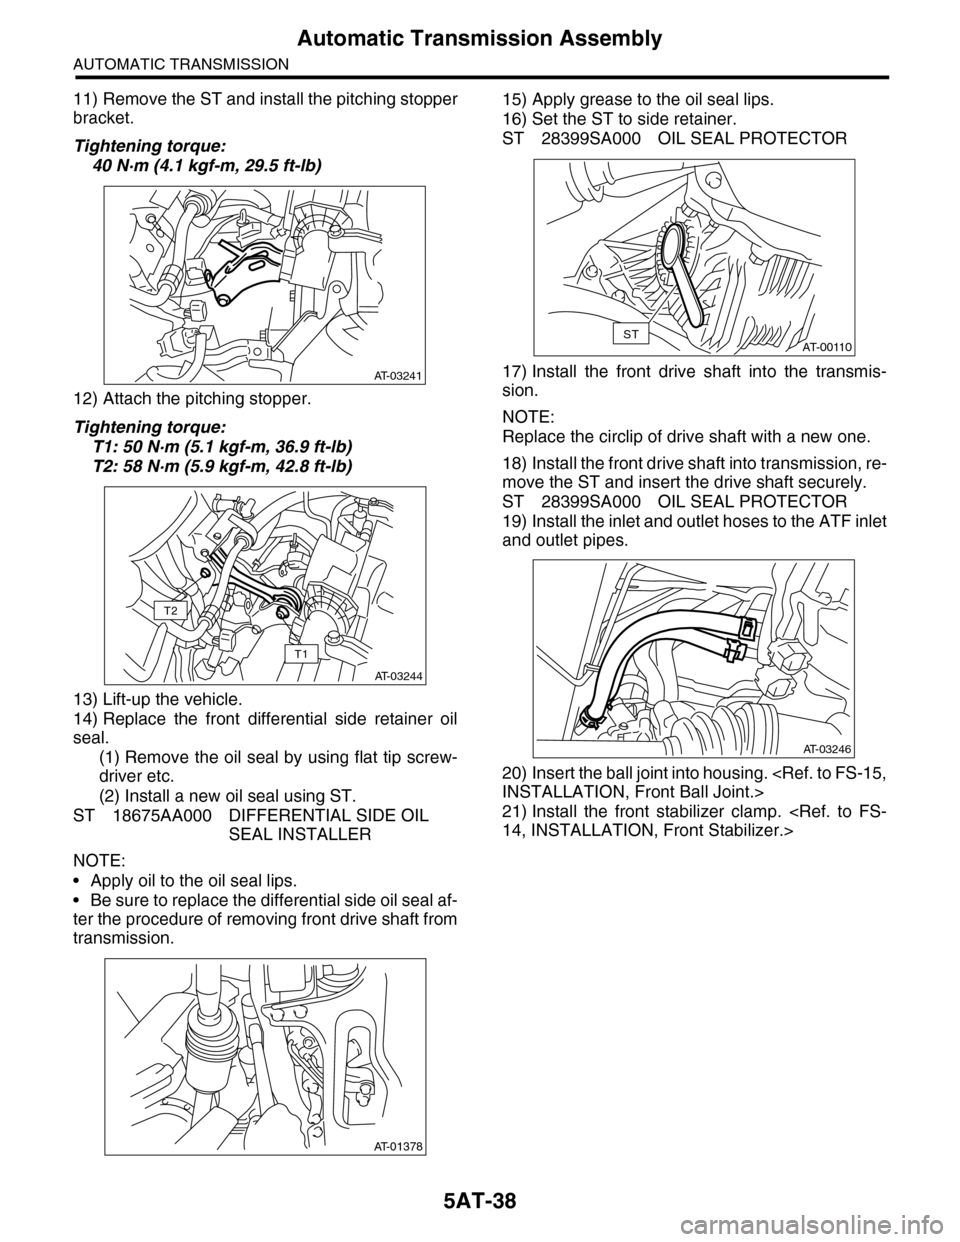
11) Remove the ST and install the pitching stopper
bracket.
Tightening torque:
40 N·m (4.1 kgf-m, 29.5 ft-lb)
12) Attach the pitching stopper.
Tightening torque:
T1: 50 N·m (5.1 kgf-m, 36.9 ft-lb)
T2: 58 N·m (5.9 kgf-m, 42.8 ft-lb)
13) Lift-up the vehicle.
14) Replace the front differential side retainer oil
seal.
(1) Remove the oil seal by using flat tip screw-
driver etc.
(2) Install a new oil seal using ST.
ST 18675AA000 DIFFERENTIAL SIDE OIL
SEAL INSTALLER
NOTE:
•Apply oil to the oil seal lips.
•Be sure to replace the differential side oil seal af-
ter the procedure of removing front drive shaft from
transmission.
15) Apply grease to the oil seal lips.
16) Set the ST to side retainer.
ST 28399SA000 OIL SEAL PROTECTOR
17) Install the front drive shaft into the transmis-
sion.
NOTE:
Replace the circlip of drive shaft with a new one.
18) Install the front drive shaft into transmission, re-
move the ST and insert the drive shaft securely.
ST 28399SA000 OIL SEAL PROTECTOR
19) Install the inlet and outlet hoses to the ATF inlet
and outlet pipes.
20) Insert the ball joint into housing.
INSTALLATION, Front Ball Joint.>
21) Install the front stabilizer clamp.
14, INSTALLATION, Front Stabilizer.>
AT-03241
AT-03244
T1
T2
AT-01378
AT-00110ST
AT-03246
Page 2061 of 2453
5AT-45
Differential Side Retainer Oil Seal
AUTOMATIC TRANSMISSION
12.Differential Side Retainer Oil
Seal
A: INSPECTION
Check for leakage of gear oil from differential side
retainer oil seal part. If there is an oil leak, replace
the oil seal.
B: REPLACEMENT
1) Lift-up the vehicle.
2) Remove the front exhaust pipe.
EX(H6DO)-4, REMOVAL, Front Exhaust Pipe.>
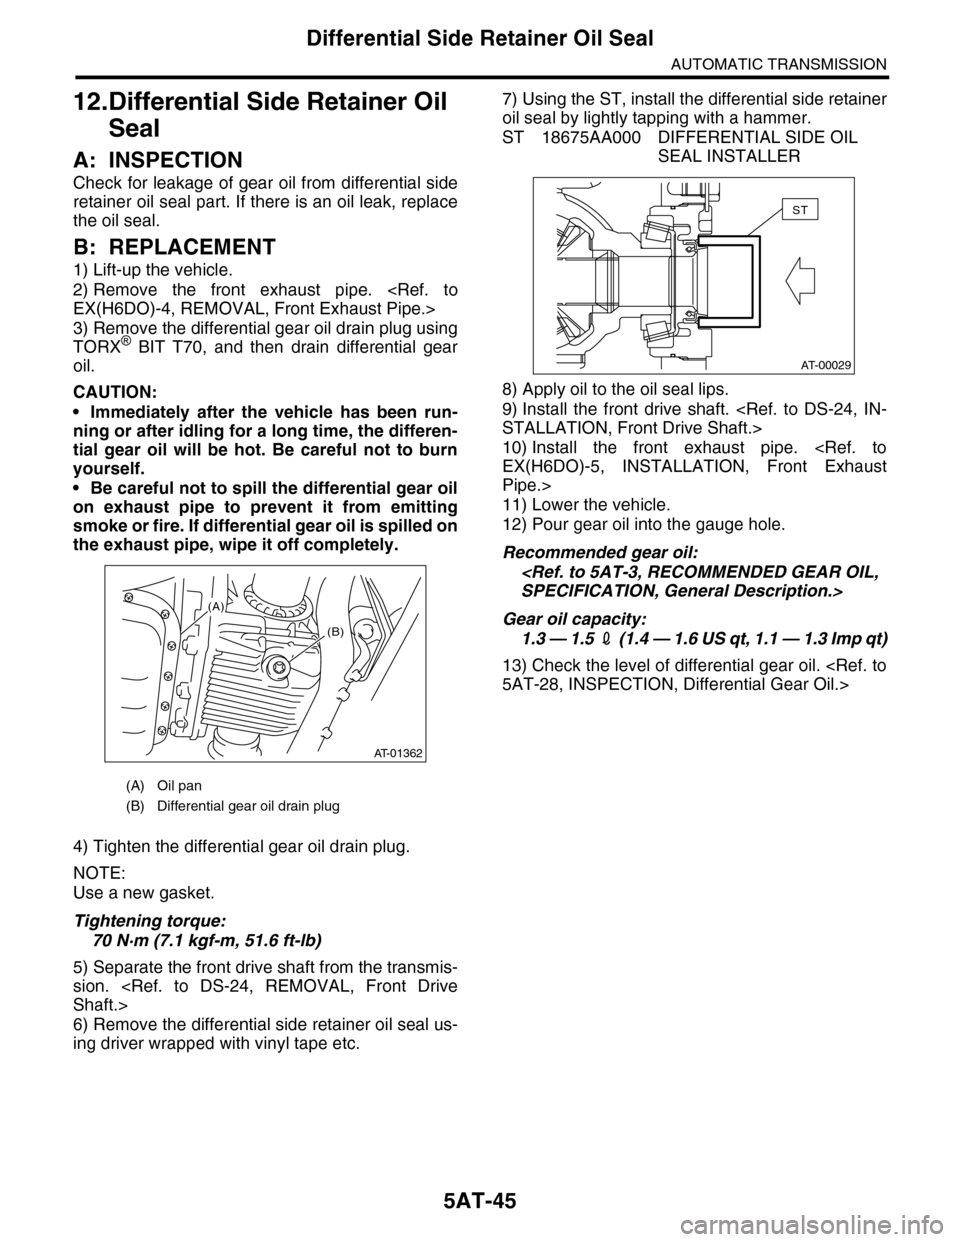
3) Remove the differential gear oil drain plug using
TORX® BIT T70, and then drain differential gear
oil.
CAUTION:
•Immediately after the vehicle has been run-
ning or after idling for a long time, the differen-
tial gear oil will be hot. Be careful not to burn
yourself.
•Be careful not to spill the differential gear oil
on exhaust pipe to prevent it from emitting
smoke or fire. If differential gear oil is spilled on
the exhaust pipe, wipe it off completely.
4) Tighten the differential gear oil drain plug.
NOTE:
Use a new gasket.
Tightening torque:
70 N·m (7.1 kgf-m, 51.6 ft-lb)
5) Separate the front drive shaft from the transmis-
sion.
Shaft.>
6) Remove the differential side retainer oil seal us-
ing driver wrapped with vinyl tape etc.
7) Using the ST, install the differential side retainer
oil seal by lightly tapping with a hammer.
ST 18675AA000 DIFFERENTIAL SIDE OIL
SEAL INSTALLER
8) Apply oil to the oil seal lips.
9) Install the front drive shaft.
STALLATION, Front Drive Shaft.>
10) Install the front exhaust pipe.
EX(H6DO)-5, INSTALLATION, Front Exhaust
Pipe.>
11) Lower the vehicle.
12) Pour gear oil into the gauge hole.
Recommended gear oil:
SPECIFICATION, General Description.>
Gear oil capacity:
1.3 — 1.5 2 ( 1 . 4 — 1 . 6 U S q t , 1 . 1 — 1 . 3 I m p q t )
13) Check the level of differential gear oil.
5AT-28, INSPECTION, Differential Gear Oil.>
(A) Oil pan
(B) Differential gear oil drain plug
(B)
AT-01362
(A)
AT-00029
ST
Page 2063 of 2453
5AT-47
Front Vehicle Speed Sensor
AUTOMATIC TRANSMISSION
14.Front Vehicle Speed Sensor
A: REMOVAL
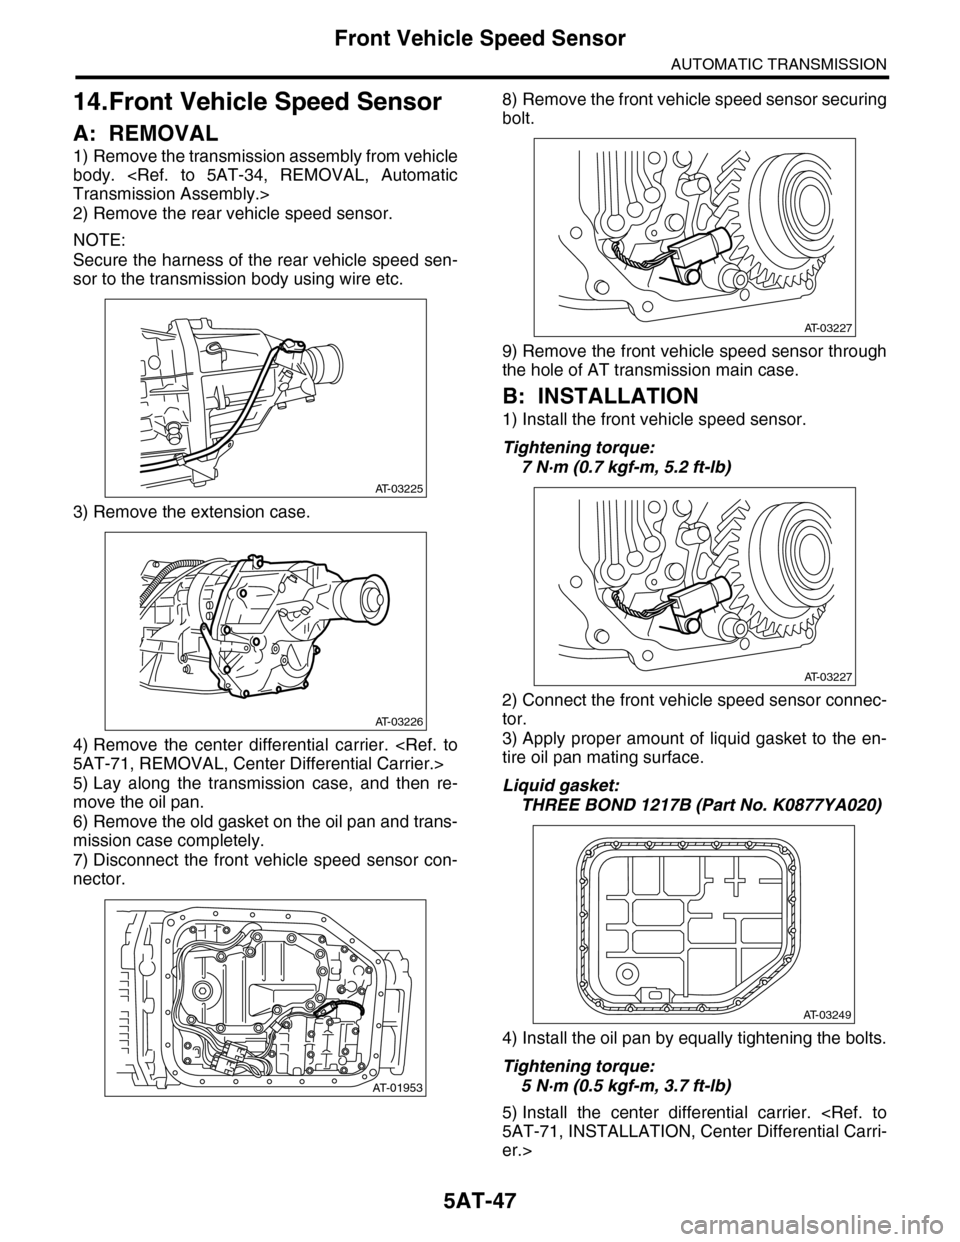
1) Remove the transmission assembly from vehicle
body.
Transmission Assembly.>
2) Remove the rear vehicle speed sensor.
NOTE:
Secure the harness of the rear vehicle speed sen-
sor to the transmission body using wire etc.
3) Remove the extension case.
4) Remove the center differential carrier.
5AT-71, REMOVAL, Center Differential Carrier.>
5) Lay along the transmission case, and then re-
move the oil pan.
6) Remove the old gasket on the oil pan and trans-
mission case completely.
7) Disconnect the front vehicle speed sensor con-
nector.
8) Remove the front vehicle speed sensor securing
bolt.
9) Remove the front vehicle speed sensor through
the hole of AT transmission main case.
B: INSTALLATION
1) Install the front vehicle speed sensor.
Tightening torque:
7 N·m (0.7 kgf-m, 5.2 ft-lb)
2) Connect the front vehicle speed sensor connec-
tor.
3) Apply proper amount of liquid gasket to the en-
tire oil pan mating surface.
Liquid gasket:
THREE BOND 1217B (Part No. K0877YA020)
4) Install the oil pan by equally tightening the bolts.
Tightening torque:
5 N·m (0.5 kgf-m, 3.7 ft-lb)
5) Install the center differential carrier.
5AT-71, INSTALLATION, Center Differential Carri-
er.>
AT-03225
AT-03226
AT-01953
AT-03227
AT-03227
AT-03249