Page 9 of 259

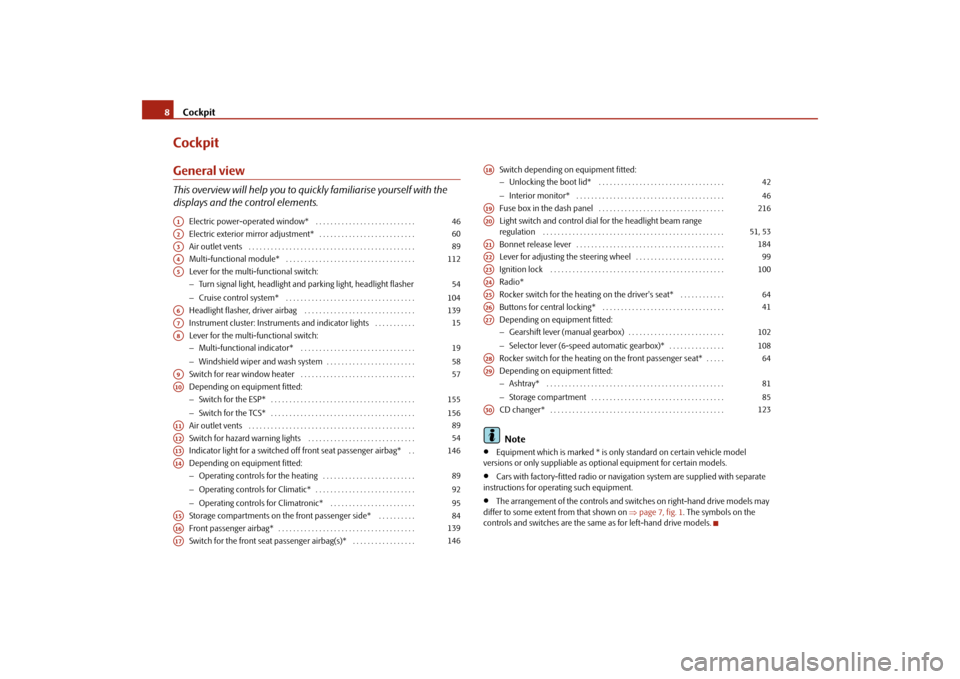
Cockpit 8CockpitGeneral viewThis overview will help you to quickly familiarise yourself with the
displays and the control elements.
Electric power-operated window* . . . . . . . . . . . . . . . . . . . . . . . . . . .
Electric exterior mirror adjustment* . . . . . . . . . . . . . . . . . . . . . . . . . .
Air outlet vents . . . . . . . . . . . . . . . . . . . . . . . . . . . . . . . . . . . . . . . . . . . . .
Multi-functional module* . . . . . . . . . . . . . . . . . . . . . . . . . . . . . . . . . . .
Lever for the multi-functional switch:
−Turn signal light, headlight and parking light, headlight flasher
−Cruise control system* . . . . . . . . . . . . . . . . . . . . . . . . . . . . . . . . . . .
Headlight flasher, driver airbag . . . . . . . . . . . . . . . . . . . . . . . . . . . . . .
Instrument cluster: Instruments and indicator lights . . . . . . . . . . .
Lever for the multi-functional switch:
−Multi-functional indicator* . . . . . . . . . . . . . . . . . . . . . . . . . . . . . . .
−Windshield wiper and wash system . . . . . . . . . . . . . . . . . . . . . . . .
Switch for rear window heater . . . . . . . . . . . . . . . . . . . . . . . . . . . . . . .
Depending on equipment fitted:
−Switch for the ESP* . . . . . . . . . . . . . . . . . . . . . . . . . . . . . . . . . . . . . . .
−Switch for the TCS* . . . . . . . . . . . . . . . . . . . . . . . . . . . . . . . . . . . . . . .
Air outlet vents . . . . . . . . . . . . . . . . . . . . . . . . . . . . . . . . . . . . . . . . . . . . .
Switch for hazard warning lights . . . . . . . . . . . . . . . . . . . . . . . . . . . . .
Indicator light for a switched off front seat passenger airbag* . .
Depending on equipment fitted:
−Operating controls for the heating . . . . . . . . . . . . . . . . . . . . . . . . .
−Operating controls for Climatic* . . . . . . . . . . . . . . . . . . . . . . . . . . .
−Operating controls for Climatronic* . . . . . . . . . . . . . . . . . . . . . . .
Storage compartments on the front passenger side* . . . . . . . . . .
Front passenger airbag* . . . . . . . . . . . . . . . . . . . . . . . . . . . . . . . . . . . . .
Switch for the front seat passenger airbag(s)* . . . . . . . . . . . . . . . . .Switch depending on equipment fitted:
−Unlocking the boot lid* . . . . . . . . . . . . . . . . . . . . . . . . . . . . . . . . . .
−Interior monitor* . . . . . . . . . . . . . . . . . . . . . . . . . . . . . . . . . . . . . . . .
Fuse box in the dash panel . . . . . . . . . . . . . . . . . . . . . . . . . . . . . . . . . .
Light switch and control dial for the headlight beam range
regulation . . . . . . . . . . . . . . . . . . . . . . . . . . . . . . . . . . . . . . . . . . . . . . . . .
Bonnet release lever . . . . . . . . . . . . . . . . . . . . . . . . . . . . . . . . . . . . . . . .
Lever for adjusting the steering wheel . . . . . . . . . . . . . . . . . . . . . . . .
Ignition lock . . . . . . . . . . . . . . . . . . . . . . . . . . . . . . . . . . . . . . . . . . . . . . .
Radio*
Rocker switch for the heating on the driver's seat* . . . . . . . . . . . .
Buttons for central locking* . . . . . . . . . . . . . . . . . . . . . . . . . . . . . . . . .
Depending on equipment fitted:
−Gearshift lever (manual gearbox) . . . . . . . . . . . . . . . . . . . . . . . . . .
−Selector lever (6-speed automatic gearbox)* . . . . . . . . . . . . . . .
Rocker switch for the heating on the front passenger seat* . . . . .
Depending on equipment fitted:
−Ashtray* . . . . . . . . . . . . . . . . . . . . . . . . . . . . . . . . . . . . . . . . . . . . . . . .
−Storage compartment . . . . . . . . . . . . . . . . . . . . . . . . . . . . . . . . . . . .
CD changer* . . . . . . . . . . . . . . . . . . . . . . . . . . . . . . . . . . . . . . . . . . . . . . .
Note
•
Equipment which is marked * is only standard on certain vehicle model
versions or only suppliable as optional equipment for certain models.
•
Cars with factory-fitted radio or navigation system are supplied with separate
instructions for operating such equipment.
•
The arrangement of the controls and switches on right-hand drive models may
differ to some extent from that shown on ⇒page 7, fig. 1. The symbols on the
controls and switches are the same as for left-hand drive models.
A1
46
A2
60
A3
89
A4
112
A5
54
104
A6
139
A7
15
A8
19
58
A9
57
A10
155
156
A11
89
A12
54
A13
146
A14
89
92
95
A15
84
A16
139
A17
146
A18
42
46
A19
216
A20
51, 53
A21
184
A22
99
A23
100
A24A25
64
A26
41
A27
102
108
A28
64
A29
81
85
A30
123
s3f4.1.book Page 8 Thursday, June 18, 2009 11:07 AM
Page 10 of 259

The brief instruction9
Using the system
Safety
Driving Tips
General Maintenance
Breakdown assistance
Technical Data
The brief instructionBasic functions and important informationIntroduction
The chapter of the brief instruction is only used as a quick reference
of the most important operating elements of the vehicle. It is neces-
sary to observe all the information which is contained in the
following chapters of the Owner's Manual.Unlocking and locking the vehicle Unlocking the vehicle
Unlocking the boot lid
Locking the vehicle
Folding out/folding up of the key
Further information ⇒page 44, “Unlocking and locking car”.
Setting steering wheel positionYou can set the height and the forward/back position of the steering wheel to the
desired position.
Further information ⇒page 99, “Setting steering wheel position*”.
WARNING
•
Adjust the steering wheel so that the distance between the steering
wheel and your chest is at least 25 cm ⇒fig. 4. Not maintaining this
Fig. 2 Remote control key
A1A2A3A4
Fig. 3 Adjustable steering
wheel: Lever on the steering
columnFig. 4 The correct distance of
the driver from the steering
wheel
s3f4.1.book Page 9 Thursday, June 18, 2009 11:07 AM
Page 11 of 259

The brief instruction 10minimum distance will mean that the airbag system will not be able to prop-
erly protect you - hazard!•
You must not adjust the steering wheel when the vehicle is moving!
•
For sa fe t y re as ons the l e ve r m us t a lw ay s b e f irm l y pu she d up t o a vo id th e
steering wheel altering its position unintentionally when driving - risk of
accident!
Seat belt height adjuster– To adjust the belt height press the height adjuster and move it up or
down ⇒fig. 5.
– Then pull firmly on the belt to ensure that the seat belt height adjuster
has correctly locked in place.Further information ⇒page 135, “Seat belt height adjuster on the front seats”.
WARNING
Adjust the height of the belt in such a way that the shoulder part of the belt
is positioned approximately across the middle of your shoulder - on no
account across your neck!
Adjusting the front seats Adjusting a seat in a forward/back direction
Adjusting height of seat*
Adjust the angle of the seat backrest
Further information ⇒page 62, “Adjusting the front seats”.
WARNING
Only adjust the driver seat when the vehicle is stationary - risk of injury!
WARNING (continued)
Fig. 5 Front seat: Seat belt
height adjuster
Fig. 6 Controls at seat
A1A2A3
s3f4.1.book Page 10 Thursday, June 18, 2009 11:07 AM
Page 12 of 259
The brief instruction11
Using the system
Safety
Driving Tips
General Maintenance
Breakdown assistance
Technical Data
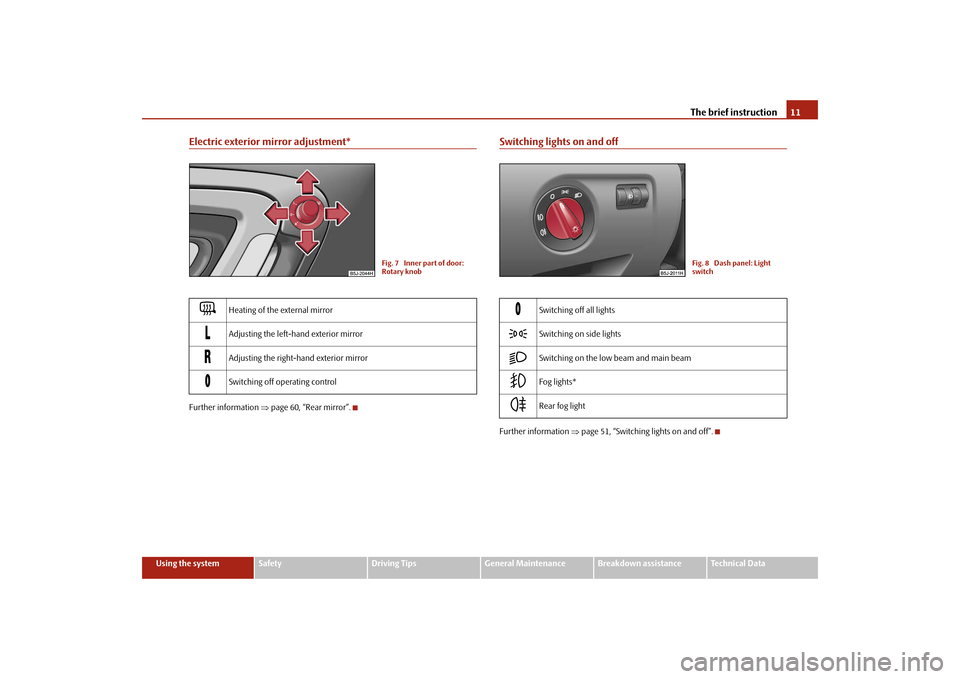
Electric exterior mirror adjustment*Further information ⇒page 60, “Rear mirror”.
Switching lights on and offFurther information ⇒page 51, “Switching lights on and off”.
Heating of the external mirror
Adjusting the left-hand exterior mirror
Adjusting the right-hand exterior mirror
Switching off operating control
Fig. 7 Inner part of door:
Rotary knob
Switching off all lights
Switching on side lights
Switching on the low beam and main beam
Fog lights*
Rear fog light
Fig. 8 Dash panel: Light
switch
s3f4.1.book Page 11 Thursday, June 18, 2009 11:07 AM
Page 13 of 259
The brief instruction 12Turn signal and main beam lever Turn signal light right
Turn signal light left
Switching over between low beam and main beam lights
Headlight flasher
Further information ⇒page 54, “The turn signal and main beam lever ”.Windscreen wiper lever
Intermittent switch
Wipers off
Intermittent wipe
Slow wipe
Fast wipe
one time wipe
Automatic wipe/wash
Wiping the rear window pane*
Intermittent wipe - every 6 seconds
Automatic wipe/wash
Further information ⇒page 58, “Windshield wiper”.Power windows* Button for the power window in the driver's door
Button for the power window in the front passenger's door
Button for the power window in the rear door on the right*
Button for the power window in the rear door on the left*
Fig. 9 Turn signal and main
beam lever
AAABACAD
Fig. 10 Windscreen wiper
lever
AAA0A1A2A3A4A5A6A7
Fig. 11 Buttons on the
driver's door
AAABACAD
s3f4.1.book Page 12 Thursday, June 18, 2009 11:07 AM
Page 14 of 259
The brief instruction13
Using the system
Safety
Driving Tips
General Maintenance
Breakdown assistance
Technical Data Safety pushbutton*
Further information ⇒page 46, “Buttons for electrical power windows”.
Refuelling– Open the fuel filler flap with the hand ⇒fig. 12.
– The fuel filler cap on the fuel filler tube must be unlocked to the left
using the vehicle key (only valid for vehicles which do not have auto-
matic unlocking of the fuel filler flap).– Unscrew the fuel filler cap anti-clockwise and place the fuel filler cap
from above on the fuel filler flap ⇒fig. 13.
Further information ⇒page 182, “Refuelling”.Bonnet remote release– Pull the unlocking lever below the dash panel on the driver's side
⇒fig. 14.Further information ⇒page 184, “Bonnet remote release”.
AS
Fig. 12 Right rear side of the
vehicle: Fuel filler flapFig. 13 Fuel filler flap with
cap unscrewed
Fig. 14 Bonnet release lever
s3f4.1.book Page 13 Thursday, June 18, 2009 11:07 AM
Page 15 of 259
The brief instruction 14Opening the bonnet– Pull on the locking lever ⇒fig. 15, the bonnet is then unlocked.
– Take the bonnet support out of its holder and set it in the opening
designed for it ⇒fig. 16.Further information ⇒page 184, “Opening and closing the bonnet.”.
Inspecting the engine oil level Engine oil must not be refilled.
Engine oil can be refilled.
Engine oil must be refilled.
Further information ⇒page 187.
Fig. 15 Radiator grille:
Locking leverFig. 16 Securing the bonnet
with the bonnet support
Fig. 17 Dipstick
AaAbAc
s3f4.1.book Page 14 Thursday, June 18, 2009 11:07 AM
Page 16 of 259

Instruments and Indicator/Warning Lights15
Using the system
Safety
Driving Tips
General Maintenance
Breakdown assistance
Technical Data
Instruments and Indicator/Warning LightsGeneral view of the instrument cluster
Engine revolutions counter ⇒page 15
Display:
−with digital clock ⇒page 19
−with counter for distance driven ⇒page 17
Speedometer
Coolant temperature gauge* ⇒page 16
Display:
−with Service Interval Display ⇒page 17
−with Multi-functional indicator* ⇒page 19
−with Information display* ⇒page 22
Clock-set button / reset button
Fuel gauge ⇒page 16When the lights are switched on, the instrument cluster is illuminated.
The version of the instrument cluster can differ depending on the equipment.
Engine revolutions counterThe start of the red zone in the revolutions counter ⇒fig. 18 indicates the
maximum permissible engine speed for all gears for an engine which has been run
in and operating at a normal temperature. Shift into the next higher gear or change
into the selector lever position D of the automatic gearbox before reaching this
zone.
One should shift to a lower gear at the latest when the engine is no longer running
“smoothly”.
Fig. 18 Instrument cluster
A1A2A3A4A5A6A7
A1
s3f4.1.book Page 15 Thursday, June 18, 2009 11:07 AM