2009 MERCEDES-BENZ GL SUV fuel
[x] Cancel search: fuelPage 114 of 309
Calling up the range
X
Press VorU on the steering wheel
to select the trip computer menu.
X Press &or* to select Range:
The multi-function display shows the esti-
mated range of the vehicle, based on the
current driving style and the fuel level. If
there is only a small amount of fuel remain-
ing in the fuel tank, a vehicle refuelling
C appears instead of the range.
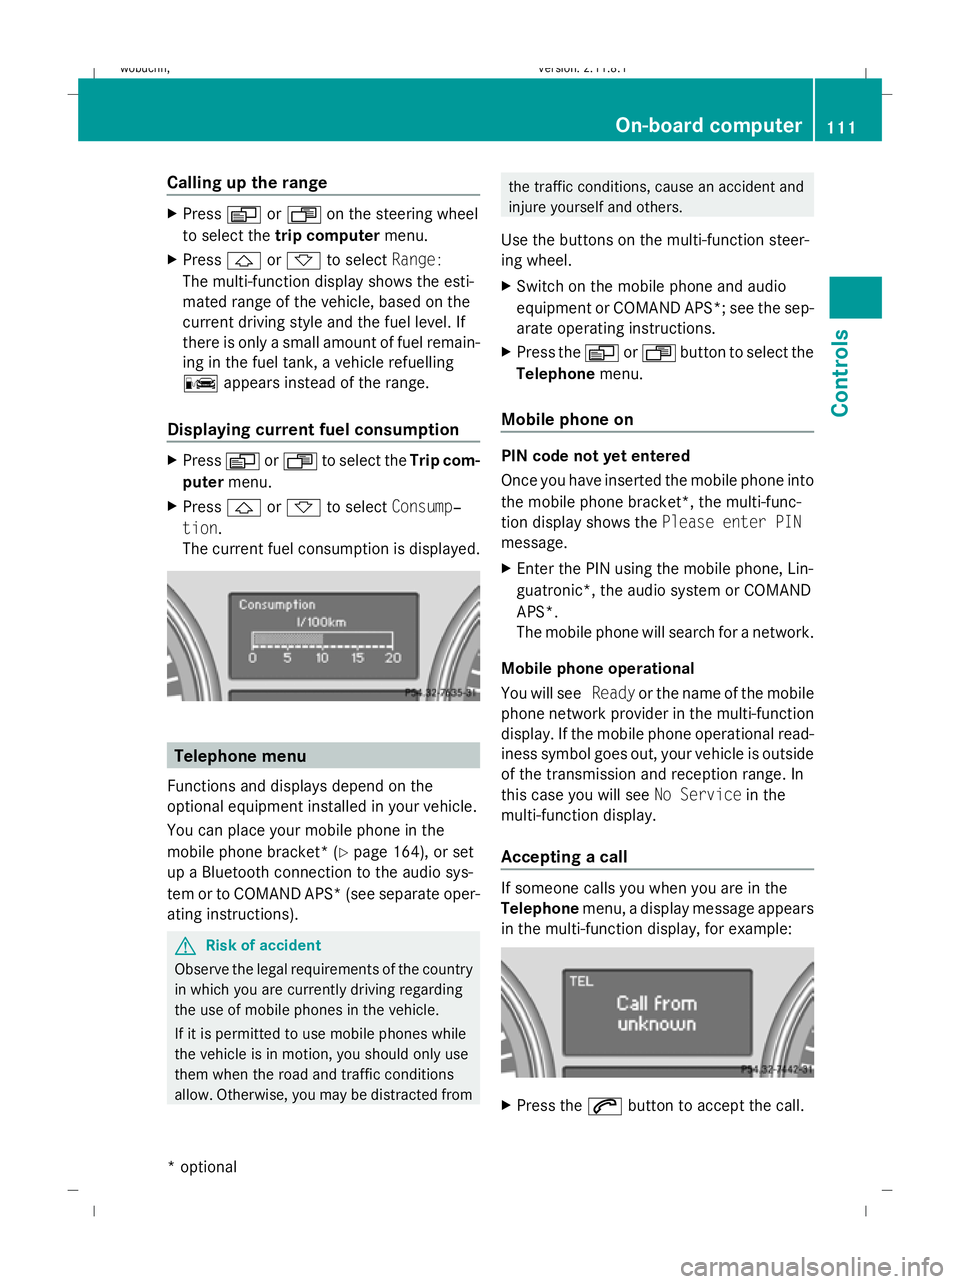
Displaying current fuel consumption X
Press VorU to select the Trip com-
puter menu.
X Press &or* to select Consump‐
tion.
The current fuel consumption is displayed. Telephone menu
Functions and displays depend on the
optional equipment installed in your vehicle.
You can place your mobile phone in the
mobile phone bracket* (Y page 164), or set
up a Bluetooth connection to the audio sys-
tem or to COMAND APS* (see separate oper-
ating instructions). G
Risk of accident
Observe the legal requirements of the country
in which you are currently driving regarding
the use of mobile phones in the vehicle.
If it is permitted to use mobile phones while
the vehicle is in motion, you should only use
them when the road and traffic conditions
allow. Otherwise, you may be distracted from the traffic conditions, cause an accident and
injure yourself and others.
Use the buttons on the multi-function steer-
ing wheel.
X Switch on the mobile phone and audio
equipment or COMAND APS*; see the sep-
arate operating instructions.
X Press the VorU button to select the
Telephone menu.
Mobile phone on PIN code not yet entered
Once you have inserted the mobile phone into
the mobile phone bracket*, the multi-func-
tion display shows the Please enter PIN
message.
X Enter the PIN using the mobile phone, Lin-
guatronic*, the audio system or COMAND
APS*.
The mobile phone will search for a network.
Mobile phone operational
You will see Readyor the name of the mobile
phone network provider in the multi-function
display. If the mobile phone operational read-
iness symbol goes out, your vehicle is outside
of the transmission and reception range. In
this case you will see No Servicein the
multi-function display.
Accepting a call If someone calls you when you are in the
Telephone
menu, a display message appears
in the multi-function display, for example: X
Press the 6button to accept the call. On-board computer
111Controls
* optional
X164_AKB; 2; 3, en-GB
wobuchh,
Version: 2.11.8.1 2009-03-31T14:14:58+02:00 - Seite 111 Z
Dateiname: 6515431202_buchblock.pdf; erzeugt am 01. Apr 2009 00:17:18; WK
Page 132 of 309
Permanent Speedtronic is deactivated.
R A limit speed between 240 km/hand
160 km/h in increments of 10 km/h. ADS (Adaptive Damping System)
ADS adapts the damping characteristics to
the current operating and driving situation.
How this is adjusted depends on:
R your driving style
R the road surface conditions
R the ADS setting
R the vehicle level setting
Your selection remains stored even if you
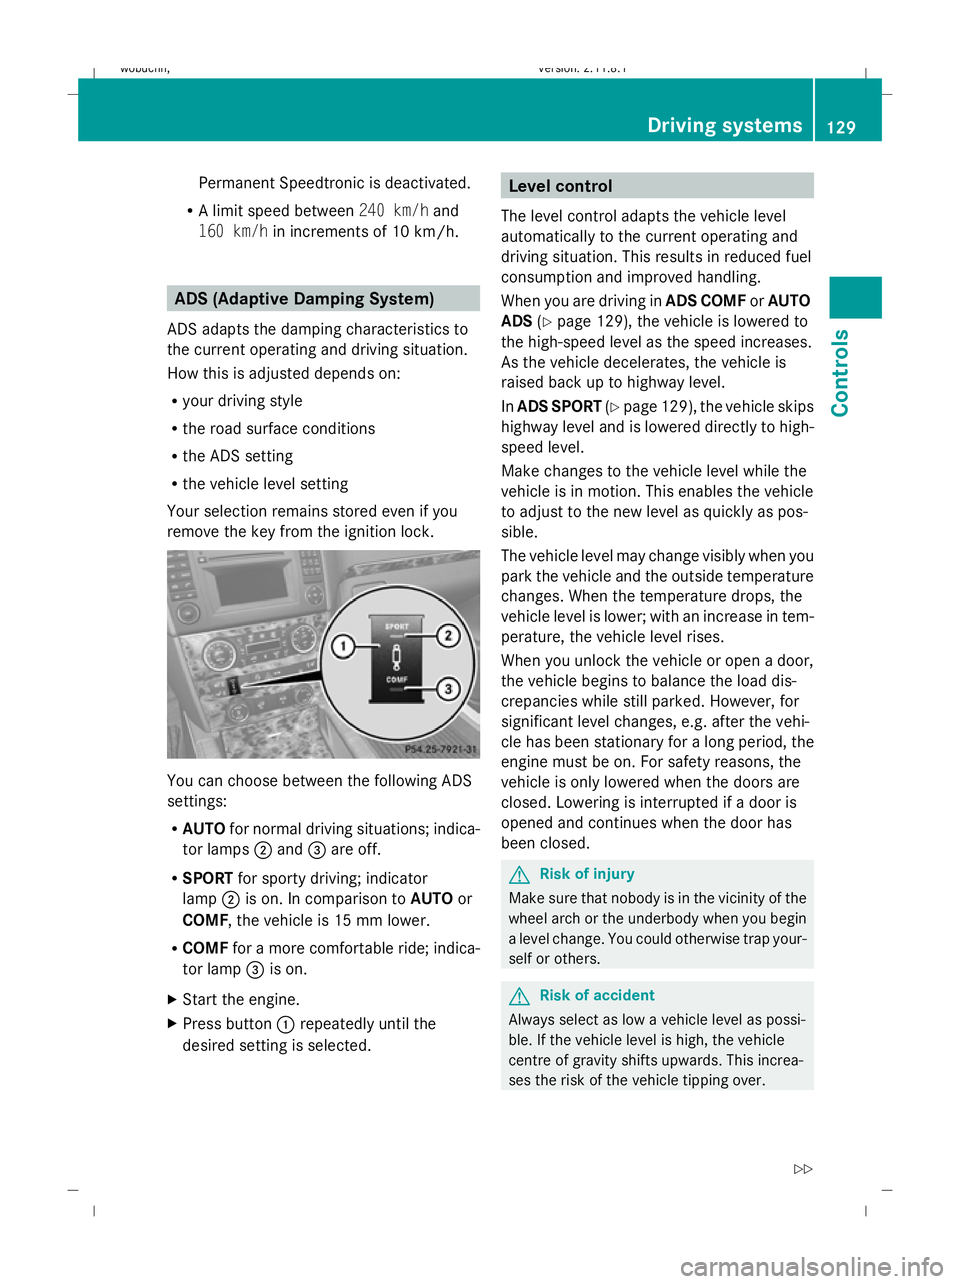
remove the key from the ignition lock. You can choose between the following ADS
settings:
R
AUTO for normal driving situations; indica-
tor lamps ;and =are off.
R SPORT for sporty driving; indicator
lamp ;is on. In comparison to AUTOor
COMF, the vehicle is 15 mm lower.
R COMF for a more comfortable ride; indica-
tor lamp =is on.
X Start the engine.
X Press button :repeatedly until the
desired setting is selected. Level control
The level control adapts the vehicle level
automatically to the current operating and
driving situation. This results in reduced fuel
consumption and improved handling.
When you are driving in ADS COMForAUTO
ADS (Ypage 129), the vehicle is lowered to
the high-speed level as the speed increases.
As the vehicle decelerates, the vehicle is
raised back up to highway level.
In ADS SPORT (Ypage 129), the vehicle skips
highway level and is lowered directly to high-
speed level.
Make changes to the vehicle level while the
vehicle is in motion. This enables the vehicle
to adjust to the new level as quickly as pos-
sible.
The vehicle level may change visibly when you
park the vehicle and the outside temperature
changes. When the temperature drops, the
vehicle level is lower; with an increase in tem-
perature, the vehicle level rises.
When you unlock the vehicle or open a door,
the vehicle begins to balance the load dis-
crepancies while still parked. However, for
significant level changes, e.g. after the vehi-
cle has been stationary for a long period, the
engine must be on. For safety reasons, the
vehicle is only lowered when the doors are
closed. Lowering is interrupted if a door is
opened and continues when the door has
been closed. G
Risk of injury
Make sure that nobody is in the vicinity of the
wheel arch or the underbody when you begin
a level change. You could otherwise trap your-
self or others. G
Risk of accident
Always select as low a vehicle level as possi-
ble. If the vehicle level is high, the vehicle
centre of gravity shifts upwards. This increa-
ses the risk of the vehicle tipping over. Driving systems
129Controls
X164_AKB; 2; 3, en-GB
wobuchh, Version: 2.11.8.1 2009-03-31T14:14:58+02:00 - Seite 129 Z
Dateiname: 6515431202_buchblock.pdf; erzeugt am 01. Apr 2009 00:17:24; WK
Page 133 of 309
Adapt your driving style to suit the vehicle
level. ESP ®
cannot reduce the risk of an acci-
dent if you drive too fast. ESP ®
cannot over-
ride the laws of physics.
! When driving on extremely rough terrain,
select a high vehicle level in good time.
Make sure there is always sufficient ground
clearance to prevent damage to the vehi-
cle.
You will find information about driving off-
road in the "Operation" section
(Y page 188).
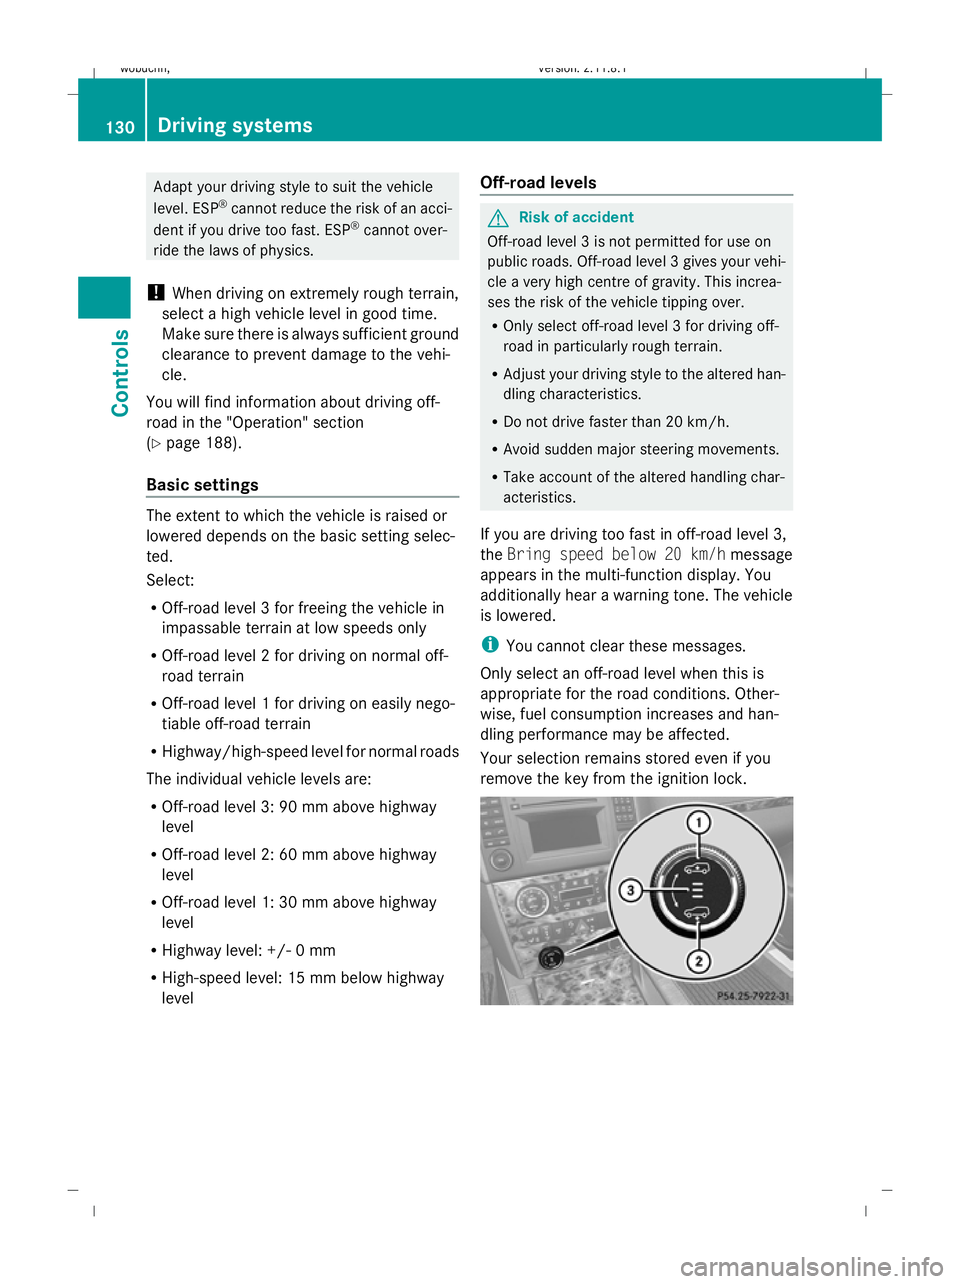
Basic settings The extent to which the vehicle is raised or
lowered depends on the basic setting selec-
ted.
Select:
R Off-road level 3 for freeing the vehicle in
impassable terrain at low speeds only
R Off-road level 2 for driving on normal off-
road terrain
R Off-road level 1 for driving on easily nego-
tiable off-road terrain
R Highway/high-speed level for normal roads
The individual vehicle levels are:
R Off-road level 3: 90 mm above highway
level
R Off-road level 2: 60 mm above highway
level
R Off-road level 1: 30 mm above highway
level
R Highway level: +/- 0 mm
R High-speed level: 15 mm below highway
level Off-road levels G
Risk of accident
Off-road level 3 is not permitted for use on
public roads. Off-road level 3 gives your vehi-
cle a very high centre of gravity. This increa-
ses the risk of the vehicle tipping over.
R Only select off-road level 3 for driving off-
road in particularly rough terrain.
R Adjust your driving style to the altered han-
dling characteristics.
R Do not drive faster than 20 km/h.
R Avoid sudden major steering movements.
R Take account of the altered handling char-
acteristics.
If you are driving too fast in off-road level 3,
the Bring speed below 20 km/h message
appears in the multi-function display. You
additionally hear a warning tone. The vehicle
is lowered.
i You cannot clear these messages.
Only select an off-road level when this is
appropriate for the road conditions. Other-
wise, fuel consumption increases and han-
dling performance may be affected.
Your selection remains stored even if you
remove the key from the ignition lock. 130
Driving systemsControls
X164_AKB; 2; 3, en-GB
wobuchh,
Version: 2.11.8.1 2009-03-31T14:14:58+02:00 - Seite 130
Dateiname: 6515431202_buchblock.pdf; erzeugt am 01. Apr 2009 00:17:24; WK
Page 150 of 309
Convenience opening/closing
G
Risk of injury
Make sure that nobody can become trapped
between the side window and the door frame
as the side windows are opened and closed.
Do not place objects or lean against the side
windows when they are being opened or
closed. You or the objects could be drawn in
or become trapped between the side window
and the door frame as the window moves. If
there is a risk of entrapment, press the
d button again. Press the button for stop-
ping, opening or closing the side windows in
the opposite direction as appropriate.
Make sure that nobody can become trapped
when you are opening or closing the sliding/
tilting sunroof*. If there is a risk of entrap-
ment, press the dbutton again. Press the
button to stop, open or close the panorama
sliding/tilting sunroof* in the opposite direc-
tion as appropriate.
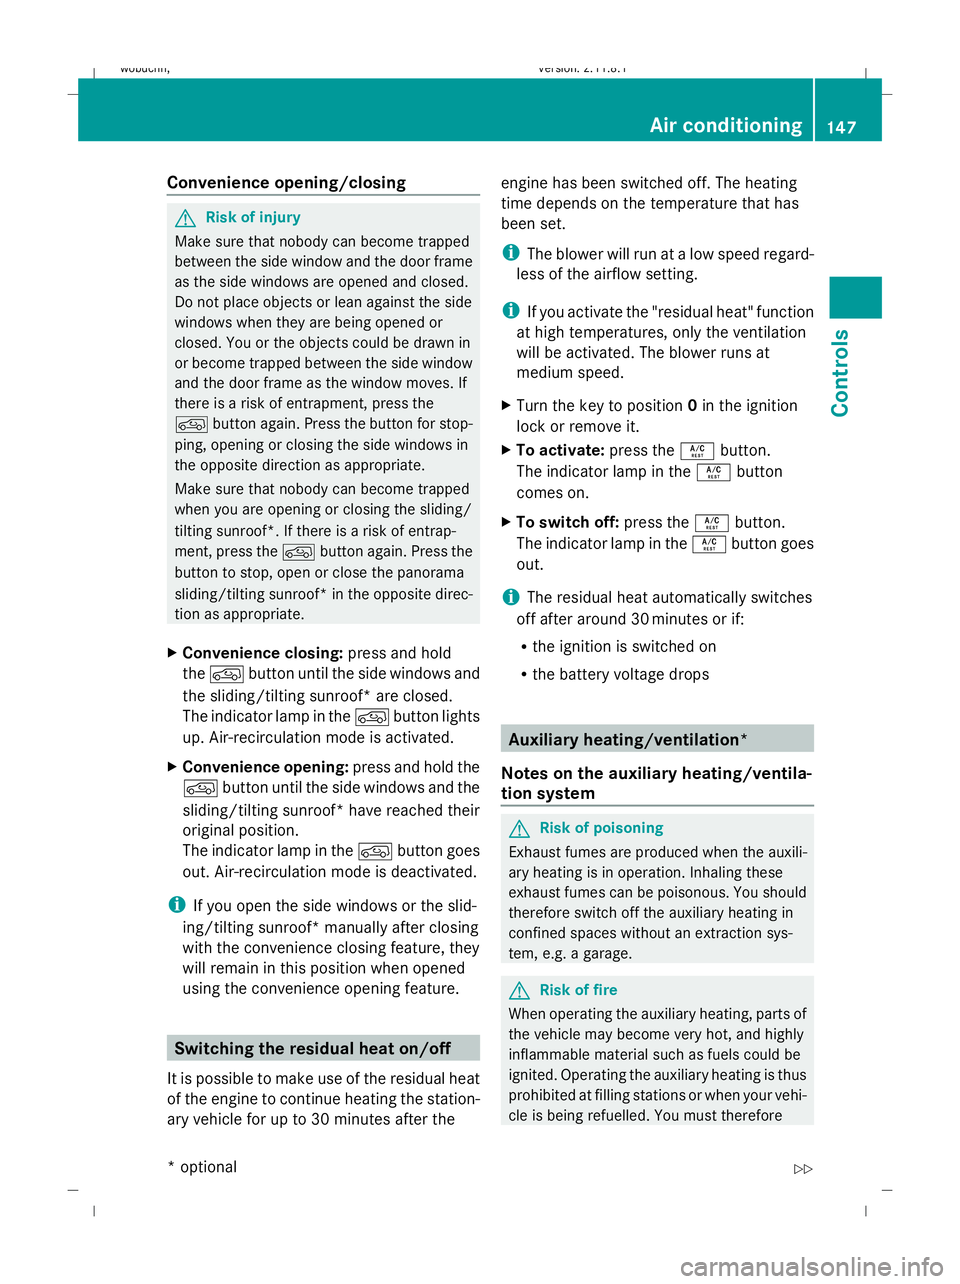
X Convenience closing: press and hold
the d button until the side windows and
the sliding/tilting sunroof* are closed.
The indicator lamp in the dbutton lights
up. Air-recirculation mode is activated.
X Convenience opening: press and hold the
d button until the side windows and the
sliding/tilting sunroof* have reached their
original position.
The indicator lamp in the dbutton goes
out. Air-recirculation mode is deactivated.
i If you open the side windows or the slid-
ing/tilting sunroof* manually after closing
with the convenience closing feature, they
will remain in this position when opened
using the convenience opening feature. Switching the residual heat on/off
It is possible to make use of the residual heat
of the engine to continue heating the station-
ary vehicle for up to 30 minutes after the engine has been switched off. The heating
time depends on the temperature that has
been set.
i
The blower will run at a low speed regard-
less of the airflow setting.
i If you activate the "residual heat" function
at high temperatures, only the ventilation
will be activated. The blower runs at
medium speed.
X Turn the key to position 0in the ignition
lock or remove it.
X To activate: press theÁbutton.
The indicator lamp in the Ábutton
comes on.
X To switch off: press theÁbutton.
The indicator lamp in the Ábutton goes
out.
i The residual heat automatically switches
off after around 30 minutes or if:
R the ignition is switched on
R the battery voltage drops Auxiliary heating/ventilation*
Notes on the auxiliary heating/ventila-
tion system G
Risk of poisoning
Exhaust fumes are produced when the auxili-
ary heating is in operation. Inhaling these
exhaust fumes can be poisonous. You should
therefore switch off the auxiliary heating in
confined spaces without an extraction sys-
tem, e.g. a garage. G
Risk of fire
When operating the auxiliary heating, parts of
the vehicle may become very hot, and highly
inflammable material such as fuels could be
ignited. Operating the auxiliary heating is thus
prohibited at filling stations or when your vehi-
cle is being refuelled. You must therefore Air conditioning
147Controls
* optional
X164_AKB; 2; 3, en-GB
wobuchh,
Version: 2.11.8.1 2009-03-31T14:14:58+02:00 - Seite 147 Z
Dateiname: 6515431202_buchblock.pdf; erzeugt am 01. Apr 2009 00:17:31; WK
Page 151 of 309
switch off the auxiliary heating at filling sta-
tions.
i Switch the auxiliary heating on regularly
once a month for about ten minutes.
The auxiliary heating heats the air in the vehi-
cle interior to the set temperature without
using the heat of the running engine. The aux-
iliary heating is operated using the vehicle's
fuel. For this reason, the tank content must
be at least at reserve fuel level to ensure that
the auxiliary heating functions.
The auxiliary heating/ventilation automati-
cally adjusts to changes in temperature and
weather conditions. For this reason, the aux-
iliary heating could switch from ventilation
mode to heating mode or from heating mode
to ventilation mode.
You cannot use the auxiliary ventilation to
cool the vehicle interior to a temperature
lower than the outside temperature.
Before activating X
Turn the key to position 2in the ignition
lock.
X Set the temperature.
The auxiliary heating/ventilation can be acti-
vated even when the air conditioning is being
controlled manually. Optimum comfort can
be attained when the system is set to auto-
matic mode. Set the temperature to 22 †.
The auxiliary heating/ventilation can be acti-
vated or deactivated using the remote control
or the button on the centre console.
The on-board computer can be used to spec-
ify up to three departure times, one of which
may be preselected (Y page 107). Switching the auxiliary heating/venti-
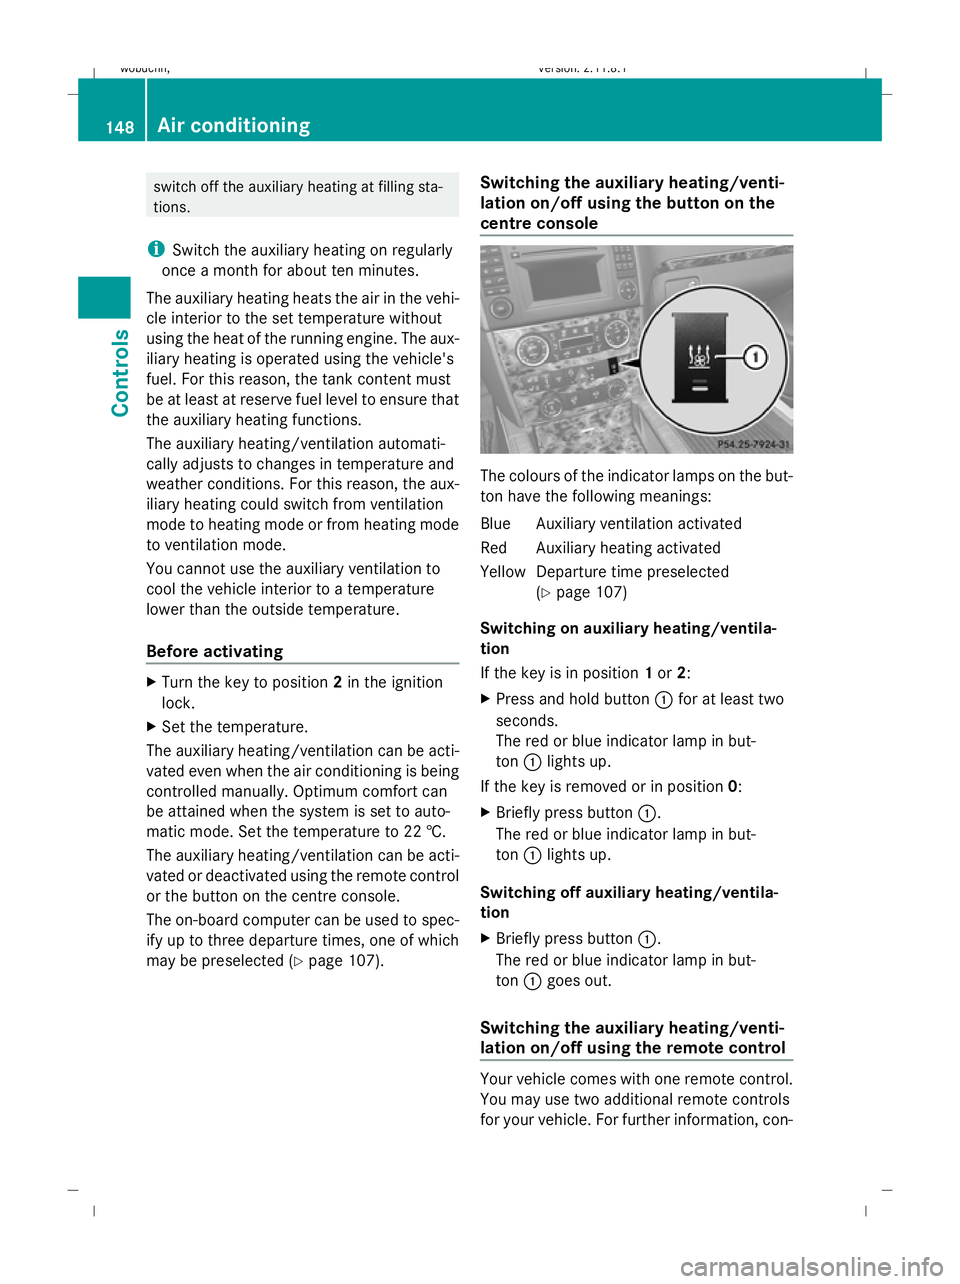
lation on/off using the button on the
centre console The colours of the indicator lamps on the but-
ton have the following meanings:
Blue Auxiliary ventilation activated
Red Auxiliary heating activated
YellowD eparture time preselected
(Y page 107)
Switching on auxiliary heating/ventila-
tion
If the key is in position 1or 2:
X Press and hold button :for at least two
seconds.
The red or blue indicator lamp in but-
ton :lights up.
If the key is removed or in position 0:
X Briefly press button :.
The red or blue indicator lamp in but-
ton :lights up.
Switching off auxiliary heating/ventila-
tion
X Briefly press button :.
The red or blue indicator lamp in but-
ton :goes out.
Switching the auxiliary heating/venti-
lation on/off using the remote control Your vehicle comes with one remote control.
You may use two additional remote controls
for your vehicle. For further information, con-148
Air conditioningControls
X164_AKB; 2; 3, en-GB
wobuchh,
Version: 2.11.8.1 2009-03-31T14:14:58+02:00 - Seite 148
Dateiname: 6515431202_buchblock.pdf; erzeugt am 01. Apr 2009 00:17:32; WK
Page 174 of 309
Running-in notes
............................... 172
Refuelling ........................................... 172
Engine compartment ........................174
Tyres and wheels .............................. 179
Winter driving ................................... 185
Driving tips ........................................ 186
Off-road driving ................................. 188
Driving abroad ................................... 193
Trailer towing* .................................. 193
Service ............................................... 199
Care .................................................... 201 171Operation
X164_AKB; 2; 3, en-GB
wobuchh,
Version: 2.11.8.1 2009-03-31T14:14:58+02:00 - Seite 171
Dateiname: 6515431202_buchblock.pdf; erzeugt am 01. Apr 2009 00:17:45; WK
Page 175 of 309
Running-in notes
The first 1,500 km
G
Risk of accident
New brake pads/linings only have optimal
braking performance after several hundred
kilometres. Until then, compensate for this by
applying greater force to the brake pedal. This
also applies when brake pads/linings or
brake discs have been changed.
If you treat the engine with sufficient care
from the very start, you will be rewarded with
excellent performance for the remainder of
the engine's life.
R Therefore, you should drive at varying road
and engine speeds for the first 1,500 km.
R Avoid heavy loads, e.g. driving at full throt-
tle, during this time. Do not exceed 2
/ 3 of
the maximum permissible engine speed for
each gear.
R Change gear in good time.
R Do not shift down a gear manually in order
to brake.
R try to avoid depressing the accelerator
pedal beyond the pressure point (kick-
down).
R only use ranges 3,2or 1for slow driving,
e.g. in mountainous terrain.
After 1,500 km, you may gradually bring the
vehicle up to full road and engine speeds.
i These running-in instructions must also
be observed if you have the engine, the dif-
ferenial gear or the front axle differential of
your vehicle replaced. Refuelling
Refuelling
G
Risk of explosion
Fuel is highly flammable. Fire, naked flames
and smoking are therefore prohibited when
handling fuels.
Switch off the engine and the auxiliary heat-
ing* before refuelling. G
Risk of injury
Avoid any contact with fuels.
You can damage your health if your skin
comes into direct contact with fuel or if you
inhale fuel vapours. G
Risk of fire
Do not use petrol to refuel vehicles with a die-
sel engine. Never mix diesel with petrol. This
causes damage to the fuel system and engine
and could result in the vehicle catching fire.
! Do not use petrol to refuel vehicles with a
diesel engine. Do not use diesel to refuel
vehicles with a petrol engine. Even a small
quantity of the wrong fuel will damage the
fuel system and engine. Damage resulting
from adding the wrong fuel is not covered
by the implied warranty.
! Do not start the engine if you accidentally
refuel with the wrong fuel. Otherwise, the
fuel could enter the fuel lines. This would
require draining of the fuel tank and fuel
lines. Notify a qualified specialist workshop
and have the fuel tank and fuel lines
drained completely.
When you open or close the vehicle with the
key or KEYLESS GO*, the fuel filler flap is
automatically unlocked or locked.
The position of the fuel filler cap is to the rear
on the right. The position of the fuel filler cap
is displayed in the instrument cluster 8.172
RefuellingOperation
* optional
X164_AKB; 2; 3, en-GB
wobuchh,
Version: 2.11.8.1 2009-03-31T14:14:58+02:00 - Seite 172
Dateiname: 6515431202_buchblock.pdf; erzeugt am 01. Apr 2009 00:17:45; WK
Page 176 of 309
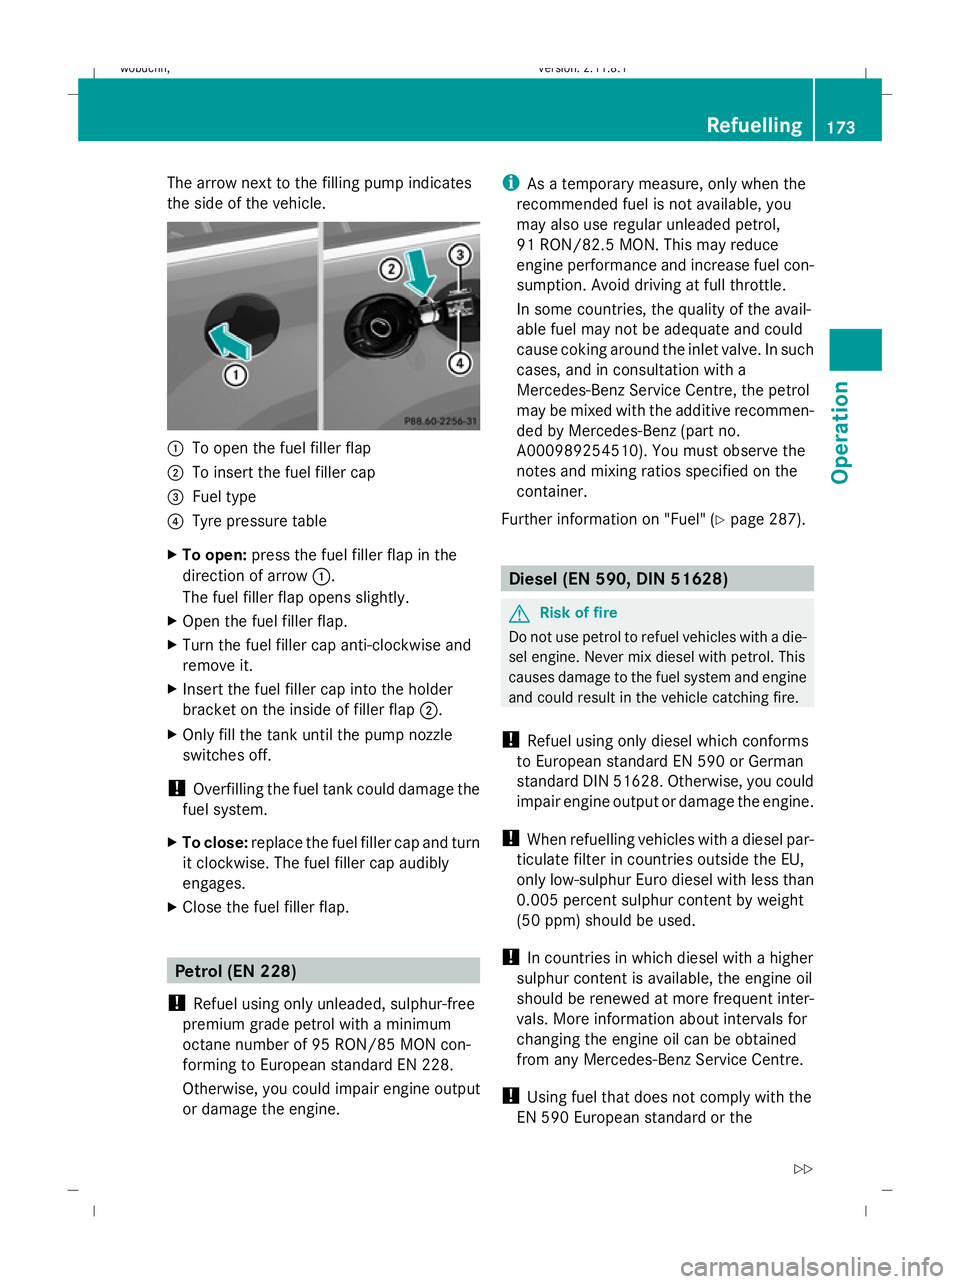
The arrow next to the filling pump indicates
the side of the vehicle.
:
To open the fuel filler flap
; To insert the fuel filler cap
= Fuel type
? Tyre pressure table
X To open: press the fuel filler flap in the
direction of arrow :.
The fuel filler flap opens slightly.
X Open the fuel filler flap.
X Turn the fuel filler cap anti-clockwise and
remove it.
X Insert the fuel filler cap into the holder
bracket on the inside of filler flap ;.
X Only fill the tank until the pump nozzle
switches off.
! Overfilling the fuel tank could damage the
fuel system.
X To close: replace the fuel filler cap and turn
it clockwise. The fuel filler cap audibly
engages.
X Close the fuel filler flap. Petrol (EN 228)
! Refuel using only unleaded, sulphur-free
premium grade petrol with a minimum
octane number of 95 RON/85 MON con-
forming to European standard EN 228.
Otherwise, you could impair engine output
or damage the engine. i
As a temporary measure, only when the
recommended fuel is not available, you
may also use regular unleaded petrol,
91 RON/82.5 MON. This may reduce
engine performance and increase fuel con-
sumption. Avoid driving at full throttle.
In some countries, the quality of the avail-
able fuel may not be adequate and could
cause coking around the inlet valve. In such
cases, and in consultation with a
Mercedes-Benz Service Centre, the petrol
may be mixed with the additive recommen-
ded by Mercedes-Benz (part no.
A000989254510). You must observe the
notes and mixing ratios specified on the
container.
Further information on "Fuel" (Y page 287). Diesel (EN 590, DIN 51628)
G
Risk of fire
Do not use petrol to refuel vehicles with a die-
sel engine. Never mix diesel with petrol. This
causes damage to the fuel system and engine
and could result in the vehicle catching fire.
! Refuel using only diesel which conforms
to European standard EN 590 or German
standard DIN 51628. Otherwise, you could
impair engine output or damage the engine.
! When refuelling vehicles with a diesel par-
ticulate filter in countries outside the EU,
only low-sulphur Euro diesel with less than
0.005 percent sulphur content by weight
(50 ppm) should be used.
! In countries in which diesel with a higher
sulphur content is available, the engine oil
should be renewed at more frequent inter-
vals. More information about intervals for
changing the engine oil can be obtained
from any Mercedes-Benz Service Centre.
! Using fuel that does not comply with the
EN 590 European standard or the Refuelling
173Operation
X164_AKB; 2; 3, en-GB
wobuchh, Version: 2.11.8.1 2009-03-31T14:14:58+02:00 - Seite 173 Z
Dateiname: 6515431202_buchblock.pdf; erzeugt am 01. Apr 2009 00:17:45; WK