2009 MERCEDES-BENZ GL SUV fuel
[x] Cancel search: fuelPage 177 of 309
DIN 51628 German standard can lead to
increased wear, engine damage and dam-
age to the exhaust system.
Do not use the following:
R marine diesel
R heating oil
R bio-diesel
R vegetable oil
R petrol
R paraffin
R kerosene
Do not add such fuels to diesel fuel and do
not use any special additives (exception:
flow improvers – see "Low outside temper-
atures").
Damage caused by the use of unapproved
fuels or additives is not covered by the
implied warranty.
Further information on "Fuel" (Y page 287).
Low outside temperatures The flow properties of diesel may be inade-
quate at low ambient temperatures.
Diesel fuel with improved cold flow qualities
is available during the winter months. In
Europe, various climate-dependent low-tem-
perature classes are defined in EN 590. Using
diesel fuels which meet the climatic require-
ments set out in EN 590 can help avoid oper-
ating problems. The flow properties of diesel
fuel may be inadequate at unusually low out-
side temperatures or when using fuel which
has not been adjusted to climatic conditions
(e.g. diesel fuels from Mediterranean
regions).
Flow improver
Flow improvers may be added to improve low-
temperature resistance. The effectiveness of
a flow improver is not guaranteed with every
fuel.
Correct dosage and mixing are decisive fac-
tors in ensuring improvement in low-temper- ature resistance. Under certain circumstan-
ces, an excessive dosage may actually
decrease low-temperature resistance, and
should therefore be avoided (follow the man-
ufacturer's dosing instructions).
Mix the additive with the diesel in good time,
before the flow properties of the diesel
become inadequate. Otherwise, malfunctions
can only be rectified by heating the entire fuel
system, e.g. by parking the vehicle in a heated
garage.
Observe the information provided by the man-
ufacturer when using a flow improver. Only
use flow improvers that have been tested and
approved by Mercedes-Benz. You can obtain
further information from any Mercedes-Benz
Service Centre.
Engine compartment
Bonnet
G
Risk of accident
Do not pull the release lever while the vehicle
is in motion. If you do so, the bonnet may open
up and block your view.
Opening G
Risk of injury
There is a risk of injury if the bonnet is open,
even if the engine is not running.
Some engine components can become very
hot.
To avoid the risk of burns, only touch those
components described in the Owner’s Manual
and observe the relevant safety notes. G
Risk of injury
The radiator fan between the radiator and the
engine can start automatically, even if the key
has been removed from the ignition lock. For
this reason, you must not reach into the fan
rotation area. Otherwise, you could be
injured. 174
Engine compartmentOperation
X164_AKB; 2; 3, en-GB
wobuchh
,V ersion: 2.11.8.1
2009-03-31T14:14:58+02:00 - Seite 174
Dateiname: 6515431202_buchblock.pdf; erzeugt am 01. Apr 2009 00:17:45; WK
Page 182 of 309
Tyres and wheels
Points to remember
! For safety reasons, Mercedes-Benz rec-
ommends that you only use tyres, wheels
and accessories which have been approved
by Mercedes-Benz specifically for your
vehicle. These tyres have been specially
adapted for use with the control systems,
such as ABS or ESP ®
, and are marked as
follows:
R MO = Mercedes-Benz Original
R MOE = Mercedes-Benz Original Exten-
ded* (tyres with run-flat characteristics)
Only use Mercedes-Benz Original Extended
tyres* on wheels that have been specifi-
cally approved by Mercedes-Benz.
If you use other tyres, wheels and acces-
sories, Mercedes-Benz cannot accept any
responsibility for damage that may result
from this. Further information about tyres,
wheels and approved combinations can be
obtained from any Mercedes-Benz Service
Centre.
! If you fit tyres other than those tested and
recommended by Mercedes-Benz, charac-
teristics such as handling, noise levels and
fuel consumption, etc. may be adversely
affected. In addition, when driving with a
load, tyre dimensional variations could
cause the tyres to come into contact with
the bodywork and axle components. This
could result in damage to the tyres or the
vehicle.
! Retreaded tyres are neither tested nor
recommended by Mercedes-Benz, since
previous damage cannot always be detec-
ted on retreaded tyres. As a result,
Mercedes-Benz cannot guarantee vehicle
safety if retreaded tyres are fitted. Do not
fit used tyres if you have no information
about their previous usage. G
Risk of accident
Tyres, wheels or accessories which have not
been approved by Mercedes-Benz for your
vehicle or are not used as they should be, can
impair driving safety. As a result, you could
cause an accident. Before purchasing and
using them, enquire about their suitability,
legal stipulations and factory recommenda-
tions at a Mercedes-Benz Service Centre.
Modification work on the brake system and
wheels is not permitted, nor is the use of
spacer plates or brake dust shields. This inva-
lidates the General Operating Permit for the
vehicle.
Notes on selecting, fitting and replac-
ing tyres R
Only fit tyres and wheels of the same type
and make.
R Only fit tyres of the correct size onto the
wheels.
R After fitting new tyres, run them in at mod-
erate speeds for the first 100 km as they
only reach their full performance after this
distance.
R Fit new tyres on the front wheels first if
tyres of the same size are required on the
front and rear wheels.
R Replace the tyres after six years at the lat-
est, regardless of wear. This also applies to
the spare wheel*.
R Do not drive with tyres which have too little
tread depth, as this significantly reduces
the traction on wet roads (aquaplaning).
! Store tyres that are not being used in a
cool, dry and preferably dark place. Protect
the tyres against oil, grease, petrol and die-
sel.
Notes on regularly inspecting wheels
and tyres R
Regularly check the wheels and tyres of
your vehicle for damage (e.g. cuts, punctu- Tyres and
wheels
179Operation
* optional
X164_AKB; 2; 3, en-GB
wobuchh
,V ersion: 2.11.8.1
2009-03-31T14:14:58+02:00 - Seite 179 Z
Dateiname: 6515431202_buchblock.pdf; erzeugt am 01. Apr 2009 00:17:47; WK
Page 183 of 309
res, tears, bulges on tyres and deformation,
cracks or severe corrosion on wheels), at
least every 14 days, as well as after driving
off-road or on rough roads. Damaged
wheels can cause a loss of tyre pressure.
R Regularly check the tyre tread depth and
the condition of the tread across the whole
width of the tyre (Y page 180). If neces-
sary, turn the front wheels to full lock in
order to inspect the inner side of the tyre
surface.
R All wheels must have a valve cap to protect
the valve against dirt and moisture. Do not
fit anything onto the valve (such as tyre
pressure monitoring systems) other than
the standard valve cap or other valve caps
approved by Mercedes-Benz for your vehi-
cle.
R Regularly check the pressure of all the tyres
including the spare tyre*, particularly prior
to long trips, and correct the pressure as
necessary (Y page 180).
Notes on driving R
While driving, pay attention to vibrations,
noises and unusual handling characteris-
tics, e.g. pulling to one side. This may indi-
cate that the wheels or tyres are damaged.
If you suspect that a tyre is defective,
reduce your speed and stop the vehicle as
soon as possible to check the wheels and
tyres for damage. Hidden tyre damage
could also be causing the unusual handling
characteristics. If you find no signs of dam-
age, have the wheels and tyres examined
at a specialist workshop, for example at a
Mercedes-Benz Service Centre.
R When parking your vehicle, make sure that
the tyres do not get deformed by the kerb
or other obstacles. If it is necessary to drive
over kerbs, speed humps or similar eleva-
tions, try to do so slowly and at an obtuse
angle. Otherwise, the tyres, particularly the
sidewalls, can get damaged. Direction of rotation
Tyres with a specified direction of rotation
have additional benefits, e.g. if there is a risk
of aquaplaning. You will only gain these ben-
efits if the correct direction of rotation is
observed.
An arrow on the sidewall of the tyre indicates
its correct direction of rotation.
i You may fit a spare tyre* against the
direction of rotation. Tyre tread
G
Risk of accident
Bear in mind that:
R tyre grip decreases rapidly on wet roads
when the tread depth is less than 3 mm.
Thus, you should replace tyres that have
insufficient tread.
R winter tyres should be replaced when the
tread depth is 4 mm or less as they will no
longer provide adequate grip.
R the tread on a tyre may not wear evenly.
Thus, you should regularly check the tread
depth and the condition of the tread across
the entire width of all tyres. If necessary,
turn the front wheels to full lock in order to
inspect the tyre tread more easily.
Otherwise, you could lose control of the vehi-
cle and cause an accident due to the reduced
grip of the tyres on the road. Tyre pressures
i You will find a table of tyre pressures for
various operating conditions on the inside
of your vehicle's fuel filler flap.
The applicable value for the spare
wheel*/"Minispare" emergency spare
wheel* is stated on the spare wheel and in
the technical data section.
Unless otherwise specified, the tyre pres-
sures on the inside of the fuel filler flap are 180
Tyres and wheelsOperation
* optional
X164_AKB; 2; 3, en-GB
wobuchh,
Version: 2.11.8.1 2009-03-31T14:14:58+02:00 - Seite 180
Dateiname: 6515431202_buchblock.pdf; erzeugt am 01. Apr 2009 00:17:47; WK
Page 185 of 309
it is too low for the current operating condi-
tions.
Driving with tyre pressure that is too high or
too low can:
R shorten the service life of the tyres
R increase the likelihood of tyre damage
R have a negative effect on handling charac-
teristics (e.g. by causing aquaplaning)
i The tyre pressure values given for low
loads are minimum values which offer you
good ride comfort characteristics.
However, you can also use the values given
for higher loads. These are permissible and
will not adversely affect the running of the
vehicle.
Also check the tyre pressure of the spare
wheel* or "Minispare" emergency spare
wheel*. H
Environmental note
Check the tyre pressure regularly, at least
every 14 days. Tyre pressure loss warning
While the vehicle is in motion, the tyre pres-
sure loss warning system monitors the set
tyre pressure using the rotational speed of
the wheels. This enables the system to detect
significant pressure loss in a tyre. If the speed
of rotation of a wheel changes as a result of
a loss of pressure, a corresponding warning
message will appear in the multi-function dis-
play. G
Risk of accident
The tyre pressure loss warning system does
not warn you of an incorrectly set tyre pres-
sure. The table on the inside of the fuel filler
flap will help you decide whether the tyre
pressures should be corrected.
The tyre pressure loss warning system does
not replace the need to regularly check your
vehicle's tyre pressures, since an even loss of pressure on several tyres at the same time
cannot be detected by the tyre pressure loss
warning system.
The tyre pressure monitor is not able to warn
you of a sudden loss of pressure, e.g. if the
tyre is penetrated by a foreign object.
In the event of a sudden loss of pressure, bring
the vehicle to a halt by braking carefully. Do
not make any sudden steering movements
when doing so.
The function of the tyre pressure loss warning
system is limited or delayed if:
R snow chains are fitted to your vehicle's
tyres.
R road conditions are wintry.
R you are driving on sand or gravel.
R you adopt a very sporty driving style (cor-
nering at high speeds or driving with high
rates of acceleration).
R you are towing a very heavy or large trailer.
R you are driving with a heavy load (in the
vehicle or on the roof).
Restarting the tyre pressure loss warn-
ing system Restart the tyre pressure loss warning system
if you have:
R
changed the tyre pressure
R changed the wheels or tyres
R fitted new wheels or tyres
X Before restarting, consult the table of tyre
pressures on the inside of the fuel filler flap
to ensure that the tyre pressure in all four
tyres is set correctly for the respective
operating conditions.
X Observe the notes in the section on tyre
pressures (Y page 180). 182
Tyres and wheelsOperation
* optional
X164_AKB; 2; 3, en-GB
wobuchh,
Version: 2.11.8.1 2009-03-31T14:14:58+02:00 - Seite 182
Dateiname: 6515431202_buchblock.pdf; erzeugt am 01. Apr 2009 00:17:48; WK
Page 186 of 309
G
Risk of accident
The tyre pressure loss warning system can
only give reliable warnings if you have set the
correct tyre pressure.
If an incorrect tyre pressure is set, these
incorrect values will be monitored.
A tyre with insufficient pressure results in
vehicle instability when driving, thus increas-
ing the risk of an accident.
X Make sure that the key is in position
2 (Y page 63) in the ignition lock.
In the multi-function display you will see the
standard display (Y page 98).
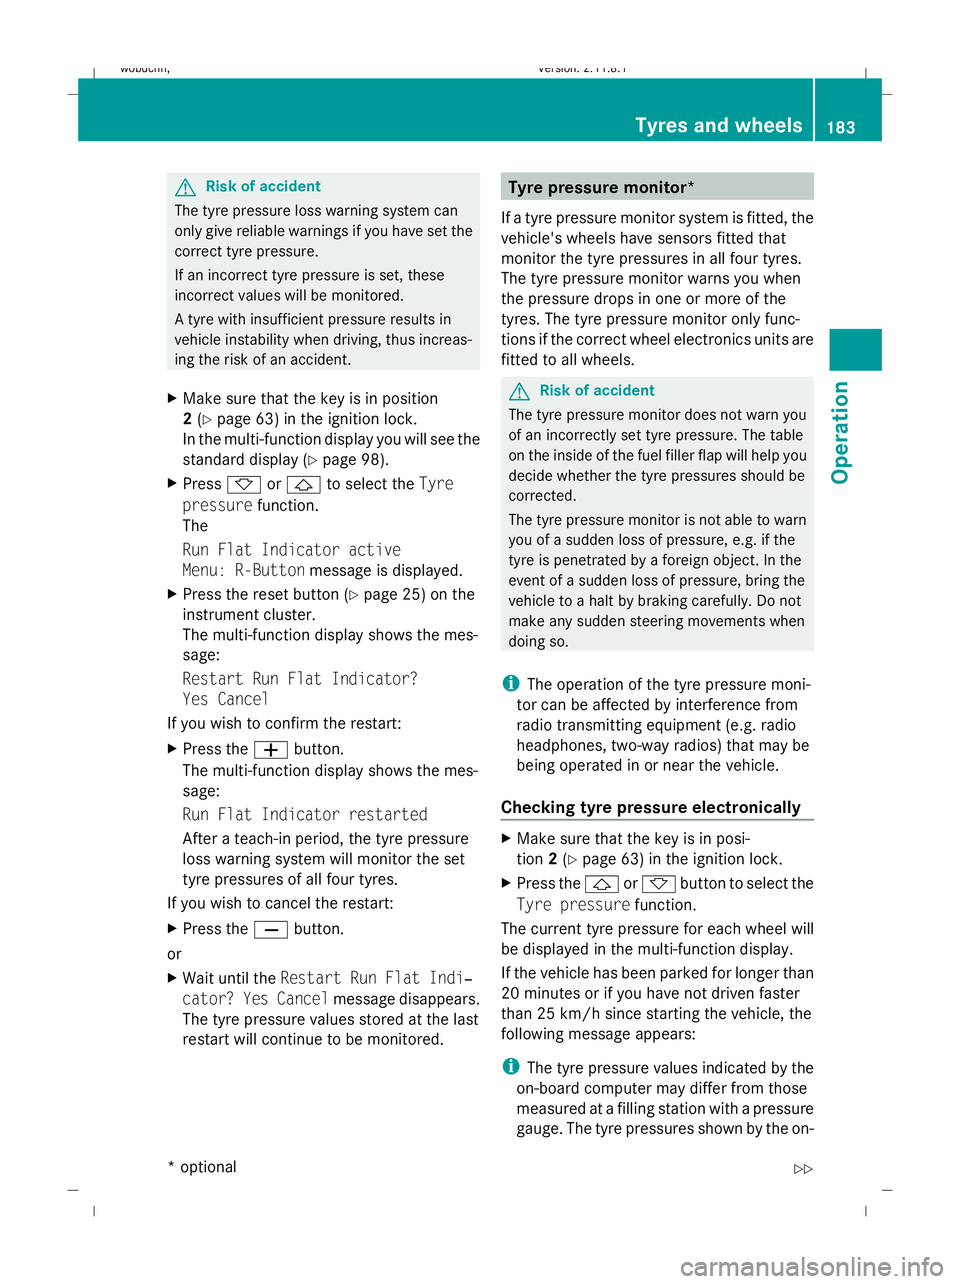
X Press *or& to select the Tyre
pressure function.
The
Run Flat Indicator active
Menu: R-Button message is displayed.
X Press the reset button (Y page 25) on the
instrument cluster.
The multi-function display shows the mes-
sage:
Restart Run Flat Indicator?
Yes Cancel
If you wish to confirm the restart:
X Press the Wbutton.
The multi-function display shows the mes-
sage:
Run Flat Indicator restarted
After a teach-in period, the tyre pressure
loss warning system will monitor the set
tyre pressures of all four tyres.
If you wish to cancel the restart:
X Press the Xbutton.
or
X Wait until the Restart Run Flat Indi‐
cator? Yes Cancel message disappears.
The tyre pressure values stored at the last
restart will continue to be monitored. Tyre pressure monitor*
If a tyre pressure monitor system is fitted, the
vehicle's wheels have sensors fitted that
monitor the tyre pressures in all four tyres.
The tyre pressure monitor warns you when
the pressure drops in one or more of the
tyres. The tyre pressure monitor only func-
tions if the correct wheel electronics units are
fitted to all wheels. G
Risk of accident
The tyre pressure monitor does not warn you
of an incorrectly set tyre pressure. The table
on the inside of the fuel filler flap will help you
decide whether the tyre pressures should be
corrected.
The tyre pressure monitor is not able to warn
you of a sudden loss of pressure, e.g. if the
tyre is penetrated by a foreign object. In the
event of a sudden loss of pressure, bring the
vehicle to a halt by braking carefully. Do not
make any sudden steering movements when
doing so.
i The operation of the tyre pressure moni-
tor can be affected by interference from
radio transmitting equipment (e.g. radio
headphones, two-way radios) that may be
being operated in or near the vehicle.
Checking tyre pressure electronically X
Make sure that the key is in posi-
tion 2(Y page 63) in the ignition lock.
X Press the &or* button to select the
Tyre pressure function.
The current tyre pressure for each wheel will
be displayed in the multi-function display.
If the vehicle has been parked for longer than
20 minutes or if you have not driven faster
than 25 km/h since starting the vehicle, the
following message appears:
i The tyre pressure values indicated by the
on-board computer may differ from those
measured at a filling station with a pressure
gauge. The tyre pressures shown by the on- Tyres and wheels
183Operation
* optional
X164_AKB; 2; 3, en-GB
wobuchh,
Version: 2.11.8.1 2009-03-31T14:14:58+02:00 - Seite 183 Z
Dateiname: 6515431202_buchblock.pdf; erzeugt am 01. Apr 2009 00:17:48; WK
Page 187 of 309

board computer refer to those measured at
sea level. At high altitudes, the tyre pres-
sure values indicated by a pressure gauge
are higher than those shown by the on-
board computer. In this case, do not reduce
the tyre pressures.
i After a teach-in period, the tyre pressure
monitor automatically recognises new
wheels or new sensors. As long as a clear
allocation of the tyre pressure values to the
individual wheels is not possible, the dis-
play message Tyre pressure monitor
active is shown instead of the tyre pres-
sure display. The tyre pressures are already
being monitored.
Restarting the tyre pressure monitor When you restart the tyre pressure monitor,
all existing warning messages are deleted and
the warning lamps go out. The monitor uses
the currently set tyre pressures as the speci-
fied values for monitoring.
In most cases, the tyre pressure monitor will
automatically detect the new reference val-
ues, e.g. if you have:
R changed the tyre pressure
R changed the wheels or tyres
R fitted new wheels or tyres
i You will find the menu overview on
(Y page 99).
If you wish to define the new reference values
manually:
X Use the table on the inside of the fuel filler
flap to ensure that the tyre pressure is set
correctly in all four tyres for the current
operating conditions.
Also observe the notes in the section on
tyre pressures (Y page 180).
X Make sure that the key is in position 2in
the ignition lock.
X Press the &or* button to select the
Tyre pressure function or wait until the
following message appears: X
Press the reset button on the instrument
cluster (Y page 25).
The multi-function display shows the mes-
sage:
Restart tyre pressure monitor?
Yes Cancel
X Press the Wbutton.
The multi-function display shows the mes-
sage:
Tyre pressure monitor restarted
The tyre pressure monitor has stored the
pressure of the tyres as a new reference
value.
Cancelling the restart X
Press the Xbutton.
Other messages in the multi-function
display If in multi-function display the following mes-
sage appears:
Please correct tyre pressures
X
Check the tyre pressure on all four wheels
and correct it if necessary.
i If the wheel positions on the vehicle are
interchanged, the tyre pressures may be
displayed for the wrong positions for a
short time. This is rectified after a few
minutes of driving, and the tyre pressures
are displayed for the correct positions. Interchanging the wheels
G
Risk of accident
Interchange the front and rear wheels only if
they have the same dimensions: for example
size, offset, etc.
After a wheel is changed, have the tightening
torque checked at a specialist workshop that
has the necessary specialist knowledge and
tools to carry out the work required.
Mercedes-Benz recommends that you use a 184
Tyres and wheelsOperation
X164_AKB; 2; 3, en-GB
wobuchh,
Version: 2.11.8.1 2009-03-31T14:14:58+02:00 - Seite 184
Dateiname: 6515431202_buchblock.pdf; erzeugt am 01. Apr 2009 00:17:48; WK
Page 193 of 309
X
Wheels and tyres: check the tyre tread
depth and tyre pressure.
X Check for damage and remove foreign
objects, e.g. small stones, from the
wheels/tyres.
X Replace any missing valve caps.
X Replace dented or damaged wheels.
Checklist after driving off-road Driving over rough terrain places greater
demands on your vehicle than driving on nor-
mal roads. After driving off-road, check the
vehicle. This allows you to detect damage
promptly and reduce the risk of an accident
to yourself and other road users.
X Deactivate the LOW RANGE off-road gear
(Y page 114).
X Deactivate DSR (Y page 113).
X Set the differential lock setting to AUTO on
the selector wheel (Y page 116).
X Lower the vehicle level again to a level suit-
able to the road conditions, e.g. to the high-
way/high-speed level.
X Clean the headlamps and rear lights and
check for damage.
X Clean the front and rear licence plates.
X Clean the wheels/tyres with a water jet and
remove any foreign objects.
X Clean the wheels, wheel arches and the
vehicle underside with a water jet; check
for foreign objects and damage.
X Check whether twigs or other parts of
plants have become trapped. These
increase the risk of fire and can damage
fuel pipes, brake hoses or the rubber bel-
lows of the axle joints and propeller shafts.
X After the trip, examine without fail the
entire undercarriage, wheels, tyres, brakes,
bodywork structure, steering, chassis and
exhaust system for damage.
X After driving for extended periods across
sand, mud, gravel, water or in similarly dirty
conditions, have the brake discs, wheels, brake pads/l
inings and axle joints checked
and cleaned.
X If you detect strong vibrations after off-road
travel, check for foreign objects in the
wheels and drive train and remove them if
necessary. Foreign objects can disturb the
balance and cause vibrations. Travelling uphill
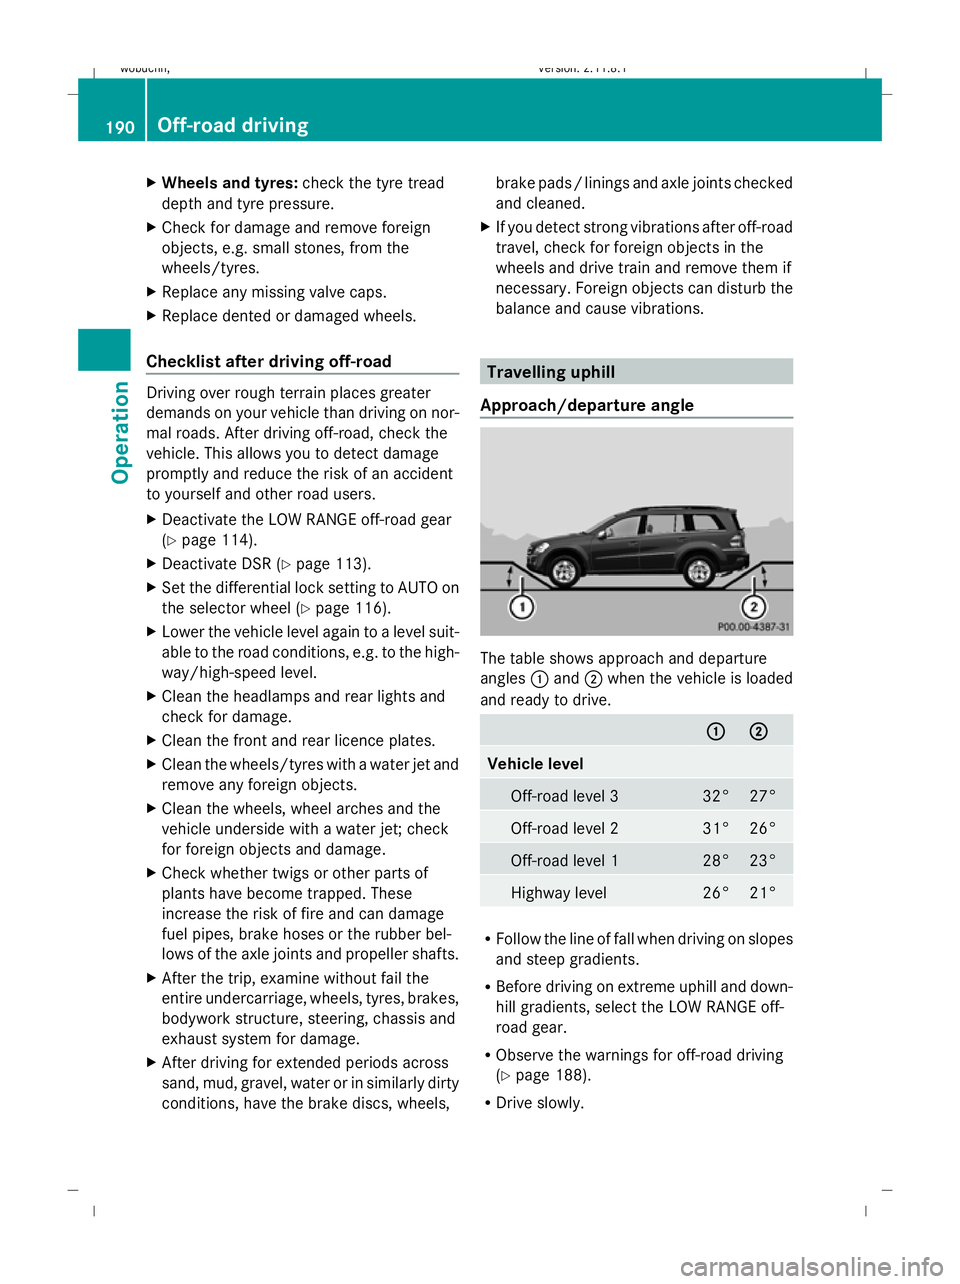
Approach/departure angle The table shows approach and departure
angles
:and ;when the vehicle is loaded
and ready to drive. :
: ;
; Vehicle level
Off-road level 3 32° 27°
Off-road level 2 31° 26°
Off-road level 1 28° 23°
Highway level 26° 21°
R
Follow the line of fall when driving on slopes
and steep gradients.
R Before driving on extreme uphill and down-
hill gradients, select the LOW RANGE off-
road gear.
R Observe the warnings for off-road driving
(Y page 188).
R Drive slowly. 190
Off-road drivingOperation
X164_AKB; 2; 3, en-GB
wobuchh,
Version: 2.11.8.1 2009-03-31T14:14:58+02:00 - Seite 190
Dateiname: 6515431202_buchblock.pdf; erzeugt am 01. Apr 2009 00:17:49; WK
Page 196 of 309

R
Drive quickly to overcome the rolling resist-
ance. The vehicle could otherwise dig itself
into the sand.
R Drive in the tracks of other vehicles, if pos-
sible. Make sure that the ruts are not too
deep, that the sand is firm enough and that
your vehicle has sufficient ground clear-
ance. Ruts
Observe the following rules when driving
along ruts in off-road terrain or on roads with
loose gravel:
! Check that the ruts are not too deep and
that your vehicle has sufficient clearance.
Otherwise, your vehicle could be damaged
or bottom out and get stuck.
R Select the LOW RANGE off-road gear
(Y page 114).
R Select a higher vehicle level.
R Avoid high engine speeds.
R Select shift range 1.
R Drive slowly.
R Where ruts are too deep, drive with the
wheels on one side on the middle section
of turf if possible. Driving abroad
Points to remember
An extensive Mercedes-Benz Service network
is also available in other countries. The
Service Hotline's current telephone numbers
for use when you are abroad are to be found
in the "Service24h" chapter of the Service
Booklet.
Only low-octane fuel is available in certain
countries.
You can find further information about fuel
grades on (Y page 172). Symmetrical dipped beam
If your journey takes you to countries where
vehicles are driven on sides of the road oppo-
site to the country in which the vehicle is reg-
istered, your headlamps must be switched to
symmetrical dipped beam. Oncoming traffic
will be dazzled less.
X Have the headlamps switched over at a
qualified specialist workshop, e. g. a
Mercedes-Benz Service Centre. G
Risk of accident
Remember to set the headlamps back to
asymmetrical dipped beam when you return
to driving on the same side of the road as that
of the country in which your vehicle was reg-
istered. You may otherwise dazzle the oncom-
ing traffic and could cause an accident. Trailer towing*
Folding out the ball coupling
Before you can tow a trailer with your vehicle,
you must fit the ball coupling.
The telescopic lever is under the boot/lug-
gage compartment mat on the left-hand side. G
Risk of accident
Make sure that the ball coupling is fully
engaged both when it is folded in and when it
is folded out. The indicator lamp is not lit.
Do not pull the telescopic lever if a trailer is
attached. The trailer could otherwise come
loose. Trailer towing*
193Operation
* optional
X164_AKB; 2; 3, en-GB
wobuchh
,V ersion: 2.11.8.1
2009-03-31T14:14:58+02:00 - Seite 193 Z
Dateiname: 6515431202_buchblock.pdf; erzeugt am 01. Apr 2009 00:17:50; WK