2009 MERCEDES-BENZ GL SUV ECO mode
[x] Cancel search: ECO modePage 143 of 309
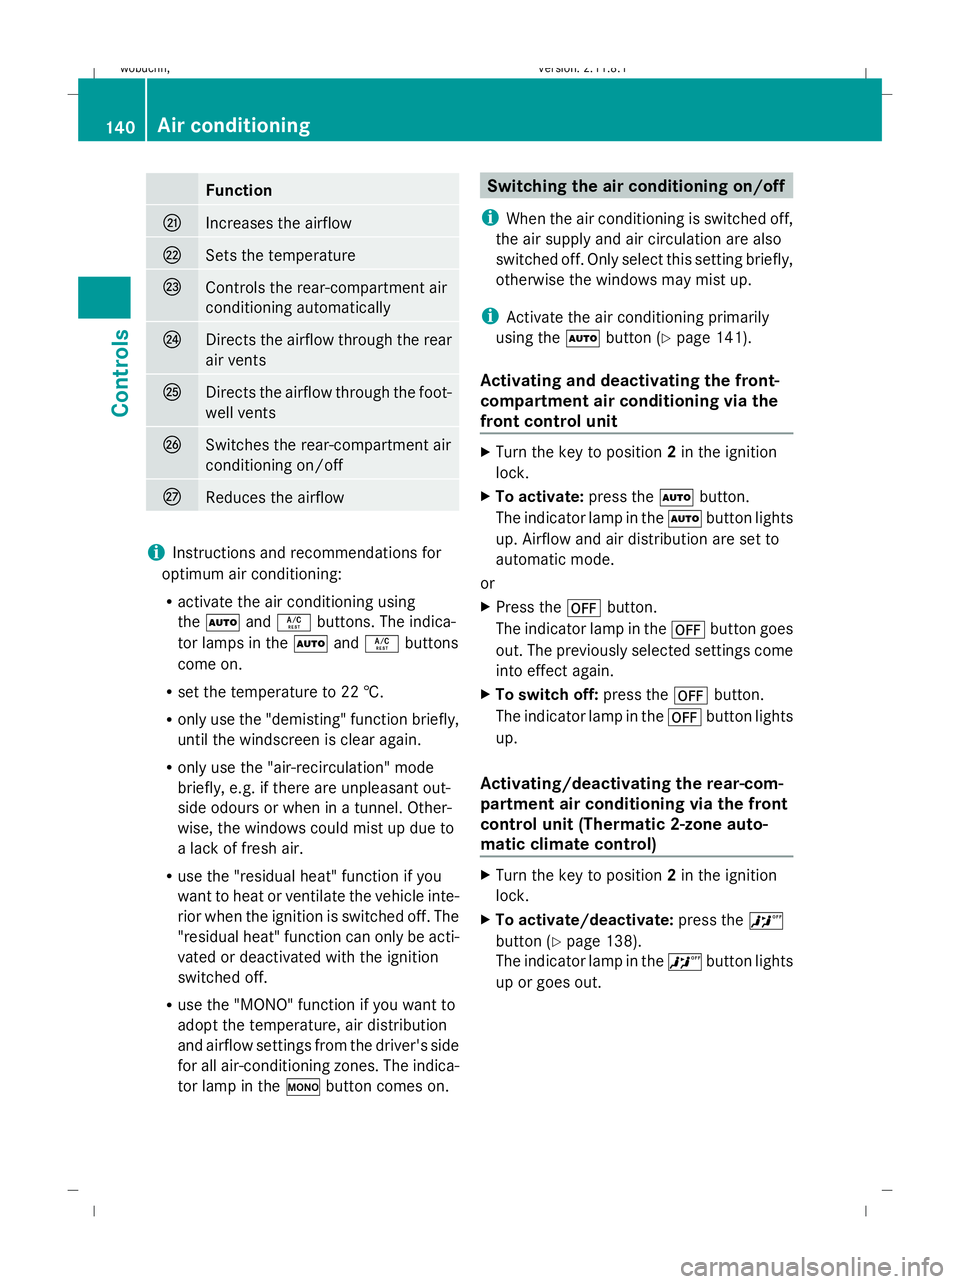
Function
Q
Increases the airflow
R
Sets the temperature
S
Controls the rear-compartment air
conditioning automatically
T
Directs the airflow through the rear
air vents
U
Directs the airflow through the foot-
well vents
V
Switches the rear-compartment air
conditioning on/off
W
Reduces the airflow
i
Instructions and recommendations for
optimum air conditioning:
R activate the air conditioning using
the à andÁ buttons. The indica-
tor lamps in the ÃandÁ buttons
come on.
R set the temperature to 22 †.
R only use the "demisting" function briefly,
until the windscreen is clear again.
R only use the "air-recirculation" mode
briefly, e.g. if there are unpleasant out-
side odours or when in a tunnel. Other-
wise, the windows could mist up due to
a lack of fresh air.
R use the "residual heat" function if you
want to heat or ventilate the vehicle inte-
rior when the ignition is switched off. The
"residual heat" function can only be acti-
vated or deactivated with the ignition
switched off.
R use the "MONO" function if you want to
adopt the temperature, air distribution
and airflow settings from the driver's side
for all air-conditioning zones. The indica-
tor lamp in the ºbutton comes on. Switching the air conditioning on/off
i When the air conditioning is switched off,
the air supply and air circulation are also
switched off. Only select this setting briefly,
otherwise the windows may mist up.
i Activate the air conditioning primarily
using the Ãbutton (Y page 141).
Activating and deactivating the front-
compartment air conditioning via the
front control unit X
Turn the key to position 2in the ignition
lock.
X To activate: press theÃbutton.
The indicator lamp in the Ãbutton lights
up. Airflow and air distribution are set to
automatic mode.
or
X Press the ^button.
The indicator lamp in the ^button goes
out. The previously selected settings come
into effect again.
X To switch off: press the^button.
The indicator lamp in the ^button lights
up.
Activating/deactivating the rear-com-
partment air conditioning via the front
control unit (Thermatic 2-zone auto-
matic climate control) X
Turn the key to position 2in the ignition
lock.
X To activate/deactivate: press the^
button (Y page 138).
The indicator lamp in the ^button lights
up or goes out. 140
Air conditioningControls
X164_AKB; 2; 3, en-GB
wobuchh,
Version: 2.11.8.1 2009-03-31T14:14:58+02:00 - Seite 140
Dateiname: 6515431202_buchblock.pdf; erzeugt am 01. Apr 2009 00:17:29; WK
Page 144 of 309
Activating/deactivating the rear-com-
partment air conditioning via the front
control unit* (Thermotronic multi-zone
luxury automatic climate control*)
X
Turn the key to position 2in the ignition
lock.
X To switch on: press theYbutton
(Y page 139).
ON and MODE are shown in the Thermotronic
multi-zone luxury automatic climate con-
trol* display behind the Ysymbol. The
MODE display goes out after three seconds.
The display switches back to the standard
display.
X To deactivate: press theYbutton
(Y page 139).
MODE is shown in the display behind the
Y symbol.
X Press the ^button (Y page 139).
OFF is shown in the display behind the
Y symbol.
Activating/deactivating the rear-com-
partment air conditioning via the rear
control unit* (Thermotronic multi-zone
luxury automatic climate control*) X
Turn the key to position 2in the ignition
lock.
X Activate Thermotronic multi-zone luxury
automatic climate control*.
X To activate: press theÃbutton.
The indicator lamp in the Ãbutton lights
up.
X To switch off: press the^button.
The indicator lamp in the ^button lights
up. Switching cooling with air dehumidi-
fication on/off
The "cooling with air dehumidification" func-
tion is only available when the engine is run-
ning. The air inside the vehicle is cooled and dehumidified according to the temperature
selected. G
Risk of accident
If you switch off the "Cooling with air dehu-
midification" function, the air inside the vehi-
cle will not be cooled (in warm weather) or
dehumidified. The windows could mist up
more quickly. This may prevent you from
observing the traffic conditions, thereby caus-
ing an accident.
Condensation may drip from the underside of
the vehicle when Thermatic is in cooling
mode.
X To activate: press theÁbutton.
The indicator lamp in the Ábutton
comes on.
X To switch off: press theÁbutton.
The indicator lamp in the Ábutton goes
out. The cooling with air dehumidification
function has a delayed switch-off feature. Controlling the air conditioning auto-
matically
In automatic mode, the set temperature is
maintained automatically at a constant level.
The system automatically regulates the tem-
perature of the dispensed air, the airflow and
the air distribution.
The automatic air conditioning will achieve
optimal operation if "cooling with air dehu-
midification" is also activated. If necessary,
cooling with air dehumidification can be deac-
tivated.
Controlling the front-compartment air
conditioning via the front control unit X
Turn the key to position 2in the ignition
lock.
X Set the desired temperature.
X To switch on: press theÃbutton.
The indicator lamp in the Ãbutton lights
up. Automatic air distribution and airflow
are activated. Air conditioning
141Controls
* optional
X164_AKB; 2; 3, en-GB
wobuchh,
Version: 2.11.8.1 2009-03-31T14:14:58+02:00 - Seite 141 Z
Dateiname: 6515431202_buchblock.pdf; erzeugt am 01. Apr 2009 00:17:29; WK
Page 150 of 309
Convenience opening/closing
G
Risk of injury
Make sure that nobody can become trapped
between the side window and the door frame
as the side windows are opened and closed.
Do not place objects or lean against the side
windows when they are being opened or
closed. You or the objects could be drawn in
or become trapped between the side window
and the door frame as the window moves. If
there is a risk of entrapment, press the
d button again. Press the button for stop-
ping, opening or closing the side windows in
the opposite direction as appropriate.
Make sure that nobody can become trapped
when you are opening or closing the sliding/
tilting sunroof*. If there is a risk of entrap-
ment, press the dbutton again. Press the
button to stop, open or close the panorama
sliding/tilting sunroof* in the opposite direc-
tion as appropriate.
X Convenience closing: press and hold
the d button until the side windows and
the sliding/tilting sunroof* are closed.
The indicator lamp in the dbutton lights
up. Air-recirculation mode is activated.
X Convenience opening: press and hold the
d button until the side windows and the
sliding/tilting sunroof* have reached their
original position.
The indicator lamp in the dbutton goes
out. Air-recirculation mode is deactivated.
i If you open the side windows or the slid-
ing/tilting sunroof* manually after closing
with the convenience closing feature, they
will remain in this position when opened
using the convenience opening feature. Switching the residual heat on/off
It is possible to make use of the residual heat
of the engine to continue heating the station-
ary vehicle for up to 30 minutes after the engine has been switched off. The heating
time depends on the temperature that has
been set.
i
The blower will run at a low speed regard-
less of the airflow setting.
i If you activate the "residual heat" function
at high temperatures, only the ventilation
will be activated. The blower runs at
medium speed.
X Turn the key to position 0in the ignition
lock or remove it.
X To activate: press theÁbutton.
The indicator lamp in the Ábutton
comes on.
X To switch off: press theÁbutton.
The indicator lamp in the Ábutton goes
out.
i The residual heat automatically switches
off after around 30 minutes or if:
R the ignition is switched on
R the battery voltage drops Auxiliary heating/ventilation*
Notes on the auxiliary heating/ventila-
tion system G
Risk of poisoning
Exhaust fumes are produced when the auxili-
ary heating is in operation. Inhaling these
exhaust fumes can be poisonous. You should
therefore switch off the auxiliary heating in
confined spaces without an extraction sys-
tem, e.g. a garage. G
Risk of fire
When operating the auxiliary heating, parts of
the vehicle may become very hot, and highly
inflammable material such as fuels could be
ignited. Operating the auxiliary heating is thus
prohibited at filling stations or when your vehi-
cle is being refuelled. You must therefore Air conditioning
147Controls
* optional
X164_AKB; 2; 3, en-GB
wobuchh,
Version: 2.11.8.1 2009-03-31T14:14:58+02:00 - Seite 147 Z
Dateiname: 6515431202_buchblock.pdf; erzeugt am 01. Apr 2009 00:17:31; WK
Page 151 of 309
switch off the auxiliary heating at filling sta-
tions.
i Switch the auxiliary heating on regularly
once a month for about ten minutes.
The auxiliary heating heats the air in the vehi-
cle interior to the set temperature without
using the heat of the running engine. The aux-
iliary heating is operated using the vehicle's
fuel. For this reason, the tank content must
be at least at reserve fuel level to ensure that
the auxiliary heating functions.
The auxiliary heating/ventilation automati-
cally adjusts to changes in temperature and
weather conditions. For this reason, the aux-
iliary heating could switch from ventilation
mode to heating mode or from heating mode
to ventilation mode.
You cannot use the auxiliary ventilation to
cool the vehicle interior to a temperature
lower than the outside temperature.
Before activating X
Turn the key to position 2in the ignition
lock.
X Set the temperature.
The auxiliary heating/ventilation can be acti-
vated even when the air conditioning is being
controlled manually. Optimum comfort can
be attained when the system is set to auto-
matic mode. Set the temperature to 22 †.
The auxiliary heating/ventilation can be acti-
vated or deactivated using the remote control
or the button on the centre console.
The on-board computer can be used to spec-
ify up to three departure times, one of which
may be preselected (Y page 107). Switching the auxiliary heating/venti-
lation on/off using the button on the
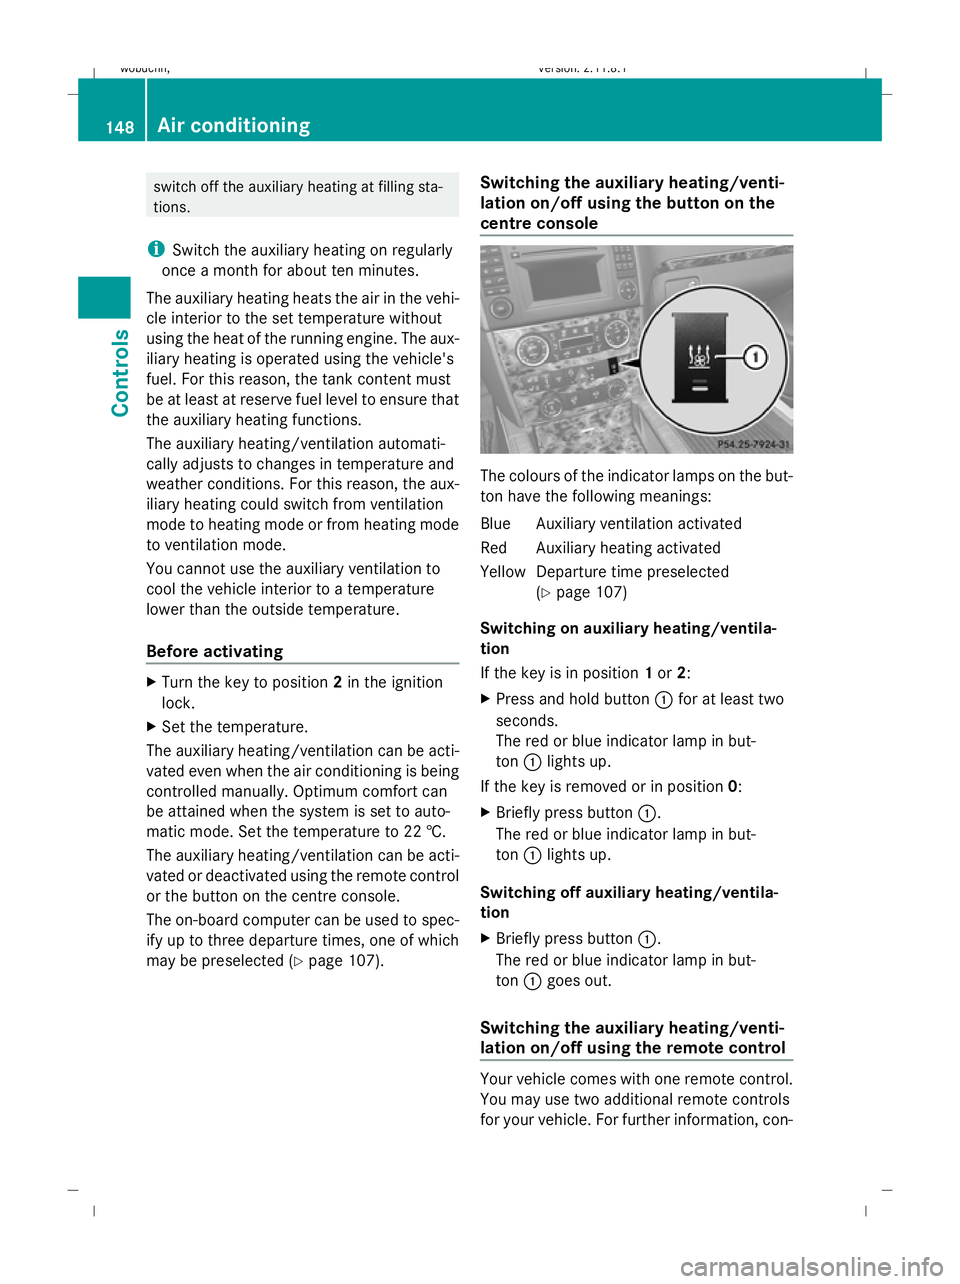
centre console The colours of the indicator lamps on the but-
ton have the following meanings:
Blue Auxiliary ventilation activated
Red Auxiliary heating activated
YellowD eparture time preselected
(Y page 107)
Switching on auxiliary heating/ventila-
tion
If the key is in position 1or 2:
X Press and hold button :for at least two
seconds.
The red or blue indicator lamp in but-
ton :lights up.
If the key is removed or in position 0:
X Briefly press button :.
The red or blue indicator lamp in but-
ton :lights up.
Switching off auxiliary heating/ventila-
tion
X Briefly press button :.
The red or blue indicator lamp in but-
ton :goes out.
Switching the auxiliary heating/venti-
lation on/off using the remote control Your vehicle comes with one remote control.
You may use two additional remote controls
for your vehicle. For further information, con-148
Air conditioningControls
X164_AKB; 2; 3, en-GB
wobuchh,
Version: 2.11.8.1 2009-03-31T14:14:58+02:00 - Seite 148
Dateiname: 6515431202_buchblock.pdf; erzeugt am 01. Apr 2009 00:17:32; WK
Page 168 of 309
cases, these are country-specific. You can
obtain these mobile phone brackets from a
qualified specialist workshop, e.g. a
Mercedes-Benz Service Centre.
The functions and services available when
you use the phone depend on your mobile
phone model and service provider.
Inserting the mobile phone
X Open the telephone compartment
(Y page 153).
X Place the mobile phone bracket into the
pre-installed fitting; see the separate
mobile phone bracket fitting instructions.
X Insert the mobile phone into the mobile
phone bracket; see the separate mobile
phone bracket fitting instructions.
If the mobile phone is inserted in the mobile
phone bracket, you can speak to the person
you are calling using the hands-free system.
You can operate the telephone using the
6 and~ buttons on the multi-function
steering wheel. You can operate other mobile
phone functions via the on-board computer
(Y page 111).
When you take the key out of the ignition lock,
the mobile phone stays on but you can no
longer use the hands-free system.
If you are making a call and you would like to
take the key out of the ignition lock, first
remove the mobile phone from the bracket.
Otherwise, the call will be ended. Garage door opener*
The remote control integrated in the rear-view
mirror allows you to operate up to three dif-
ferent door and gate systems.
i The garage door opener is only available
for certain countries. Observe the legal
requirements in all countries concerned.
The HomeLink ®
garage door opener is
compatible with most European garage and
gate opener drives. More information on HomeLink
®
and/or compatible products is
available from:
R any Mercedes-Benz Service Centre
R the HomeLink ®
hotline
(0) 08000 466 354 65 (free of charge) or
+49 (0) 6838 907-277 (charges apply)
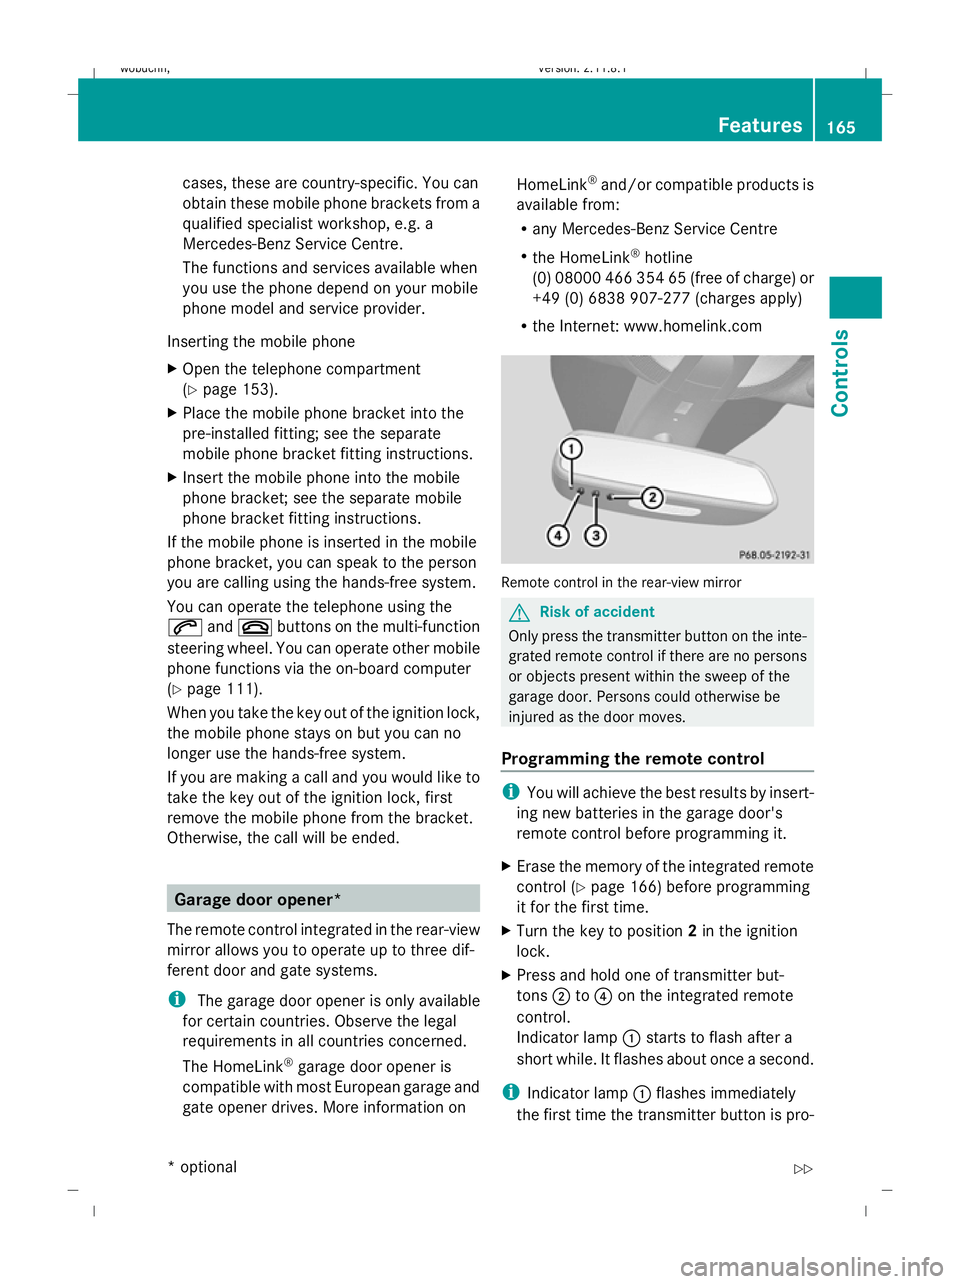
R the Internet: www.homelink.com Remote control in the rear-view mirror
G
Risk of accident
Only press the transmitter button on the inte-
grated remote control if there are no persons
or objects present within the sweep of the
garage door. Persons could otherwise be
injured as the door moves.
Programming the remote control i
You will achieve the best results by insert-
ing new batteries in the garage door's
remote control before programming it.
X Erase the memory of the integrated remote
control ( Ypage 166) before programming
it for the first time.
X Turn the key to position 2in the ignition
lock.
X Press and hold one of transmitter but-
tons ;to? on the integrated remote
control.
Indicator lamp :starts to flash after a
short while. It flashes about once a second.
i Indicator lamp :flashes immediately
the first time the transmitter button is pro- Features
165Controls
* optional
X164_AKB; 2; 3, en-GB
wobuchh,
Version: 2.11.8.1 2009-03-31T14:14:58+02:00 - Seite 165 Z
Dateiname: 6515431202_buchblock.pdf; erzeugt am 01. Apr 2009 00:17:43; WK
Page 179 of 309
i
If the bonnet can be raised slightly, it is
not properly engaged. Open it again and
close it with a little more force. Engine oil
Depending on driving style, the vehicle con-
sumes up to 0.8 l oil per 1,000 km. The oil
consumption may be higher than this when
the vehicle is new or if you frequently drive at
high engine speeds.
Checking the engine oil level Before checking the engine oil level the fol-
lowing conditions for the vehicle should be
met:
R the vehicle should be parked on level
ground.
R the engine should be switched off for at
least five minutes if the engine is at normal
operating temperature.
R the engine should be switched off for at
least 30 minutes if the engine is not at
operating temperature (i.e. if you only start
the engine briefly).
Using the on-board computer*
i Only possible on the GL 450 CDI 4MATIC.
On all other models, a dipstick is used to
check the engine oil level (Y page 177).
X Make sure that the key is in position
2(Y page 63) in the ignition lock.
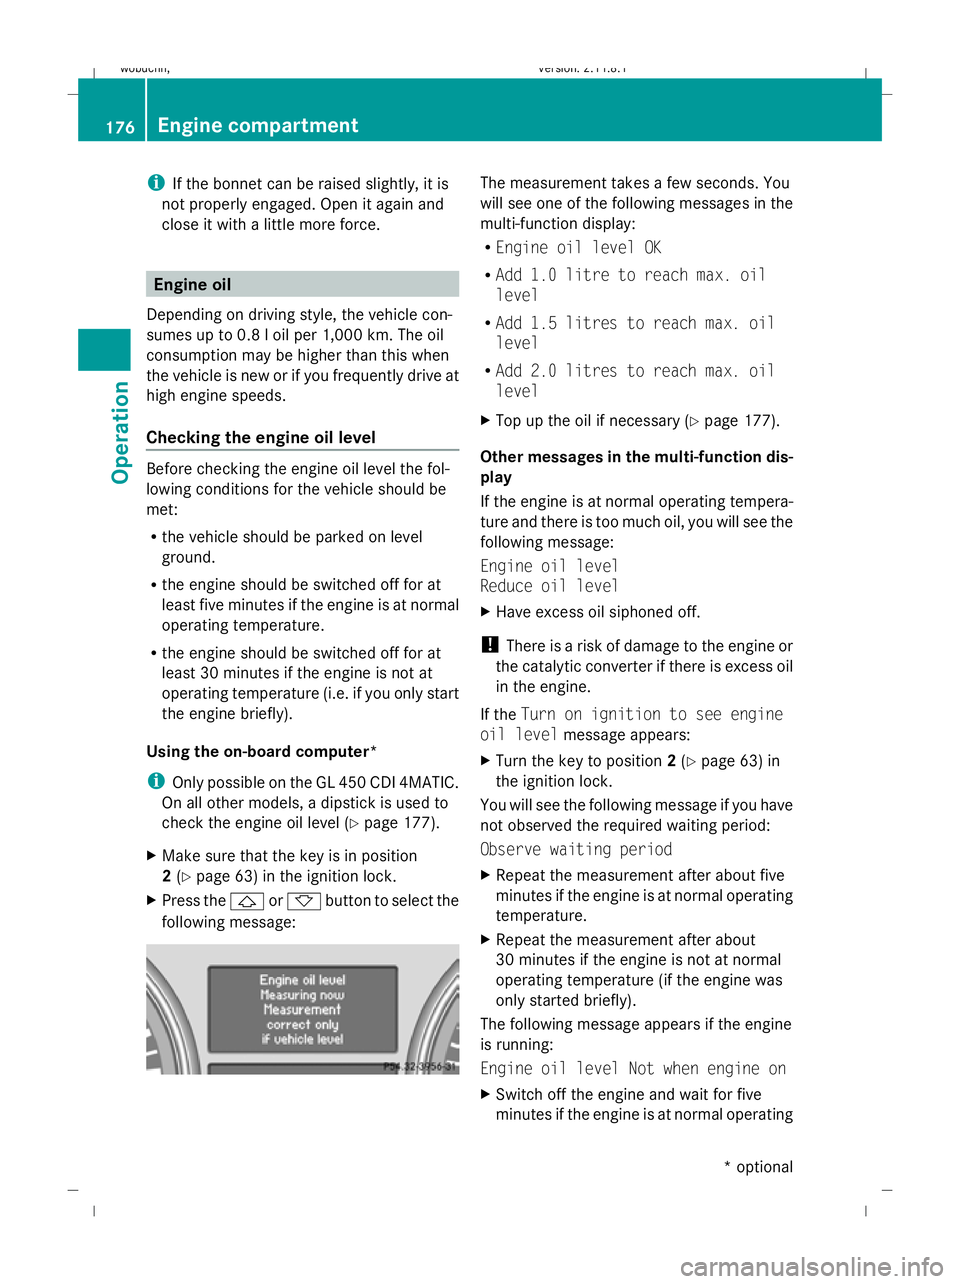
X Press the &or* button to select the
following message: The measurement takes a few seconds. You
will see one of the following messages in the
multi-function display:
R
Engine oil level OK
R Add 1.0 litre to reach max. oil
level
R Add 1.5 litres to reach max. oil
level
R Add 2.0 litres to reach max. oil
level
X Top up the oil if necessary (Y page 177).
Other messages in the multi-function dis-
play
If the engine is at normal operating tempera-
ture and there is too much oil, you will see the
following message:
Engine oil level
Reduce oil level
X Have excess oil siphoned off.
! There is a risk of damage to the engine or
the catalytic converter if there is excess oil
in the engine.
If the Turn on ignition to see engine
oil level message appears:
X Turn the key to position 2(Y page 63) in
the ignition lock.
You will see the following message if you have
not observed the required waiting period:
Observe waiting period
X Repeat the measurement after about five
minutes if the engine is at normal operating
temperature.
X Repeat the measurement after about
30 minutes if the engine is not at normal
operating temperature (if the engine was
only started briefly).
The following message appears if the engine
is running:
Engine oil level Not when engine on
X Switch off the engine and wait for five
minutes if the engine is at normal operating 176
Engine compartmentOperation
* optional
X164_AKB; 2; 3, en-GB
wobuchh,
Version: 2.11.8.1 2009-03-31T14:14:58+02:00 - Seite 176
Dateiname: 6515431202_buchblock.pdf; erzeugt am 01. Apr 2009 00:17:46; WK
Page 189 of 309
mum permissible speed for the winter tyres
(Y page 128).
Once you have fitted the winter tyres:
X Check the tyre pressures (Y page 180).
X Restart the tyre pressure moni-
tor* (Y page 183). G
Risk of accident
If you fit the spare wheel* when driving with
winter tyres, bear in mind that driving stability
will be impaired owing to unstable cornering
characteristics caused by the different tyres.
You should therefore adapt your driving style
and drive carefully.
Have the spare wheel* replaced at the near-
est qualified specialist workshop which has
the necessary specialist knowledge and tools
to carry out the work required. Mercedes-
Benz recommends that you use a Mercedes-
Benz Service Centre for this purpose. In par-
ticular, work relevant to safety or on safety-
related systems must be carried out at a quali-
fied specialist workshop. Snow chains
For safety reasons, Mercedes-Benz recom-
mends that you only use snow chains which
have been specially approved for your vehicle
by Mercedes-Benz, or are of a corresponding
standard of quality.
! Do not drive in ADS SPORTmode when
driving with snow chains fitted.
If you intend to fit snow chains, please bear
the following points in mind:
R you may not attach snow chains to all
wheel-tyre combinations; see the "Tyres and wheels" section in the "Technical data"
chapter.
R snow chains must not be fitted to emer-
gency spare wheels, e.g. a "Minispare"
emergency spare wheel.
R Fit snow chains only in pairs and only to the
rear wheels. Comply with the manufactur-
er's installation instructions.
Do not exceed the maximum permissible
speed of 50 km/h.
i You may wish to deactivate ESP ®
when
pulling away with snow chains fitted
(Y page 51). This way, you can allow the
wheels to spin in a controlled manner, ach-
ieving an increased driving force (cutting
action). Winter driving
G
Risk of accident
Do not shift down for additional engine brak-
ing on a slippery road surface. This could
cause the drive wheels to lose their grip and
the vehicle could skid.
You should drive particularly carefully on slip-
pery road surfaces. Avoid sudden accelera-
tion, steering and braking manoeuvres.
If the vehicle threatens to skid or cannot be
stopped when moving at low speed:
X Shift the selector lever to N.
X Try to bring the vehicle under control by
using corrective steering. Driving tips
Rolling with the engine switched off
G
Risk of accident
Never switch the engine off while the vehicle
is in motion.
There is no power assistance for the steering
and the service brake when the engine is not
running. 186
Driving tipsOperation
* optional
X164_AKB; 2; 3, en-GB
wobuchh,
Version: 2.11.8.1 2009-03-31T14:14:58+02:00 - Seite 186
Dateiname: 6515431202_buchblock.pdf; erzeugt am 01. Apr 2009 00:17:48; WK
Page 190 of 309
You will require considerably more effort to
steer and brake and you could therefore lose
control of the vehicle and cause an accident.
Brakes
G
Risk of accident
Do not change down for additional engine
braking on a slippery road surface. This could
cause the drive wheels to lose their grip and
the vehicle could skid. G
Risk of accident
Make sure that other road users are not
endangered by your braking.
Downhill gradients On long and steep downhill gradients, espe-
cially if the vehicle is laden or towing a trailer,
you must select shift range 1,2or 3in good
time.
i This also applies if you have activated
cruise control, Speedtronic or Distronic*.
This will use the braking effect of the engine,
so less braking will be required to maintain
the speed. This relieves the load on the brake
system and prevents the brakes from over-
heating and wearing too quickly. If you need
additional braking, depress the brake pedal
repeatedly rather than continuously.
Heavy and light loads If the brakes have been subjected to a heavy
load, do not stop the vehicle immediately, but
drive on for a short while. This allows the air-
flow to cool the brakes more quickly. G
Risk of accident
Never depress the brake pedal continuously
while the vehicle is in motion, e.g. never cause
the brakes to rub by applying constant slight
pedal pressure. This causes the brake system
to overheat, increases the braking distance
and can lead to the brakes failing completely. If the brakes have been used only moderately,
you should occasionally test their effective-
ness. To do this, brake more firmly from a
higher speed. This improves the grip of the
brakes.
Wet roads If driving in heavy rain for a prolonged period
of time without braking, there may be a
delayed reaction from the brakes when brak-
ing for the first time. You must brake harder.
You must therefore maintain a greater dis-
tance from the vehicle in front.
After driving on a wet surface, brake firmly
while paying attention to the traffic condi-
tions. This way the brake discs will become
warm, drying more quickly, which will protect
them against corrosion.
Limited braking performance on salted
roads
G
Risk of accident
The layer of salt on the brake discs and the
brake pads/linings may cause a delay in the
braking effect, resulting in a significantly lon-
ger braking distance, which could lead to an
accident.
To avoid this danger, you should:
R occasionally brake carefully, without put-
ting other road users at risk, when you are
driving on salted roads. This helps to
remove any salt that may have started to
build up on the brake discs and the brake
pads/linings.
R maintain a greater distance to the vehicle
ahead and drive with particular care.
R carefully apply the brakes at the end of a
trip and immediately after commencing a
new trip, so that salt residues are removed
from the brake disc. Driving tips
187Operation
* optional
X164_AKB; 2; 3, en-GB
wobuchh
,V ersion: 2.11.8.1
2009-03-31T14:14:58+02:00 - Seite 187 Z
Dateiname: 6515431202_buchblock.pdf; erzeugt am 01. Apr 2009 00:17:49; WK