2009 MERCEDES-BENZ E-CLASS COUPE display
[x] Cancel search: displayPage 165 of 313
With the key
G
Risk of injury
Make sure nobody can be trappe dorinjured
by moving parts such as the soft-top linkage
or soft-top compartment cover when opening
or closing the soft top.
If there is arisk of entrapment, immediately
release the 0036or0037 button on the key.
The soft-top mechanism stops immediately. Closing
X
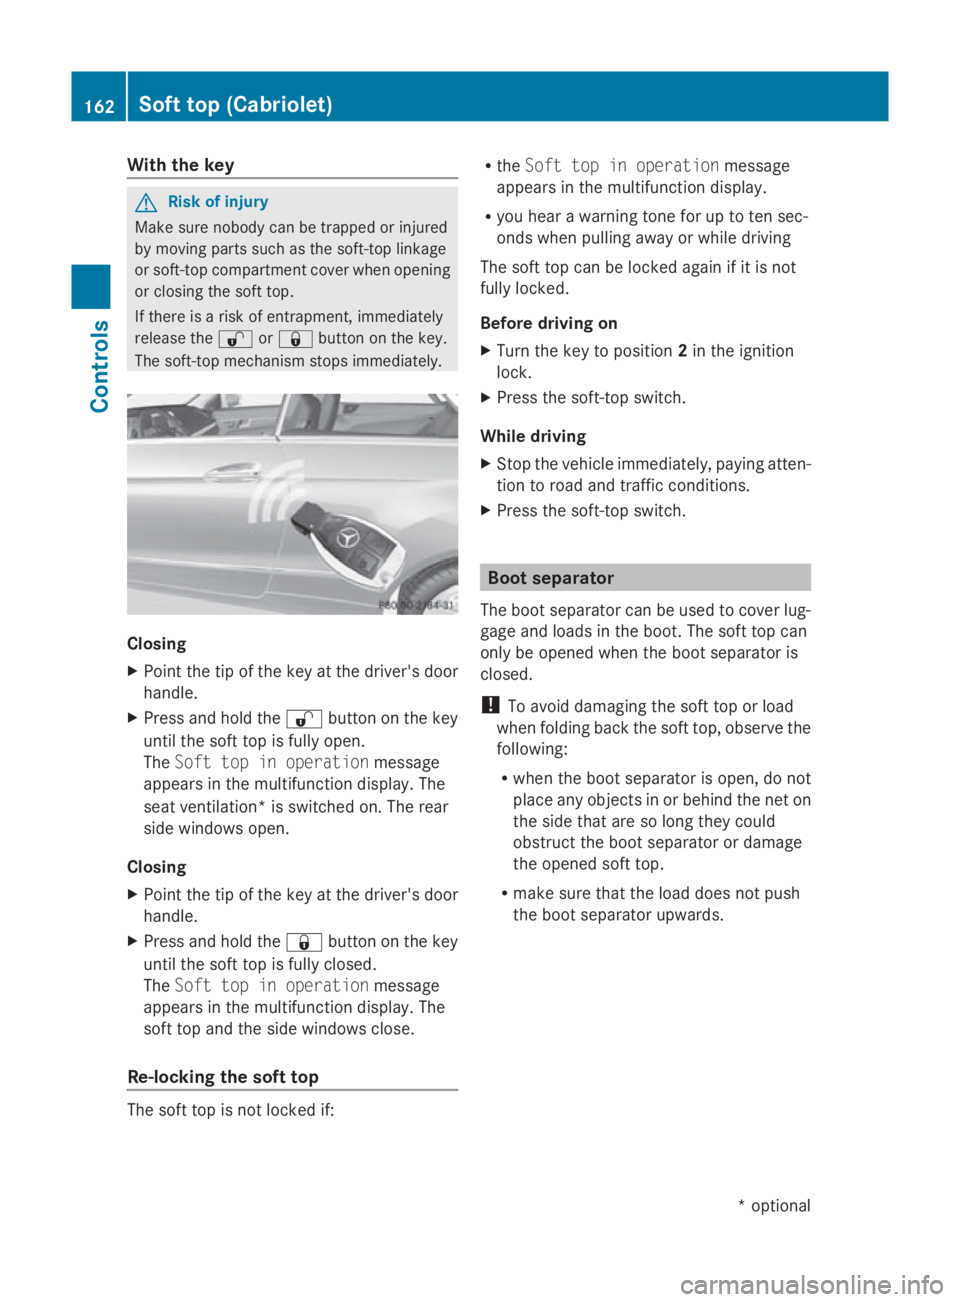
Point the tip of the key at the driver's door
handle.
X Press and hold the 0036button on the key
until the soft top is fully open.
The Soft top in operation message
appears in the multifunction display. The
sea tventilation* is switched on. The rear
side windows open.
Closing
X Point the tip of the key at the driver's door
handle.
X Press and hold the 0037button on the key
until the soft top is fully closed.
The Soft top in operation message
appears in the multifunction display. The
soft top and the side windows close.
Re-locking the soft top The soft top is not locked if: R
the Soft top in operation message
appears in the multifunction display.
R you hea rawarning tone for up to ten sec-
onds whe npulling away or while driving
The soft top can be locked again if it is not
fully locked.
Before driving on
X Turn the key to position 2in the ignition
lock.
X Press the soft-top switch.
While driving
X Stop the vehicl eimmediately ,paying atten-
tion to road and traffic conditions.
X Press the soft-top switch. Boot separator
The boot separator can be use dtocover lug-
gag eand loads in the boot. The soft top can
only be opened whe nthe boot separator is
closed.
! To avoi ddamaging the soft top or load
whe nfolding back the soft top, observe the
following:
R whe nthe boot separator is open, do not
place any objects in or behind the net on
the side that are so long they could
obstruct the boot separator or damage
the opened soft top.
R make sure that the loa ddoes not push
the boot separator upwards. 162
Soft top (Cabriolet)Controls
*o
ptional
207_AKB; 2; 3, en-GB
mkalafa,
Version: 2.11.8.1 2009-07-23T10:23:49+02:00-Seite 162
Page 173 of 313
Folding th
erears eat backres tback X
If necessary, mov ethe driver' sorfront-
passenger seat forward.
! Mak esure that th eseat belt does not
become trapped when foldin gthe rear seat
backrest back. Otherwise, it could be dam-
aged.
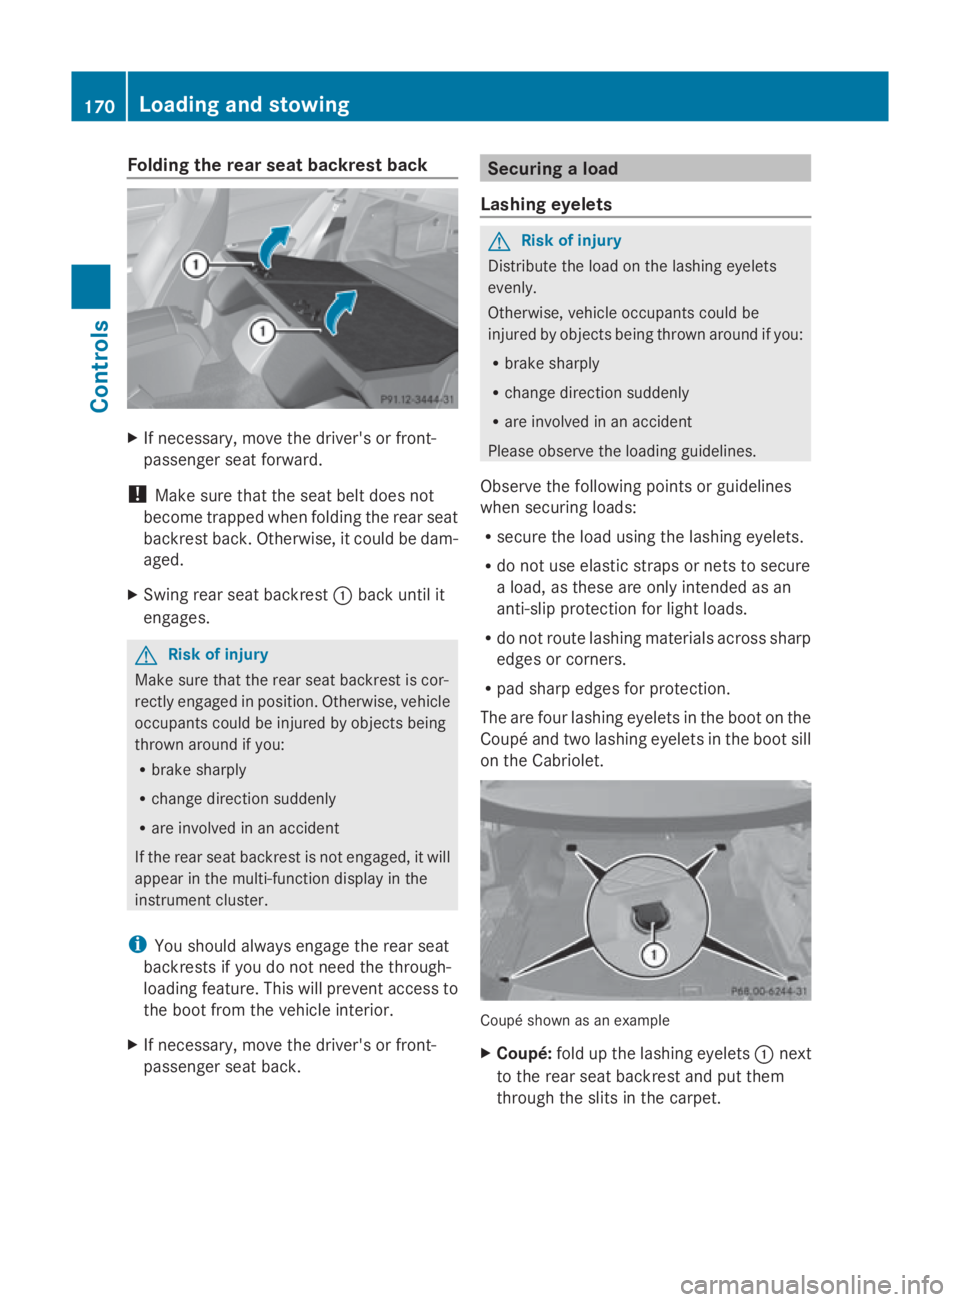
X Swin grear seat backrest 0046bac kuntil it
engages. G
Ris
kofi njury
Mak esure that th erear seat backrest is cor-
rectl yengage dinp osition .Otherwise, vehicle
occupant scould be injured by object sbeing
thrown aroun difyou:
R brak esharply
R chang edirection suddenly
R are involved in an accident
If th erear seat backrest is no tengaged, it will
appear in th emulti-function display in the
instrumen tcluster.
i You should always engage th erear seat
backrest sifyou do no tneedt he through-
loadin gfeature. This will preven taccess to
th eb oot from th evehicl einterior.
X If necessary, mov ethe driver' sorfront-
passenger seat back. Securing
aload
Lashing eyelets G
Ris
kofi njury
Distribut ethe load on th elashing eyelets
evenly.
Otherwise, vehicl eoccupant scould be
injured by object sbein gthrown aroun difyou:
R brak esharply
R chang edirection suddenly
R are involved in an accident
Pleas eobserv ethe loadin gguidelines.
Observ ethe followin gpoints or guidelines
when securin gloads:
R secure th eload usin gthe lashing eyelets.
R do no tuse elastic straps or nets to secure
al oad, as these are only intended as an
anti-slip protection for light loads.
R do no trout elashing material sacross sharp
edge sorc orners.
R pad shar pedge sfor protection.
The are four lashing eyelet sintheboot on the
Coupé and two lashing eyelet sintheboot sill
on th eCabriolet. Coupé shown as an example
X
Coupé: foldupt helashing eyelets 0046next
to th erear seat backrest and put them
throug hthe slitsint hecarpet. 170
Loading and stowingCont
rols
207_AKB; 2; 3, en-GB
mkalafa,V ersion: 2.11.8.1
2009-07-23T10:23:49+02:00
-Seite 170
Page 181 of 313
Running-i
nnotes The firs
t1,50 0km G
Ris
kofa ccident
New brake pads/linings only have optimal
braking performance afte rsevera lhun dred
kilometres. Until then, compensate for this by
applying greate rforce to the brake pedal .This
also applie swhenb rake pads/linings or
brake discs have bee nchanged.
If yo utrea tthe engine with sufficient care
from the very start, yo uwillber ewarded with
excellent performance for the remainder of
the engine's life.
R Therefore, yo ushoul ddrive at varying road
and engine speeds for the firs t1,500 km.
R Avoi dheavy loads, e.g. driving at ful lthrot-
tle, during this time .Donot exceed 2
/ 3 of
the maximum permissible engine speed for
each gear.
R Chang egearing oodt ime.
R Do not shift dow nagearm anually in order
to brake.
Vehicles with automatic transmission*:
R try to avoid depressing the accelerator
pedal beyond the pressure point (kick-
down).
R only us eranges 3,2or 1for slo wdriving,
e.g. in mountainou sterrain.
After 1,500 km ,you may gradually bring the
vehicl euptof ullr oa da nd engine speeds.
i These running-in instructions mus talso
be observe difyouhave the engine, the dif-
ferenia lgea rort he front axl edifferentia lof
your vehicl ereplaced. Refuelling
Refuelling
G
Ris
kofe xplosion
Fue lish ighly flammable. Fire ,nake dflames
and smoking are therefore prohibited when
handling fuels.
Switch off the engine before refuelling. G
Ris
kofi njury
Avoi dany contact with fuels.
Yo uc an damag eyourh ealth if your skin
come sinto direct contact with fue lorifyou
inhale fue lvapours. G
Ris
koff ire
Do not us epetrol to refuel vehicles with adie-
sel engine. Neve rmix diese lwithp etrol .This
causes damag etothe fue lsys tem and engine
and could resul tinthe vehicl ecatching fire.
! Do not us epetrol to refuel vehicles with a
diese lengine. Do not us ediese ltor efuel
vehicles with apetrol engine. Even small
amounts of the wrong fue lwillc ause dam-
ag etot he fue lsys tem and engine. Damage
resulting from adding the wrong fue lisnot
covered by the implied warranty.
! Do not star tthe engine if yo uaccidentally
refuel with the wrong fuel. Otherwise, the
fue lcould enter the fue llin es. Thi swould
require draining of the fue ltank and fuel
lines. Notify aquali fied specialist workshop
and have the fue ltank and fue llin es
draine dcompletely.
Whe nyou ope norc lose the vehicl ewitht he
key or KEYLESS GO*, the fue lfille rflapis
automaticall yunlocked or locked.
The position of the fue lfille rcap is to the rear
on the right. The position of the fue lfille rcap
is displayed in the instrument cluster 00B8.178
RefuellingOperation
*o
ptional
207_AKB; 2; 3, en-GB
mkalafa
,V ersion: 2.11.8.1
2009-07-23T10:23:49+02:00
-Seite 178
Page 186 of 313
imum mark on the dipstick
,the engine or
catalytic converter could be damaged.
Have excess oil siphoned off.
X Replace cap 0046on the filler nec kand
tighten clockwise.
Ensure that the cap lock sintop lace
securely.
For further information on engine oil, see
(Y page 288). Coolant
Only chec kthe coolan tlevel when the vehicle
is on alevel surface and the engine has cooled
down.
X Turn the key to position 2(Y page 65) in
the ignition lock.
X Check the coolan ttemperature gauge in
the instrumen tcluster. G
Risk of injury
The cooling system is pressurised. Therefore,
only unscrew the cap onc ethe engine has
coole ddown. The coolan ttemperature gauge
must display less than 70 †. Otherwise, you
could be scalde difhot coolan tescapes.
The coolan texpansion tan kislocated in the
engine compartmen tonthe right when
viewed in the direction of travel. X
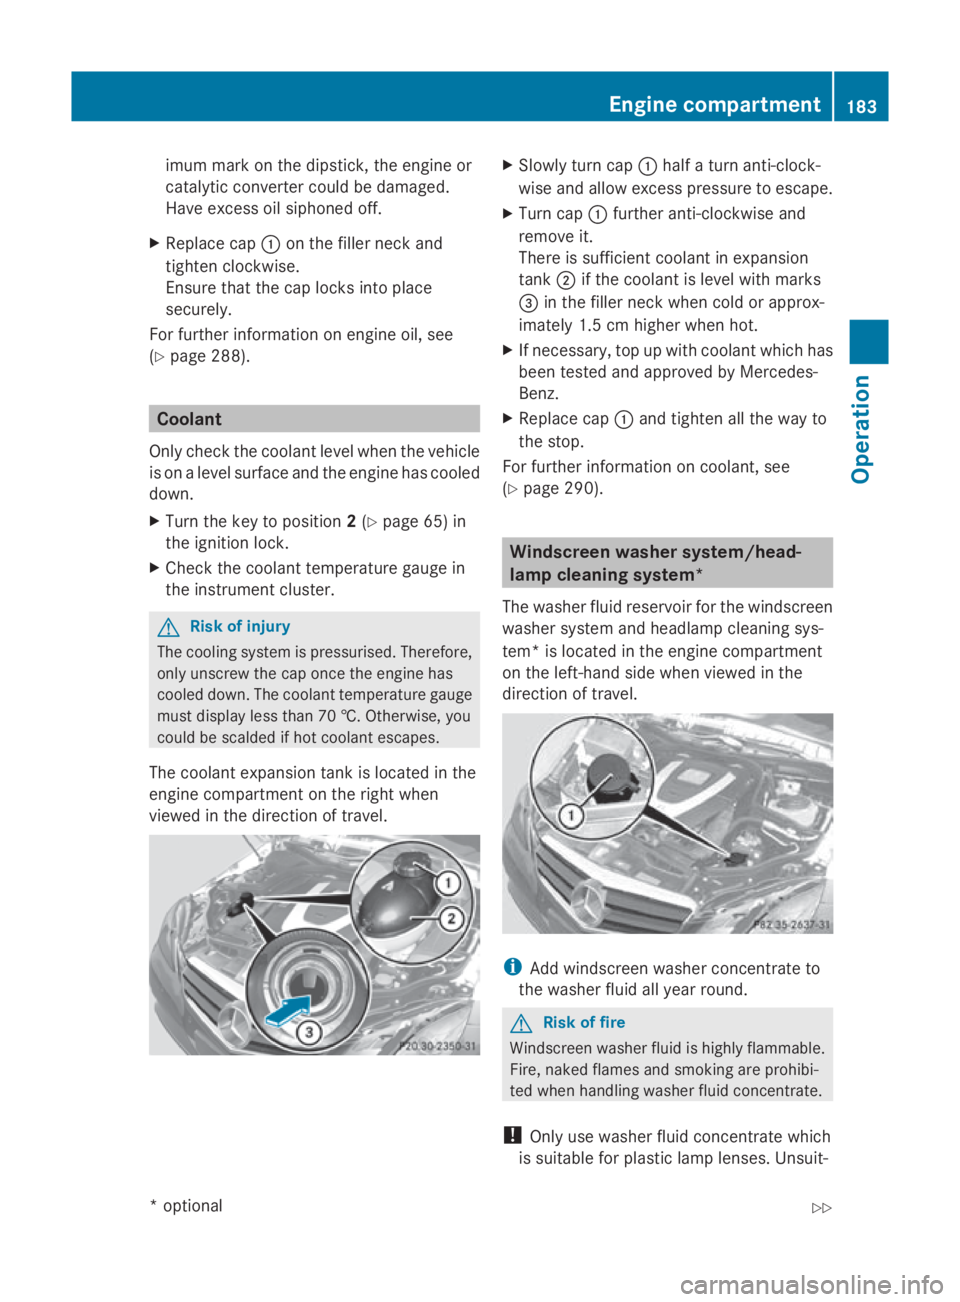
Slowly tur ncap 0046 half aturna nti-clock-
wise and allow excess pressure to escape.
X Turn cap 0046further anti-clockwise and
remove it.
There is sufficien tcoolan tinexpansion
tank 0047if the coolan tislevel with marks
008A in the filler nec kwhen cold or approx-
imately 1. 5cmhigher when hot.
X If necessary, top up with coolan twhich has
been tested and approved by Mercedes-
Benz.
X Replace cap 0046and tighten all the way to
the stop.
For further information on coolant, see
(Y page 290). Windscreen washer system/head-
lam
pcleaning system*
The washer fluid reservoir for the windscreen
washer system and headlamp cleaning sys-
tem *isl ocated in the engine compartment
on the left-han dside when viewed in the
direction of travel. i
Add windscreen washer concentrate to
the washer fluid all year round. G
Risk of fire
Windscreen washer fluid is highly flammable.
Fire ,naked flames and smoking are prohibi-
ted when handlin gwasher fluid concentrate.
! Only use washer fluid concentrate which
is suitable for plastic lamp lenses. Unsuit- Engine compartment
183Operation
*optional
207_AKB; 2; 3, en-GB
mkalafa,
Version: 2.11.8.1
2009-07-23T10:23:49+02:0
0-Seite1 83 Z
Page 191 of 313

The tyre pressure loss warning system does
not replace the need to regularly check your
vehicle's tyre pressures, since an even loss of
pressure on several tyres at the same time
cannot be detected by the tyre pressure loss
warning system.
The tyre pressure monitor is not able to warn
you of asudden loss of pressure, e.g. if the
tyre is penetrated by aforeign object.
In the event of asudden loss of pressure, bring
the vehicle to ahalt by braking carefully. Do
not make any sudden steerin gmovements
when doing so.
The function of the tyre pressure loss warning
system is limited or delaye dif:
R snow chains are fitted to your vehicle's
tyres.
R road conditions are wintry.
R you are driving on sand or gravel.
R you adopt avery sporty driving style (cor-
nering at high speeds or driving with high
rates of acceleration).
R you are towing avery heavy or large trailer.
R you are driving with aheavy load (in the
vehicle or on the roof).
Restarting the tyrep ressureloss warn-
ing system Restart the tyre pressure loss warning system
if you have:
R
changed the tyre pressure
R changed the wheels or tyres
R fitted new wheels or tyres
X Before restarting, consult the table of tyre
pressures on the inside of the fuel filler flap
to ensure that the tyre pressure in all four
tyres is set correctly for the respective
operating conditions.
X Observe the notes in the section on tyre
pressures (Y page 186). G
Risk of accident
The tyre pressure loss warning system can
only give reliable warnings if you have set the
correc ttyre pressure.
If an incorrect tyre pressure is set, these
incorrect values will be monitored.
At yre with insufficien tpressure results in
vehicle instability when driving, thus increas-
ing the risk of an accident.
X Make sure that the key is in position 2in
the ignition lock.
In the multi-function display you will see the
standard display (Y page 108).
X Press the 0040or003E button to select the
Service menu.
X Press the 003Cor003D button to select
Tyre pressure.
X Press the 0064button.
The multi-function display shows the mes-
sage:
Run Flat Indicator active Restart
with OK
If you wish to confirm the restart:
X Press the 0064button.
The multi-function display shows the mes-
sage:
Tyre press. now OK?
X Press the 003Cor003D button to select
Yes.
X Press the 0064button.
You will see the following message in the
multi-function display:
Run Flat Indicator restarted
After ateach-in period, the tyre pressure
loss warning system will monitor the set
tyre pressures of all four tyres.
If you wish to cancel the restart:
X Press the 0041button.
or
X When the Tyre press. now OK? message
appears, press 003Cor003D to select
Cancel. 188
Tyres and wheelsOperation
207_AKB; 2; 3, en-GB
mkalafa,
Version: 2.11.8.1 2009-07-23T10:23:49+02:00-Seite 188
Page 192 of 313
X
Press the 0064button.
The tyre pressure values stored at the last
restart will continue to be monitored. Interchanging the wheels
G
Risk of accident
Interchange the fron tand rear wheels only if
they have the same dimensions :for example
size, offset ,etc.
After awheel is changed, have the tightening
torque checked at aspecialist workshop that
has the necessary specialist knowledge and
tools to carry out the work required.
Mercedes-Benz recommends that you use a
Mercedes-Benz Servic eCentre for this pur-
pose. In particular, work relevant to safety or
on safety-related systems must be carried out
at aq ualified specialist workshop.
The wheels could work loose if they are not
tightened to atorque of 130 Nm.
For safety reasons, Mercedes-Benz recom-
mends that you only use wheel bolts of the
correc tsize which have been approved for
Mercedes-Benz vehicles.
The wear patterns on the fronta nd rear tyres
differ, depending on the operating conditions.
Interchange the wheels before aclear wear
patter nhas formed on the tyres. Frontt yres
typically wear more on the shoulders and the
rear tyres in the centre.
On vehicles that have the same size fronta nd
rear wheels you can interchange the wheels
every 5,000 km to 10,00 0kmdepending on
the degree of tyre wear. Do not reverse the
direction of tyre rotation.
Clean the contact surfaces of the wheel and
the brake disc thoroughly every time awheel
is interchanged. Check the tyre pressure and,
if necessary, restart the tyre pressure loss
warning system*. Winter driving
Points to remember
Have your vehicle winterproofed at aqualified
specialist workshop, e.g. at aMercedes-Benz
Servic eCentre, at the onset of winter.
Observe the notes in the "Changing awheel"
section (Y page 189). Winter tyres
Use winter tyres at temperatures below
+7 ˚C and in wintry road conditions. Only
winter tyres displaying the 004Dsnowflake
symbol in addition to the M+S markin gpro-
vide optimum grip in wintry road conditions.
Only these tyres will allow the ABS and ESP
driving systems to function optimally in win-
ter, as these tyres have been designed spe-
cifically for driving on snow.
Use winter tyres of the same make and tread
on all wheels to maintain safe handling char-
acteristics. G
Risk of accident
Winter tyres with atread depth of less than
4mmm ust be replaced immediately. They are
no longer suitable for winter use and can no
longer provide sufficient grip. This could
cause you to lose control of your vehicle and
cause an accident.
Always observe the maximum permissible
speed specified for the winter tyres you have
fitted. If you fit winter tyres which have a
lower maximum permissible speed than that
of the vehicle, affix an appropriate warning
sign in the driver's field of vision. This can be
obtained at aqualified specialist workshop,
e.g. from aMercedes-Benz Servic eCentre.
Under these circumstances, you should also
restrict the maximum speed of the vehicle
using permanen tSpeedtronic 37
to the maxi-
mum permissible speed for the winter tyres
(Y page 135).
37 Only available for certain countries. Winter driving
189Operation
*optional
207_AKB; 2; 3, en-GB
mkalafa,
Version: 2.11.8.1 2009-07-23T10:23:49+02:00-Seite 189 Z
Page 197 of 313
X
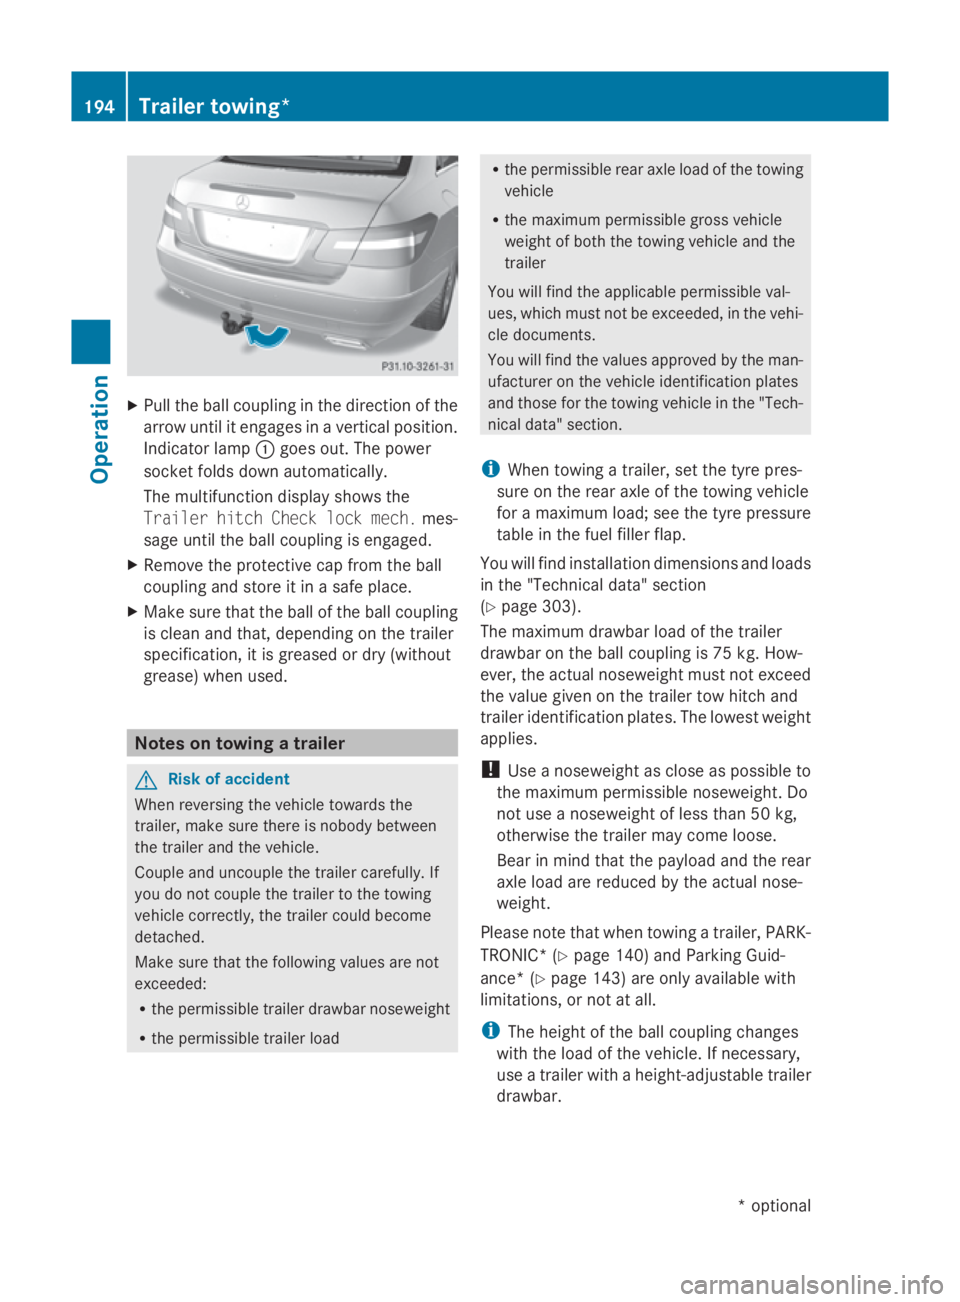
Pull the ball coupling in the direction of the
arrow until it engages in avertical position.
Indicator lamp 0046goes out. The power
socket folds down automatically.
The multifunction display shows the
Trailer hitch Check lock mech. mes-
sage until the ball coupling is engaged.
X Remove the protective cap from the ball
coupling and store it in asafe place.
X Make sure that the ball of the ball coupling
is clean and that, depending on the trailer
specification, it is greased or dry (without
grease) when used. Notes on towing
atrailer G
Risk of accident
When reversin gthe vehicle towards the
trailer, make sure there is nobody between
the trailer and the vehicle.
Couple and uncouple the trailer carefully. If
you do not couple the trailer to the towing
vehicle correctly, the trailer could become
detached.
Make sure that the following values are not
exceeded:
R the permissible trailer drawbar noseweight
R the permissible trailer load R
the permissible rear axle load of the towing
vehicle
R the maximum permissible gross vehicle
weight of both the towing vehicle and the
trailer
You will find the applicable permissible val-
ues, which must not be exceeded, in the vehi-
cle documents.
You will find the values approved by the man-
ufacturer on the vehicle identification plates
and those for the towing vehicle in the "Tech-
nical data" section.
i When towing atrailer, set the tyre pres-
sure on the rear axle of the towing vehicle
for am aximum load; see the tyre pressure
table in the fuel filler flap.
You will find installation dimensions and loads
in the "Technical data" section
(Y page 303).
The maximum drawbar load of the trailer
drawbar on the ball coupling is 75 kg. How-
ever, the actual noseweight must not exceed
the value given on the trailer tow hitch and
trailer identification plates. The lowest weight
applies.
! Use anoseweight as close as possible to
the maximum permissible noseweight. Do
not use anoseweight of less than 50 kg,
otherwise the trailer may come loose.
Bear in mind that the payloa dand the rear
axle load are reduced by the actual nose-
weight.
Please notet hat when towing atrailer, PARK-
TRONIC* (Y page 140) and Parking Guid-
ance* (Y page 143) are only availabl ewith
limitations ,ornot at all.
i The height of the ball coupling changes
with the load of the vehicle. If necessary,
use atrailer with aheight-adjustable trailer
drawbar. 194
Trailer towing*Operation
*optional
207_AKB; 2; 3, en-GB
mkalafa,
Version: 2.11.8.1 2009-07-23T10:23:49+02:00-Seite 194
Page 198 of 313

Coupling up
atrailer G
Ris
kofi njury
Do no tdisconnect atrailer wit hanengaged
overrun brake. Otherwise, your han dcould
become trapped between th ebumpe rand
trailer drawbar.
! Do no tdisconnect atrailer wit han
engaged overrun brake. Otherwise, your
vehicle could be damaged by th erebound-
ing of th eoverrun brake.
X Positio nthe trailer leve lbehin dthe vehicle.
X Couple up th etrailer.
X Establish th eelectrical connection
between th evehicle and th etrailer.
Driving tips G
Ris
kofa ccident
If the Check traile rhitch locking
mechanism message appear sinthemulti-
function display while th evehicle is in motion,
pull ove rimmediately and check whether the
ball couplin giscorrectly engaged.
i Observ ethe note sonE SP®
trailer stabi-
lisation (Y page 55).
In Germany, th emaximum permissible speed
for vehicle/trailer combinations depends on
th et ype of trailer and is either 80 km/h or
10 0k m/ h. In som ecountries ,higher maxi-
mum speeds are permissible for vehicle/
trailer combinations .Before beginnin gthe
journey, check th etrailer' sdocuments to see
what th emaximum permitted spee dis.
For certain Mercedes-Ben zvehicles, th emax-
imum permissible rear axle load is increased
when towing atrailer. Refer to th e"Technical
data" sectio ntofindo ut whether this applies
to your vehicle .Ifyou utilise any of th eadded
maximum rear axle load when towing atrailer,
th ev ehicle/trailer combinatio nmay not
excee damaximum spee dof100km/h for
reason sconcernin gthe operatin gpermit. This also applies in countries in whic
hthe
permissible maximum spee dfor vehicle/
trailer combinations is abov e100 km/h. G
Ris
kofa ccident
Always observ ethe maximum spee dpermit-
te dinG ermany for vehicle/traile rcombina-
tions ,eveninc ountries wher ehigher speeds
are permitted. This lower sthe riskofana cci-
dent.
When towing atrailer, your vehicle's handling
characteristic swill be different in comparison
to when driving without atrailer.
The vehicle/trailer combination:
R is heavier
R is restricted in its acceleratio nand gradi-
ent-climbin gcapability
R has an increased braking distance
R is affected mor ebystron gc rosswinds
R demands mor esensitive steering
R consumes mor efuel
On lon gand steep downhill gradients ,you
must selec talower gear in good time, or on
vehicle switha utomatic transmission*, select
shif trange 1,2or 3.
i This also applies if you have activated
cruise control, SPEEDTRONI CorDIS-
TRONIC PLUS*.
This will use th ebraking effect of th eengine,
so less braking will be required to maintain
th es peed. This relieves th eload on th ebrake
system and prevents th ebrakes from over-
heating and wearin gtoo quickly. If you need
additional braking ,depress th ebrak epedal
repeatedly rather than continuously. G
Ris
kofa ccident
Never depress th ebrak epedal continuously
while th evehicle is in motion ,e.g.n ever cause
th eb rakes to rub by applyin gconstant slight
pedal pressure .This causes th ebrak esystem
to overheat, increases th ebraking distance
and can lead to th ebrakes failin gcompletely. Trailer towing*
195Operation
*o
ptional
207_AKB
;2;3,en-GB
mkalafa ,V ersion: 2.11.8.1
2009-07-23T10:23:49+02:00
-Seite 195 Z