Page 194 of 521

NOTE:You must apply the brakes before shifting from
PARK.
22. Fuel Gauge
The pointer shows the level of fuel in the fuel tank when
the ignition switch is in the ON position.
23. Electronic Throttle Control (ETC) Warning Light
This light informs you of a problem with the
Electronic Throttle Control (ETC) system. If a
problem is detected the light will come on
while the engine is running. Cycle the ignition
key when the vehicle has completely stopped and the
shift lever is placed in the PARK position. The light
should turn off. If the light remains lit with the engine
running your vehicle will usually be drivable, however,
see your authorized dealer for service as soon as possible.
If the light is flashing when the engine is running,
immediate service is required and you may experience
reduced performance, an elevated/rough idle or enginestall and your vehicle may require towing. The light will
come on when the ignition is first turned on and remain
on briefly as a bulb check. If the light does not come on
during starting, have the system checked by an autho-
rized dealer.
24. Front Fog Light Indicator — If Equipped
This light shows the front fog lights are ON.
25. Charging System Light
This light shows the status of the electrical charg-
ing system. The light should come on when the
ignition switch is first turned ON and remain on briefly
as a bulb check. If the light stays on or comes on while
driving, turn off some of the vehicle’s non-essential
electrical devices or increase engine speed (if at idle). If
the charging system light remains on, it means that the
192 UNDERSTANDING YOUR INSTRUMENT PANEL
Page 195 of 521
vehicle is experiencing a problem with the charging
system. Obtain SERVICE IMMEDIATELY. See an autho-
rized dealer.
26. Low Fuel Light
This light will turn on, and a single chime will
sound, when the fuel level drops to 1/8 tank. The
Low Fuel Warning Light may turn on and off again,
especially during and after hard braking, accelerations,
or turns. This occurs due to the shifting of the fuel in the
tank.
27. Glow Plug Indicator Light — Diesel Only
This light will illuminate when the ignition
switch is first turned to the ON position. Wait
until the light turns off before starting the
vehicle. Refer to “Starting Procedures” in Sec-
tion 5 of this manual.ELECTRONIC VEHICLE INFORMATION CENTER
(EVIC)
The Electronic Vehicle Information Center (EVIC) fea-
tures a driver-interactive display that is located in the
instrument cluster.
The EVIC consists of the following:
•System Status
UNDERSTANDING YOUR INSTRUMENT PANEL 193
4
Page 208 of 521
door. Refer to “Easy Entry/Exit Seat” under “Driver
Memory Seat” in Section 3 of this manual for more
information.
Key Off Power Delay
When this feature is selected, the power window
switches, radio, uconnect�phone (if equipped), DVD
video system (if equipped), power sunroof (if equipped),
and power outlets will remain active for up to 10 minutes
after the ignition switch is turned off. Opening a vehicle
door will cancel this feature. To make your selection,
press and release the FUNCTION SELECT button until
“Off,” “45 sec.,” “5 min.,” or “10 min.” appears.
Illuminated Approach
When this feature is selected, the headlights will activate
and remain on for up to 90 seconds when the doors are
unlocked with the RKE transmitter. To make your selec-
tion, press and release the FUNCTION SELECT button
until “OFF,” “30 sec.,” “60 sec.,” or “90 sec.” appears.
Hill Start Assist
To make your selection, press and release the FUNC-
TION SELECT button until YES (Y) or NO (N) appears.
Display Units of Measure In:
The EVIC, odometer, and uconnect�gps (if equipped)
can be changed between English and Metric units of
measure. To make your selection, press and release the
FUNCTION SELECT button until “US” or “METRIC”
appears.
System Status
Press and release the MENU button until one of the
following System Status messages displays in the EVIC:
•System OK
•System Warnings Displayed (will display all currently
active System Warnings.)
206 UNDERSTANDING YOUR INSTRUMENT PANEL
Page 279 of 521
▫HDC (Hill Descent Control) (4WD Models
With NV245 Two–Speed Transfer
Case Only)......................... 323
▫ESP/BAS Warning Light And ESP/TCS
Indicator Light...................... 325
�Tire Safety Information................. 326
▫Tire Markings....................... 326
▫Tire Identification Number (TIN)......... 330
▫Tire Loading And Tire Pressure.......... 331
�Tires — General Information............. 335
▫Tire Pressure....................... 335
▫Tire Inflation Pressures................ 336
▫Tire Pressures For High Speed Operation . . . 337
▫Radial-Ply Tires..................... 338▫Compact Spare Tire — If Equipped....... 338
▫Limited-Use Spare — If Equipped........ 339
▫Tire Spinning....................... 340
▫Tread Wear Indicators................. 340
▫Life Of Tire........................ 341
▫Replacement Tires.................... 342
�Tire Chains.......................... 343
�Tire Rotation Recommendations........... 344
�Tire Pressure Monitor System (TPMS)....... 345
▫Base System........................ 347
▫Premium System — If Equipped......... 350
▫General Information.................. 355
STARTING AND OPERATING 277
5
Page 285 of 521
NOTE:
•Use of Climatized ULSD Diesel Fuel or Number 1
ULSD Diesel Fuel results in a noticeable decrease in
fuel economy.
•Climatized ULSD Diesel Fuel is a blend of Number 2
ULSD and Number 1 ULSD Diesel Fuels, which re-
duces the temperature at which wax crystals form in
fuel.
NOTE:This engine requires the use of“Ultra Low
Sulfur Diesel Fuel.”Use of incorrect fuel could result in
exhaust system damage. Refer to “Fuel Requirements” in
this section for further details on fuel recommendations.
Battery Blanket Usage
A battery loses 60% of its cranking power as the battery
temperature decreases to 0°F (-18°C). For the same de-
crease in temperature, the engine requires twice as much
power to crank at the same RPM. The use of batteryblankets will greatly increase starting capability at low
temperatures. Suitable battery blankets are available
from your authorized MOPAR�dealer.
Engine Starting Procedure
WARNING!
NEVER pour fuel or other flammable liquid into the
air inlet opening in an attempt to start the vehicle.
This could result in a flash fire causing serious
personal injury.
1. The shift lever must be in the NEUTRAL or PARK
position before you can start the engine.
2. Turn the ignition key to the ON position.
3. Watch for the “Wait To Start Light” in the instrument
cluster. Refer to “Instrument Cluster” in Section 4 of this
manual. It will glow for two to ten seconds or more,
STARTING AND OPERATING 283
5
Page 306 of 521
Hill Climbing
NOTE:Before attempting to climb a hill, determine the
conditions at the crest and/or on the other side.
Before climbing a steep hill,shift the transmission to a
lower gear and shift the transfer case to 4WD LOW. Use
first gear and 4WD LOW for very steep hills.
If you stall or begin to lose forward motionwhile
climbing a steep hill, allow your vehicle to come to a stop
and immediately apply the brakes. Restart the engine,
and shift into REVERSE. Back slowly down the hill,
allowing the compression braking of the engine to help
regulate your speed. If the brakes are required to control
vehicle speed, apply them lightly and avoid locking or
skidding the tires.
WARNING!
If the engine stalls, you lose forward motion, or
cannot make it to the top of a steep hill or grade,
never attempt to turn around. To do so may result in
tipping and rolling the vehicle. Always back care-
fully straight down a hill in REVERSE gear. Never
back down a hill in NEUTRAL using only the brake.
Remember, never drive diagonally across a hill always
drive straight up or down.
If the wheels start to slip as you approach the crest of a
hill, ease off the accelerator and maintain forward motion
by turning the front wheels slowly. This may provide a
fresh “bite” into the surface and will usually provide
traction to complete the climb.
304 STARTING AND OPERATING
Page 310 of 521
WARNING!
Fluid level should be checked on a level surface and
with the engine off to prevent injury from moving
parts and to ensure accurate fluid level reading. Do
not overfill. Use only manufacturers recommended
power steering fluid.
If necessary, add fluid to restore to the proper indicated
level. With a clean cloth, wipe any spilled fluid from all
surfaces.
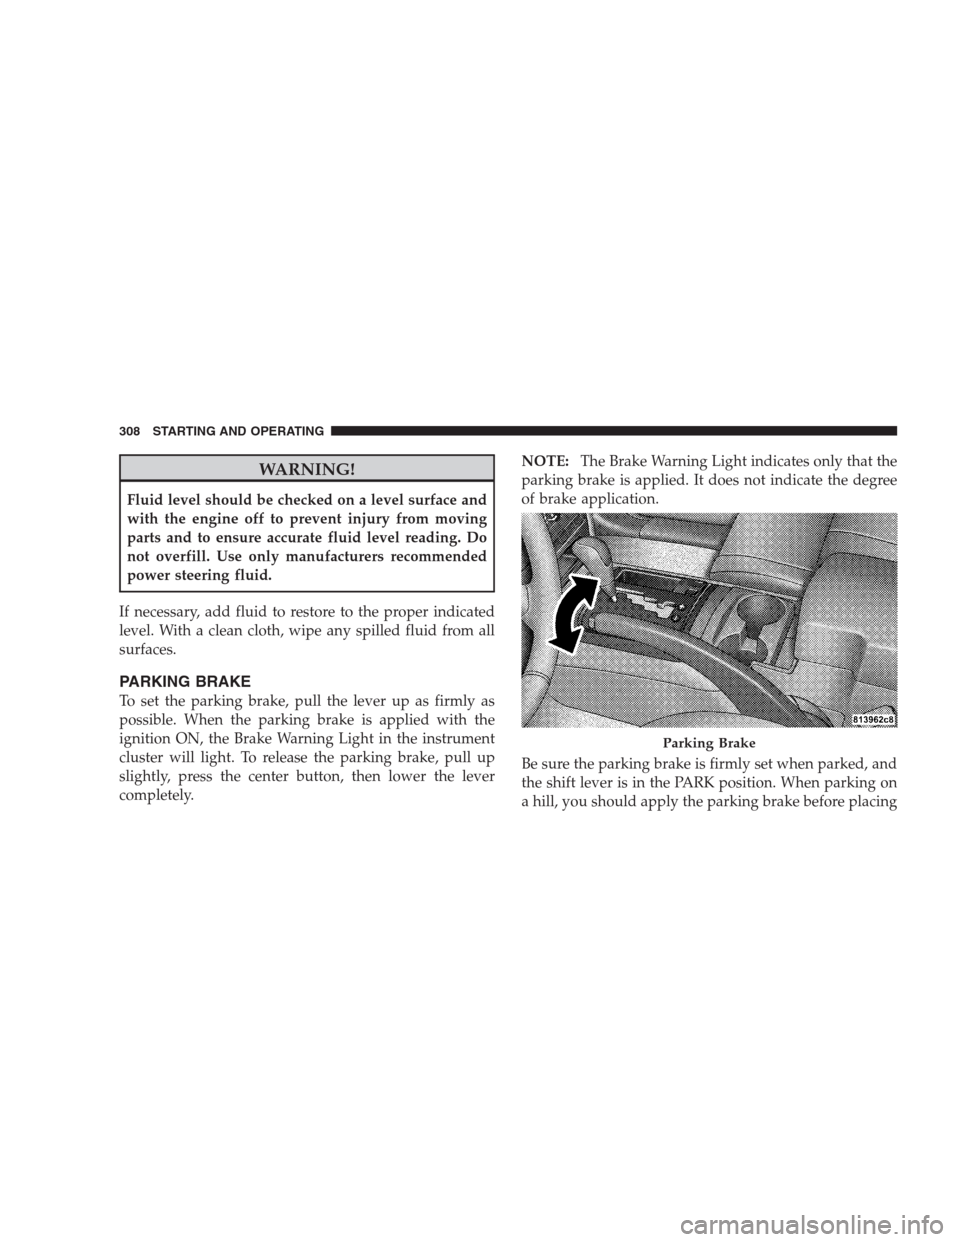
PARKING BRAKE
To set the parking brake, pull the lever up as firmly as
possible. When the parking brake is applied with the
ignition ON, the Brake Warning Light in the instrument
cluster will light. To release the parking brake, pull up
slightly, press the center button, then lower the lever
completely.NOTE:The Brake Warning Light indicates only that the
parking brake is applied. It does not indicate the degree
of brake application.
Be sure the parking brake is firmly set when parked, and
the shift lever is in the PARK position. When parking on
a hill, you should apply the parking brake before placing
Parking Brake
308 STARTING AND OPERATING
Page 312 of 521

wheel lock-up and help avoid skidding on slippery
surfaces.
All vehicle wheels and tires must be the same size and
type, and tires must be properly inflated, to produce
accurate signals for the computer.
WARNING!
Significant over or under-inflation of tires or mixing
sizes of tires or wheels on the vehicle can lead to loss
of braking effectiveness.
The ABS conducts a low-speed self-test at about 12 mph
(20 km/h). If you have your foot lightly on the brake
while this test is occurring, you may feel slight pedal
movement. The movement can be more apparent on ice
and snow. This is normal.The ABS pump motor runs during the self-test at 12 mph
(20 km/h) and during an ABS stop. The pump motor
makes a low humming noise during operation, which is
normal.
WARNING!
•Pumping of the Anti-Lock Brakes will diminish
their effectiveness and may lead to an accident.
Pumping makes the stopping distance longer. Just
press firmly on your brake pedal when you need
to slow down or stop.
•The ABS cannot prevent the natural laws of phys-
ics from acting on the vehicle, nor can it increase
braking or steering efficiency beyond that af-
forded by the condition of the vehicle brakes and
tires or the traction afforded.
(Continued)
310 STARTING AND OPERATING