2009 INFINITI QX56 headlamp
[x] Cancel search: headlampPage 1980 of 4171
EXL-32
< COMPONENT DIAGNOSIS >
HEADLAMP (HI) CIRCUIT
HEADLAMP (HI) CIRCUIT
DescriptionINFOID:0000000005867521
The IPDM E/R (intelligent power distribution module engine room) controls the headlamp LH high and head-
lamp RH high relays based on inputs from the BCM via the CAN communication lines. When the headlamp LH
high and headlamp RH high relays are energized, power flows through fuse\
s 34 and 35, located in the IPDM
E/R. Power then flows to the front combination lamps to the headlamp high beam.
Component Function CheckINFOID:0000000003776179
1.CHECK HEADLAMP (HI) OPERATION
WITHOUT CONTULT-III
1. Start IPDM E/R auto active test. Refer to PCS-12, "
Diagnosis Description".
2. Check that the headlamp switches to the high beam. NOTE:
HI/LO is repeated 1 second each when usi ng the IPDM E/R auto active test.
CONSULT-III
1. Select "EXTERNAL LAMP" of IPDM E/R active test item.
2. With the test item operating, check that the headlamp switches to high beam.
Does the headlamp switch to high beam?
YES >> Headlamp (HI) circuit is normal.
NO >> Refer to EXL-32, "
Diagnosis Procedure - Without Daytime Light System", EXL-33, "Diagnosis
Procedure - With Daytime Light System".
Diagnosis Procedure - Wit hout Daytime Light SystemINFOID:0000000003776180
1.CHECK HEADLAMP (HI) FUSES
1. Turn the ignition switch OFF.
2. Check that the following fuses are not open.
Is the fuse open?
YES >> Repair the harness and replace the fuse.
NO >> GO TO 2.
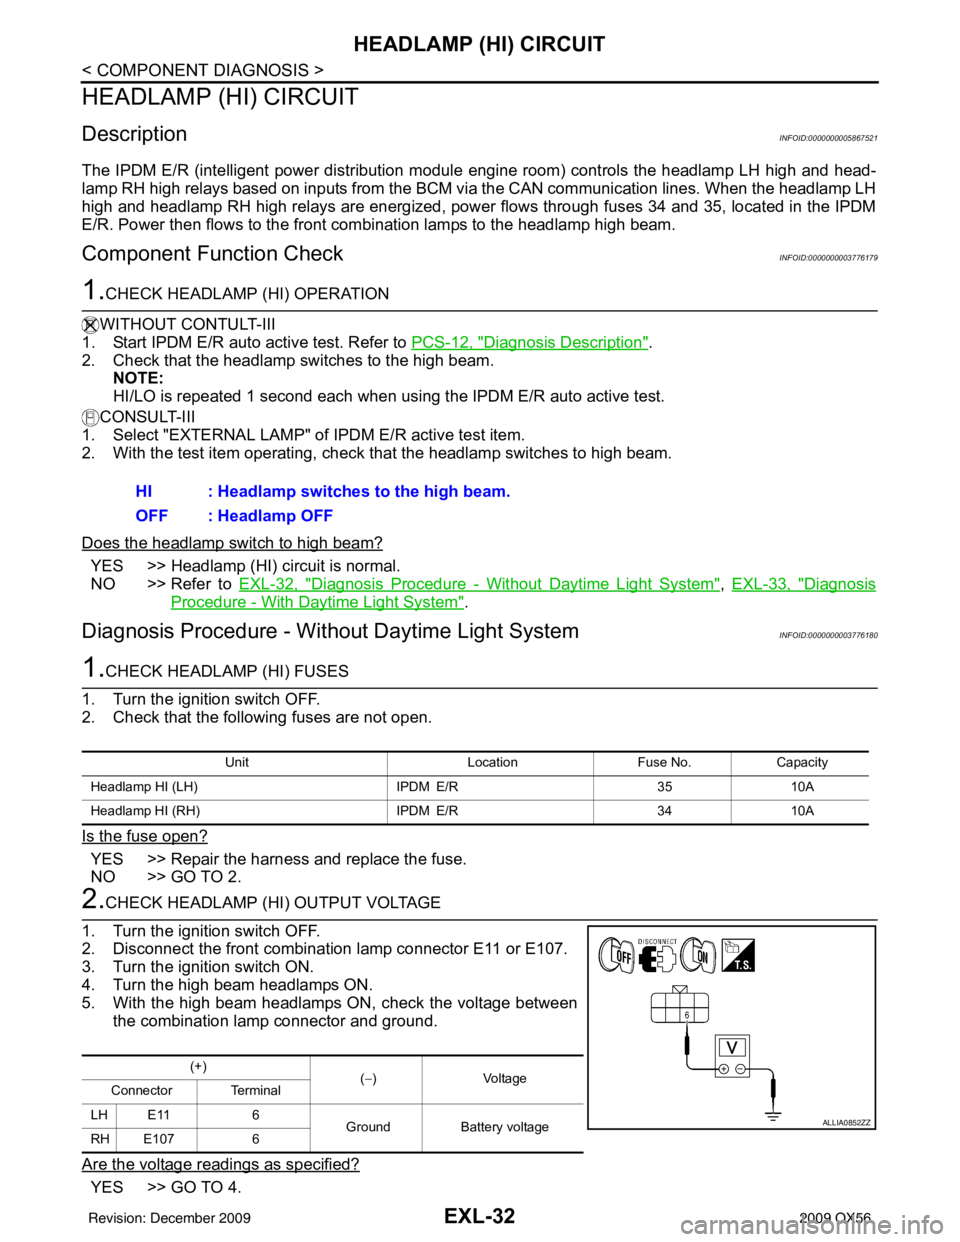
2.CHECK HEADLAMP (HI) OUTPUT VOLTAGE
1. Turn the ignition switch OFF.
2. Disconnect the front combination lamp connector E11 or E107.
3. Turn the ignition switch ON.
4. Turn the high beam headlamps ON.
5. With the high beam headlamps ON, check the voltage between the combination lamp connector and ground.
Are the voltage readings as specified?
YES >> GO TO 4. HI : Headlamp switches to the high beam.
OFF : Headlamp OFF
Unit
LocationFuse No.Capacity
Headlamp HI (LH) IPDM E/R3510A
Headlamp HI (RH) IPDM E/R3410A
(+)
(−)Voltage
Connector Terminal
LH E11 6 GroundBattery voltage
RH E107 6
ALLIA0852ZZ
Revision: December 20092009 QX56
Page 1981 of 4171
HEADLAMP (HI) CIRCUITEXL-33
< COMPONENT DIAGNOSIS >
C
DE
F
G H
I
J
K
M A
B
EXL
N
O P
NO >> GO TO 3.
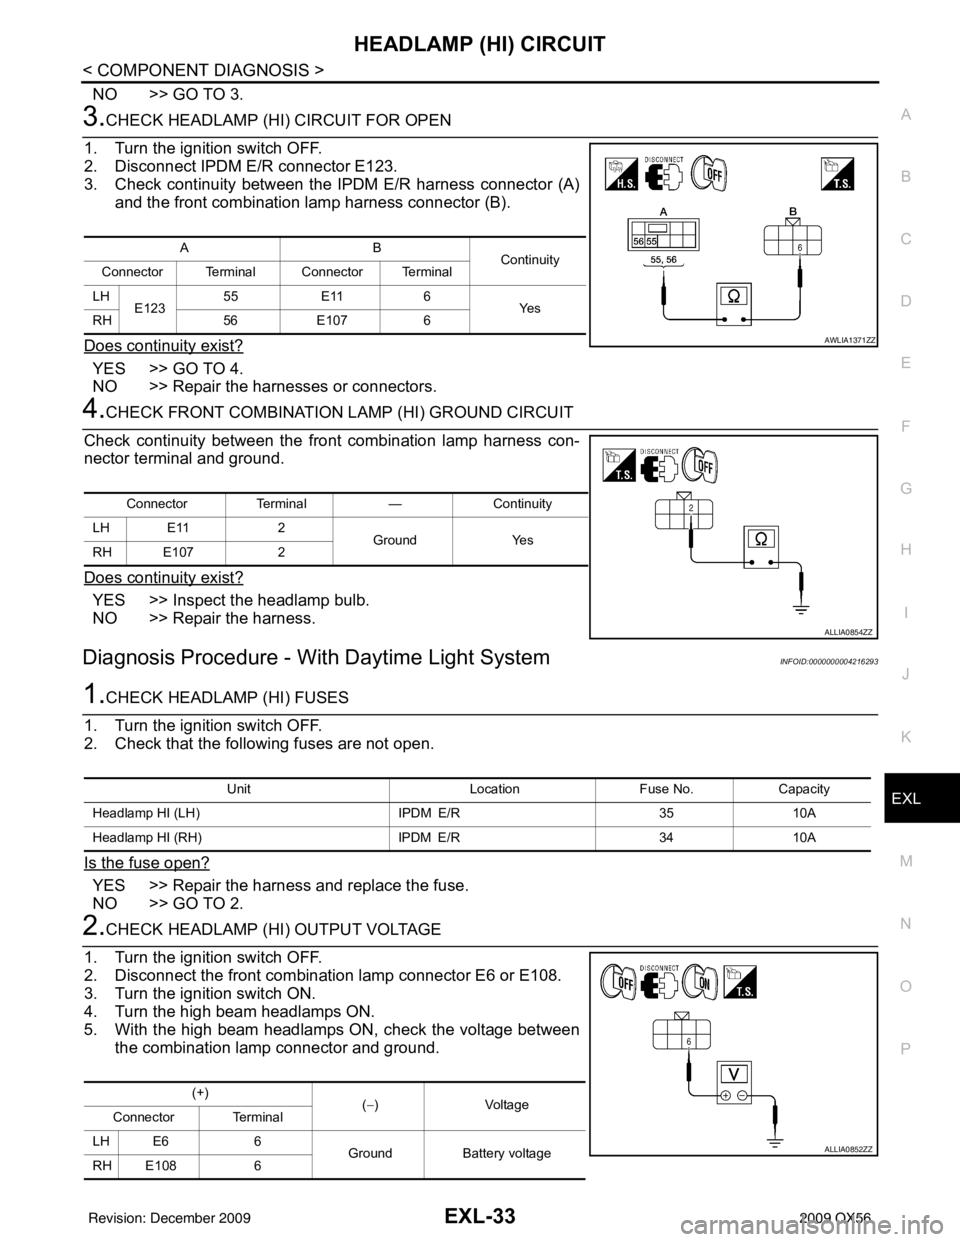
3.CHECK HEADLAMP (HI) CIRCUIT FOR OPEN
1. Turn the ignition switch OFF.
2. Disconnect IPDM E/R connector E123.
3. Check continuity between the IPDM E/R harness connector (A) and the front combination lamp harness connector (B).
Does continuity exist?
YES >> GO TO 4.
NO >> Repair the harnesses or connectors.
4.CHECK FRONT COMBINATION LAMP (HI) GROUND CIRCUIT
Check continuity between the front combination lamp harness con-
nector terminal and ground.
Does continuity exist?
YES >> Inspect the headlamp bulb.
NO >> Repair the harness.
Diagnosis Procedure - With Daytime Light SystemINFOID:0000000004216293
1.CHECK HEADLAMP (HI) FUSES
1. Turn the ignition switch OFF.
2. Check that the following fuses are not open.
Is the fuse open?
YES >> Repair the harness and replace the fuse.
NO >> GO TO 2.
2.CHECK HEADLAMP (HI) OUTPUT VOLTAGE
1. Turn the ignition switch OFF.
2. Disconnect the front combination lamp connector E6 or E108.
3. Turn the ignition switch ON.
4. Turn the high beam headlamps ON.
5. With the high beam headlamps ON, check the voltage between the combination lamp connector and ground.
AB Continuity
Connector Terminal Connector Terminal
LH E123 55
E11 6
Ye s
RH 56E107 6
AWLIA1371ZZ
Connector Terminal —Continuity
LH E11 2
Ground Yes
RH E107 2
ALLIA0854ZZ
Unit LocationFuse No.Capacity
Headlamp HI (LH) IPDM E/R3510A
Headlamp HI (RH) IPDM E/R3410A
(+)
(−)Voltage
Connector Terminal
LH E6 6 Ground Battery voltage
RH E108 6
ALLIA0852ZZ
Revision: December 20092009 QX56
Page 1982 of 4171
EXL-34
< COMPONENT DIAGNOSIS >
HEADLAMP (HI) CIRCUIT
Are the voltage readings as specified?
YES >> GO TO 4.
NO >> GO TO 3.
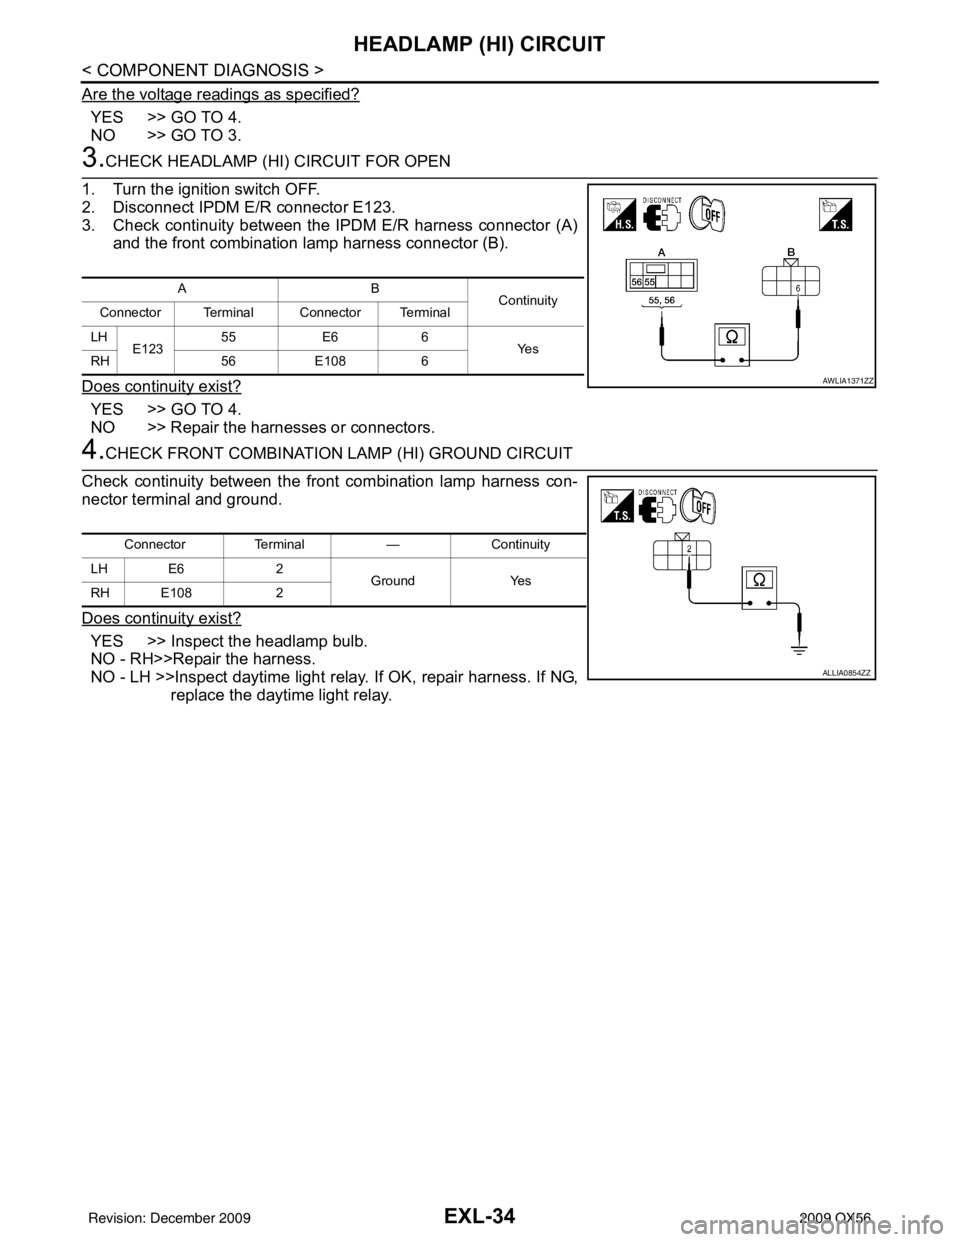
3.CHECK HEADLAMP (HI) CIRCUIT FOR OPEN
1. Turn the ignition switch OFF.
2. Disconnect IPDM E/R connector E123.
3. Check continuity between the IPDM E/R harness connector (A) and the front combination lamp harness connector (B).
Does continuity exist?
YES >> GO TO 4.
NO >> Repair the harnesses or connectors.
4.CHECK FRONT COMBINATION LAMP (HI) GROUND CIRCUIT
Check continuity between the front combination lamp harness con-
nector terminal and ground.
Does continuity exist?
YES >> Inspect the headlamp bulb.
NO - RH>>Repair the harness.
NO - LH >>Inspect daytime light rela y. If OK, repair harness. If NG,
replace the daytime light relay.
AB Continuity
Connector Terminal Connector Terminal
LH E123 55
E66
Ye s
RH 56E108 6
AWLIA1371ZZ
Connector Terminal —Continuity
LH E6 2
Ground Yes
RH E108 2
ALLIA0854ZZ
Revision: December 20092009 QX56
Page 1983 of 4171
HEADLAMP (LO) CIRCUITEXL-35
< COMPONENT DIAGNOSIS >
C
DE
F
G H
I
J
K
M A
B
EXL
N
O P
HEADLAMP (LO) CIRCUIT
DescriptionINFOID:0000000003776181
The IPDM E/R (intelligent power distribution modul e engine room) controls the headlamp low relay based on
inputs from the BCM via the CAN communication li nes. When the headlamp low relay is energized, power
flows through fuses 40 and 41, located in the IPDM E/R. Power then flows to the front combination lamps to
the headlamp low beam.
Component Function CheckINFOID:0000000003776182
1.CHECK HEADLAMP (LO) OPERATION
WITHOUT CONSULT-III
1. Start IPDM E/R auto active test. Refer to PCS-12, "
Diagnosis Description".
2. Check that the headlamp is turned ON. NOTE:
HI/LO is repeated 1 second each when using the IPDM E/R auto active test.
CONSULT-III
1. Select "EXTERNAL LAMP" of IPDM E/R active test item.
2. With the test items operating, c heck that the headlamp is turned ON.
Is the headlamp turned ON?
YES >> Headlamp (LO) is normal.
NO >> Refer to EXL-35, "
Diagnosis Procedure - Without Daytime Light System", EXL-36, "Diagnosis
Procedure - With Daytime Light System".
Diagnosis Procedure - Without Daytime Light SystemINFOID:0000000003776183
1.CHECK HEADLAMP (LO) FUSES
1. Turn the ignition switch OFF.
2. Check that the following fuses are not open.
Is the fuse open?
YES >> Repair the harness and replace the fuse.
NO >> GO TO 2.
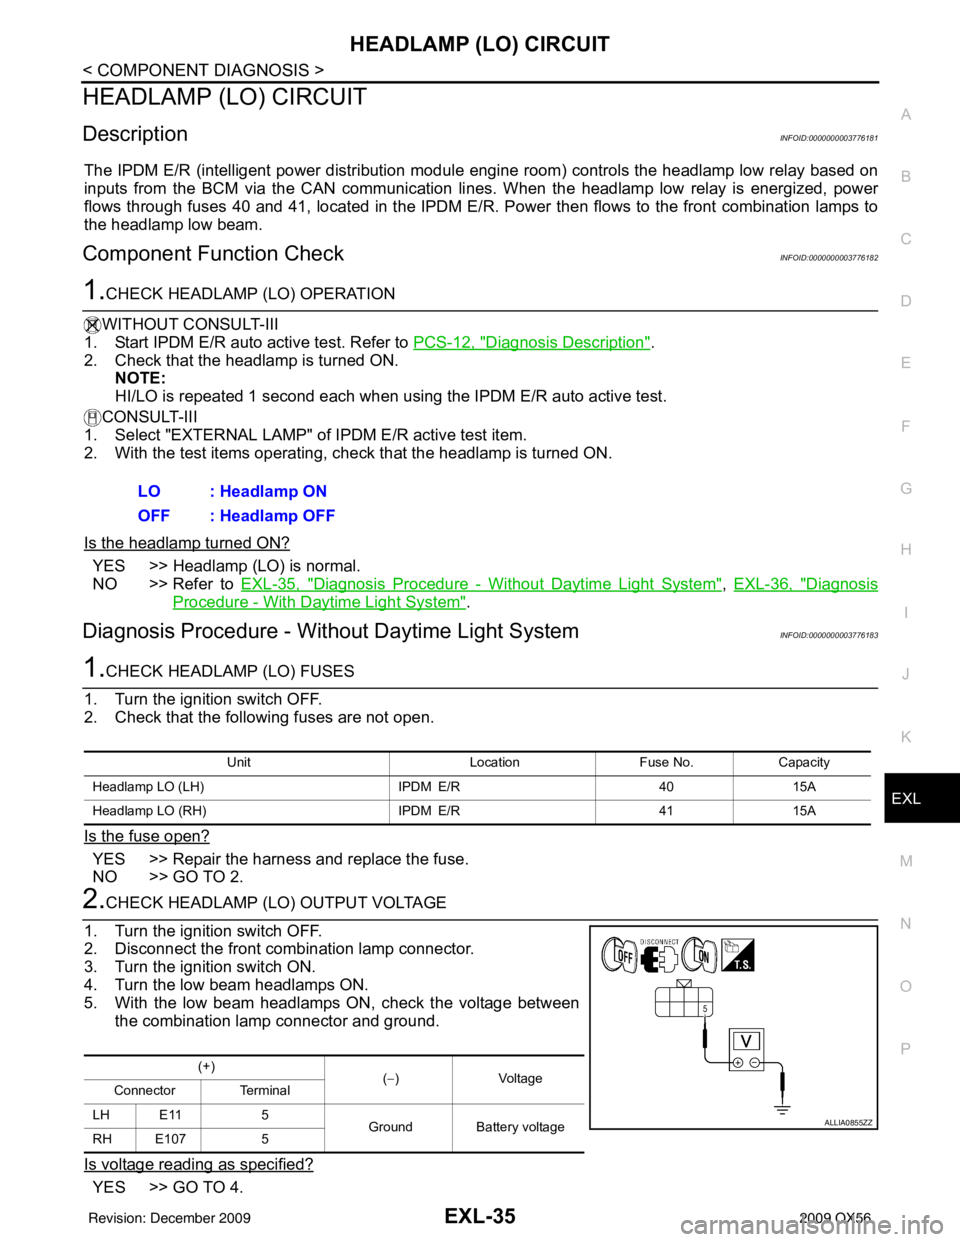
2.CHECK HEADLAMP (LO) OUTPUT VOLTAGE
1. Turn the ignition switch OFF.
2. Disconnect the front combination lamp connector.
3. Turn the ignition switch ON.
4. Turn the low beam headlamps ON.
5. With the low beam headlamps ON, check the voltage between the combination lamp connector and ground.
Is voltage reading as specified?
YES >> GO TO 4. LO : Headlamp ON
OFF : Headlamp OFF
Unit
LocationFuse No.Capacity
Headlamp LO (LH) IPDM E/R4015A
Headlamp LO (RH) IPDM E/R4115A
(+)
(−)Voltage
Connector Terminal
LH E11 5
Ground Battery voltage
RH E107 5
ALLIA0855ZZ
Revision: December 20092009 QX56
Page 1984 of 4171
EXL-36
< COMPONENT DIAGNOSIS >
HEADLAMP (LO) CIRCUIT
NO >> GO TO 3.
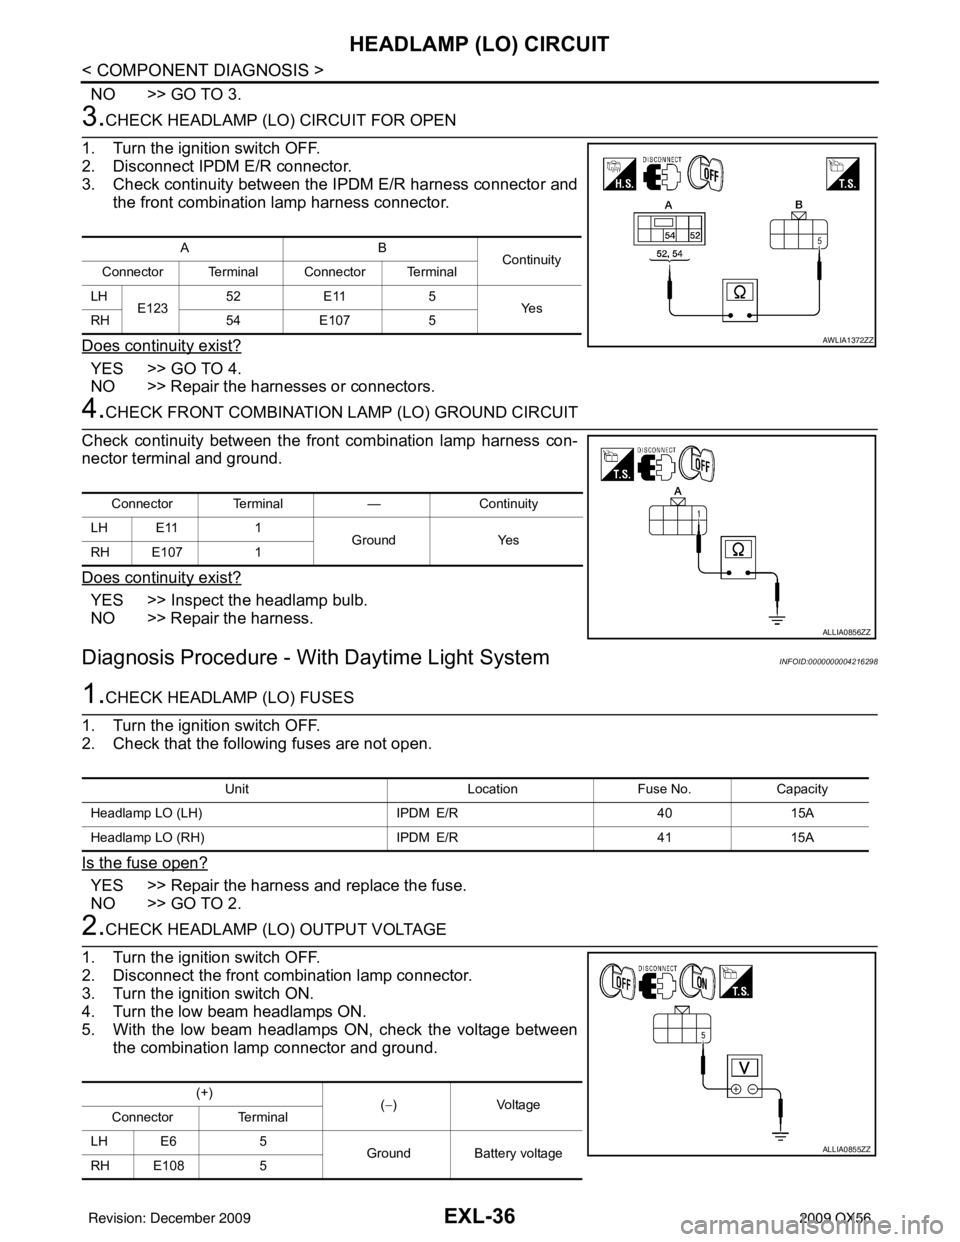
3.CHECK HEADLAMP (LO) CIRCUIT FOR OPEN
1. Turn the ignition switch OFF.
2. Disconnect IPDM E/R connector.
3. Check continuity between the IPDM E/R harness connector and
the front combination lamp harness connector.
Does continuity exist?
YES >> GO TO 4.
NO >> Repair the harnesses or connectors.
4.CHECK FRONT COMBINATION LAMP (LO) GROUND CIRCUIT
Check continuity between the front combination lamp harness con-
nector terminal and ground.
Does continuity exist?
YES >> Inspect the headlamp bulb.
NO >> Repair the harness.
Diagnosis Procedure - With Daytime Light SystemINFOID:0000000004216298
1.CHECK HEADLAMP (LO) FUSES
1. Turn the ignition switch OFF.
2. Check that the following fuses are not open.
Is the fuse open?
YES >> Repair the harness and replace the fuse.
NO >> GO TO 2.
2.CHECK HEADLAMP (LO) OUTPUT VOLTAGE
1. Turn the ignition switch OFF.
2. Disconnect the front combination lamp connector.
3. Turn the ignition switch ON.
4. Turn the low beam headlamps ON.
5. With the low beam headlamps ON, check the voltage between the combination lamp connector and ground.
AB Continuity
Connector Terminal Connector Terminal
LH E123 52
E11 5
Ye s
RH 54E107 5
AWLIA1372ZZ
Connector Terminal —Continuity
LH E11 1
Ground Yes
RH E107 1
ALLIA0856ZZ
Unit LocationFuse No.Capacity
Headlamp LO (LH) IPDM E/R4015A
Headlamp LO (RH) IPDM E/R4115A
(+)
(−)V olt a ge
Connector Terminal
LH E6 5
Ground Battery voltage
RH E108 5
ALLIA0855ZZ
Revision: December 20092009 QX56
Page 1985 of 4171
HEADLAMP (LO) CIRCUITEXL-37
< COMPONENT DIAGNOSIS >
C
DE
F
G H
I
J
K
M A
B
EXL
N
O P
Is voltage reading as specified?
YES >> GO TO 4.
NO >> GO TO 3.
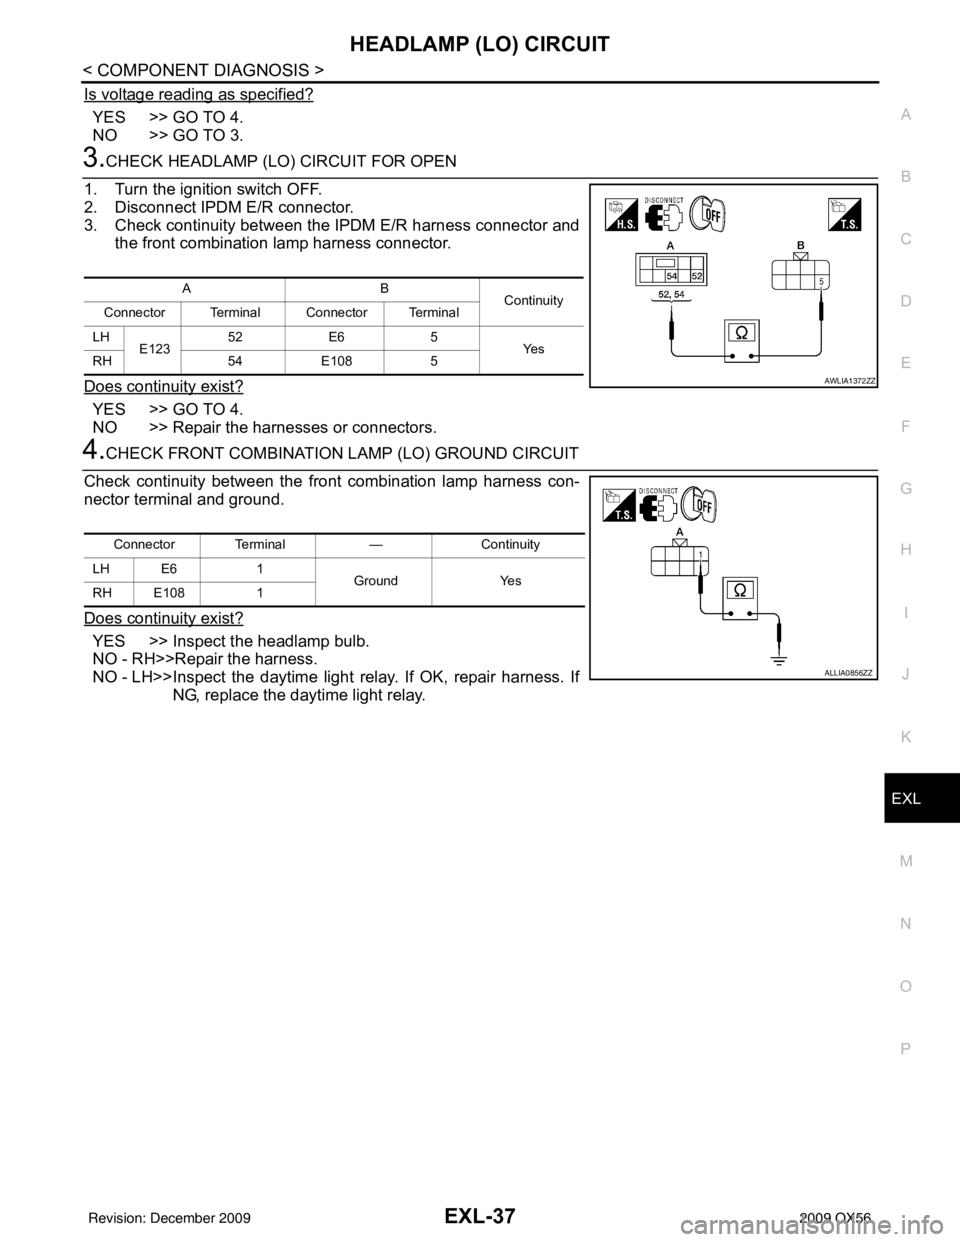
3.CHECK HEADLAMP (LO) CIRCUIT FOR OPEN
1. Turn the ignition switch OFF.
2. Disconnect IPDM E/R connector.
3. Check continuity between the IPDM E/R harness connector and the front combination lamp harness connector.
Does continuity exist?
YES >> GO TO 4.
NO >> Repair the harnesses or connectors.
4.CHECK FRONT COMBINATION LAMP (LO) GROUND CIRCUIT
Check continuity between the front combination lamp harness con-
nector terminal and ground.
Does continuity exist?
YES >> Inspect the headlamp bulb.
NO - RH>>Repair the harness.
NO - LH>>Inspect the daytime light relay. If OK, repair harness. If NG, replace the daytime light relay.
AB Continuity
Connector Terminal Connector Terminal
LH E123 52
E6 5
Ye s
RH 54E108 5
AWLIA1372ZZ
Connector Terminal —Continuity
LH E6 1
Ground Yes
RH E108 1
ALLIA0856ZZ
Revision: December 20092009 QX56
Page 1999 of 4171
HEADLAMP AIMING SWITCHEXL-51
< COMPONENT DIAGNOSIS >
C
DE
F
G H
I
J
K
M A
B
EXL
N
O P
HEADLAMP AIMING SWITCH
DescriptionINFOID:0000000003776196
The manual headlamp aiming system uses a headlamp aiming switch to adjust the axis of the headlamp aim-
ing motor. The headlamp aimer switch has four sett ings, each with a different resistance value. The head-
lamp aiming motor adjusts to the proper axis based off the position of the headlamp aiming switch.
Diagnosis Procedure - Without Daytime Light SystemINFOID:0000000003776197
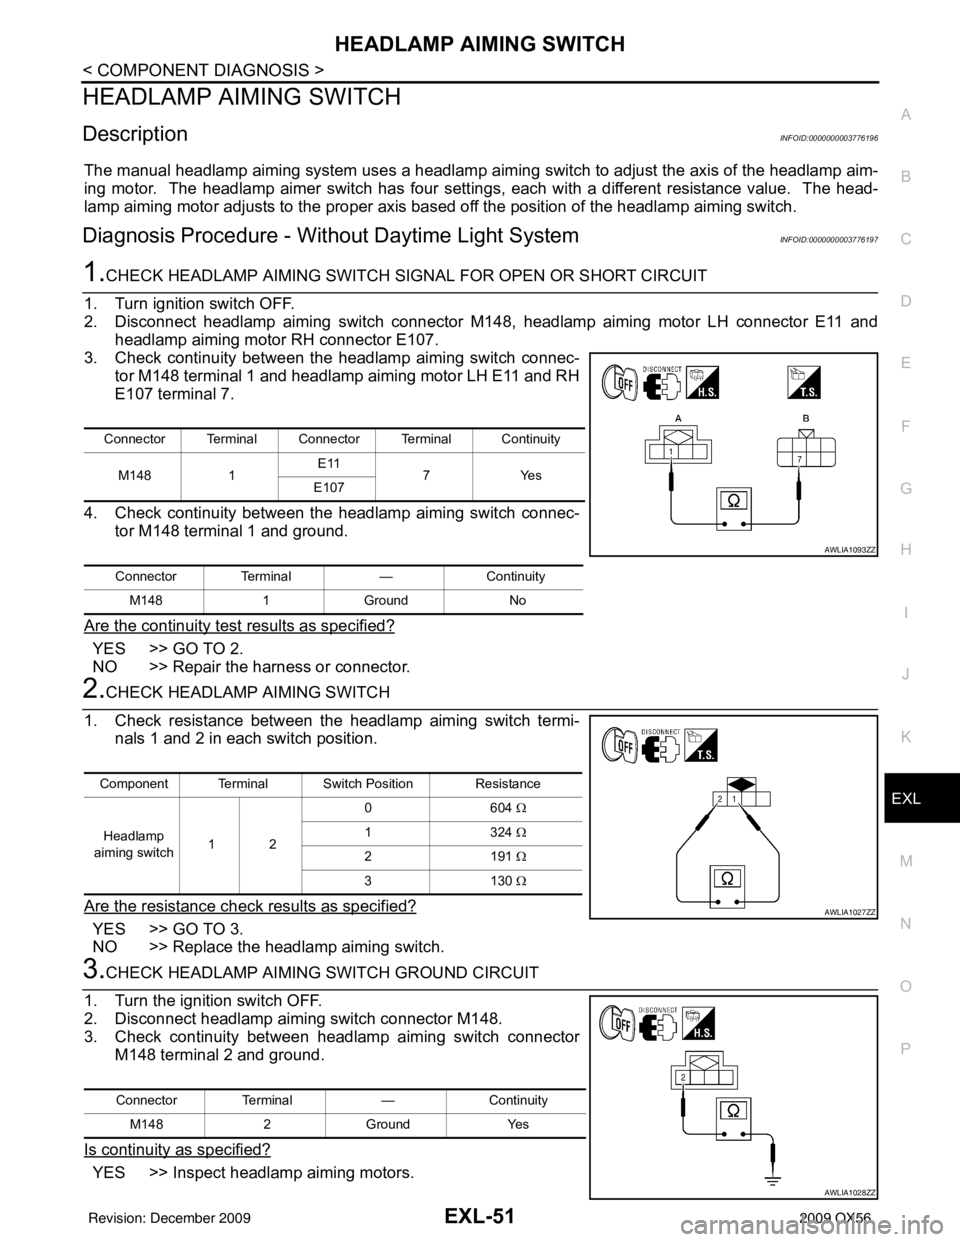
1.CHECK HEADLAMP AIMING SWITCH SIGNAL FOR OPEN OR SHORT CIRCUIT
1. Turn ignition switch OFF.
2. Disconnect headlamp aiming switch connector M148, headlamp aiming motor LH connector E11 and headlamp aiming motor RH connector E107.
3. Check continuity between the headlamp aiming switch connec-
tor M148 terminal 1 and headlamp aiming motor LH E11 and RH
E107 terminal 7.
4. Check continuity between the headlamp aiming switch connec- tor M148 terminal 1 and ground.
Are the continuity test results as specified?
YES >> GO TO 2.
NO >> Repair the harness or connector.
2.CHECK HEADLAMP AIMING SWITCH
1. Check resistance between the headlamp aiming switch termi- nals 1 and 2 in each switch position.
Are the resistance check results as specified?
YES >> GO TO 3.
NO >> Replace the headlamp aiming switch.
3.CHECK HEADLAMP AIMING SWITCH GROUND CIRCUIT
1. Turn the ignition switch OFF.
2. Disconnect headlamp aiming switch connector M148.
3. Check continuity between headlamp aiming switch connector M148 terminal 2 and ground.
Is continuity as specified?
YES >> Inspect headlamp aiming motors.
Connector Terminal Connector Terminal Continuity M148 1E11
7Y es
E107
Connector Terminal —Continuity
M148 1Ground No
AWLIA1093ZZ
Component Terminal Switch Position Resistance
Headlamp
aiming switch 12 06
04 Ω
13 24 Ω
21 91 Ω
31 30 Ω
AWLIA1027ZZ
Connector Terminal —Continuity
M148 2Ground Yes
AWLIA1028ZZ
Revision: December 20092009 QX56
Page 2000 of 4171
EXL-52
< COMPONENT DIAGNOSIS >
HEADLAMP AIMING SWITCH
NO >> Repair harness or connector.
Diagnosis Procedure - With Daytime Light SystemINFOID:0000000004221417
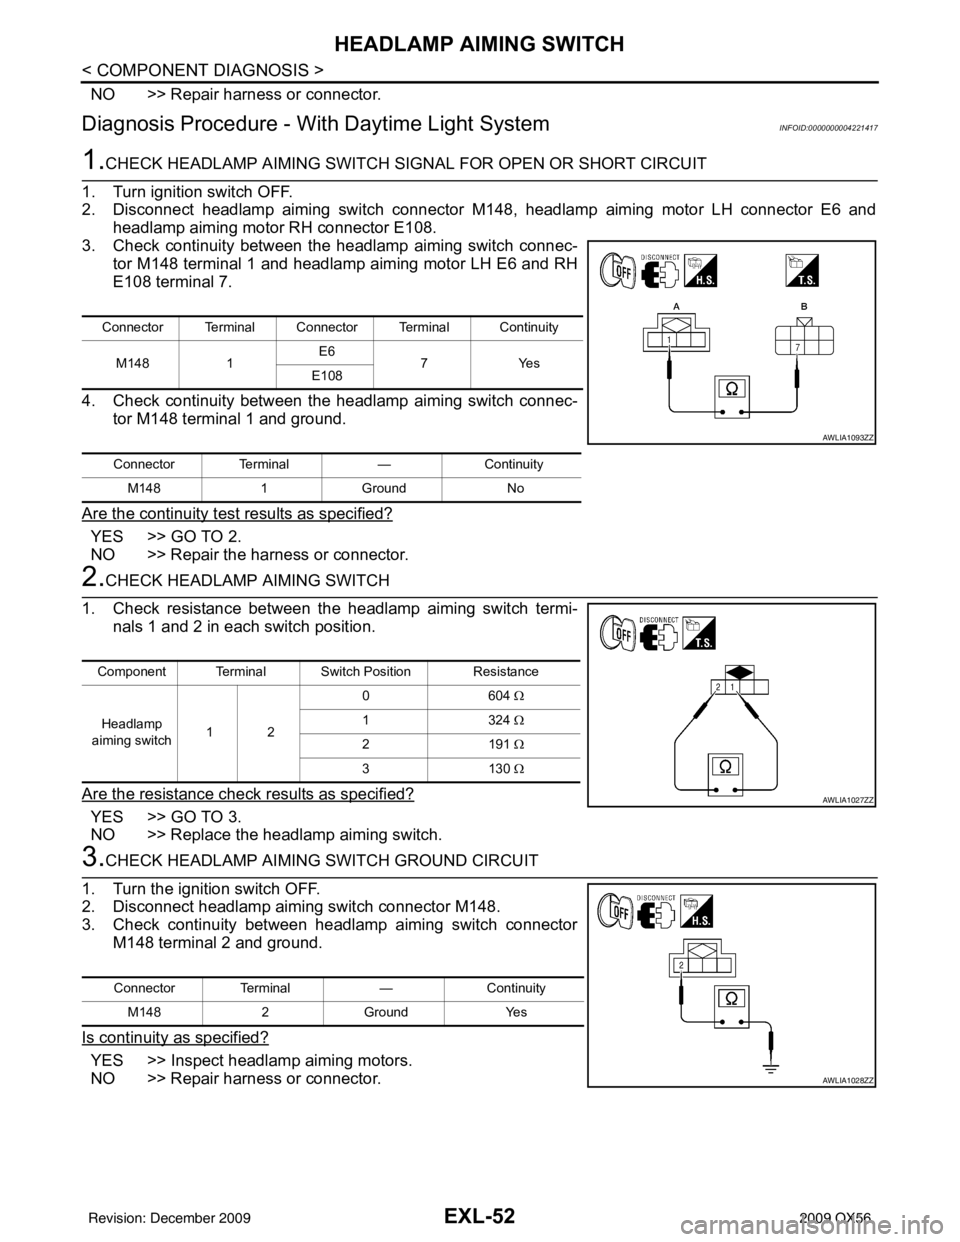
1.CHECK HEADLAMP AIMING SWITCH SIGNAL FOR OPEN OR SHORT CIRCUIT
1. Turn ignition switch OFF.
2. Disconnect headlamp aiming switch connector M148, headlamp aiming motor LH connector E6 and headlamp aiming motor RH connector E108.
3. Check continuity between the headlamp aiming switch connec-
tor M148 terminal 1 and headlamp aiming motor LH E6 and RH
E108 terminal 7.
4. Check continuity between the headlamp aiming switch connec- tor M148 terminal 1 and ground.
Are the continuity test results as specified?
YES >> GO TO 2.
NO >> Repair the harness or connector.
2.CHECK HEADLAMP AIMING SWITCH
1. Check resistance between the headlamp aiming switch termi- nals 1 and 2 in each switch position.
Are the resistance check results as specified?
YES >> GO TO 3.
NO >> Replace the headlamp aiming switch.
3.CHECK HEADLAMP AIMING SWITCH GROUND CIRCUIT
1. Turn the ignition switch OFF.
2. Disconnect headlamp aiming switch connector M148.
3. Check continuity between headlamp aiming switch connector M148 terminal 2 and ground.
Is continuity as specified?
YES >> Inspect headlamp aiming motors.
NO >> Repair harness or connector.
Connector Terminal Connector Terminal Continuity M148 1E6
7Y es
E108
Connector Terminal —Continuity
M148 1Ground No
AWLIA1093ZZ
Component Terminal Switch Position Resistance
Headlamp
aiming switch 12 06
04 Ω
13 24 Ω
21 91 Ω
31 30 Ω
AWLIA1027ZZ
Connector Terminal —Continuity
M148 2Ground Yes
AWLIA1028ZZ
Revision: December 20092009 QX56