2009 INFINITI QX56 fuse
[x] Cancel search: fusePage 2855 of 4171
![INFINITI QX56 2009 Factory Service Manual PCS-18
< COMPONENT DIAGNOSIS >[IPDM E/R]
POWER SUPPLY AND GROUND CIRCUIT
POWER SUPPLY AND GROUND CIRCUIT
Diagnosis ProcedureINFOID:0000000003776501
1. CHECK FUSES AND FUSIBLE LINK
Check that the follo INFINITI QX56 2009 Factory Service Manual PCS-18
< COMPONENT DIAGNOSIS >[IPDM E/R]
POWER SUPPLY AND GROUND CIRCUIT
POWER SUPPLY AND GROUND CIRCUIT
Diagnosis ProcedureINFOID:0000000003776501
1. CHECK FUSES AND FUSIBLE LINK
Check that the follo](/manual-img/42/57031/w960_57031-2854.png)
PCS-18
< COMPONENT DIAGNOSIS >[IPDM E/R]
POWER SUPPLY AND GROUND CIRCUIT
POWER SUPPLY AND GROUND CIRCUIT
Diagnosis ProcedureINFOID:0000000003776501
1. CHECK FUSES AND FUSIBLE LINK
Check that the following IPDM E/R fuses or fusible link are not blown.
Is the fuse blown?
YES >> Replace the blown fuse or fusible link after repairing the affected circuit.
NO >> GO TO 2
2. CHECK BATTERY POWER SUPPLY CIRCUIT
1. Turn ignition switch OFF.
2. Disconnect IPDM E/R.
3. Check voltage between IPDM E/R harness connectors and ground.
Is the measurement value normal?
YES >> GO TO 3
NO >> Repair or replace harness.
3. CHECK GROUND CIRCUIT
1. Turn ignition switch OFF.
2. Check continuity between IPDM E/R harness connectors and ground.
Does continuity exist?
YES >> Inspection End.
NO >> Repair or replace harness.
Terminal No. Signal nameFuses and fusible link No.
1 Battery A, D
2 Battery C
12 Ignition switch ON or START 59
TerminalsIgnition switch position
(+) (−) OFF ON START
Connector Terminal
E118 (A) 1
Ground Battery
voltage Battery
voltage Battery
voltage
2 Battery
voltage Battery
voltage Battery
voltage
E119 (B) 12 0VBattery
voltage Battery
voltage
AWMIA0023ZZ
IPDM E/R
GroundContinuity
Connector Terminal
E122 (A) 38
Ye s
E124 (B) 59
AWMIA0024ZZ
Revision: December 20092009 QX56
Page 2859 of 4171
![INFINITI QX56 2009 Factory Service Manual PCS-22
< ECU DIAGNOSIS >[IPDM E/R]
IPDM E/R (INTELLIGENT POWER DI
STRIBUTION MODULE ENGINE ROOM)
Te r m i n a lWire
color Signal name Signal
input/
output Measuring condition
Reference value(Approx.) INFINITI QX56 2009 Factory Service Manual PCS-22
< ECU DIAGNOSIS >[IPDM E/R]
IPDM E/R (INTELLIGENT POWER DI
STRIBUTION MODULE ENGINE ROOM)
Te r m i n a lWire
color Signal name Signal
input/
output Measuring condition
Reference value(Approx.)](/manual-img/42/57031/w960_57031-2858.png)
PCS-22
< ECU DIAGNOSIS >[IPDM E/R]
IPDM E/R (INTELLIGENT POWER DI
STRIBUTION MODULE ENGINE ROOM)
Te r m i n a lWire
color Signal name Signal
input/
output Measuring condition
Reference value(Approx.)
Igni-
tion
switch Operation or condition
1 B/Y Battery power supply Input OFF —Battery voltage
2 R Battery power supply Input OFF —Battery voltage
3 BR ECM relay Output —Ignition switch ON or START
Battery voltage
Ignition switch OFF or ACC 0V
4 W/L ECM relay Output —Ignition switch ON or START
Battery voltage
Ignition switch OFF or ACC 0V
6L Throttle control motor
relay Output —Ignition switch ON or START
Battery voltage
Ignition switch OFF or ACC 0V
7 W/B ECM relay control Input — Ignition switch ON or START
0V
Ignition switch OFF or ACC Battery voltage
8 R/B Fuse 54 Output —Ignition switch ON or START
Battery voltage
Ignition switch OFF or ACC 0V
10 G Fuse 45
(Canada only) Output ONDaytime light system active
0V
Daytime light system inactive Battery voltage
11 Y/B A/C compressor Output ON or
START A/C switch ON or defrost A/C
switch
Battery voltage
A/C switch OFF or defrost A/C
switch 0V
12 L/W Ignition switch sup-
plied power Input —OFF or ACC
0V
ON or START Battery voltage
13 B/Y Fuel pump relay Output — Ignition switch ON or START
Battery voltage
Ignition switch OFF or ACC 0V
14 Y/R Fuse 49 Output —Ignition switch ON or START
Battery voltage
Ignition switch OFF or ACC 0V
15 LG/B Fuse 50 Output —Ignition switch ON or START
Battery voltage
Ignition switch OFF or ACC 0V
16 G Fuse 51 Output —Ignition switch ON or START
Battery voltage
Ignition switch OFF or ACC 0V
17 W Fuse 55 Output —Ignition switch ON or START
Battery voltage
Ignition switch OFF or ACC 0V
19 W/R Starter motor Output START—Battery voltage
21 BR Ignition switch sup-
plied power
Input —OFF or ACC
0V
START Battery voltage
22 G Battery power supply Output OFF —Battery voltage
23 GR/W Door mirror defogger
output signal Output —When rear defogger switch is
ON
Battery voltage
When raker defogger switch is
OFF 0V
24 L Cooling fan relay Output — Conditions correct for cooling
fan operation
Battery voltage
Conditions not correct for
cooling fan operation 0V
Revision: December 20092009 QX56
Page 2860 of 4171
![INFINITI QX56 2009 Factory Service Manual PCS
IPDM E/R (INTELLIGENT POWER DISTRIBUTION MODULE ENGINE ROOM)
PCS-23
< ECU DIAGNOSIS > [IPDM E/R]
C
D
E
F
G H
I
J
K L
B A
O P
N26 P/L
Headlamp aiming mo-
tors
Output —Lighting
switch 2nd
positi INFINITI QX56 2009 Factory Service Manual PCS
IPDM E/R (INTELLIGENT POWER DISTRIBUTION MODULE ENGINE ROOM)
PCS-23
< ECU DIAGNOSIS > [IPDM E/R]
C
D
E
F
G H
I
J
K L
B A
O P
N26 P/L
Headlamp aiming mo-
tors
Output —Lighting
switch 2nd
positi](/manual-img/42/57031/w960_57031-2859.png)
PCS
IPDM E/R (INTELLIGENT POWER DISTRIBUTION MODULE ENGINE ROOM)
PCS-23
< ECU DIAGNOSIS > [IPDM E/R]
C
D
E
F
G H
I
J
K L
B A
O P
N26 P/L
Headlamp aiming mo-
tors
Output —Lighting
switch 2nd
position or
AUTO, head-
lamp aiming
switch in po-
sition OFF
0V
ON Battery voltage
27 W/B Fuse 38
(With trailer tow)
Output —Ignition switch ON or START
Battery voltage
Ignition switch OFF or ACC 0V
30 W Fuse 53 Output —Ignition switch ON or START
Battery voltage
Ignition switch OFF or ACC 0V
32 L Wiper low speed sig-
nal
OutputON or
START Wiper switch OFF
Battery voltage
LO or INT 0V
35 L/B Wiper high speed sig-
nal
OutputON or
START Wiper switch OFF, LO, INT Battery voltage
HI 0V
37 Y Power generation
command signal Output —Ignition switch ON
6.3 V
40% is set on "Active test,"
"ALTERNATOR DUTY" of
"ENGINE" 3.8 V
40% is set on "Active test,"
"ALTERNATOR DUTY" of
"ENGINE" 1.4 V
38 B Ground Input ——0V
39 L CAN-H — ON— —
40 P CAN-L — ON— —
41 Y/B Hood switch Input —Hood closed OFF
0V
Hood open ON Battery voltage
42 GR Oil pressure switch Input — Engine running
Battery voltage
Engine stopped 0V
Te r m i n a l
Wire
color Signal name Signal
input/
output Measuring condition
Reference value(Approx.)
Igni-
tion
switch Operation or condition
JPMIA0001GB
JPMIA0002GB
JPMIA0003GB
Revision: December 20092009 QX56
Page 2862 of 4171
![INFINITI QX56 2009 Factory Service Manual PCS
IPDM E/R (INTELLIGENT POWER DISTRIBUTION MODULE ENGINE ROOM)
PCS-25
< ECU DIAGNOSIS > [IPDM E/R]
C
D
E
F
G H
I
J
K L
B A
O P
N
*: When horn reminder is ON
60 B/W
Rear window defog-
ger relay
Outpu INFINITI QX56 2009 Factory Service Manual PCS
IPDM E/R (INTELLIGENT POWER DISTRIBUTION MODULE ENGINE ROOM)
PCS-25
< ECU DIAGNOSIS > [IPDM E/R]
C
D
E
F
G H
I
J
K L
B A
O P
N
*: When horn reminder is ON
60 B/W
Rear window defog-
ger relay
Outpu](/manual-img/42/57031/w960_57031-2861.png)
PCS
IPDM E/R (INTELLIGENT POWER DISTRIBUTION MODULE ENGINE ROOM)
PCS-25
< ECU DIAGNOSIS > [IPDM E/R]
C
D
E
F
G H
I
J
K L
B A
O P
N
*: When horn reminder is ON
60 B/W
Rear window defog-
ger relay
OutputON or
START Rear defogger switch ON
Battery voltage
Rear defogger switch OFF 0V
61 BR Fuse 32
(With trailer tow) Output OFF
—Battery voltage
Te r m i n a l
Wire
color Signal name Signal
input/
output Measuring condition
Reference value(Approx.)
Igni-
tion
switch Operation or condition
Revision: December 20092009 QX56
Page 2872 of 4171

PG
PG-1
ELECTRICAL & POWER CONTROL
C
DE
F
G H
I
J
K L
B
SECTION PG
A
O P
N
CONTENTS
POWER SUPPLY, GROUND & CIRCUIT ELEMENTS
PRECAUTION .......
........................................2
PRECAUTIONS .............................................. .....2
Precaution for Supplemental Restraint System
(SRS) "AIR BAG" and "SEAT BELT PRE-TEN-
SIONER" ............................................................. ......
2
Precaution Necessary for Steering Wheel Rota-
tion After Battery Disconnect ............................... ......
2
Precaution for Power Generation Variable Voltage
Control System ..........................................................
3
PREPARATION ............................................4
PREPARATION .............................................. .....4
Special Service Tool ........................................... ......4
Commercial Service Tool ..........................................4
BASIC INSPECTION ....................................5
BATTERY ....................................................... .....5
How to Handle Battery ........................................ ......5
Work Flow ........................................................... ......7
INSPECTION AND ADJUSTMENT .....................8
ADDITIONAL SERVICE WHEN REMOVING BAT-
TERY NEGATIVE TERMINAL ............................... ......
8
ADDITIONAL SERVICE WHEN REMOVING
BATTERY NEGATIVE TERMINAL : Special Re-
pair Requirement ................................................. ......
8
COMPONENT DIAGNOSIS ..........................9
POWER SUPPLY ROUTING CIRCUIT .......... .....9
Wiring Diagram — Battery Power Supply — ....... ......9
Wiring Diagram — Accessory Power Supply — .....18
Wiring Diagram — Ignition Power Supply — ..........22
Fuse ........................................................................30
Fusible Link ......................................................... ....30
GROUND ...........................................................31
Ground Distribution ..................................................31
HARNESS .........................................................41
Harness Layout ................................................... ....41
ELECTRICAL UNITS LOCATION ....................64
Electrical Units Location ..........................................64
HARNESS CONNECTOR .................................67
Description ...............................................................67
STANDARDIZED RELAY .................................70
Description ...............................................................70
FUSE BLOCK - JUNCTION BOX (J/B) ............72
Terminal Arrangement .............................................72
FUSE, FUSIBLE LINK AND RELAY BOX ........73
Terminal Arrangement .............................................73
IPDM E/R (INTELLIGENT POWER DISTRI-
BUTION MODULE ENGINE ROOM) ................
75
IPDM E/R Terminal Arrangement ............................75
ON-VEHICLE REPAIR .................................76
BATTERY ..........................................................76
Removal and Installation ..................................... ....76
SERVICE DATA AND SPECIFICATIONS
(SDS) ............... .......................................... ...
77
SERVICE DATA AND SPECIFICATIONS
(SDS) .................................................................
77
Battery ................................................................. ....77
Revision: December 20092009 QX56
Page 2901 of 4171

PG-30
< COMPONENT DIAGNOSIS >
POWER SUPPLY ROUTING CIRCUIT
Fuse
INFOID:0000000003776568
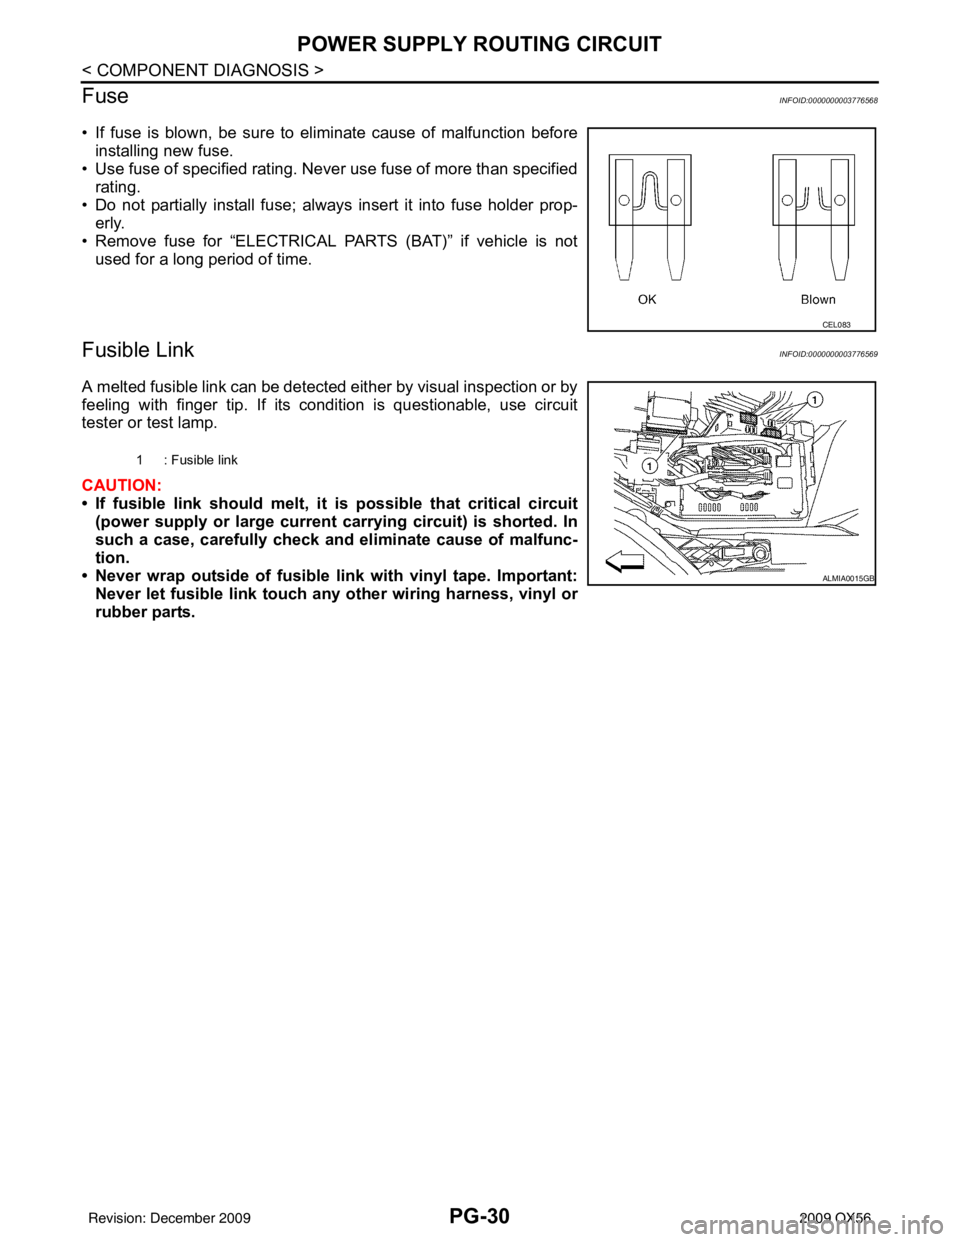
• If fuse is blown, be sure to eliminate cause of malfunction before installing new fuse.
• Use fuse of specified rating. Never use fuse of more than specified
rating.
• Do not partially install fuse; always insert it into fuse holder prop- erly.
• Remove fuse for “ELECTRICAL PARTS (BAT)” if vehicle is not used for a long period of time.
Fusible LinkINFOID:0000000003776569
A melted fusible link can be detected either by visual inspection or by
feeling with finger tip. If its condition is questionable, use circuit
tester or test lamp.
CAUTION:
• If fusible link should melt, it is possible that critical circuit
(power supply or large current carrying circuit) is shorted. In
such a case, carefully check and eliminate cause of malfunc-
tion.
• Never wrap outside of fusible link with vinyl tape. Important: Never let fusible link touch an y other wiring harness, vinyl or
rubber parts.
CEL083
1 : Fusible link
ALMIA0015GB
Revision: December 20092009 QX56
Page 2912 of 4171

PG
HARNESSPG-41
< COMPONENT DIAGNOSIS >
C
DE
F
G H
I
J
K L
B A
O P
N
HARNESS
Harness LayoutINFOID:0000000003776571
HOW TO IDENTIFY TYPE A AND TYPE B MAIN HARNESSES
The differences between Type A and type B harnesses are minimal and mainly consist of differences in the cir-
cuit connections to the fuse block (J/B).
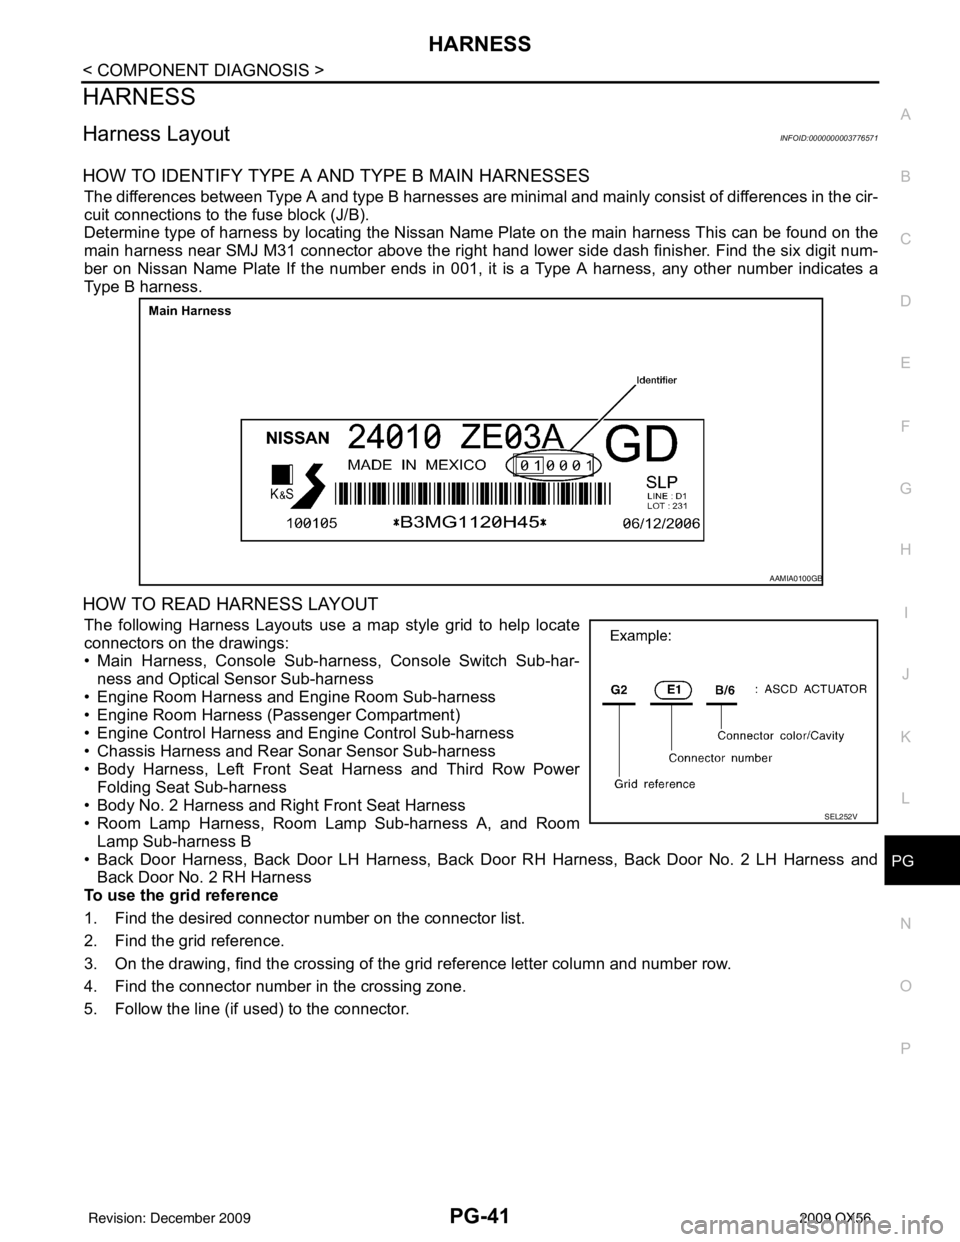
Determine type of harness by locating the Nissan Name Plate on the main harness This can be found on the
main harness near SMJ M31 connector above the right hand
lower side dash finisher. Find the six digit num-
ber on Nissan Name Plate If the number ends in 001, it is a Type A harness, any other number indicates a
Type B harness.
HOW TO READ HARNESS LAYOUT
The following Harness Layouts use a map style grid to help locate
connectors on the drawings:
• Main Harness, Console Sub-harness, Console Switch Sub-har-
ness and Optical Sensor Sub-harness
• Engine Room Harness and Engine Room Sub-harness
• Engine Room Harness (Passenger Compartment)
• Engine Control Harness and Engine Control Sub-harness
• Chassis Harness and Rear Sonar Sensor Sub-harness
• Body Harness, Left Front Seat Harness and Third Row Power Folding Seat Sub-harness
• Body No. 2 Harness and Right Front Seat Harness
• Room Lamp Harness, Room Lamp Sub-harness A, and Room
Lamp Sub-harness B
• Back Door Harness, Back Door LH Harness, Back Door RH Harness, Back Door No. 2 LH Harness and
Back Door No. 2 RH Harness
To use the grid reference
1. Find the desired connector number on the connector list.
2. Find the grid reference.
3. On the drawing, find the crossing of the grid reference letter column and number row.
4. Find the connector number in the crossing zone.
5. Follow the line (if used) to the connector.
AAMIA0100GB
SEL252V
Revision: December 20092009 QX56
Page 2914 of 4171

PG
HARNESSPG-43
< COMPONENT DIAGNOSIS >
C
DE
F
G H
I
J
K L
B A
O P
N
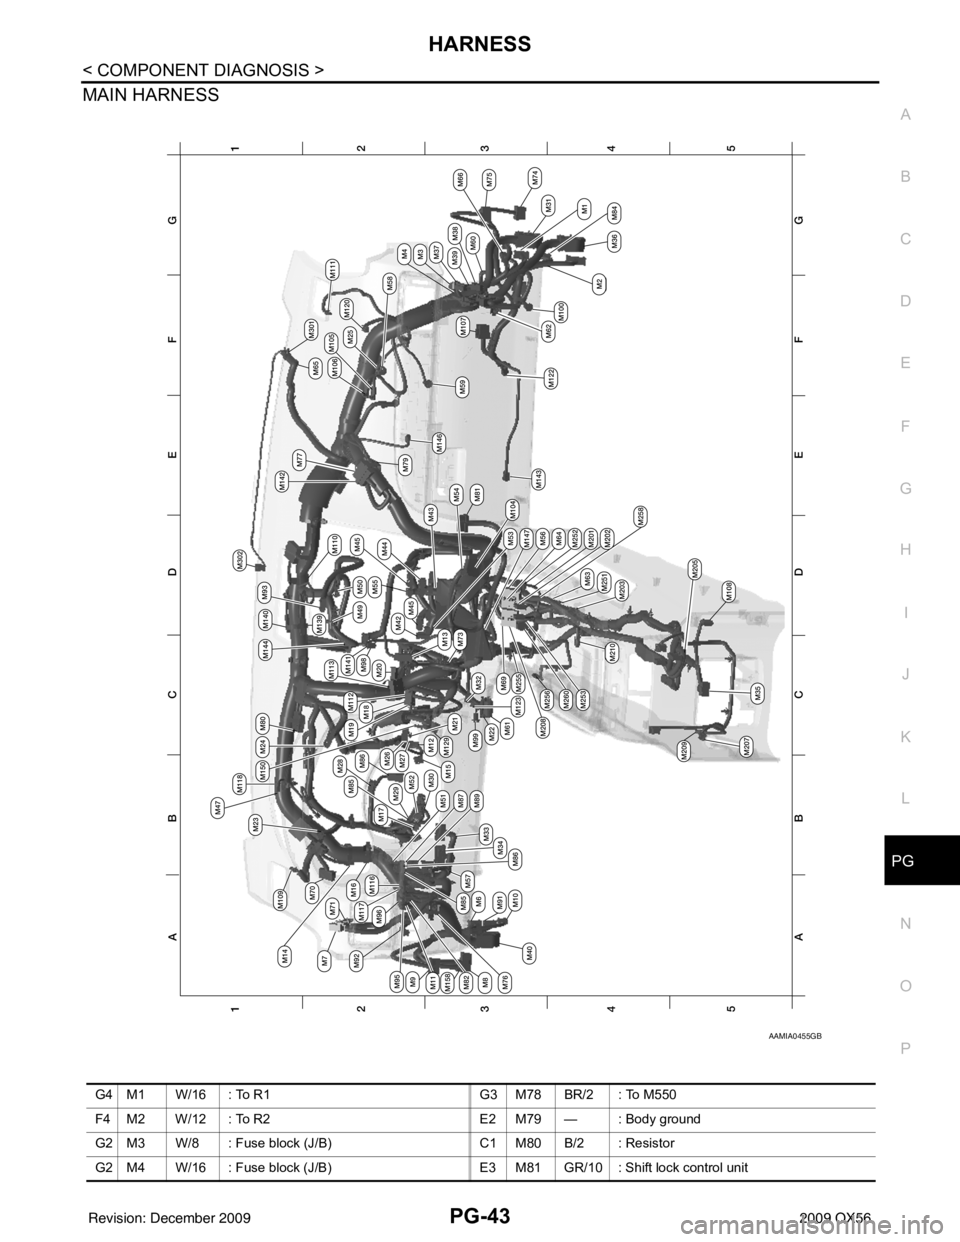
MAIN HARNESS
AAMIA0455GB
G4 M1 W/16 : To R1
G3 M78 BR/2 : To M550
F4 M2 W/12 : To R2 E2 M79 — : Body ground
G2 M3 W/8 : Fuse block (J/B) C1 M80 B/2 : Resistor
G2 M4 W/16 : Fuse block (J/B) E3 M81 GR/10 : Shift lock control unit
Revision: December 20092009 QX56