2009 HYUNDAI TUCSON parking brake
[x] Cancel search: parking brakePage 11 of 273
YOUR VEHICLE AT A GLANCE
F10
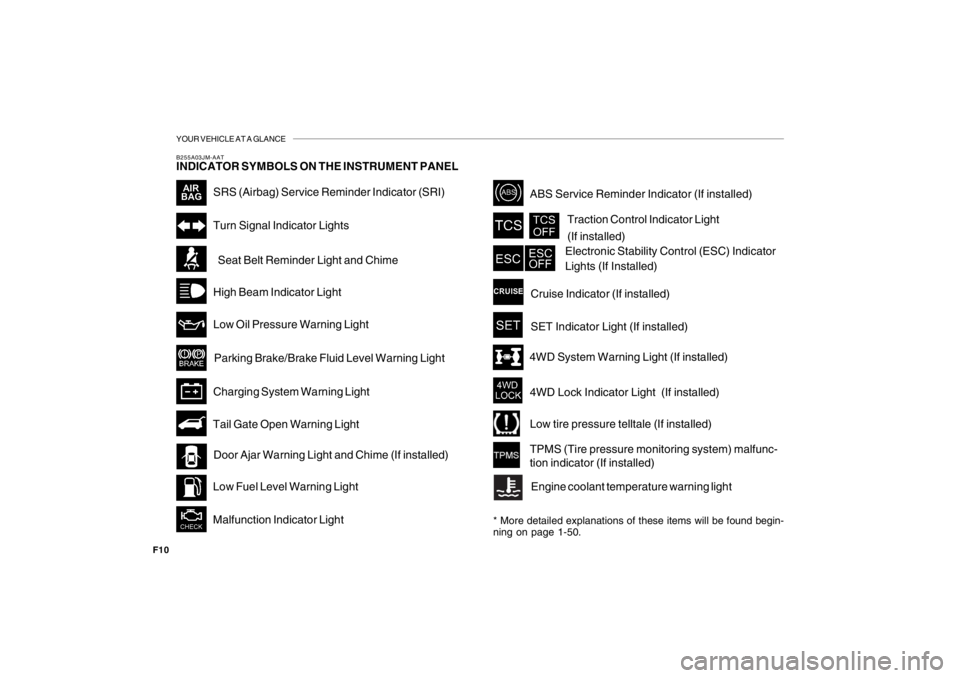
SRS (Airbag) Service Reminder Indicator (SRI)
B255A03JM-AATINDICATOR SYMBOLS ON THE INSTRUMENT PANEL
Turn Signal Indicator LightsHigh Beam Indicator Light
Low Oil Pressure Warning Light
Charging System Warning LightSeat Belt Reminder Light and Chime
* More detailed explanations of these items will be found begin-
ning on page 1-50.
Parking Brake/Brake Fluid Level Warning LightMalfunction Indicator Light Tail Gate Open Warning LightLow Fuel Level Warning LightDoor Ajar Warning Light and Chime (If installed)Traction Control Indicator Light
(If installed)
ABS Service Reminder Indicator (If installed)Cruise Indicator (If installed)
4WD Lock Indicator Light (If installed)4WD System Warning Light (If installed)SET Indicator Light (If installed)
Electronic Stability Control (ESC) Indicator
Lights (If Installed)
Low tire pressure telltale (If installed)
TPMS (Tire pressure monitoring system) malfunc-
tion indicator (If installed)
Engine coolant temperature warning light
Page 60 of 273

1
FEATURES OF YOUR HYUNDAI
49
1. Tachometer
2. Turn Signal Indicator Light
3. Seat Belt Warning Light
4. Supplemental Restraint (AirBag) System
Service Reminder Indicator (SRI)
5. Speedometer
6. Parking Brake/Low Brake Fluid Level Warning Light
7. Low Oil Pressure Warning Light
8. High Beam Indicator Light
9. Engine Temperature Warning Light
10. Fuel Gauge
11. Tail Gate Open Warning Light
12. Traction Control Indicator Light (If installed)/
Electronic Stability Control (ESC) Indicator Light
(If installed)13. ABS Service Reminder Indicator (If installed)
14. Immobilizer Warning Light (If installed)
15. Door Ajar Warning Light
16. Automatic Transaxle Position Indicator Light (If installed)
17. Odometer/ Trip odmeter
18. Trip Computer (If installed)
19. Malfunction Indicator Light (MIL)
20. Charging System Warning Light
21. Low Tire Pressure Telltale (If installed)
22. 4WD System Warning Light (If installed)
23. TPMS (Tire Pressure Monitoring System) Malfunction Indicator
(If installed)
24. 4WD Lock Indicator Light
25. Cruise Indicator (If installed)
26. Low Fuel Warning Light
Page 62 of 273
1
FEATURES OF YOUR HYUNDAI
51
!
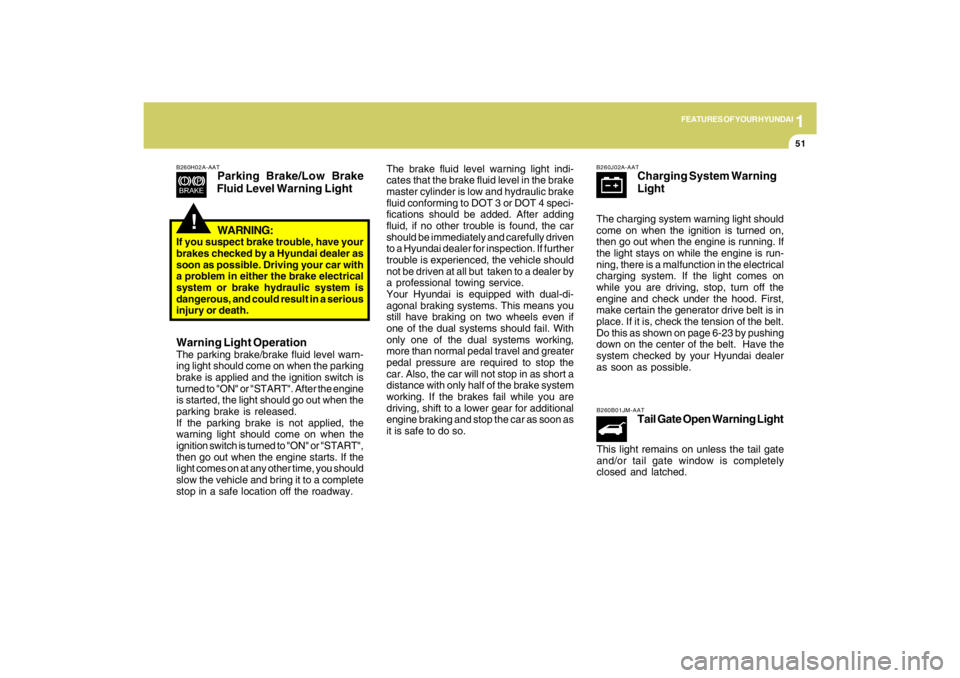
B260H02A-AAT
Parking Brake/Low Brake
Fluid Level Warning Light
The brake fluid level warning light indi-
cates that the brake fluid level in the brake
master cylinder is low and hydraulic brake
fluid conforming to DOT 3 or DOT 4 speci-
fications should be added. After adding
fluid, if no other trouble is found, the car
should be immediately and carefully driven
to a Hyundai dealer for inspection. If further
trouble is experienced, the vehicle should
not be driven at all but taken to a dealer by
a professional towing service.
Your Hyundai is equipped with dual-di-
agonal braking systems. This means you
still have braking on two wheels even if
one of the dual systems should fail. With
only one of the dual systems working,
more than normal pedal travel and greater
pedal pressure are required to stop the
car. Also, the car will not stop in as short a
distance with only half of the brake system
working. If the brakes fail while you are
driving, shift to a lower gear for additional
engine braking and stop the car as soon as
it is safe to do so.
WARNING:
If you suspect brake trouble, have your
brakes checked by a Hyundai dealer as
soon as possible. Driving your car with
a problem in either the brake electrical
system or brake hydraulic system is
dangerous, and could result in a serious
injury or death.Warning Light OperationThe parking brake/brake fluid level warn-
ing light should come on when the parking
brake is applied and the ignition switch is
turned to "ON" or "START". After the engine
is started, the light should go out when the
parking brake is released.
If the parking brake is not applied, the
warning light should come on when the
ignition switch is turned to "ON" or "START",
then go out when the engine starts. If the
light comes on at any other time, you should
slow the vehicle and bring it to a complete
stop in a safe location off the roadway.
B260J02A-AAT
Charging System Warning
Light
The charging system warning light should
come on when the ignition is turned on,
then go out when the engine is running. If
the light stays on while the engine is run-
ning, there is a malfunction in the electrical
charging system. If the light comes on
while you are driving, stop, turn off the
engine and check under the hood. First,
make certain the generator drive belt is in
place. If it is, check the tension of the belt.
Do this as shown on page 6-23 by pushing
down on the center of the belt. Have the
system checked by your Hyundai dealer
as soon as possible.B260B01JM-AAT
Tail Gate Open Warning Light
This light remains on unless the tail gate
and/or tail gate window is completely
closed and latched.
Page 63 of 273
1FEATURES OF YOUR HYUNDAI52
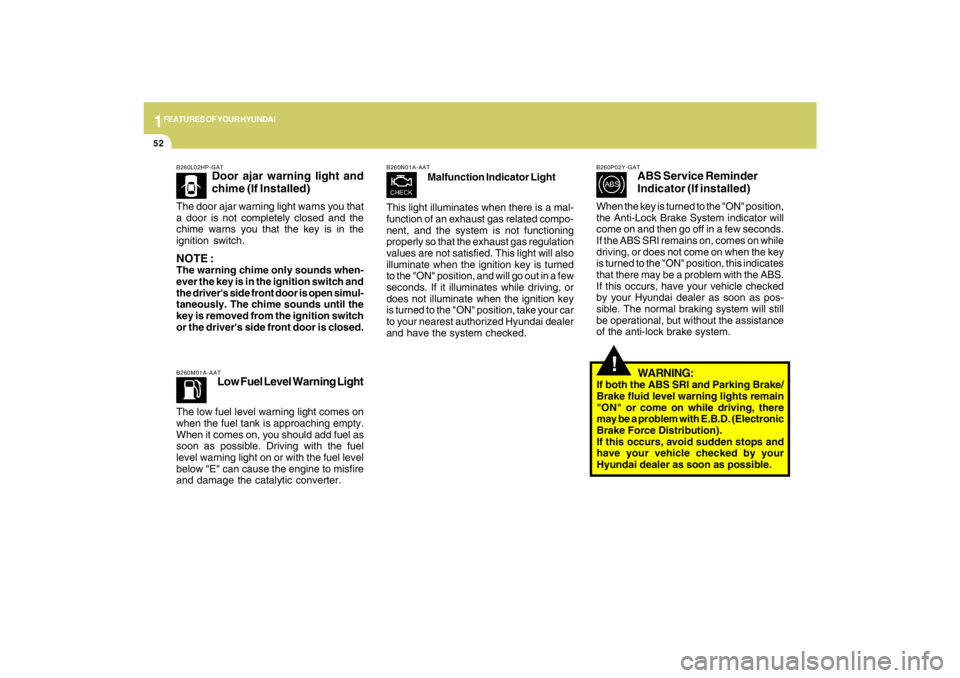
B260L02HP-GAT
Door ajar warning light and
chime (If Installed)
The door ajar warning light warns you that
a door is not completely closed and the
chime warns you that the key is in the
ignition switch.NOTE :The warning chime only sounds when-
ever the key is in the ignition switch and
the driver's side front door is open simul-
taneously. The chime sounds until the
key is removed from the ignition switch
or the driver's side front door is closed.
!
B260M01A-AAT
Low Fuel Level Warning Light
The low fuel level warning light comes on
when the fuel tank is approaching empty.
When it comes on, you should add fuel as
soon as possible. Driving with the fuel
level warning light on or with the fuel level
below "E" can cause the engine to misfire
and damage the catalytic converter.
B260N01A-AAT
Malfunction Indicator Light
This light illuminates when there is a mal-
function of an exhaust gas related compo-
nent, and the system is not functioning
properly so that the exhaust gas regulation
values are not satisfied. This light will also
illuminate when the ignition key is turned
to the "ON" position, and will go out in a few
seconds. If it illuminates while driving, or
does not illuminate when the ignition key
is turned to the "ON" position, take your car
to your nearest authorized Hyundai dealer
and have the system checked.
B260P02Y-GAT
ABS Service Reminder
Indicator (If installed)
When the key is turned to the "ON" position,
the Anti-Lock Brake System indicator will
come on and then go off in a few seconds.
If the ABS SRI remains on, comes on while
driving, or does not come on when the key
is turned to the "ON" position, this indicates
that there may be a problem with the ABS.
If this occurs, have your vehicle checked
by your Hyundai dealer as soon as pos-
sible. The normal braking system will still
be operational, but without the assistance
of the anti-lock brake system.
WARNING:
If both the ABS SRI and Parking Brake/
Brake fluid level warning lights remain
"ON" or come on while driving, there
may be a problem with E.B.D. (Electronic
Brake Force Distribution).
If this occurs, avoid sudden stops and
have your vehicle checked by your
Hyundai dealer as soon as possible.
Page 89 of 273

1FEATURES OF YOUR HYUNDAI78
!TAIL GATEB540A01JM-AATo Pull and raise the "DOOR" release lever
to open the tail gate.
o To close, lower the door, then press
down on it until it locks. To be sure the
door is securely fastened, try to pull it up
again.
OJM019023
WARNING:
The tail gate should always be kept com-
pletely closed while the vehicle is in
motion. If it is left open or ajar, poisonous
exhaust gases may enter the car result-
ing in serious illness or death to the
occupants. See additional warnings con-
cerning exhaust gases on page 2-2.
PARKING BRAKEB530A02A-AATApplying the parking brakeTo engage the parking brake, first apply
the foot brake and then without pressing
the release button in, pull the parking brake
lever up as far as possible. In addition it is
recommended that when parking the ve-
hicle on a gradient, the shift lever should
be positioned in the appropriate low gear
on manual transaxle vehicles or in the P
(Park) position on automatic transaxle ve-
hicles.
HJM3026
Releasing the parking brakeTo release the parking brake, first apply
the foot brake and pull the parking brake
lever slightly. Secondly, depress the re-
lease button and lower the parking brake
lever while holding the button.
CAUTION:
Driving with the parking brake applied
will cause excessive brake pad (or lin-
ing) and brake rotor wear.
!
Page 139 of 273
2
DRIVING YOUR HYUNDAI
4
TO START THE ENGINEC030A01E-AATCOMBINATION IGNITION SWITCHo If your Hyundai is equipped with a
manual transaxle, place the shift lever
in neutral and depress the clutch pedal
fully.
o If your Hyundai has an automatic
transaxle, place the shift lever in "P"
(park).
o To start the engine, insert the ignition
key and turn it to the "START" position.
Release it as soon as the engine starts.
Do not hold the key in the "START"
position for more that 15 seconds.NOTE:o For safety, the engine will not start if
the clutch pedal is not depressed fully
(Manual Transaxle) or the shift lever
is not in "P" or "N" Position (Auto-
matic Transaxle).
o The ignition key cannot be turned from
"ACC" position to "LOCK" position
unless the shift lever is in the "P"
(Park) position or the negative bat-
tery terminal is disconnected from
the battery. To remove the key, al-
ways confirm that the shift lever is
securely positioned in "P" (Park) (For
Automatic Transaxle).
o For additional information about start-
ing, see page 2-6.
BEFORE STARTING THE EN-
GINEC020A04A-AATBefore you start the engine, you should
always:
1. Look around the vehicle to be sure
there are no flat tires, puddles of oil,
water or other indications of possible
trouble.
2. After entering the car, check to be sure
the parking brake is engaged.
3. Check that all windows, and lights are
clean.
4. Check that the interior and exterior mir-
rors are clean and in position.
5. Check your seat, seatback and head-
rest to be sure they are in their proper
positions.
6. Lock all the doors.
7. Fasten your seat belt and be sure that all
other occupants have fastened theirs.
8. Turn off all lights and accessories that
are not needed.
9. When you turn the ignition switch to
"ON", check that all appropriate warn-
ing lights are operating and that you
have sufficient fuel.
10. Check the operation of warning lights
and all bulbs when key is in the "ON"
position.
!
WARNING:
o All passengers must be properly
belted whenever the vehicle is mov-
ing. Refer to pages: 1-19 through 1-
25 for more information on their proper
use.
o Always check the surrounding areas
near your vehicle for people, espe-
cially children, before putting a car
into 'drive.'
!
WARNING:
Always wear appropriate shoes when
operating your vehicle.
Unsuitable shoes (high heels, ski boots,
etc.) may interfere with your ability to
use the brake and accelerator pedal,
and the clutch (if installed).
!
WARNING:
When you intend to park or stop the
vehicle with the engine on, be careful not
to depress the accelerator pedal for a
long period of time. It may overheat the
engine or exhaust system and cause
fire.
Page 142 of 273
2
DRIVING YOUR HYUNDAI
7
OPERATING THE MANUAL
TRANSAXLE
NOTE:
o To shift into reverse, rest the lever in
neutral for at least 3 seconds after
your car is completely stopped. Then
move the lever into the reverse posi-
tion.
o During cold weather, shifting may be
difficult until the transaxle lubricant
has warmed up. This is normal and not
harmful to the transaxle.
o If you've come to a complete stop and
it's hard to shift into 1st or R(Reverse),
put the shift lever in N(Neutral) posi-
tion and release the clutch. Press the
clutch pedal down, and then shift into
1st or R(Reverse) gear position.
o Do not use the shift lever as a handrest
during driving, as this can result in
premature wear of the transaxle shift
forks.
CAUTION:
When downshifting from fifth gear to
fourth gear, caution should be taken not
to inadvertently press the gear lever
sideways in such a manner that second
gear is engaged. Such a drastic down-
shift may cause the engine speed to
increase to the point that the tachometer
will enter the red-zone. Such over-rev-
ving of the engine may cause engine
damage.
!
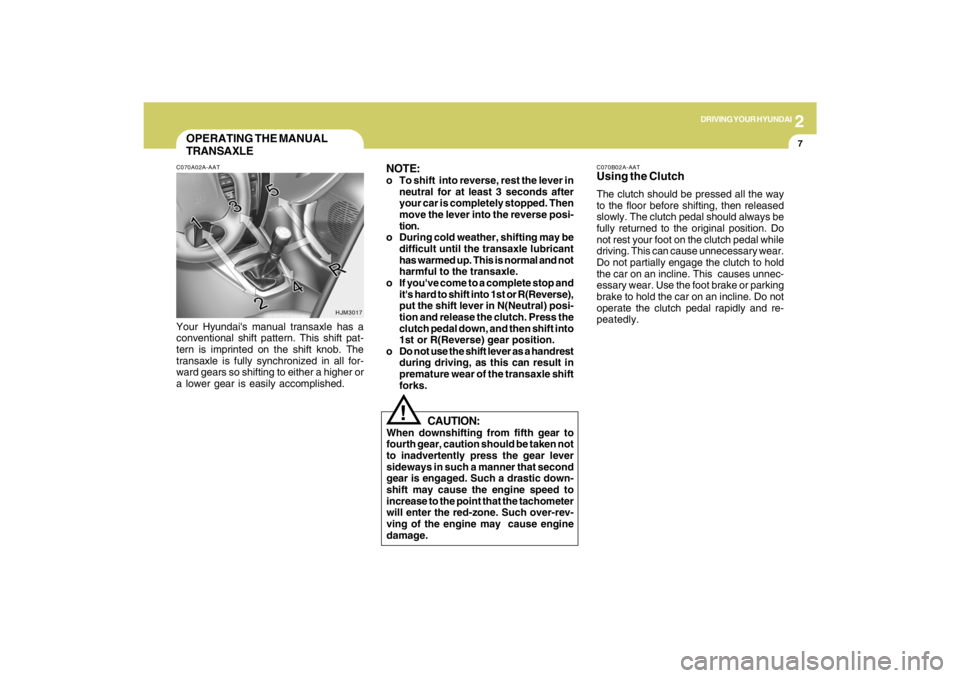
C070A02A-AATYour Hyundai's manual transaxle has a
conventional shift pattern. This shift pat-
tern is imprinted on the shift knob. The
transaxle is fully synchronized in all for-
ward gears so shifting to either a higher or
a lower gear is easily accomplished.
HJM3017C070B02A-AAT
Using the ClutchThe clutch should be pressed all the way
to the floor before shifting, then released
slowly. The clutch pedal should always be
fully returned to the original position. Do
not rest your foot on the clutch pedal while
driving. This can cause unnecessary wear.
Do not partially engage the clutch to hold
the car on an incline. This causes unnec-
essary wear. Use the foot brake or parking
brake to hold the car on an incline. Do not
operate the clutch pedal rapidly and re-
peatedly.
Page 145 of 273
2
DRIVING YOUR HYUNDAI
10
!
C090E02O-AATo D (Drive):Use for normal driving. Bring the car to a
complete stop before shifting the selector
to "D" position. The transaxle will automati-
cally shift through a four gear sequence.C090D02O-AATo N (Neutral):In the "N" position, the transaxle is in neu-
tral, which means that no gears are en-
gaged. The engine can be started with the
shift lever in "N" position, although this is
not recommended except if the engine
stalls while the car is moving.
C090B02A-AATThe function of each position is as
follows:
o P (Park):Use to hold the vehicle in place when
parked or while starting the engine. When-
ever parking the car, apply the parking
brake and shift the selector lever to the "P"
(Park) position.
C090C01A-AATo R (Reverse):Use for backing up the vehicle. Bring the
car to a complete stop before shifting the
selector lever to "R" position.
CAUTION:
Never place the selector lever in the "P"
(Park) position unless the vehicle is fully
stopped. Failure to observe this caution
will cause severe damage to the
transaxle.
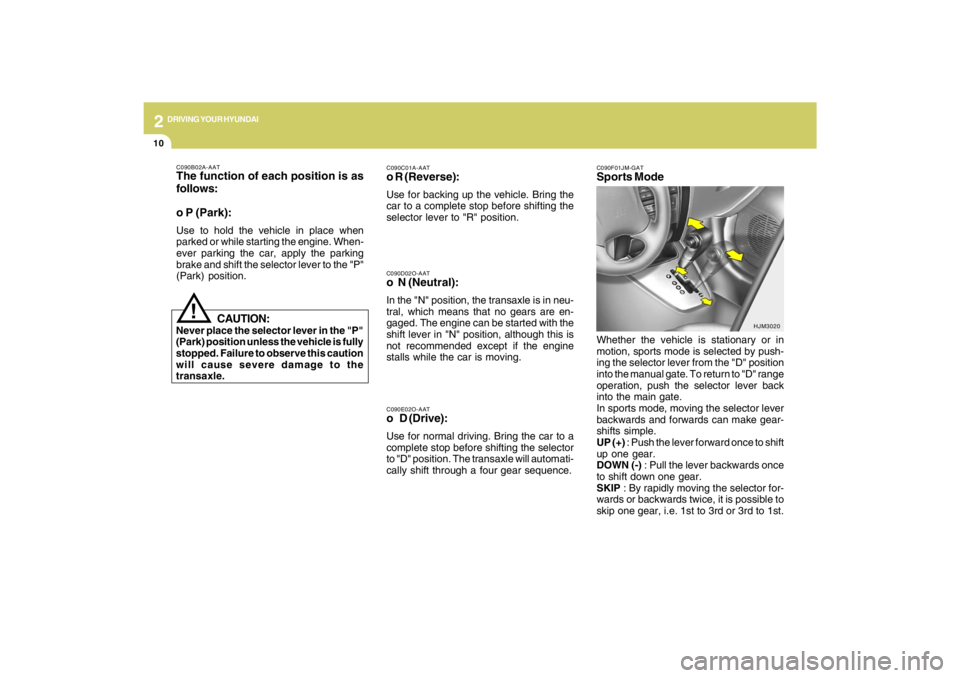
C090F01JM-GATSports ModeWhether the vehicle is stationary or in
motion, sports mode is selected by push-
ing the selector lever from the "D" position
into the manual gate. To return to "D" range
operation, push the selector lever back
into the main gate.
In sports mode, moving the selector lever
backwards and forwards can make gear-
shifts simple.
UP (+) : Push the lever forward once to shift
up one gear.
DOWN (-) : Pull the lever backwards once
to shift down one gear.
SKIP : By rapidly moving the selector for-
wards or backwards twice, it is possible to
skip one gear, i.e. 1st to 3rd or 3rd to 1st.
HJM3020