2009 HYUNDAI TUCSON battery
[x] Cancel search: batteryPage 20 of 273
1
FEATURES OF YOUR HYUNDAI
9
B070B02JM
UNLOCK LOCK
THEFT-ALARM SYSTEM
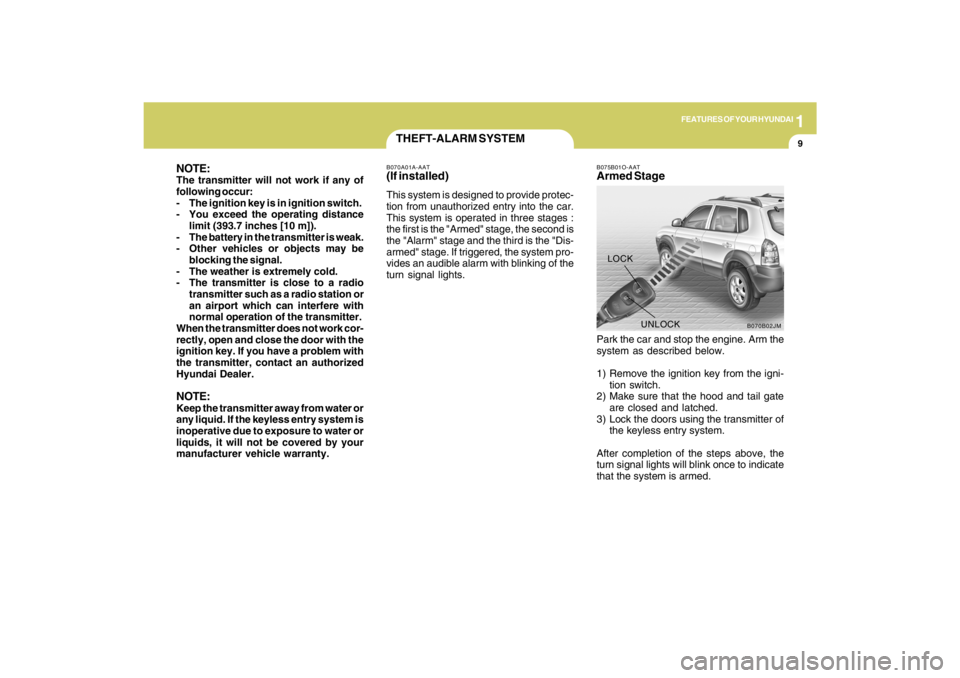
B075B01O-AATArmed StagePark the car and stop the engine. Arm the
system as described below.
1) Remove the ignition key from the igni-
tion switch.
2) Make sure that the hood and tail gate
are closed and latched.
3) Lock the doors using the transmitter of
the keyless entry system.
After completion of the steps above, the
turn signal lights will blink once to indicate
that the system is armed.
B070A01A-AAT(If installed)This system is designed to provide protec-
tion from unauthorized entry into the car.
This system is operated in three stages :
the first is the "Armed" stage, the second is
the "Alarm" stage and the third is the "Dis-
armed" stage. If triggered, the system pro-
vides an audible alarm with blinking of the
turn signal lights.
NOTE:The transmitter will not work if any of
following occur:
- The ignition key is in ignition switch.
- You exceed the operating distance
limit (393.7 inches [10 m]).
- The battery in the transmitter is weak.
- Other vehicles or objects may be
blocking the signal.
- The weather is extremely cold.
- The transmitter is close to a radio
transmitter such as a radio station or
an airport which can interfere with
normal operation of the transmitter.
When the transmitter does not work cor-
rectly, open and close the door with the
ignition key. If you have a problem with
the transmitter, contact an authorized
Hyundai Dealer.NOTE:Keep the transmitter away from water or
any liquid. If the keyless entry system is
inoperative due to exposure to water or
liquids, it will not be covered by your
manufacturer vehicle warranty.
Page 22 of 273
1
FEATURES OF YOUR HYUNDAI
11
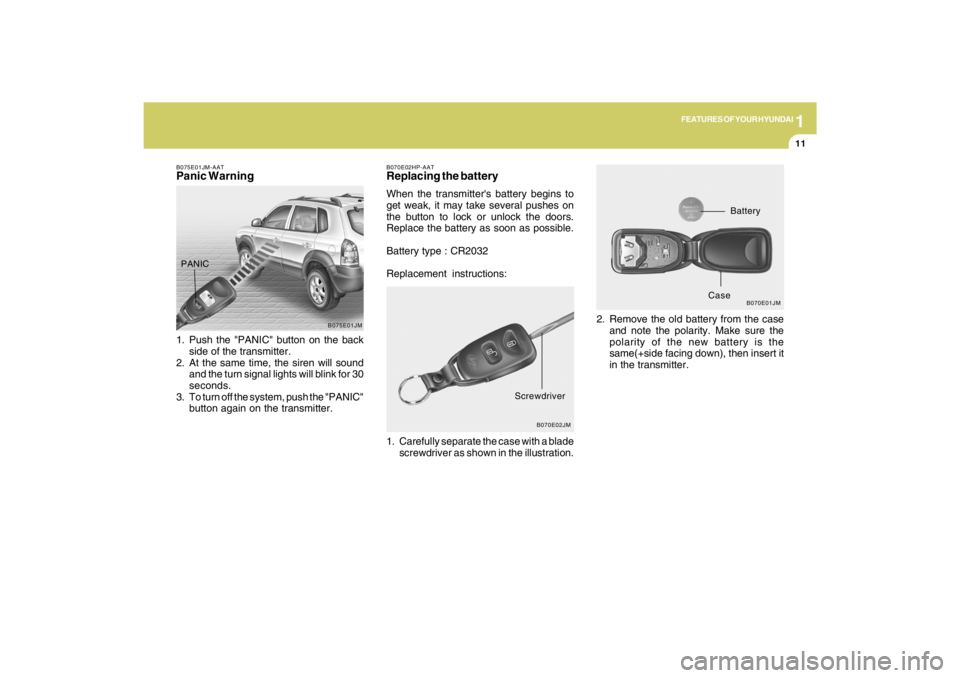
B070E02HP-AATReplacing the batteryWhen the transmitter's battery begins to
get weak, it may take several pushes on
the button to lock or unlock the doors.
Replace the battery as soon as possible.
Battery type : CR2032
Replacement instructions:
1. Carefully separate the case with a blade
screwdriver as shown in the illustration.2. Remove the old battery from the case
and note the polarity. Make sure the
polarity of the new battery is the
same(+side facing down), then insert it
in the transmitter.
B070E02JM
Screwdriver
B070E01JM
Battery
Case
B075E01JM-AATPanic Warning1. Push the "PANIC" button on the back
side of the transmitter.
2. At the same time, the siren will sound
and the turn signal lights will blink for 30
seconds.
3. To turn off the system, push the "PANIC"
button again on the transmitter.
B075E01JM
PANIC
Page 50 of 273
1
FEATURES OF YOUR HYUNDAI
39
!
WARNING:
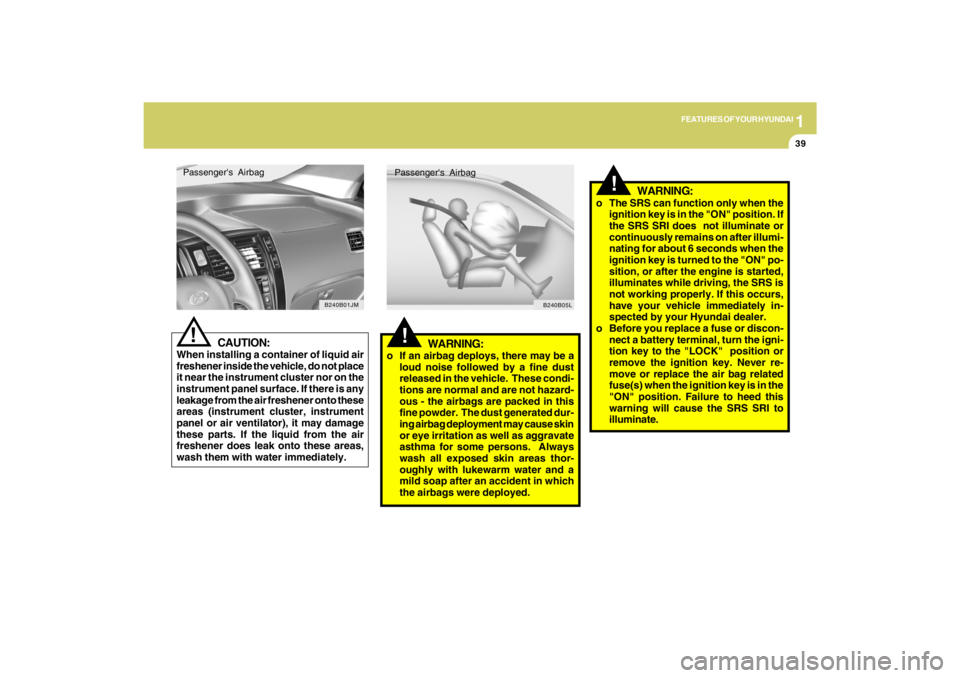
o If an airbag deploys, there may be a
loud noise followed by a fine dust
released in the vehicle. These condi-
tions are normal and are not hazard-
ous - the airbags are packed in this
fine powder. The dust generated dur-
ing airbag deployment may cause skin
or eye irritation as well as aggravate
asthma for some persons. Always
wash all exposed skin areas thor-
oughly with lukewarm water and a
mild soap after an accident in which
the airbags were deployed.Passenger's Airbag
B240B05L
!
o The SRS can function only when the
ignition key is in the "ON" position. If
the SRS SRI does not illuminate or
continuously remains on after illumi-
nating for about 6 seconds when the
ignition key is turned to the "ON" po-
sition, or after the engine is started,
illuminates while driving, the SRS is
not working properly. If this occurs,
have your vehicle immediately in-
spected by your Hyundai dealer.
o Before you replace a fuse or discon-
nect a battery terminal, turn the igni-
tion key to the "LOCK" position or
remove the ignition key. Never re-
move or replace the air bag related
fuse(s) when the ignition key is in the
"ON" position. Failure to heed this
warning will cause the SRS SRI to
illuminate.
WARNING:
CAUTION:
When installing a container of liquid air
freshener inside the vehicle, do not place
it near the instrument cluster nor on the
instrument panel surface. If there is any
leakage from the air freshener onto these
areas (instrument cluster, instrument
panel or air ventilator), it may damage
these parts. If the liquid from the air
freshener does leak onto these areas,
wash them with water immediately.
!Passenger's Airbag
B240B01JM
Page 68 of 273
1
FEATURES OF YOUR HYUNDAI
57
TRIPMETER A
TRIPMETER B
DISTANCE TO EMPTY
AVERAGE FUEL CONSUMPTION
AVERAGE SPEED
DRIVE TIME
HJM2186-C
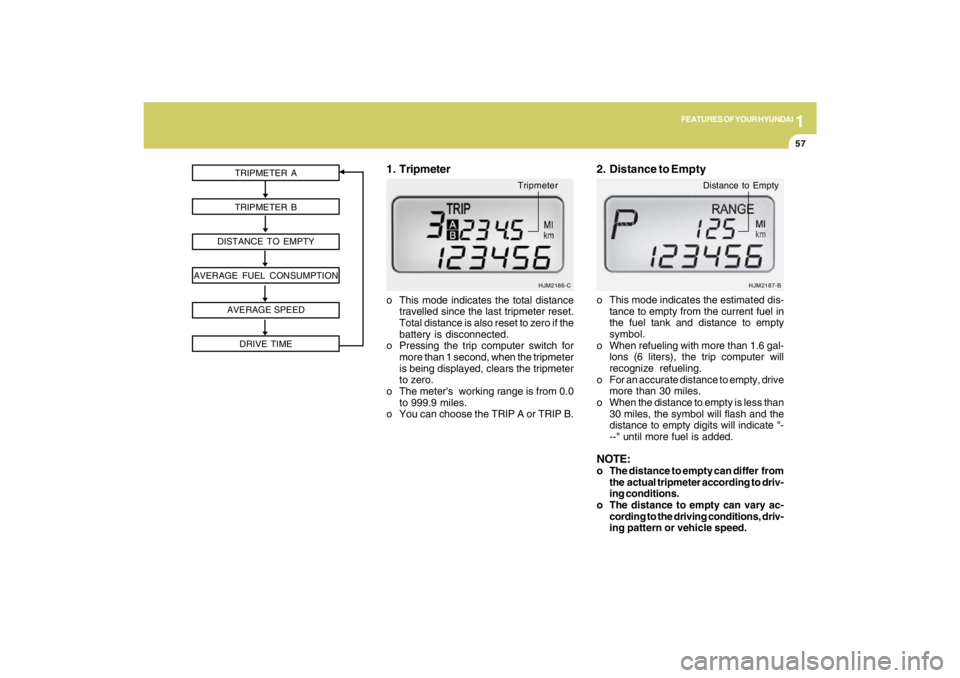
o This mode indicates the total distance
travelled since the last tripmeter reset.
Total distance is also reset to zero if the
battery is disconnected.
o Pressing the trip computer switch for
more than 1 second, when the tripmeter
is being displayed, clears the tripmeter
to zero.
o The meter's working range is from 0.0
to 999.9 miles.
o You can choose the TRIP A or TRIP B.1. Tripmeter
Tripmeter
o This mode indicates the estimated dis-
tance to empty from the current fuel in
the fuel tank and distance to empty
symbol.
o When refueling with more than 1.6 gal-
lons (6 liters), the trip computer will
recognize refueling.
o For an accurate distance to empty, drive
more than 30 miles.
o When the distance to empty is less than
30 miles, the symbol will flash and the
distance to empty digits will indicate "-
--" until more fuel is added.NOTE:o The distance to empty can differ from
the actual tripmeter according to driv-
ing conditions.
o The distance to empty can vary ac-
cording to the driving conditions, driv-
ing pattern or vehicle speed.2. Distance to Empty
HJM2187-B
Distance to Empty
Page 71 of 273
1FEATURES OF YOUR HYUNDAI60
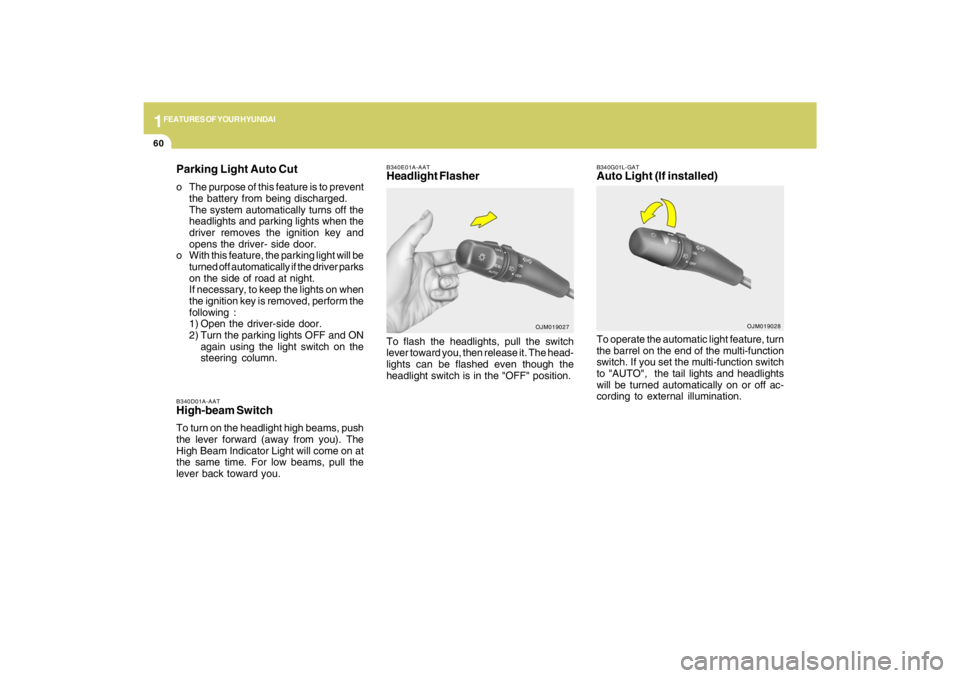
B340D01A-AATHigh-beam SwitchTo turn on the headlight high beams, push
the lever forward (away from you). The
High Beam Indicator Light will come on at
the same time. For low beams, pull the
lever back toward you.
B340E01A-AATHeadlight FlasherTo flash the headlights, pull the switch
lever toward you, then release it. The head-
lights can be flashed even though the
headlight switch is in the "OFF" position.
OJM019027
Parking Light Auto Cuto The purpose of this feature is to prevent
the battery from being discharged.
The system automatically turns off the
headlights and parking lights when the
driver removes the ignition key and
opens the driver- side door.
o With this feature, the parking light will be
turned off automatically if the driver parks
on the side of road at night.
If necessary, to keep the lights on when
the ignition key is removed, perform the
following :
1) Open the driver-side door.
2) Turn the parking lights OFF and ON
again using the light switch on the
steering column.
B340G01L-GATAuto Light (If installed)To operate the automatic light feature, turn
the barrel on the end of the multi-function
switch. If you set the multi-function switch
to "AUTO", the tail lights and headlights
will be turned automatically on or off ac-
cording to external illumination.
OJM019028
Page 78 of 273
1
FEATURES OF YOUR HYUNDAI
67
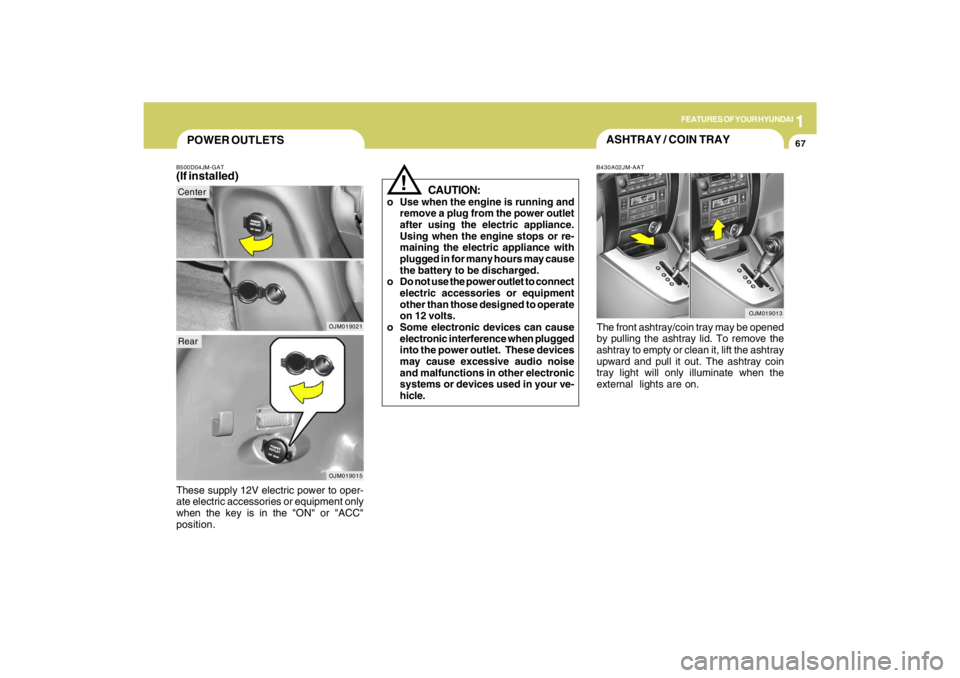
POWER OUTLETSB500D04JM-GAT(If installed)These supply 12V electric power to oper-
ate electric accessories or equipment only
when the key is in the "ON" or "ACC"
position.
OJM019021
!
CAUTION:
o Use when the engine is running and
remove a plug from the power outlet
after using the electric appliance.
Using when the engine stops or re-
maining the electric appliance with
plugged in for many hours may cause
the battery to be discharged.
o Do not use the power outlet to connect
electric accessories or equipment
other than those designed to operate
on 12 volts.
o Some electronic devices can cause
electronic interference when plugged
into the power outlet. These devices
may cause excessive audio noise
and malfunctions in other electronic
systems or devices used in your ve-
hicle.
ASHTRAY / COIN TRAYB430A02JM-AATThe front ashtray/coin tray may be opened
by pulling the ashtray lid. To remove the
ashtray to empty or clean it, lift the ashtray
upward and pull it out. The ashtray coin
tray light will only illuminate when the
external lights are on.
OJM019013
OJM019015
CenterRear
Page 81 of 273
1FEATURES OF YOUR HYUNDAI70
B460E02JM-GATResetting the sunroofWhenever the vehicle battery is disconnected
or discharged, you have to reset your sunroof
system as follows:
1. Turn the ignition key to the ON position.
2. According to the position of the sunroof,
do as follows.
1) In case that the sunroof has closed
completely or been tilted : Press the
TILT UP button for 1 second.
2) In case that the sunroof has slide-
opened: Press and hold the CLOSE
button for more than 5 seconds until
the sunroof has closed completely.
And then press the TILT UP button for
1 second
3. Then, release it.
4. Press and hold the TILT UP button once
again until the sunroof has returned to
the original position of TILT UP after it is
raised a little higher than the maximum
TILT UP position. When this is com-
plete, the sunroof system is reset.
CAUTION:
If the sunroof is not reset, it may not
operate properly.
!
CloseTo close the sunroof, press the CLOSE
button on the overhead console and hold
it until the sunroof is closed.NOTE:After washing the car or after there is
rain, be sure to wipe off any water that is
on the sunroof before operating it.
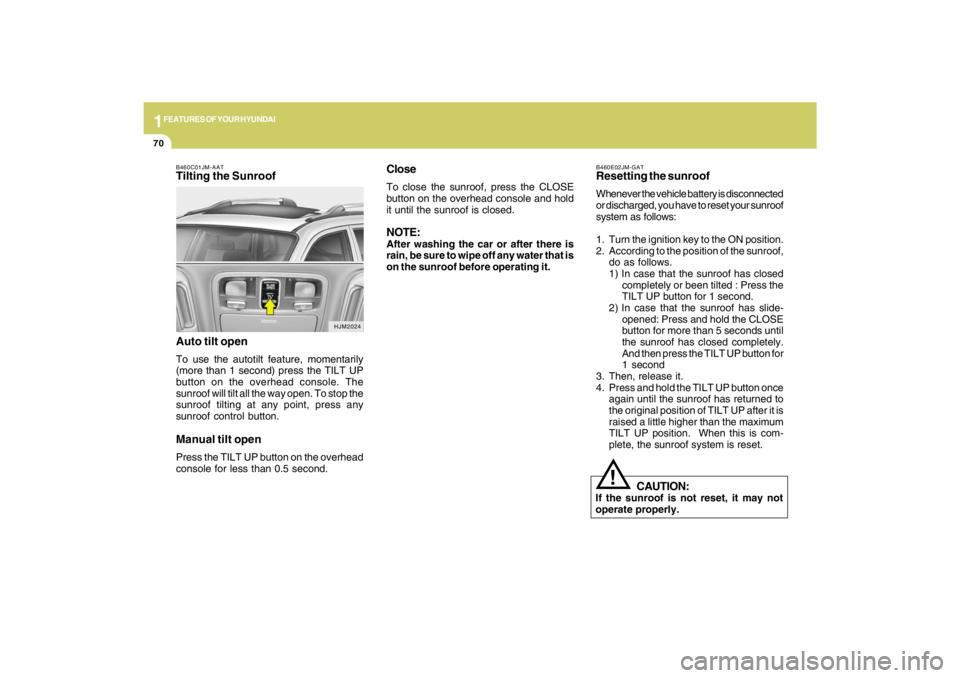
B460C01JM-AATTilting the Sunroof
Auto tilt openTo use the autotilt feature, momentarily
(more than 1 second) press the TILT UP
button on the overhead console. The
sunroof will tilt all the way open. To stop the
sunroof tilting at any point, press any
sunroof control button.Manual tilt openPress the TILT UP button on the overhead
console for less than 0.5 second.
HJM2024
Page 115 of 273
1FEATURES OF YOUR HYUNDAI
104
Photo sensor
HJM2086
NOTE:o If the battery has been discharged or
disconnected, the temperature mode
will reset to Centigrade degrees.
This is a normal condition and you can
change the temperature mode from
Centigrade to Farenheit as follows;
Press the "TEMP" down button and
"AUTO" button simultaneously for 3
secs. The display shows that the unit
of temperature is adjusted to Centi-
grade or Fahrenheit.
(°C
→ →→ →
→°F or °F
→ →→ →
→°C)
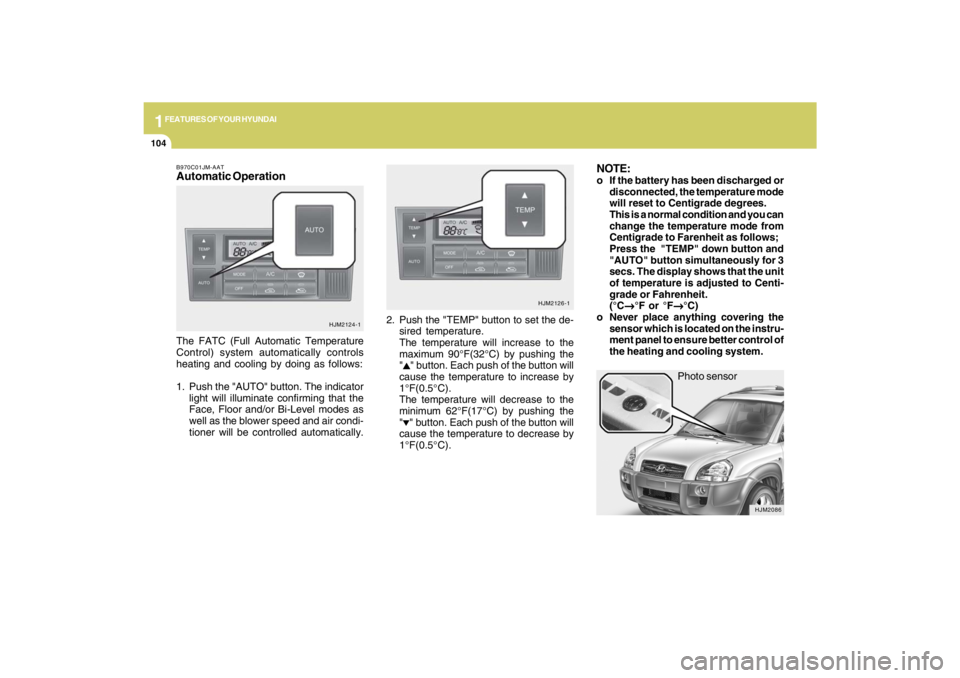
o Never place anything covering the
sensor which is located on the instru-
ment panel to ensure better control of
the heating and cooling system.
B970C01JM-AATAutomatic OperationThe FATC (Full Automatic Temperature
Control) system automatically controls
heating and cooling by doing as follows:
1. Push the "AUTO" button. The indicator
light will illuminate confirming that the
Face, Floor and/or Bi-Level modes as
well as the blower speed and air condi-
tioner will be controlled automatically.2. Push the "TEMP" button to set the de-
sired temperature.
The temperature will increase to the
maximum 90°F(32°C) by pushing the
"
" button. Each push of the button will
cause the temperature to increase by
1°F(0.5°C).
The temperature will decrease to the
minimum 62°F(17°C) by pushing the
"" button. Each push of the button will
cause the temperature to decrease by
1°F(0.5°C).
HJM2124-1HJM2126-1