Page 65 of 232
1FEATURES OF YOUR HYUNDAI
54
B260U01MC-DATImmobiliser Warning Light
This warning light comes on for some seconds after the ignition key is turned to the "ON" position. At this time, you can start the engine. The light goes outafter the engine is running. In case this light goes out before you start the en- gine, you must turn the key to the"LOCK" position and restart the engine. In case this light blinks for five seconds when the ignition key is turned to "ON"position, this indicates that the immobiliser system is out of order. Should the immobiliser system becomeout of order, have the system inspected with a Hyundai dealer.
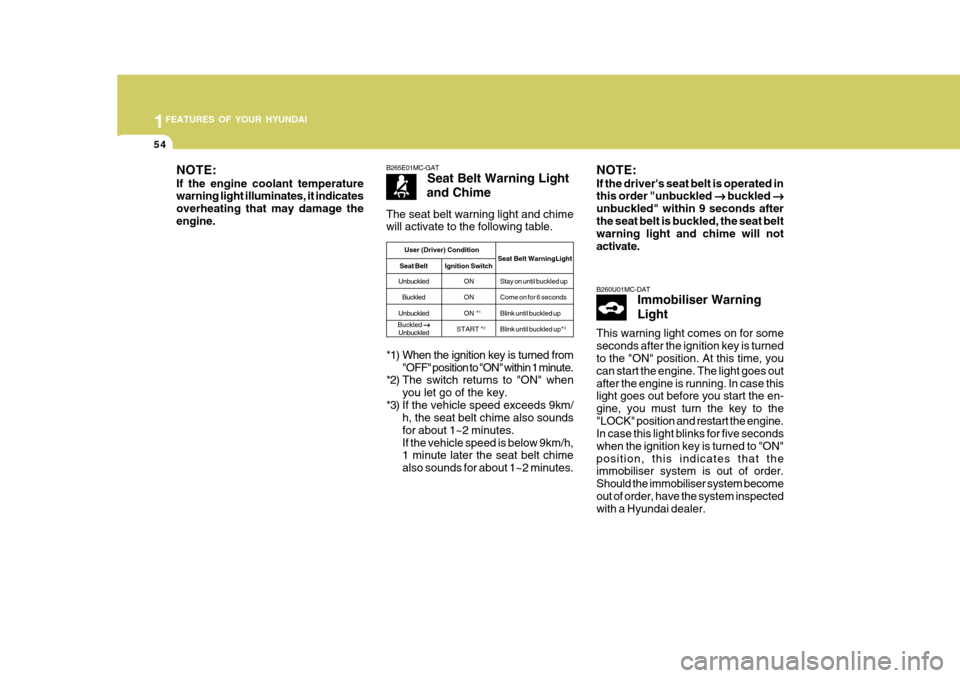
B265E01MC-GAT Seat Belt Warning Light
and Chime
*1) When the ignition key is turned from "OFF" position to "ON" within 1 minute.
*2) The switch returns to "ON" when
you let go of the key.
*3) If the vehicle speed exceeds 9km/ h, the seat belt chime also sounds for about 1~2 minutes.If the vehicle speed is below 9km/h, 1 minute later the seat belt chime also sounds for about 1~2 minutes.
The seat belt warning light and chime will activate to the following table.
User (Driver) Condition
Seat Belt WarningLight
Seat Belt Ignition Switch
Unbuckled ON Stay on until buckled up
Buckled ON Come on for 6 seconds
Unbuckled ON * 1
Blink until buckled up
START * 2
Blink until buckled up* 3
Buckled
��
��
�
Unbuckled NOTE: If the driver's seat belt is operated in this order "unbuckled
��
��
� buckled
��
��
�
unbuckled" within 9 seconds after the seat belt is buckled, the seat belt warning light and chime will not activate.
NOTE: If the engine coolant temperature warning light illuminates, it indicates overheating that may damage theengine.
Page 66 of 232
1
FEATURES OF YOUR HYUNDAI
55INSTRUMENT CLUSTER
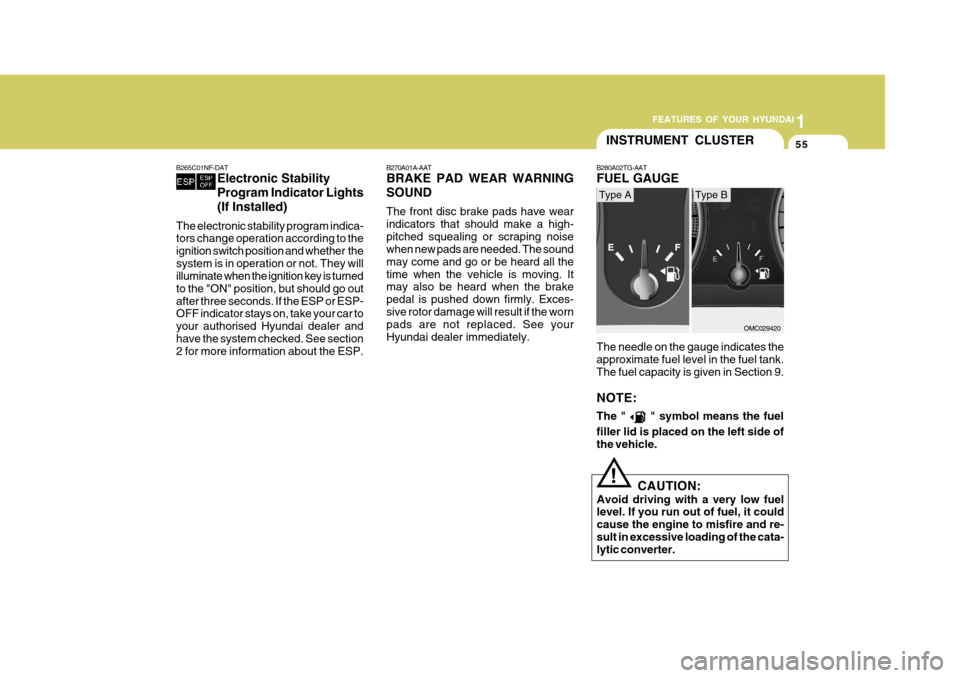
The needle on the gauge indicates the approximate fuel level in the fuel tank. The fuel capacity is given in Section 9. NOTE: The "
" symbol means the fuel
filler lid is placed on the left side of the vehicle.
B280A02TG-AAT FUEL GAUGE
OMC029420
Type AType B
B270A01A-AAT BRAKE PAD WEAR WARNING SOUND The front disc brake pads have wear indicators that should make a high-pitched squealing or scraping noise when new pads are needed. The sound may come and go or be heard all thetime when the vehicle is moving. It may also be heard when the brake pedal is pushed down firmly. Exces-sive rotor damage will result if the worn pads are not replaced. See your Hyundai dealer immediately.
B265C01NF-DAT
Electronic Stability Program Indicator Lights(If Installed)
The electronic stability program indica- tors change operation according to the ignition switch position and whether thesystem is in operation or not. They will illuminate when the ignition key is turned to the "ON" position, but should go outafter three seconds. If the ESP or ESP- OFF indicator stays on, take your car to your authorised Hyundai dealer andhave the system checked. See section 2 for more information about the ESP.
CAUTION:
Avoid driving with a very low fuel level. If you run out of fuel, it could cause the engine to misfire and re-sult in excessive loading of the cata- lytic converter.!
Page 68 of 232
1
FEATURES OF YOUR HYUNDAI
57
B310B01MC-DAT ODOMETER/TRIP ODOMETER (Without Trip Computer) 1. Odometer
The odometer records the total driving distance in kilometers , and is useful for keeping a record for maintenance inter-vals. It is normal for a new vehicle to have the odometer indicating less than 50km. NOTE: Any alteration of the odometer may void your warranty coverage.
B310B01MC-C 2. Trip Odometer
Pushing in the TRIP switch for less than 1 second when the ignition switch is in "ON" position changes the display as follows;
B310B02MC-C
OMC025054R
B310B03MC-C
Trip odometer records the distance of 2 trips in kilometers. TRIP A: First distance you have trav-
eled from your origination point to a first destination. Type A
Type B
Type A
Type B
Page 70 of 232
1
FEATURES OF YOUR HYUNDAI
59
OUTSIDE TEMPERATURE
TRIPMETER
AVERAGE FUEL CONSUMPTION DISTANCE TO EMPTY
TRIP Switch Pushing in the TRIP switch for less than 1 second when the ignition switch is in "ON" position changes the displayas follows;1. Outside Temperature (°C ) This mode indicates the outside tem-
perature between -40°C and 80°C. B400B02MC-C
Odometer
Outside Temperature
2. Tripmeter (km)
o This mode indicates the total dis-
tance travelled since the last tripmeter reset. Total distance is also reset to zero if the battery is disconnected.
o Pressing the TRIP switch for more
than 1 second when the tripmeter isbeing displayed clears the tripmeter to zero.
o The meter's working range is from 0 to 999.9 kms. B400B03MC-C
Odometer Tripmeter
OMC025054R
Page 72 of 232
1
FEATURES OF YOUR HYUNDAI
61MULTI-FUNCTION LIGHT SWITCH
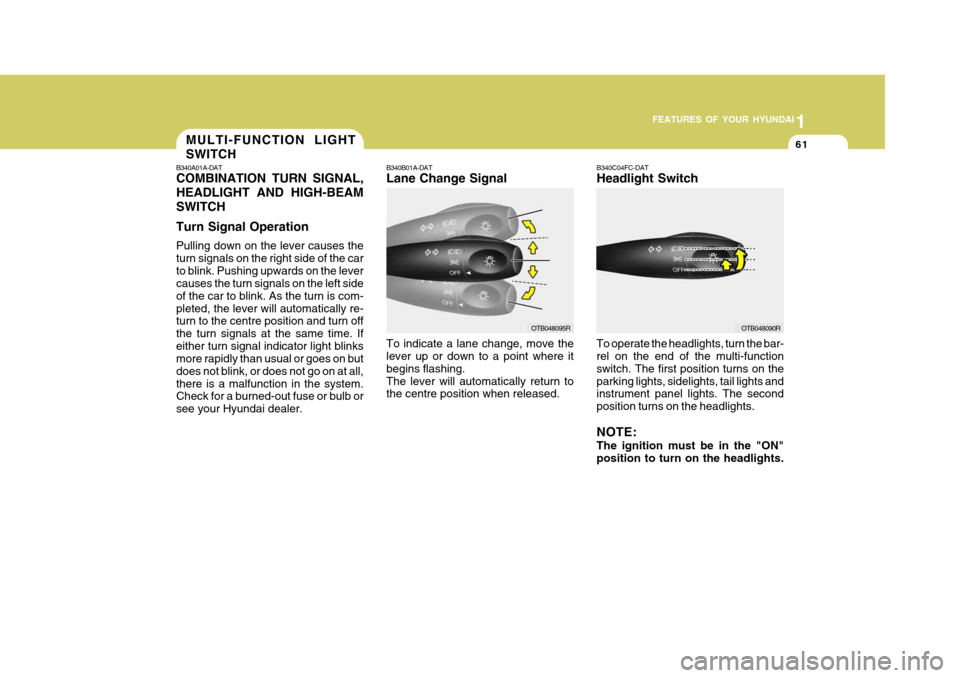
B340A01A-DAT COMBINATION TURN SIGNAL, HEADLIGHT AND HIGH-BEAMSWITCH Turn Signal Operation Pulling down on the lever causes the turn signals on the right side of the carto blink. Pushing upwards on the lever causes the turn signals on the left side of the car to blink. As the turn is com-pleted, the lever will automatically re- turn to the centre position and turn off the turn signals at the same time. Ifeither turn signal indicator light blinks more rapidly than usual or goes on but does not blink, or does not go on at all,there is a malfunction in the system. Check for a burned-out fuse or bulb or see your Hyundai dealer. B340B01A-DAT Lane Change Signal To indicate a lane change, move the lever up or down to a point where it begins flashing.The lever will automatically return to the centre position when released.
B340C04FC-DAT Headlight Switch To operate the headlights, turn the bar- rel on the end of the multi-function switch. The first position turns on theparking lights, sidelights, tail lights and instrument panel lights. The second position turns on the headlights. NOTE: The ignition must be in the "ON" position to turn on the headlights.
OTB048095ROTB048090R
Page 73 of 232
1FEATURES OF YOUR HYUNDAI
62
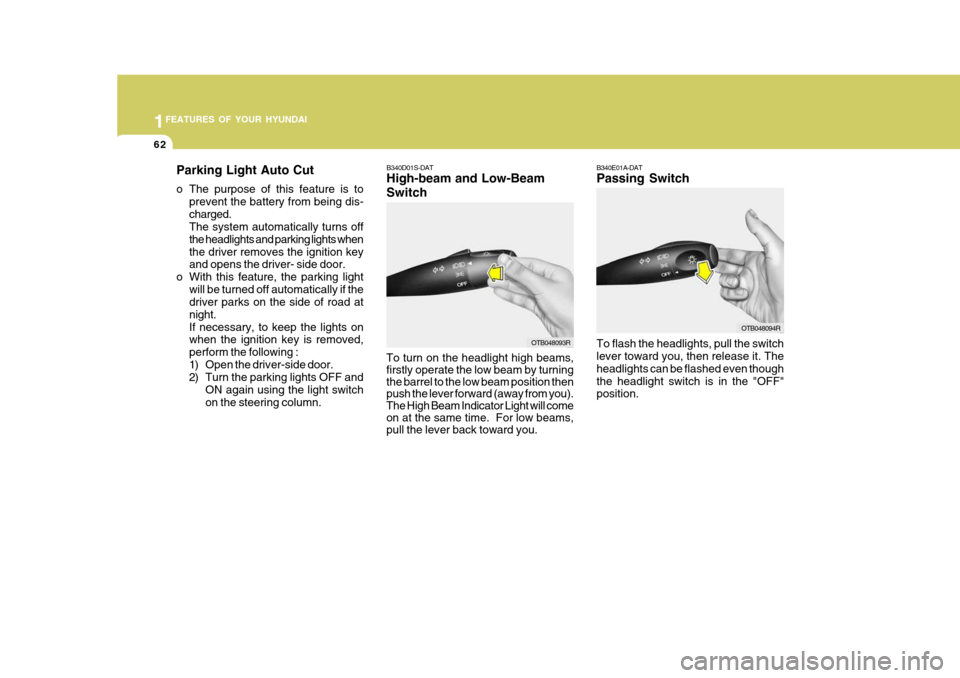
B340E01A-DAT Passing Switch To flash the headlights, pull the switch lever toward you, then release it. The headlights can be flashed even thoughthe headlight switch is in the "OFF" position.
B340D01S-DAT High-beam and Low-Beam Switch
OTB048093R
To turn on the headlight high beams, firstly operate the low beam by turning the barrel to the low beam position then push the lever forward (away from you). The High Beam Indicator Light will come on at the same time. For low beams, pull the lever back toward you.
OTB048094R
Parking Light Auto Cut
o The purpose of this feature is to
prevent the battery from being dis- charged. The system automatically turns off the headlights and parking lights whenthe driver removes the ignition key and opens the driver- side door.
o With this feature, the parking light will be turned off automatically if thedriver parks on the side of road at night.If necessary, to keep the lights on when the ignition key is removed, perform the following :
1) Open the driver-side door.
2) Turn the parking lights OFF and ON again using the light switch on the steering column.
Page 77 of 232
1FEATURES OF YOUR HYUNDAI
66REAR WINDOW DEMISTER SWITCHHAZARD WARNING SYS- TEMINSTRUMENT PANEL LIGHT CONTROL (RHEOSTAT)
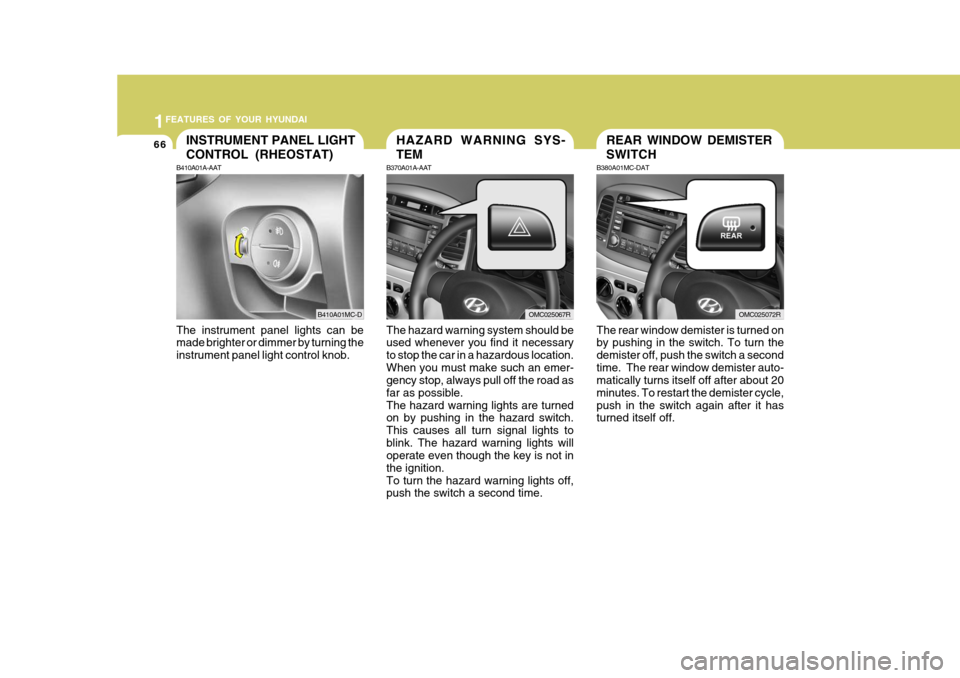
B370A01A-AAT The hazard warning system should be used whenever you find it necessary to stop the car in a hazardous location.When you must make such an emer- gency stop, always pull off the road as far as possible.The hazard warning lights are turned on by pushing in the hazard switch. This causes all turn signal lights toblink. The hazard warning lights will operate even though the key is not in the ignition.To turn the hazard warning lights off, push the switch a second time.
The instrument panel lights can bemade brighter or dimmer by turning the instrument panel light control knob.
B410A01A-AAT
B410A01MC-DOMC025067R
B380A01MC-DAT The rear window demister is turned on by pushing in the switch. To turn the demister off, push the switch a secondtime. The rear window demister auto- matically turns itself off after about 20 minutes. To restart the demister cycle,push in the switch again after it has turned itself off.OMC025072R
Page 82 of 232
1
FEATURES OF YOUR HYUNDAI
71
B460B01MC-GAT Opening the Sunroof System
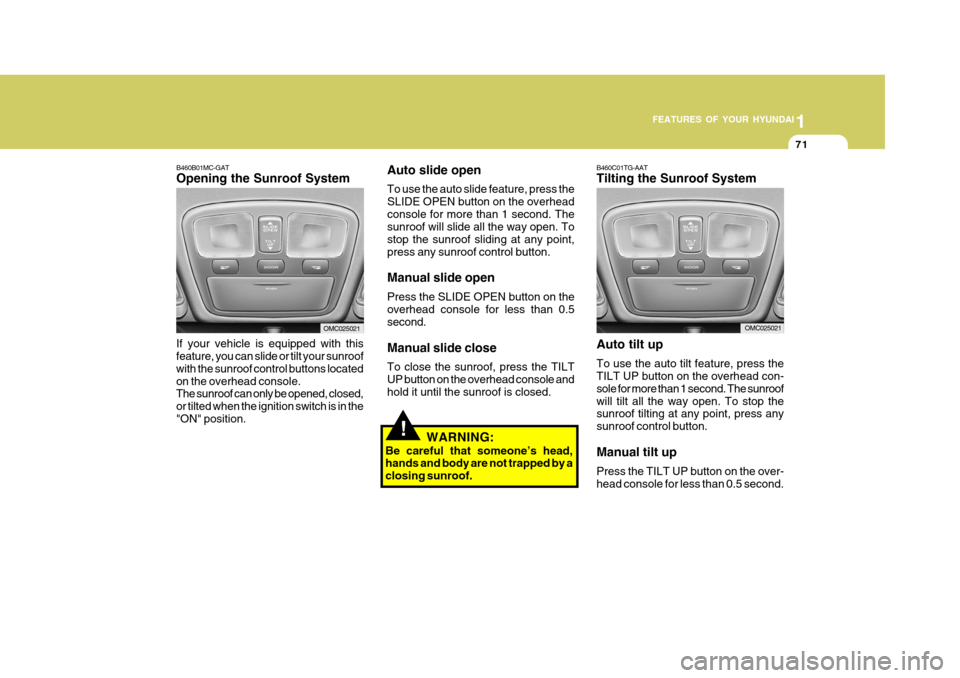
If your vehicle is equipped with this feature, you can slide or tilt your sunroof with the sunroof control buttons locatedon the overhead console. The sunroof can only be opened, closed, or tilted when the ignition switch is in the"ON" position.
OMC025021
!
Auto slide open To use the auto slide feature, press the SLIDE OPEN button on the overheadconsole for more than 1 second. The sunroof will slide all the way open. To stop the sunroof sliding at any point,press any sunroof control button. Manual slide open Press the SLIDE OPEN button on the overhead console for less than 0.5 second. Manual slide close To close the sunroof, press the TILT UP button on the overhead console andhold it until the sunroof is closed. WARNING:
Be careful that someone’s head, hands and body are not trapped by a closing sunroof.B460C01TG-AAT Tilting the Sunroof System Auto tilt up To use the auto tilt feature, press the TILT UP button on the overhead con- sole for more than 1 second. The sunroofwill tilt all the way open. To stop the sunroof tilting at any point, press any sunroof control button. Manual tilt up Press the TILT UP button on the over- head console for less than 0.5 second.
OMC025021