Page 77 of 442

The passenger sensing system may not operate
properly if the original seat trim is replaced with
non-GM covers, upholstery or trim, or with GM
covers, upholstery or trim designed for a different
vehicle. Any object, such as an aftermarket seat
heater or a comfort enhancing pad or device,
installed under or on top of the seat fabric, could also
interfere with the operation of the passenger sensing
system. This could either prevent proper deployment
of the passenger airbag(s) or prevent the passenger
sensing system from properly turning off the
passenger airbag(s). SeePassenger Sensing
System on page 1-67.
If you have any questions, call Customer Assistance.
The phone numbers and addresses for Customer
Assistance are in Step Two of the Customer
Satisfaction Procedure in this manual. See
Customer Satisfaction Procedure on page 7-2.
If the vehicle has rollover roof-rail airbags, see
Different Size Tires and Wheels on page 5-70for
additional important information.Q:Because I have a disability, I have to get my
vehicle modi�ed. How can I �nd out whether
this will affect my airbag system?
A:If you have questions, call Customer Assistance.
The phone numbers and addresses for Customer
Assistance are in Step Two of the Customer
Satisfaction Procedure in this manual. See
Customer Satisfaction Procedure on page 7-2.
In addition, your dealer/retailer and the service manual
have information about the location of the airbag sensors,
sensing and diagnostic module and airbag wiring.
1-73
Page 82 of 442
OnStar®System.............................................2-37
Storage Areas................................................2-41
Glove Box...................................................2-41
Cupholders..................................................2-41
Center Console Storage.................................2-41
Luggage Carrier...........................................2-41Rear Compartment Storage Panel/Cover..........2-44
Rear Seat Armrest........................................2-46
Table..........................................................2-46
Convenience Net..........................................2-47
Cargo Tie Downs..........................................2-47
Sunroof.........................................................2-47
Section 2 Features and Controls
2-2
Page 101 of 442
ACC (ACC/ACCESSORY):This is the position in
which you can operate some electrical accessories.
R(ON/RUN):This position can be used to operate
the electrical accessories and to display some
instrument panel cluster warning and indicator
lights. The switch stays in this position when the
engine is running. If you leave the key in the
ACC/ACCESSORY or ON/RUN position with the
engine off, the battery could be drained. You may not
be able to start the vehicle if the battery is allowed
to drain for an extended period of time.
/(START):This is the position that starts the engine.
When the engine starts, release the key. The ignition
switch returns to ON/RUN for driving.
Retained Accessory Power (RAP)
These vehicle accessories can be used for up to
10 minutes after the engine is turned off:
Audio System
Power Windows
Sunroof (if equipped)
Power to these accessories will continue to operate for
up to 10 minutes or until the driver door is opened.
All these features will work when the key is in ON/RUN
or ACC/ACCESSORY.
Starting the Engine
Move the shift lever to P (Park) or N (Neutral).
The engine will not start in any other position.
To restart the engine when the vehicle is already
moving, use N (Neutral) only.
Notice:Do not try to shift to P (Park) if the
vehicle is moving. If you do, you could damage
the transmission. Shift to P (Park) only when the
vehicle is stopped.
2-21
Page 121 of 442
Storage Areas
Glove Box
To open the glove box, pull the handle to the left and
pull the glove box door down until it stops and is
fully open.
Cupholders
Cupholders are located on the lower front of the center
console. Pull-out cupholders are located at the
bottom of the armrest and on the back of the rear seat
center console. Cupholders are also located on the
rear seat armrest.
Center Console Storage
For vehicles with a center console storage area, open
with the lever on the front of the console.
Luggage Carrier
{CAUTION:
If something is carried on top of the vehicle that is
longer or wider than the luggage carrier — like
paneling, plywood, or a mattress — the wind can
catch it while the vehicle is being driven. This can
cause a driver to lose control. The item being
carried could be violently torn off, and this could
cause a collision, and damage the vehicle. Items
may be carried inside. Never carry something
longer or wider than the luggage carrier on top of
the vehicle.
For vehicles with a luggage carrier, it allows for things
to be loaded on top of the vehicle. The luggage carrier
has side rails attached to the roof, sliding crossrails,
if equipped, and places to use for tying things down.
These allow for some things to be loaded on top of the
vehicle, as long as objects are not wider or longer
than the luggage carrier.
2-41
Page 122 of 442
The roof rack crossrails can be locked in four
positions only.Press the lever down and align the crossrails on both
sides with the holes on the siderails. Move the crossrail
by hand. There will be a notable click as the pins align
into the holes locking the crossrail into place.
Make sure the lever is in the down position, and that the
crossrail cannot be moved by hand when it is in place.
2-42
Page 127 of 442
Convenience Net
Use the convenience net, located in the rear, to store
small loads as far forward as possible. The net should
not be used to store heavy loads.
Cargo Tie Downs
Four cargo tie-downs are located in the rear
compartment of the vehicle. The tie-downs can
be used to secure small loads.
Sunroof
If the vehicle is equipped with a sunroof, the controls
to operate it are located on the headliner above the
rearview mirror. The ignition must be in RUN/ON or
ACC/ACCESSORY, or Retained Accessory Power (RAP)
must be active, to operate the sunroof. SeeRetained
Accessory Power (RAP) on page 2-21for more
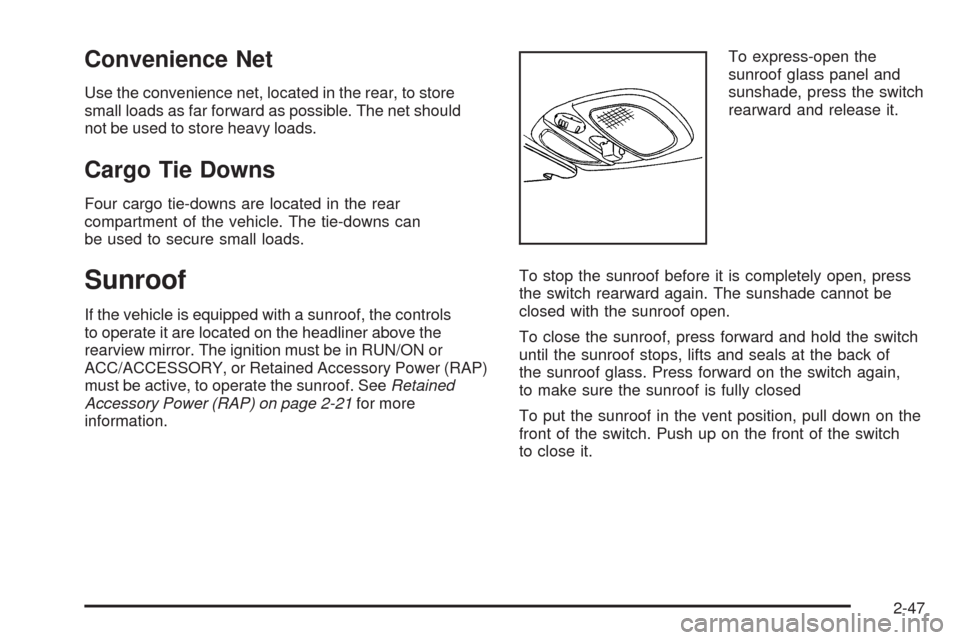
information.To express-open the
sunroof glass panel and
sunshade, press the switch
rearward and release it.
To stop the sunroof before it is completely open, press
the switch rearward again. The sunshade cannot be
closed with the sunroof open.
To close the sunroof, press forward and hold the switch
until the sunroof stops, lifts and seals at the back of
the sunroof glass. Press forward on the switch again,
to make sure the sunroof is fully closed
To put the sunroof in the vent position, pull down on the
front of the switch. Push up on the front of the switch
to close it.
2-47
Page 176 of 442
Compass Calibration
The compass can be manually calibrated. Only calibrate
the compass in a magnetically clean and safe location,
such as an open parking lot, where driving the vehicle in
circles is not a danger. It is suggested to calibrate
away from tall buildings, utility wires, manhole covers, or
other industrial structures, if possible.
If CAL should ever appear in the DIC display, the
compass should be calibrated.
If the DIC display does not show a heading, for example,
N for North, or the heading does not change after
making turns, there may be a strong magnetic �eld
interfering with the compass. Such interference may be
caused by a magnetic CB or cell phone antenna
mount, a magnetic emergency light, magnetic note pad
holder, or any other magnetic item. Turn off the
vehicle, move the magnetic item, then turn on the
vehicle and calibrate the compass.To calibrate the compass, use the following procedure:Compass Calibration Procedure
1. Before calibrating the compass, make sure the
compass zone is set to the variance zone in
which the vehicle is located. See “Compass
Variance (Zone) Procedure” earlier in this section.
Do not operate any switches such as window,
sunroof, climate controls, seats, etc. during
the calibration procedure.
2. Press the vehicle information button until PRESS
V
TO CALIBRATE COMPAS (Compass) displays.
3. Press the set/reset button to start the compass
calibration.
4. The DIC will display CALIBRATING: DRIVE IN
CIRCLES. Drive the vehicle in tight circles at
less than 5 mph (8 km/h) to complete the
calibration. The DIC will display CALIBRATION
COMPLETE for a few seconds when the calibration
is complete. The DIC display will then return to
the previous menu.
3-48
Page 246 of 442
XM™ Satellite Radio Service
XM Satellite Radio Service gives digital radio reception
from coast-to-coast in the 48 contiguous United States,
and in Canada. Just as with FM, tall buildings or hills
can interfere with satellite radio signals, causing
the sound to fade in and out. In addition, traveling or
standing under heavy foliage, bridges, garages, or
tunnels may cause loss of the XM signal for a period
of time.
Cellular Phone Usage
Cellular phone usage may cause interference with the
vehicle’s radio. This interference may occur when
making or receiving phone calls, charging the phone’s
battery, or simply having the phone on. This interference
causes an increased level of static while listening to
the radio. If static is received while listening to the radio,
unplug the cellular phone and turn it off.
Multi-Band Antenna
The multi-band antenna is located on the roof of the
vehicle. The antenna is used for the AM/FM radio,
OnStar
®and the XM™ Satellite Radio Service System,
if the vehicle has these features. Keep the antenna
clear of obstructions for clear reception. If the vehicle
has a sunroof, the performance of the AM/FM radio,
OnStar
®, and the XM system may be affected if
the sunroof is open.
3-118