Page 1505 of 1903
Downloaded from www.Manualslib.com manuals search engine Specifications
Torque Specifications
DESCRIPTIONTORQUE (N·m)
All General Service Screws 5
Recirculation door actuator screws 2
Special Tools
Digital Multimeter
Fluke 15B & 17B
GENERAL INFORMATION
13
13–23Chery Automobile Co., Ltd.
Page 1506 of 1903
Downloaded from www.Manualslib.com manuals search engine ON-VEHICLE SERVICE
Recirculation Door Actuator
Removal & Installation
1. Remove the rod connected to the recirculation dooractuator.
2. Remove the bolt (1) connecting the recirculation door actuator to the bracket.
(Tighten: Recirculation door actuator bolt to 2 N·m)
3. Remove the recirculation door actuator.
4. Installation is in the reverse order of removal.
LTSM130003
13–24Chery Automobile Co., Ltd.
Page 1507 of 1903
Downloaded from www.Manualslib.com manuals search engine AIR DISTRIBUTION
GENERAL INFORMATION13-26
Description 13-26
Operation 13-26
Specifications 13-26
Special Tools 13-27
DIAGNOSIS & TESTING13-28
Blower Motor Electrical Troubleshooting 13-28
Blower Motor Noise 13-28
Blower Motor Vibration 13-28
ON-VEHICLE SERVICE13-29
HVAC Housing 13-29
Removal & Installation 13-29
Blower Motor 13-30
Description 13-30
Operation 13-30
Removal & Installation 13-31
13
13–25Chery Automobile Co., Ltd.
Page 1508 of 1903

Downloaded from www.Manualslib.com manuals search engine GENERAL INFORMATION
Description
All models are equipped with a common HVAC housing assembly that combines A/C and heating capabilities into a
single unit mounted within the passenger compartment. The HVAC housing assembly consists of three separate
housings:
•HVAC housing — The HVAC housing is mounted to the dash panel behind the instrument panel and contains
the A/C evaporator. The HVAC housing has mounting provisions for the air inlet housing, blower motor and the
air distribution housing.
• Air distribution housing — The air distribution housing is mounted to the rear of the HVAC housing and con-
tains the heater core, blend-air and mode-air doors and door linkage.
• Air inlet housing — The air inlet housing is mounted to the passenger side end of the HVAC housing. The air
inlet housing contains the recirculation-air door and actuator.
Operation
The A/C system is designed for the use of a non-CFC, R-134a refrigerant and uses an A/C evaporator to cool and
dehumidify the incoming air prior to blending it with the heated air. Temperature control determines the discharge air
temperature by operating the temperature control cable, which moves the blend-air door. This allows an almost
immediate control of the output air temperature of the system. The mode door cable operates the mode-air doors
which direct the flow of the conditioned air out the various air outlets, depending on the mode selected. When
equipped with A/C, the recirculation door actuator operates the recirculation-air door which closes off the fresh air
intake and recirculates the air already inside the vehicle. The electric recirculation door actuator and the blower motor
are connected to the vehicle electrical system by the instrument panel wire harness. The blower motor controls the
velocity of air flowing through the HVAC housing assembly by spinning the blower wheel within the HVAC housing at
the selected speed by use of the blower motor resistor, which is around the blower motor.
The air distribution housing must be removed from the HVAC housing and disassembled for service of the blend-air
and mode-air doors. The air inlet housing must be removed from the HVAC housing and disassembled for service of
the recirculation-air door. The HVAC housing must be removed from the vehicle and disassembled for service of the
A/C evaporator.
Specifications
Torque Specifications
DESCRIPTION TORQUE (N·m)
All General Service Screws 2
Evaporator Bolts 4
Expansion Valve Bolts 10
Pipeline Stent 4
Refrigerant Lines To A/C Accumulator 6
Condenser Bolts 6
Refrigerant Lines To A/C Compressor Bolt 30
Refrigerant Lines 10
Refrigerant Lines To A/C Evaporator Bolt 25
13–26Chery Automobile Co., Ltd.
Page 1509 of 1903
Downloaded from www.Manualslib.com manuals search engine Special Tools
Digital MultimeterFluke 15B & 17B
GENERAL INFORMATION
13
13–27Chery Automobile Co., Ltd.
Page 1510 of 1903

Downloaded from www.Manualslib.com manuals search engine DIAGNOSIS & TESTING
Blower Motor Electrical Troubleshooting
To determine if an open condition exists within the blower motor circuit wiring, it is necessary to disconnect the neg-
ative battery cable and check for continuity within the blower motor circuits using an ohmmeter.
Possible causes of an inoperative blower motor include the following:
•Open fuse
• Inoperative blower motor switch
• Inoperative blower motor resistor
• Inoperative blower motor
• Inoperative blower motor circuit wiring or wiring harness electrical connectors
Blower Motor Noise
To determine if the blower motor is the source of the noise, simply switch the blower motor from Off to On. To verify
that the blower motor is the source of the noise, unplug the blower motor wire harness connector and operate the
heater-A/C system. If the noise goes away, possible causes include:
•Foreign material on fresh air inlet screen
• Foreign material in blower wheel
• Foreign material in HVAC housing
• Incorrect blower motor mounting
• Deformed or damaged blower wheel
• Worn blower motor bearings or brushes
Blower Motor Vibration
Possible causes of a blower motor vibration include:
•Incorrect blower motor mounting
• Foreign material in blower wheel
• Deformed or damaged blower wheel
• Worn blower motor bearings
13–28Chery Automobile Co., Ltd.
Page 1511 of 1903
Downloaded from www.Manualslib.com manuals search engine ON-VEHICLE SERVICE
HVAC Housing
Removal & Installation
1. Evacuate the A/C system (See A/C System Evacuation and Recharge in Section 13 Heating & Air Conditioning).
2. Drain the cooling system and then disconnectheater hoses (1). (See Cooling System Draining &
Filling in Section 06 Cooling).
3. Remove the instrument panel (See Instrument Panel Removal & Installation in Section 15 Body & Accessories).
4. Remove the evaporator assembly upper retaining bolts (1).
LTSM130010
LTSM130011
13
13–29Chery Automobile Co., Ltd.
Page 1512 of 1903

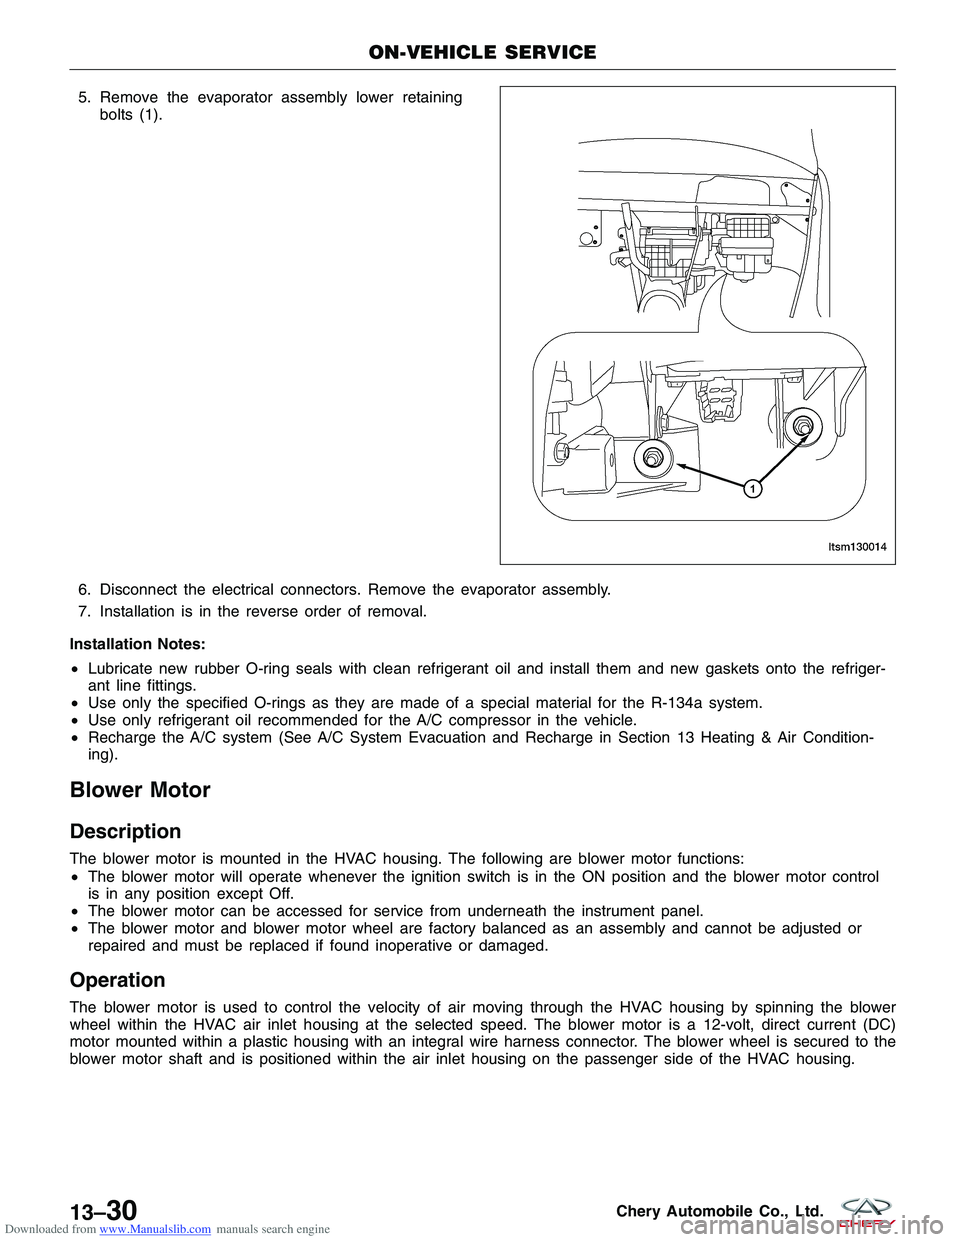
Downloaded from www.Manualslib.com manuals search engine 5. Remove the evaporator assembly lower retainingbolts (1).
6. Disconnect the electrical connectors. Remove the evaporator assembly.
7. Installation is in the reverse order of removal.
Installation Notes:
• Lubricate new rubber O-ring seals with clean refrigerant oil and install them and new gaskets onto the refriger-
ant line fittings.
• Use only the specified O-rings as they are made of a special material for the R-134a system.
• Use only refrigerant oil recommended for the A/C compressor in the vehicle.
• Recharge the A/C system (See A/C System Evacuation and Recharge in Section 13 Heating & Air Condition-
ing).
Blower Motor
Description
The blower motor is mounted in the HVAC housing. The following are blower motor functions:
•The blower motor will operate whenever the ignition switch is in the ON position and the blower motor control
is in any position except Off.
• The blower motor can be accessed for service from underneath the instrument panel.
• The blower motor and blower motor wheel are factory balanced as an assembly and cannot be adjusted or
repaired and must be replaced if found inoperative or damaged.
Operation
The blower motor is used to control the velocity of air moving through the HVAC housing by spinning the blower
wheel within the HVAC air inlet housing at the selected speed. The blower motor is a 12-volt, direct current (DC)
motor mounted within a plastic housing with an integral wire harness connector. The blower wheel is secured to the
blower motor shaft and is positioned within the air inlet housing on the passenger side of the HVAC housing.
ON-VEHICLE SERVICE
LTSM130014
13–30Chery Automobile Co., Ltd.