Page 81 of 400
82 1−7. Safety information
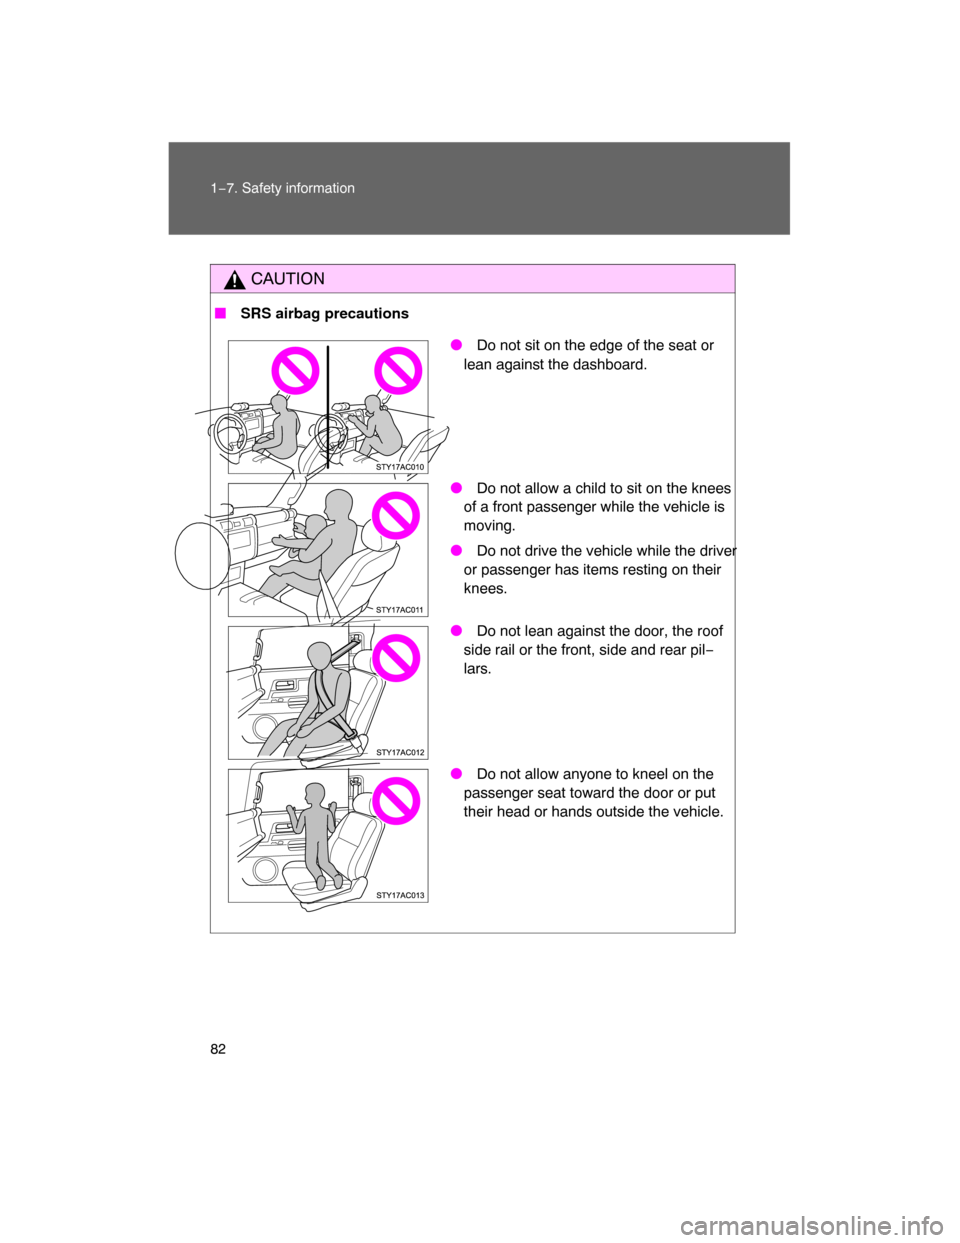
CAUTION
� SRS airbag precautions
� Do not sit on the edge of the seat or
lean against the dashboard.
� Do not allow a child to sit on the knees
of a front passenger while the vehicle is
moving.
� Do not drive the vehicle while the driver
or passenger has items resting on their
knees.
� Do not lean against the door, the roof
side rail or the front, side and rear pil−
lars.
� Do not allow anyone to kneel on the
passenger seat toward the door or put
their head or hands outside the vehicle.
Page 104 of 400

106 2−1. Driving procedures
Lightly depress the accelerator pedal at the same time as
gradually releasing the clutch pedal.
Release the parking brake.
� Driving in the rain
� Drive carefully when it is raining, because visibility will be reduced, the
windows may become fogged−up, and the road will be slippery.
�Drive carefully when it starts to rain, because the road surface will be
especially slippery.
� Refrain from high speeds when driving on an expressway in the rain,
because there may be a layer of water between the tires and the road
surface, preventing the steering and brakes from operating properly.
� Breaking in your new Toyota
To extend the life of the vehicle, the following precautions are recommended
to observe:
� For the first 200 miles (300 km):
Avoid sudden stops.
�For the first 500 miles (800 km):
Do not tow a trailer.
� For the first 1000 miles (1600 km):
�Do not drive at extremely high speeds.
�Avoid sudden acceleration.
�Do not drive continuously in the low gears.
�Do not drive at a constant speed for extended periods.
� Drum�in disc type parking brake system
Your vehicle has a drum−in−disc type parking brake system. This type of
brake system needs bedding−down of the brake shoes periodically or when−
ever the parking brake shoes and/or drum are replaced. Have your Toyota
dealer perform the bedding down.
� Operating your vehicle in a foreign country
Comply with the relevant vehicle registration laws and confirm the availability
of the correct fuel. (
P. 364)
Page 129 of 400
131
2
When driving
2−3. Operating the lights and wipers
Headlight switch
Turning on the high beam headlights
With the headlights on, push
the lever forward to turn on the
high beams.
Pull the lever back to the center
position to turn the high beams
off.
Pull the lever toward you to
turn on the high beams.
Release the lever to turn them off.
You can flash the high beams
with the headlights on or off. The headlights can be operated manually.
The side marker, parking, tail, license plate, outside rear
view mirror illumination (if equipped) and instrument panel
lights turn on.
The headlights and all lights listed above turn on.
Page 132 of 400
134 2−3. Operating the lights and wipers
� The windshield wiper and washer can be operated when
The engine switch must be in the ON position.
�If no windshield washer fluid sprays
Check that the washer nozzles are not blocked and if there is washer fluid in
the windshield washer fluid reservoir.
NOTICE
� When the windshield is dry
Do not use the wipers, as they may damage the windshield.
�When there is no washer fluid spray from the nozzle
Damage to the washer fluid pump may be caused if the lever is pulled
toward you and held continually.
�When a nozzle becomes block
Do not try to clear it with a pin
or other object. The nozzle will be damaged.
Page 135 of 400
137
2−4. Using other driving systems
2
When driving
� Cruise control can be set when
� The shift lever is in D or 4 (vehicles with an automatic transmission).
�Vehicle speed is between approximately 25 mph (40 km/h) and 125 mph
(200 km/h).
� Accelerating
The vehicle can be accelerated normally.
�Automatic cruise control cancelation
The set speed is automatically cancelled in any of the following situations.
�Actual vehicle speed falls more than 10 mph (16 km/h) below the preset
vehicle speed.
At this time, the memorized set speed is not retained.
� Actual vehicle speed is below 25 mph (40 km/h).
�
VSC is activated.
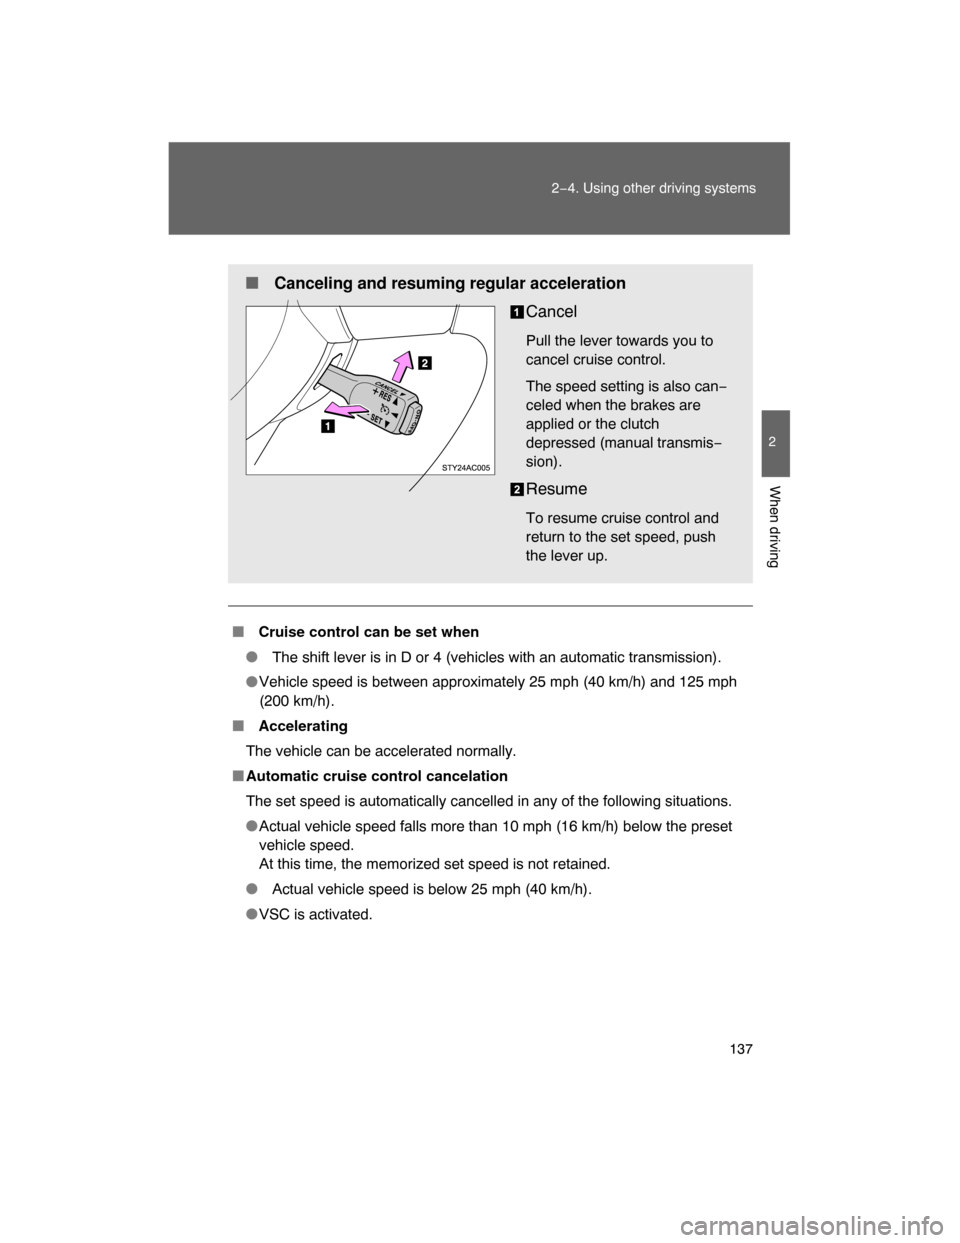
� Canceling and resuming regular acceleration
Cancel
Pull the lever towards you to
cancel cruise control.
The speed setting is also can−
celed when the brakes are
applied or the clutch
depressed (manual transmis−
sion).
Resume
To resume cruise control and
return to the set speed, push
the lever up.
Page 140 of 400

142 2−4. Using other driving systems
� Sensor detection information
� Certain vehicle conditions and the surrounding environment may affect
the ability of a sensor to correctly detect an obstacle. Particular instances
where this may occur are listed below.
�There is dirt, snow or ice on a sensor.
�A sensor is frozen.
�A sensor is covered in any way.
�The vehicle is leaning considerably to one side.
�On an extremely bumpy road, on an incline, on gravel, or on grass.
�The vicinity of the vehicle is noisy due to vehicle horns, motorcycle
engines, air brakes of large vehicles, or other loud noises producing
ultrasonic waves.
�There is another vehicle equipped with parking assist sensors in the
vicinity.
�A sensor is coated with a sheet of spray or heavy rain.
�The vehicle is equipped with a fender pole or radio antenna.
�A bumper or sensor receives a strong impact.
�The vehicle is approaching a tall or right−angled curb.
�In harsh sunlight or intense cold weather.
�The area directly under the bumpers is not detected.
Objects lower than the sensors or thin stakes etc. may be detected ini−
tially, but as they draw closer, they may cease to be detected.
�A towing hitch is mounted to the vehicle.
�A non−genuine Toyota suspension (lowered suspension etc.) is
installed.
In addition to the examples above, there are instances in which, because of
their shapes, signs and other objects may be judged by a sensor to be closer
than they are.
� The shape of the obstacle may prevent a sensor from detecting it. Pay
particular attention to the following obstacles:
�Wires, fences, ropes, etc.
�Cotton, snow and other materials that absorb radio waves
�Sharply−angled objects
�Low obstacles
�Tall obstacles with upper sections projecting outwards in the direction
of your vehicle
Page 163 of 400
 = (Total load capacity)
(Total")
165
2−5. Driving information
2
When driving
Cargo and luggage
Capacity and distribution
Cargo capacity depends on the total weight of the occupants.
(Cargo capacity) = (Total load capacity)
(Total weight of occupants)
Steps for Determining Correct Load Limit—
(1) Locate the statement “The co
mbined weight of occupants and
cargo should never exceed XXX kg or XXX lbs.” on your vehicle’s
placard.
(2) Determine the combined weight of the driver and passengers that
will be riding in your vehicle.
(3)Subtract the combined weight of the driver and passengers from
XXX kg or XXX lbs.
(4) The resulting figure equals the av
ailable amount of cargo and lug−
gage load capacity.
For example, if the “XXX” amount
equals 1400 lbs. and there will
be five 150 lb passengers in your vehicle, the amount of available
cargo and luggage load capacity is 650 lbs. (1400
750 (5 150)
= 650 lbs.)
(5) Determine the combined weight of luggage and cargo being
loaded on the vehicle. That weight may not safely exceed the
available cargo and luggage load
capacity calculated in Step 4.
Take notice of the following information about storage precau�
tions, cargo capacity and load.
� Stow cargo and luggage in the luggage compartment whenever
possible.
�Be sure all items are secured in place.
�
Be careful to keep the vehicle level. Placing the weight as far for−
ward as possible helps maintain vehicle balance.
� For better fuel economy, do not carry unnecessary weight.
Page 164 of 400
 If your vehicle will be towing a trailer, load from your trailer will be
transferred to your vehicle. Consult this manual to determine how
this reduces the availabl")
166 2−5. Driving information
(6) If your vehicle will be towing a trailer, load from your trailer will be
transferred to your vehicle. Consult this manual to determine how
this reduces the available cargo
and luggage load capacity of your
vehicle.
Example on your vehicle
Cargo capacity
Total load capacity
When 2 people with the combined weight of 366 lb. (166 kg) are
riding in your vehicle, which has a
total load capacity of 1190 lb. (540
kg), the available amount of cargo and luggage load capacity will be
as follows:
1190 lb. 366 lb. = 824 lb. (540 kg 166 kg = 374 kg)
In this condition, if 3 more pa ssengers with the combined weight of
388 lb. (176 kg) get on, the available cargo and luggage load will be
reduced as follows:
824 lb. 388 lb. = 436 lb. (374 kg 176 kg = 198 kg)
As shown in the above example, if the number of occupants
increases, the cargo and luggage load equaling the combined weight
of the occupants who got on later,
by an amount. In other words, if an
increase in the number of occupants causes an excess of the total
load capacity (combined weight of occupants plus cargo and luggage
load), you must reduce the ca
rgo and luggage on your vehicle.