2008 SUBARU TRIBECA rear entertainment
[x] Cancel search: rear entertainmentPage 3 of 409
Warranties&Warranties for U.S.A.All SUBARU vehicles distributed by
Subaru of America, Inc. and sold at retail
by an authorized SUBARU dealer in the
United States come with the following
warranties:
. SUBARU Limited Warranty
. Emission Control Systems Warranty
. Emissions Performance Warranty
All warranty information, including details
of coverage and exclusions, is in the
“ Warranty and Maintenance Booklet ”.
Please read these warranties carefully.& Warranties for CanadaAll SUBARU vehicles distributed by
Subaru Canada, Inc. and sold at retail by
an authorized SUBARU dealer in Canada
come with the following warranties:
. SUBARU Limited Warranty
. Anti-Corrosion Warranty
. Emission Control Warranty
All warranty information, including details
of coverage and exclusions, is in the
“Warranty and Service Booklet ”. Please
read these warranties carefully.
CAUTION
. If your vehicle is equipped with a
navigation system and/or Rear
Seat Entertainment System, the
displays contain mercury. There-
fore, the displays of the naviga-
tion system and/or Rear Seat
Entertainment System must be
removed before vehicle disposal.
Once the displays have been
removed, please reuse, recycle
or dispose of them as hazardous
waste.
. If your vehicle is equipped with
High Intensity Discharge (HID)
headlights, the HID headlights
contain mercury. Therefore, it is
necessary to remove HID head-
lights before vehicle disposal.
Once removed, please reuse, re-
cycle or dispose of the HID head-
lights as hazardous waste.
How to use this Owner ’s
Manual& Using your Owner ’s ManualBefore you operate your vehicle, carefully
read this manual. To protect yourself and
extend the service life of your vehicle,
follow the instructions in this manual.
Failure to observe these instructions may
result in serious injury and damage to your
vehicle.
This manual is composed of fourteen
chapters. Each chapter begins with a brief
table of contents, so you can usually tell at
a glance if that chapter contains the
information you want.
Chapter 1: Seat, seatbelt and SRS
airbags
This chapter informs you how to use the
seat and seatbelt and contains precau-
tions for the SRS airbags.
Chapter 2: Keys and doors
This chapter informs you how to operate
the keys, locks and windows.
Chapter 3: Instruments and controls
This chapter informs you about the opera-
tion of instrument panel indicators and
how to use the instruments and other
switches.
1
– CONTINUED –
ProCarManuals.com
Page 177 of 409
Antenna system............................................... 5-2
Printed antenna................................................ 5-2
FM reception .................................................... 5-2
XM
TM
satellite radio reception
(if equipped) .................................................. 5-2
Installation of accessories ............................... 5-4
Audio set .......................................................... 5-4
Type A audio set .............................................. 5-4
Type B audio set .............................................. 5-4
Type A audio set (if equipped) ........................ 5-5
Radio operation................................................ 5-5 Compact disc player operation .
....................... 5-11
Type B audio set (if equipped)...................... 5-16
Radio operation.............................................. 5-16
Built in CD changer operation .. ....................... 5-22
Audio control buttons................................... 5-27
MODE button.................................................. 5-27
Aux unit operation ......................................... 5-29
Rear Seat Entertainment (RSE) system operation (if equipped) ................................... 5-29
Precautions to observe when handling a compact disc ............................................... 5-30
Audio
5
ProCarManuals.com
Page 186 of 409
5-10
Audio
2. Press the“SCAN”button (8) or the
TUNE TRACK button (4) to select the
channel.
3. Press one of the preset buttons (10)
for more than 1.5 seconds to store the
channel. If the button is pressed for less
than 1.5 seconds, the preceding selection
will remain in memory.NOTEIf the connection between the radio and
battery is broken for any reason such
as vehicle maintenance or radio re-
moval, all channels stored in the preset
buttons are cleared. If this occurs, it is
necessary to reset the preset buttons.
! Display selection
Press the “AUDIO”(5) button while receiv-
ing satellite radio to change the display as
follows:! Rear seat entertainment
If your vehicle is equipped with a Rear
Seat Entertainment System, you can
enjoy audio outputs from the system
through the vehicle ’s speakers by press-
ing the “RSE AUX ”button (3). Press the button again to return to the audio set
sound.
NOTEIf your vehicle is equipped with a Rear
Seat Entertainment System, refer to the
separate
“Operating Instructions for
Rear Seat Entertainment System ”for
further details.
ProCarManuals.com
Page 197 of 409
2. Press the“SCAN”button (8) or the
TUNE TRACK button (4) to select the
channel.
3. Press one of the preset buttons (10)
for more than 1.5 seconds to store the
channel. If the button is pressed for less
than 1.5 seconds, the preceding selection
will remain in memory.NOTEIf the connection between the radio and
battery is broken for any reason such
as vehicle maintenance or radio re-
moval, all channels stored in the preset
buttons are cleared. If this occurs, it is
necessary to reset the preset buttons.
! Display selection
Press the “AUDIO”(5) button while receiv-
ing satellite radio to change the display as
follows:! Rear seat entertainment
If your vehicle is equipped with a Rear
Seat Entertainment System, you can
enjoy audio outputs from the system
through the vehicle ’s speakers by press-
ing the “RSE AUX ”button. Press the button again to return to the audio set
sound.
NOTEIf your vehicle is equipped with a Rear
Seat Entertainment System, refer to the
separate
“Operating Instructions for
Rear Seat Entertainment System ”for
further details.
Audio
5-21
– CONTINUED –
ProCarManuals.com
Page 204 of 409
5-28
Audio
waveband will be displayed.
*2: Only when a CD is in the player.
*3: Only vehicle equipped with RSE (Rear Seat Entertainment)
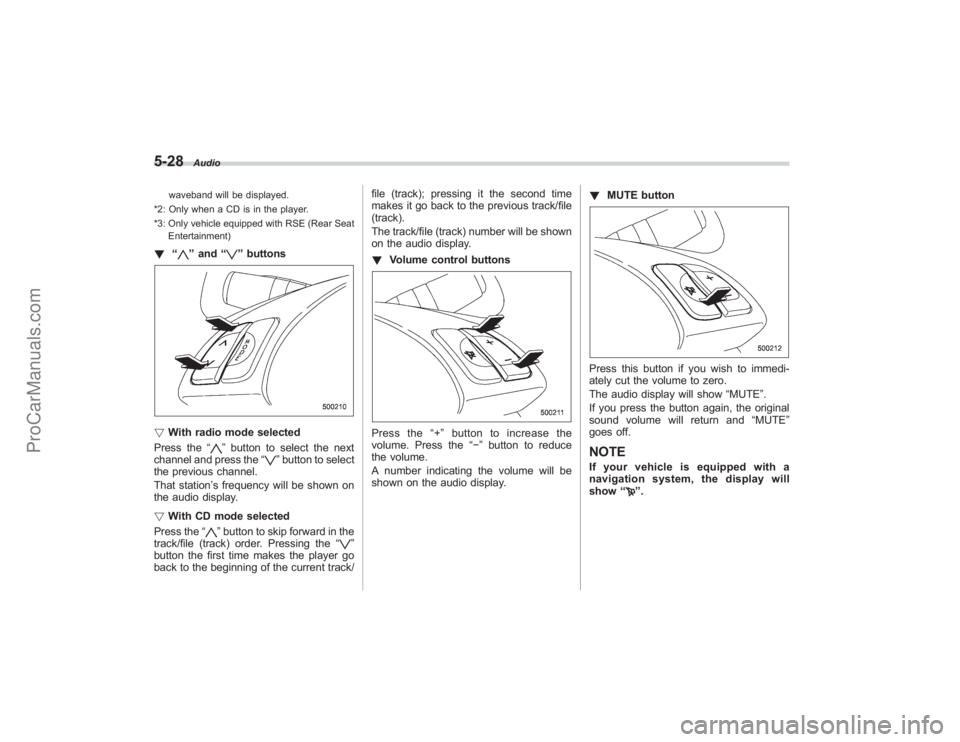
! “
”and “
”buttons
! With radio mode selected
Press the “
”button to select the next
channel and press the “
”button to select
the previous channel.
That station ’s frequency will be shown on
the audio display.
! With CD mode selected
Press the “
”button to skip forward in the
track/file (track) order. Pressing the “
”
button the first time makes the player go
back to the beginning of the current track/ file (track); pressing it the second time
makes it go back to the previous track/file
(track).
The track/file (track) number will be shown
on the audio display.
!
Volume control buttons
Press the “+ ” button to increase the
volume. Press the “−”button to reduce
the volume.
A number indicating the volume will be
shown on the audio display. !
MUTE button
Press this button if you wish to immedi-
ately cut the volume to zero.
The audio display will show “MUTE”.
If you press the button again, the original
sound volume will return and “MUTE ”
goes off.NOTEIf your vehicle is equipped with a
navigation system, the display will
show “
”.
ProCarManuals.com
Page 205 of 409
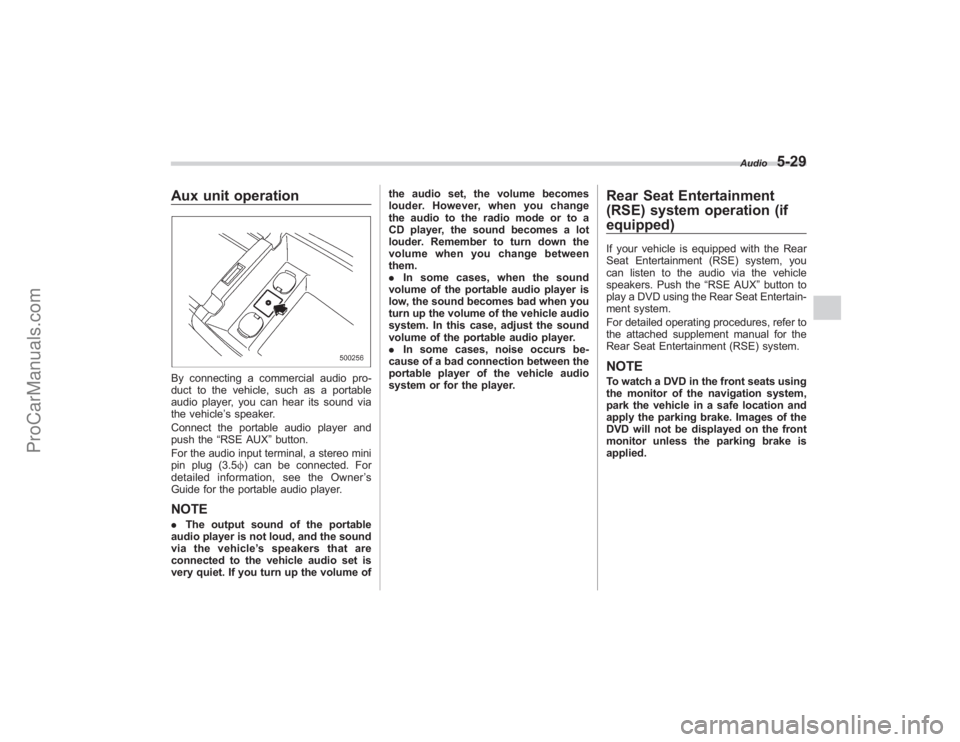
Aux unit operationBy connecting a commercial audio pro-
duct to the vehicle, such as a portable
audio player, you can hear its sound via
the vehicle’s speaker.
Connect the portable audio player and
push the “RSE AUX ”button.
For the audio input terminal, a stereo mini
pin plug (3.5 f) can be connected. For
detailed information, see the Owner ’s
Guide for the portable audio player.NOTE. The output sound of the portable
audio player is not loud, and the sound
via the vehicle ’s speakers that are
connected to the vehicle audio set is
very quiet. If you turn up the volume of the audio set, the volume becomes
louder. However, when you change
the audio to the radio mode or to a
CD player, the sound becomes a lot
louder. Remember to turn down the
volume when you change between
them.
.
In some cases, when the sound
volume of the portable audio player is
low, the sound becomes bad when you
turn up the volume of the vehicle audio
system. In this case, adjust the sound
volume of the portable audio player.
. In some cases, noise occurs be-
cause of a bad connection between the
portable player of the vehicle audio
system or for the player.
Rear Seat Entertainment
(RSE) system operation (if
equipped)If your vehicle is equipped with the Rear
Seat Entertainment (RSE) system, you
can listen to the audio via the vehicle
speakers. Push the “RSE AUX”button to
play a DVD using the Rear Seat Entertain-
ment system.
For detailed operating procedures, refer to
the attached supplement manual for the
Rear Seat Entertainment (RSE) system.NOTETo watch a DVD in the front seats using
the monitor of the navigation system,
park the vehicle in a safe location and
apply the parking brake. Images of the
DVD will not be displayed on the front
monitor unless the parking brake is
applied.
Audio
5-29
ProCarManuals.com
Page 210 of 409
6-2
Interior equipment
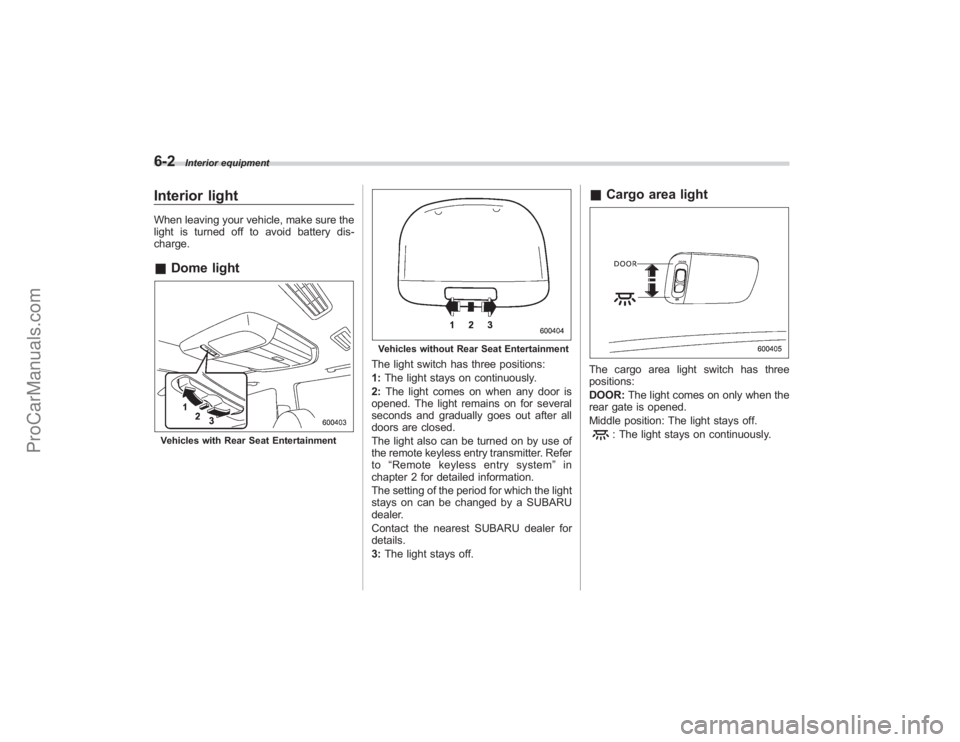
Interior lightWhen leaving your vehicle, make sure the
light is turned off to avoid battery dis-
charge.&Dome lightVehicles with Rear Seat Entertainment
Vehicles without Rear Seat EntertainmentThe light switch has three positions:
1:The light stays on continuously.
2: The light comes on when any door is
opened. The light remains on for several
seconds and gradually goes out after all
doors are closed.
The light also can be turned on by use of
the remote keyless entry transmitter. Refer
to “Remote keyless entry system ”in
chapter 2 for detailed information.
The setting of the period for which the light
stays on can be changed by a SUBARU
dealer.
Contact the nearest SUBARU dealer for
details.
3: The light stays off.
& Cargo area lightThe cargo area light switch has three
positions:
DOOR: The light comes on only when the
rear gate is opened.
Middle position: The light stays off.
: The light stays on continuously.
ProCarManuals.com
Page 364 of 409
11-42
Maintenance and service
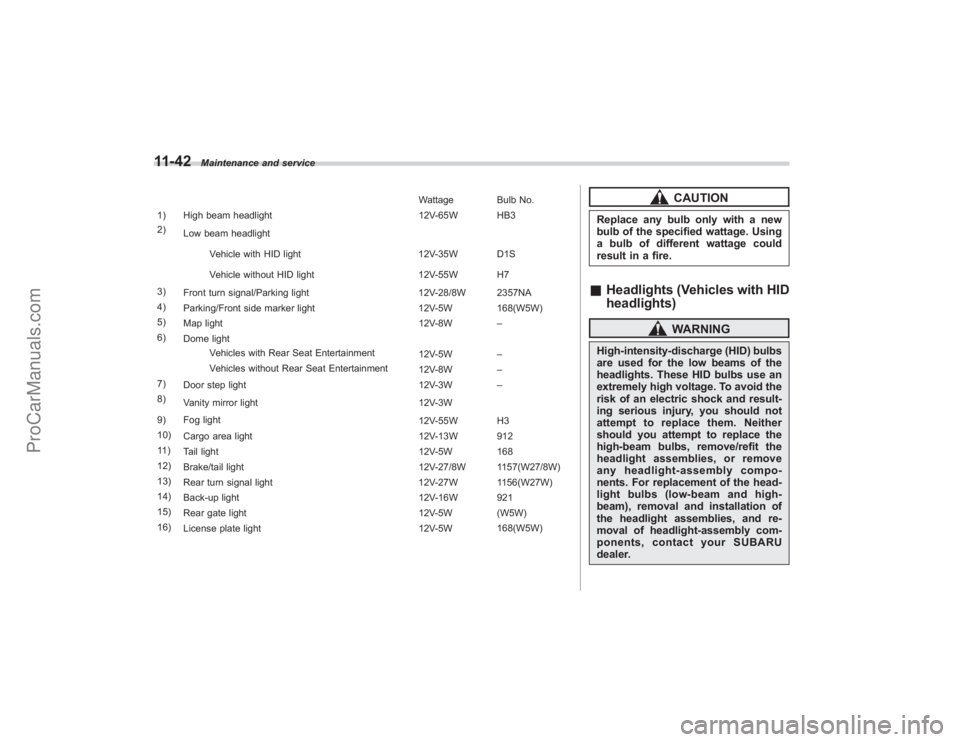
Wattage Bulb No.
1) High beam headlight 12V-65W HB3
2) Low beam headlight
Vehicle with HID light 12V-35W D1S
Vehicle without HID light 12V-55W H7
3) Front turn signal/Parking light 12V-28/8W 2357NA
4) Parking/Front side marker light 12V-5W 168(W5W)
5) Map light 12V-8W –
6) Dome light
Vehicles with Rear Seat Entertainment 12V-5W–
Vehicles without Rear Seat Entertainment 12V-8W–
7) Door step light 12V-3W –
8) Vanity mirror light 12V-3W
9) Fog light 12V-55W H3
10) Cargo area light 12V-13W 912
11 ) Tail light 12V-5W 168
12) Brake/tail light 12V-27/8W 1157(W27/8W)
13) Rear turn signal light 12V-27W 1156(W27W)
14) Back-up light 12V-16W 921
15) Rear gate light 12V-5W (W5W)
16) License plate light 12V-5W 168(W5W)
CAUTION
Replace any bulb only with a new
bulb of the specified wattage. Using
a bulb of different wattage could
result in a fire.&
Headlights (Vehicles with HID
headlights)
WARNING
High-intensity-discharge (HID) bulbs
are used for the low beams of the
headlights. These HID bulbs use an
extremely high voltage. To avoid the
risk of an electric shock and result-
ing serious injury, you should not
attempt to replace them. Neither
should you attempt to replace the
high-beam bulbs, remove/refit the
headlight assemblies, or remove
any headlight-assembly compo-
nents. For replacement of the head-
light bulbs (low-beam and high-
beam), removal and installation of
the headlight assemblies, and re-
moval of headlight-assembly com-
ponents, contact your SUBARU
dealer.
ProCarManuals.com