2008 SUBARU TRIBECA remove seats
[x] Cancel search: remove seatsPage 29 of 409
.When any trouble or a malfunc-
tion occurs during the retrieval of
the seat position, stop the retrie-
val of the seat position using any
of the control switches for man-
ual adjustment, seat memory set
button, seat memory registered
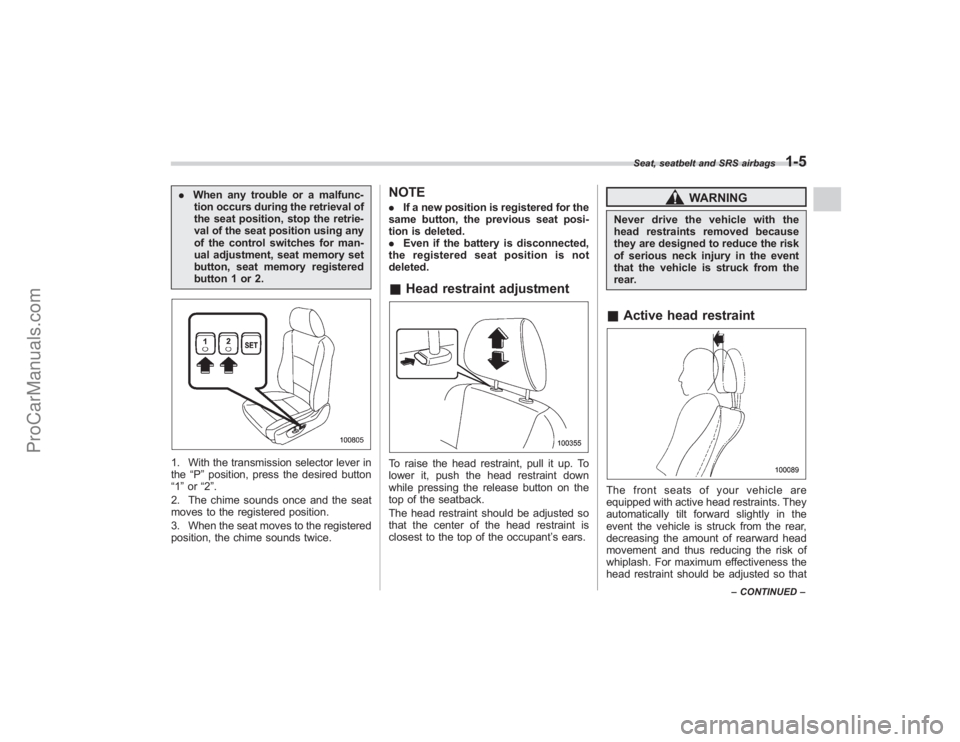
button 1 or 2.1. With the transmission selector lever in
the “P”position, press the desired button
“1 ”or “2”.
2. The chime sounds once and the seat
moves to the registered position.
3. When the seat moves to the registered
position, the chime sounds twice.
NOTE. If a new position is registered for the
same button, the previous seat posi-
tion is deleted.
. Even if the battery is disconnected,
the registered seat position is not
deleted.& Head restraint adjustmentTo raise the head restraint, pull it up. To
lower it, push the head restraint down
while pressing the release button on the
top of the seatback.
The head restraint should be adjusted so
that the center of the head restraint is
closest to the top of the occupant ’s ears.
WARNING
Never drive the vehicle with the
head restraints removed because
they are designed to reduce the risk
of serious neck injury in the event
that the vehicle is struck from the
rear.& Active head restraintThe front seats of your vehicle are
equipped with active head restraints. They
automatically tilt forward slightly in the
event the vehicle is struck from the rear,
decreasing the amount of rearward head
movement and thus reducing the risk of
whiplash. For maximum effectiveness the
head restraint should be adjusted so that
Seat, seatbelt and SRS airbags
1-5
–CONTINUED –
ProCarManuals.com
Page 35 of 409
.Raise the seatback of the center
seat while taking care not to trap
your hands or other parts of the
body between the center seat
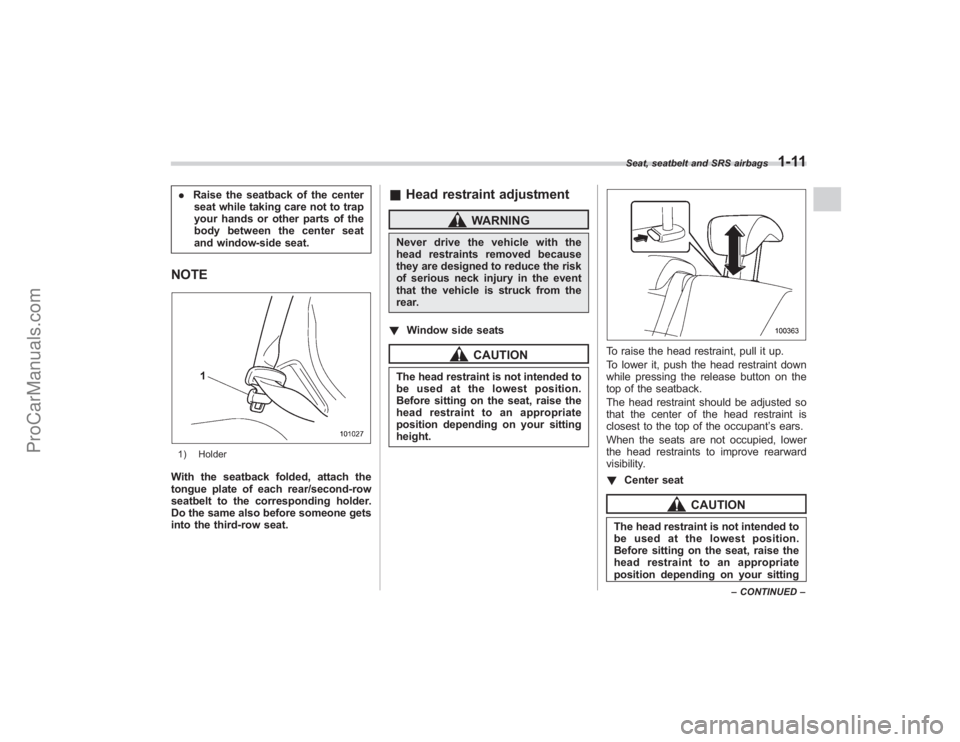
and window-side seat.NOTE1) HolderWith the seatback folded, attach the
tongue plate of each rear/second-row
seatbelt to the corresponding holder.
Do the same also before someone gets
into the third-row seat.
& Head restraint adjustment
WARNING
Never drive the vehicle with the
head restraints removed because
they are designed to reduce the risk
of serious neck injury in the event
that the vehicle is struck from the
rear.
! Window side seats
CAUTION
The head restraint is not intended to
be used at the lowest position.
Before sitting on the seat, raise the
head restraint to an appropriate
position depending on your sitting
height.
To raise the head restraint, pull it up.
To lower it, push the head restraint down
while pressing the release button on the
top of the seatback.
The head restraint should be adjusted so
that the center of the head restraint is
closest to the top of the occupant ’s ears.
When the seats are not occupied, lower
the head restraints to improve rearward
visibility.
! Center seat
CAUTION
The head restraint is not intended to
be used at the lowest position.
Before sitting on the seat, raise the
head restraint to an appropriate
position depending on your sittingSeat, seatbelt and SRS airbags
1-11
–CONTINUED –
ProCarManuals.com
Page 39 of 409
&Head restraint adjustment
WARNING
Never drive the vehicle with the
head restraints removed because
they are designed to reduce the risk
of serious neck injury in the event
that the vehicle is struck from the
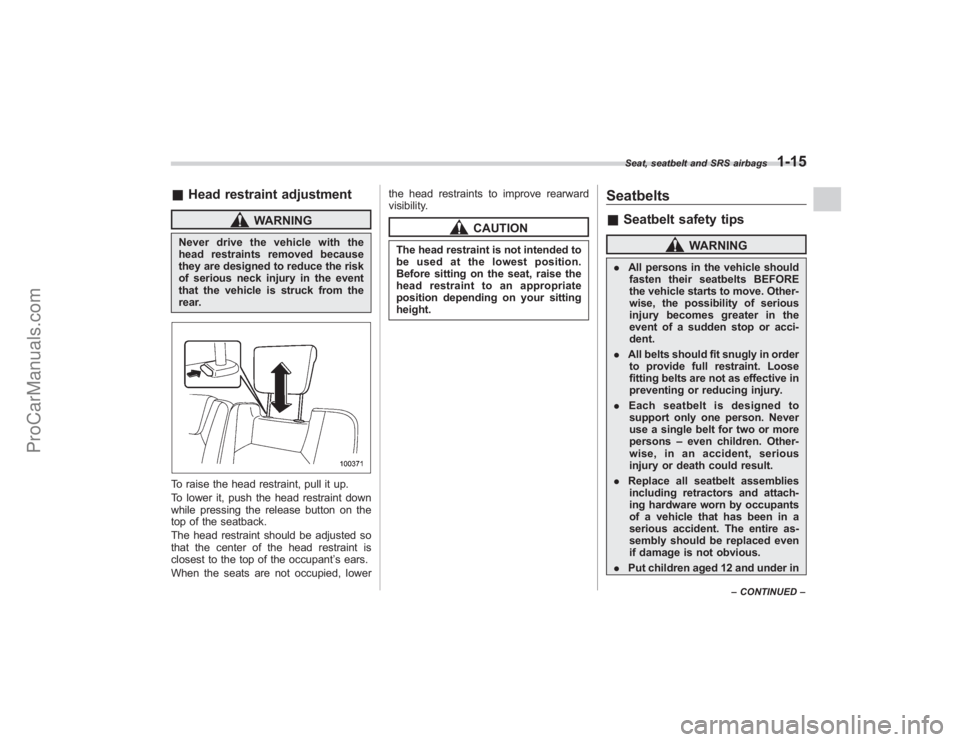
rear.To raise the head restraint, pull it up.
To lower it, push the head restraint down
while pressing the release button on the
top of the seatback.
The head restraint should be adjusted so
that the center of the head restraint is
closest to the top of the occupant ’s ears.
When the seats are not occupied, lower the head restraints to improve rearward
visibility.
CAUTION
The head restraint is not intended to
be used at the lowest position.
Before sitting on the seat, raise the
head restraint to an appropriate
position depending on your sitting
height.
Seatbelts&
Seatbelt safety tips
WARNING
. All persons in the vehicle should
fasten their seatbelts BEFORE
the vehicle starts to move. Other-
wise, the possibility of serious
injury becomes greater in the
event of a sudden stop or acci-
dent.
. All belts should fit snugly in order
to provide full restraint. Loose
fitting belts are not as effective in
preventing or reducing injury.
. Each seatbelt is designed to
support only one person. Never
use a single belt for two or more
persons –even children. Other-
wise, in an accident, serious
injury or death could result.
. Replace all seatbelt assemblies
including retractors and attach-
ing hardware worn by occupants
of a vehicle that has been in a
serious accident. The entire as-
sembly should be replaced even
if damage is not obvious.
. Put children aged 12 and under inSeat, seatbelt and SRS airbags
1-15
–CONTINUED –
ProCarManuals.com
Page 64 of 409
1-40
Seat, seatbelt and SRS airbags
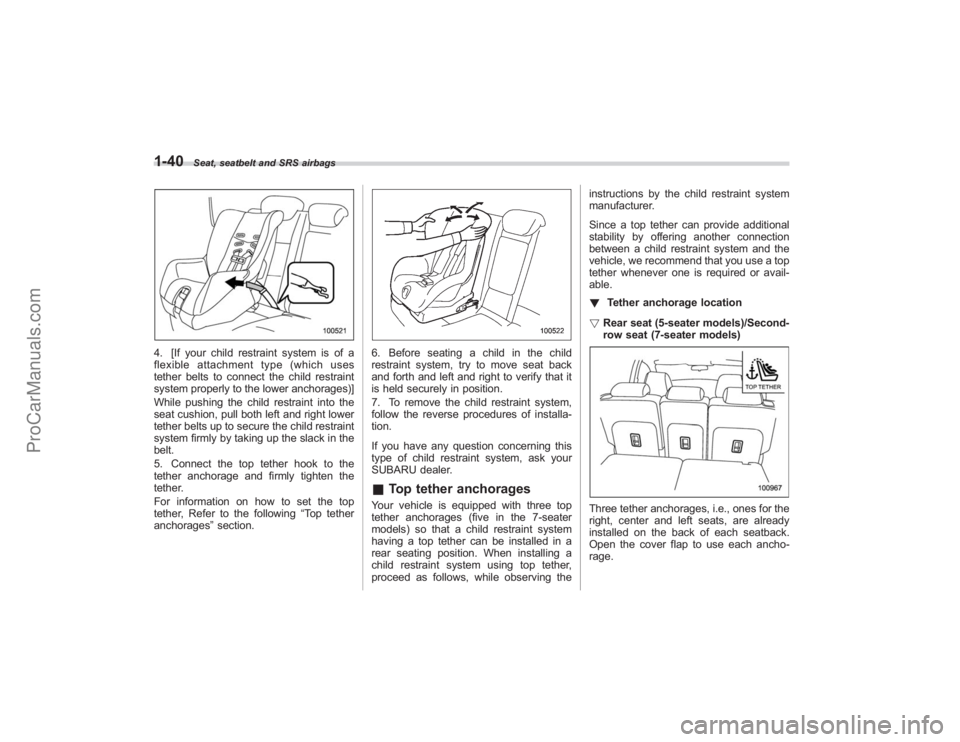
4. [If your child restraint system is of a
flexible attachment type (which uses
tether belts to connect the child restraint
system properly to the lower anchorages)]
While pushing the child restraint into the
seat cushion, pull both left and right lower
tether belts up to secure the child restraint
system firmly by taking up the slack in the
belt.
5. Connect the top tether hook to the
tether anchorage and firmly tighten the
tether.
For information on how to set the top
tether, Refer to the following“Top tether
anchorages ”section.
6. Before seating a child in the child
restraint system, try to move seat back
and forth and left and right to verify that it
is held securely in position.
7. To remove the child restraint system,
follow the reverse procedures of installa-
tion.
If you have any question concerning this
type of child restraint system, ask your
SUBARU dealer.& Top tether anchoragesYour vehicle is equipped with three top
tether anchorages (five in the 7-seater
models) so that a child restraint system
having a top tether can be installed in a
rear seating position. When installing a
child restraint system using top tether,
proceed as follows, while observing the instructions by the child restraint system
manufacturer.
Since a top tether can provide additional
stability by offering another connection
between a child restraint system and the
vehicle, we recommend that you use a top
tether whenever one is required or avail-
able.
!
Tether anchorage location
! Rear seat (5-seater models)/Second-
row seat (7-seater models)
Three tether anchorages, i.e., ones for the
right, center and left seats, are already
installed on the back of each seatback.
Open the cover flap to use each ancho-
rage.
ProCarManuals.com
Page 76 of 409
1-52
Seat, seatbelt and SRS airbags
!Conditions in which front passen-
ger’s SRS frontal airbag is not
activated
The front passenger ’s SRS frontal airbag
will not be activated when any of the
following conditions are met regarding the
front passenger ’s seat:
. The seat is empty.
. The seat is equipped with a rearward
facing child restraint system and an infant
is restrained with it. (See WARNING that
follows.)
. The seat is equipped with a forward
facing child restraint system and a small
child is restrained with it. (See WARNING
that follows.)
. The seat is equipped with a booster
seat and a small child is in the booster
seat. (See WARNING that follows.)
. The seat is relieved of the occupant
load for a time exceeding the predeter-
mined monitoring time period.
. The seat is occupied by a child who
has outgrown a child restraint system
(See WARNING that follows.) or by a
small adult.
. The front passenger ’s occupant detec-
tion system is faulty.
WARNING
NEVER INSTALL A REARWARD FA-
CING CHILD SEAT IN THE FRONT
PASSENGER ’S SEAT EVEN IF THE
FRONT PASSENGER ’S SRS FRON-
TAL AIRBAG IS DEACTIVATED. Be
sure to install it in one of the rear
seating positions recommended in
this Owner ’s Manual in a correct
manner. Also, it is strongly recom-
mended that any forward facing
child seat or booster seat be in-
stalled in one of the rear seating
positions recommended in this
Owner ’s Manual, and that even
children who have outgrown a child
restraint system be also seated in a
REAR seat. This is because children
sitting in the front passenger ’s seat
may be killed or severely injured
should the front passenger ’s SRS
frontal airbag deploy. REAR seats
are the safest place for children.
When the front passenger ’s seat is occu-
pied by a child, observe the following
precautions. Failure to do so may increase
the load on the front passenger ’s seat,
activating the front passenger ’sSRS
frontal airbag even though that seat is
occupied by a child. .
Do not place any article on the seat
other than the child occupant and a child
restraint system.
. Do not place more than one child on
the seat.
. Do not install any accessory such as a
table or TV onto the seatback.
. Do not store a heavy load in the
seatback pocket.
. Do not allow the rear/second-row seat
occupant to place his/her hands or legs on
the front passenger ’s seatback, or allow
him/her to pull the seatback.
! If the front passenger ’s frontal air-
bag ON indicator illuminates and the
OFF indicator extinguishes even
when an infant or a small child is in
a child restraint system (including
booster seat)
Turn the ignition switch to the “LOCK”
position if the front passenger ’s frontal
airbag ON indicator illuminates and the
OFF indicator extinguishes even when an
infant or a small child is in a child restraint
system (including booster seat). Remove
the child restraint system from the seat. By
referring to the child restraint manufac-
turer ’s recommendations as well as the
child restraint system installation proce-
dures in the “Child restraint systems ”
section in this chapter, correctly install
ProCarManuals.com
Page 321 of 409
Cleaning the interiorUse a soft, damp cloth to clean the climate
control panel, audio equipment, instru-
ment panel, center console, combination
meter panel, and switches. (Do not use
organic solvents.)&Seat fabricRemove loose dirt, dust or debris with a
vacuum cleaner. If the dirt is caked on the
fabric or hard to remove with a vacuum
cleaner, use a soft blush then vacuum it.
Wipe the fabric surface with a tightly
wrung cloth and dry the seat fabric
thoroughly. If the fabric is still dirty, wipe
using a solution of mild soap and luke-
warm water then dry thoroughly.
If the stain does not come out, try a
commercially-available fabric cleaner. Use
the cleaner on a hidden place and make
sure it does not affect the fabric adversely.
Use the cleaner according to its instruc-
tions.NOTEWhen cleaning the seat, do not use
benzine, paint thinner, or any similar
materials.
&Leather seat materialsThe leather used by SUBARU is a high
quality natural product which will retain its
distinctive appearance and feel for many
years with proper care.
Allowing dust or road dirt to build up on the
surface can cause the material to become
brittle and to wear prematurely. Regular
cleaning with a soft, moist, natural fiber
cloth should be performed monthly, taking
care not to soak the leather or allow water
to penetrate the stitched seams.
A mild detergent suitable for cleaning
woolen fabrics may be used to remove
difficult dirt spots, rubbing with a soft, dry
cloth afterwards to restore the luster. If
your SUBARU is to be parked for a long
time in bright sunlight, it is recommended
that the seats and headrests be covered,
or the windows shaded, to prevent fading
or shrinkage.
Minor surface blemishes or bald patches
may be treated with a commercial leather
spray lacquer. You will discover that each
leather seat section will develop soft folds
or wrinkles, which is characteristic of
genuine leather.&Synthetic leather upholsteryThe synthetic leather material used on the
SUBARU may be cleaned using mild soap or detergent and water, after first vacuum-
ing or brushing away loose dirt. Allow the
soap to soak in for a few minutes and wipe
off with a clean, damp cloth. Commercial
foam-type cleaners suitable for synthetic
leather materials may be used when
necessary.
NOTEStrong cleaning agents such as sol-
vents, paint thinners, window cleaner
or gasoline must never be used on
leather or synthetic interior materials.&
Climate control panel, audio
panel, instrument panel,
console panel, switches,
combination meter, and other
plastic surfaceUse a soft, damp cloth to clean the climate
control panel, audio equipment, instru-
ment panel, center console, combination
meter panel, and switches.NOTEDo not use organic solvents such as
paint thinners or gasoline, or strong
cleaning agents that contain those
solvents.
Appearance care
10-5
–CONTINUED –
ProCarManuals.com