2008 SUBARU TRIBECA automatic transmission fluid
[x] Cancel search: automatic transmission fluidPage 133 of 409

NOTEThis light also comes on when the fuel
filler cap is not tightened until it clicks.
If you have recently refueled your vehicle,
the cause of the CHECK ENGINE warning
light/malfunction indicator lamp coming on
could be a loose or missing fuel filler cap.
Remove the cap and retighten it until it
clicks. Make sure nothing is interfering
with the sealing of the cap. Tightening the
cap will not make the CHECK ENGINE
warning light turn off immediately. It may
take several driving trips. If the light does
not go out, take your vehicle to your
authorized SUBARU dealer immediately.
!If the light is blinking:
If the light is blinking while driving, an
engine misfire condition has been de-
tected which may damage the emission
control system.
To prevent serious damage to the emis-
sion control system, you should do the
following.
. Reduce vehicle speed.
. Avoid hard acceleration.
. Avoid steep uphill grades.
. Reduce the amount of cargo, if possi-
ble.
. Stop towing a trailer as soon as
possible. The CHECK ENGINE warning light may
stop blinking and come on steadily after
several driving trips. You should have your
vehicle checked by an authorized
SUBARU dealer immediately.
&
Charge warning light
If this light comes on when the engine is
running, it may indicate that the charging
system is not working properly.
If the light comes on while driving or does
not go out after the engine starts, stop the
engine at the first safe opportunity and
check the alternator belt. If the belt is
loose, broken or if the belt is in good
condition but the light remains on, contact
your nearest SUBARU dealer immedi-
ately.&
Oil pressure warning
light
CAUTION
Do not operate the engine with the
oil pressure warning light on. This
may cause serious engine damage.
If this light comes on when the engine is
running, it may indicate that the engine oil
pressure is low and the lubricating system
is not working properly. If the light comes on while driving or does
not go out after the engine starts, stop the
engine at the first safe opportunity and
check the engine oil level. If the oil level is
low, add oil immediately. If the engine oil is
at the proper level but the light remains on,
contact your nearest SUBARU dealer
immediately.
&
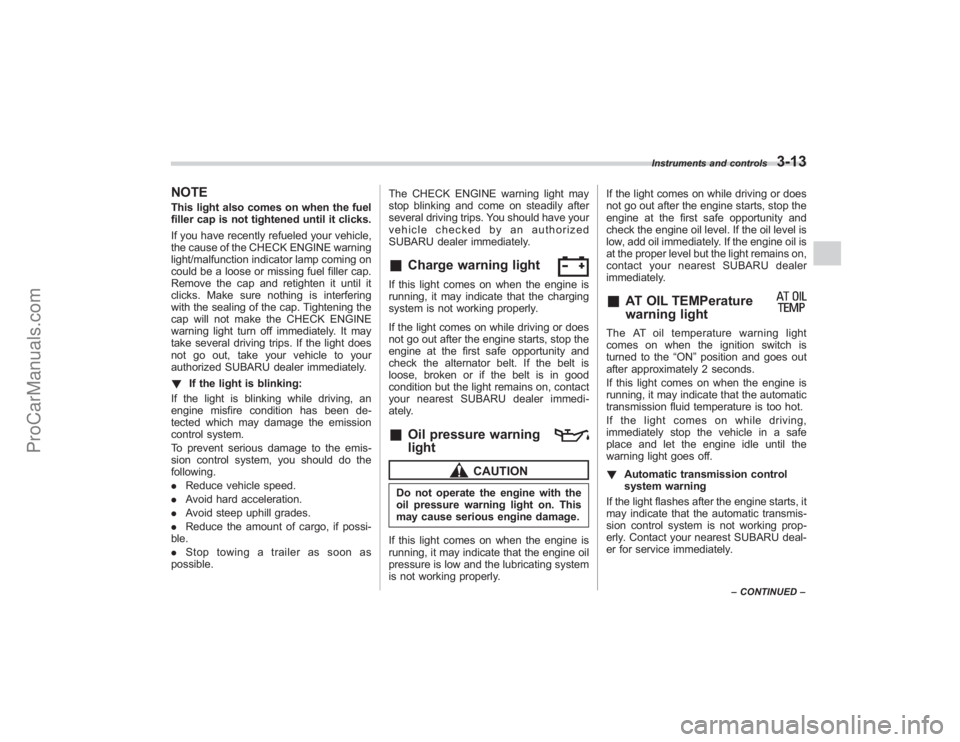
AT OIL TEMPerature
warning light
The AT oil temperature warning light
comes on when the ignition switch is
turned to the
“ON”position and goes out
after approximately 2 seconds.
If this light comes on when the engine is
running, it may indicate that the automatic
transmission fluid temperature is too hot.
If the light comes on while driving,
immediately stop the vehicle in a safe
place and let the engine idle until the
warning light goes off.
! Automatic transmission control
system warning
If the light flashes after the engine starts, it
may indicate that the automatic transmis-
sion control system is not working prop-
erly. Contact your nearest SUBARU deal-
er for service immediately.
Instruments and controls
3-13
– CONTINUED –
ProCarManuals.com
Page 156 of 409

3-36
Instruments and controls
speed is low; shorter when the vehicle
speed is high).
When you subsequently move the selec-
tor lever of the automatic transmission to
the“R ”position, the rear wiper will switch
to continuous operation. When you move
the selector lever from the “R”position to
some other position, the rear wiper will
return to intermittent operation.
! Washer
To wash the rear window while the rear
wiper is operating, turn the knob on the
end of the wiper control lever upward to
the “
”position. The washer fluid sprays
until you release the knob.
To wash the rear window when the rear
wiper is not in use, turn the knob on the
end of the wiper control lever downward to
the “”position. The washer fluid sprays
and the wiper operates until you release
the knob.
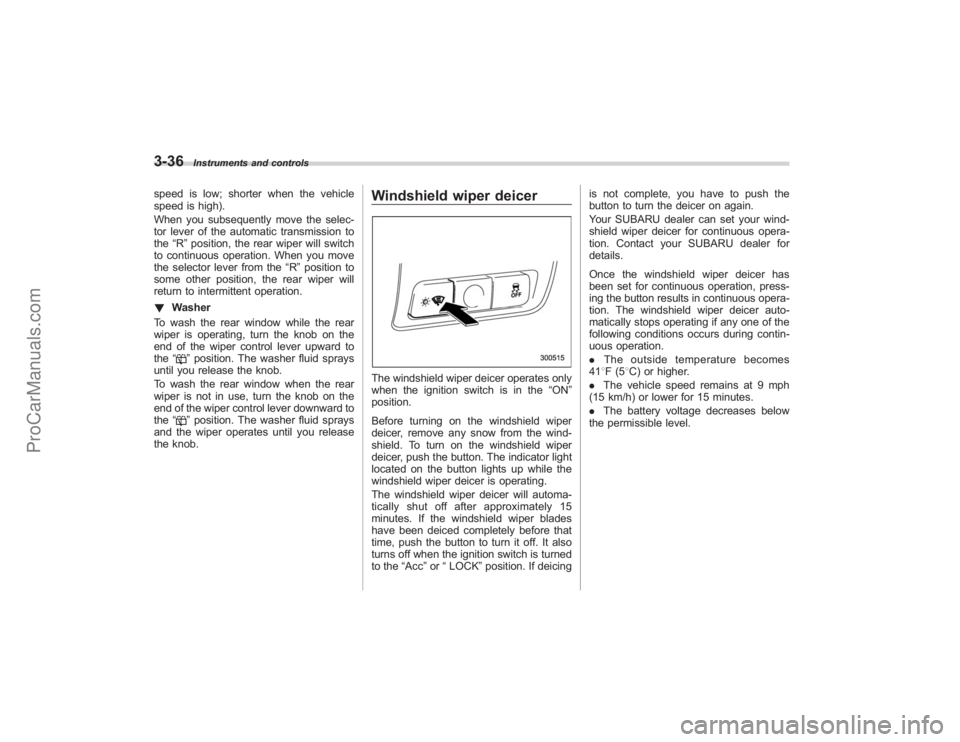
Windshield wiper deicerThe windshield wiper deicer operates only
when the ignition switch is in the “ON”
position.
Before turning on the windshield wiper
deicer, remove any snow from the wind-
shield. To turn on the windshield wiper
deicer, push the button. The indicator light
located on the button lights up while the
windshield wiper deicer is operating.
The windshield wiper deicer will automa-
tically shut off after approximately 15
minutes. If the windshield wiper blades
have been deiced completely before that
time, push the button to turn it off. It also
turns off when the ignition switch is turned
to the “Acc”or “LOCK” position. If deicing is not complete, you have to push the
button to turn the deicer on again.
Your SUBARU dealer can set your wind-
shield wiper deicer for continuous opera-
tion. Contact your SUBARU dealer for
details.
Once the windshield wiper deicer has
been set for continuous operation, press-
ing the button results in continuous opera-
tion. The windshield wiper deicer auto-
matically stops operating if any one of the
following conditions occurs during contin-
uous operation.
.
The outside temperature becomes
41 8F(5 8C) or higher.
. The vehicle speed remains at 9 mph
(15 km/h) or lower for 15 minutes.
. The battery voltage decreases below
the permissible level.
ProCarManuals.com
Page 246 of 409

7-12
Starting and operating
on the old batteries before removing them
to ensure that the new batteries are
inserted properly (battery“+”should be
pointed away from the transmitter circuit
board on both batteries).
3. Carefully snap the case halves back
together, then test the remote control.NOTEThis device complies with Part 15 of
the FCC Rules and with RSS-210 of
Industry Canada. Operation is subject
to the following two conditions: (1) This
device may not cause harmful inter-
ference, and (2) this device must
accept any interference received, in-
cluding interference that may cause
undesired operation.
Changes or modifications not ex-
pressly approved by the party respon-
sible for compliance could void the
user ’s authority to operate the equip-
ment.
Automatic transmissionThe automatic transmission is electroni-
cally controlled and provides 5 forward
speeds and 1 reverse speed. Also, it has a
manual mode and a SPORT mode.
WARNING
Do not shift from the “P ” or “N ”
position into the “D ” or “R ” position
while depressing the accelerator
pedal. This may cause the vehicle
to jump forward or backward.
CAUTION
. Shift into the “P ” or “R ” position
only after the vehicle is comple-
tely stopped. Shifting while the
vehicle is moving may cause
damage to the transmission.
. Do not race the engine for more
than 5 seconds in any position
except the “N ” or “P ” position
when the brake is set or when
chocks are used in the wheels.
This may cause the automatic
transmission fluid to overheat.
. Avoid shifting from one of the
forward driving positions into the “
R ” position or vice versa until
the vehicle has completely
stopped. Such shifting may
cause damage to the transmis-
sion.
. When parking the vehicle, first
securely apply the parking brake
and then place the selector lever
in the “P ” position. Avoid parking
for a long time with the selector
lever in any other position as
doing so could result in a dead
battery.
NOTE. When the engine coolant tempera-
ture is still low, your vehicle ’s auto-
matic transmission will up-shift at high-
er engine speeds than when the cool-
ant temperature is sufficiently high in
order to shorten the warm-up time and
improve driveability. The gearshift tim-
ing will automatically shift to the nor-
mal timing after the engine has warmed
up.
. Immediately after ATF (automatic
transmission fluid) is replaced, you
may feel that the automatic transmis-
sion operation is somewhat unusual.
This results from invalidation of data
which the on-board computer has
ProCarManuals.com
Page 250 of 409

7-16
Starting and operating
.The transmission does not automa-
tically shift up in the manual mode.
Perform gearshifts in accordance with
road conditions so that the tachometer
needle does not enter the red zone. If
the engine speed reaches a predeter-
mined level, a fuel-cut function will
operate. Shift up if this happens. Also,
the transmission may automatically
shift up to protect the engine.
. If you attempt to shift down when
the engine speed is too high, i.e., when
a downshift would push the tachometer
needle beyond the red zone, beeps will
be emitted to warn you that the down-
shift is not possible.
. If you attempt to shift up when the
vehicle speed is too low, the transmis-
sion will not respond.
. You can perform a skip-shift (for
example, from 4th to 2nd) by operating
the selector lever twice in rapid suc-
cession.
. The transmission automatically se-
lects 1st gear when the vehicle stops
moving.
. If the temperature of the automatic
transmission fluid becomes too high,
the “AT OIL TEMP ”warning light will
come on and upshifts to 5th gear will
not be possible. Immediately stop the
vehicle in a safe place and let the
engine idle until the warning light goes off.
&
Maximum speeds
WARNING
When down shifting, ensure that the
vehicle is not travelling at a speed
exceeding the Maximum Allowable
Speed for the gear which is about to
be selected. Failure to observe this
precaution can lead to engine over-
revving and this in turn can result in
engine damage.
In addition, sudden application of
engine braking caused by down
shifting when the vehicle is travel-
ling on a slippery surface can lead
to wheel locking; as a consequence,
control of the vehicle may be lost
and the risk of an accident in-
creased.
The following tables show the maximum
speeds that are possible with each differ-
ent gear.
When down shifting, it is important to
confirm that the current vehicle speed is
not in excess of the Maximum Allowable
Speed of the gear which is about to be
selected.
Position mph (km/h)
1 28 (45)
2 53 (85)
3 87 (140)
Never exceed posted speed limits.
NOTE. In order to prevent over-revving
during acceleration of the vehicle, the
transmission will automatically shift to
the next highest gear if the Maximum
Allowable Speed for the current gear is
exceeded.
. Similarly, in order to prevent over-
revving during deceleration of the
vehicle, the transmission will remain
in the current gear if the speed of the
vehicle is in excess of the Maximum
Allowable Speed for the gear to which
the selector lever has been moved.& Driving tips. On a road surface where there is a risk
of wheelspin (for example, a snow- or
gravel-covered road), you can pull away
from a standstill safely and easily by first
selecting the 2nd gear of the manual
mode.
. Always apply the foot or parking brake
when the vehicle is stopped in the “D”or
ProCarManuals.com
Page 295 of 409

.Backing up with a trailer is difficult and
takes practice. When backing up with a
trailer, never accelerate or steer rapidly.
When turning back, grip the bottom of the
steering wheel with one hand and turn it to
the left for a left turn, and turn it to the right
for a right turn.
. If the ABS warning light illuminates
while the vehicle is in motion, stop towing
the trailer and have repairs performed
immediately by the nearest SUBARU
dealer.
! Driving on grades
. Before going down a steep hill, slow
down and shift into lower gear (if neces-
sary, use 1st gear) in order to utilize the
engine braking effect and prevent over-
heating of your vehicle’ s brakes. Do not
make sudden downshifts.
. When driving uphill in hot weather, the
air conditioner may turn off automatically
to protect the engine from overheating.
. When driving uphill in hot weather, pay
attention to the water temperature gauge
pointer and AT OIL TEMP warning light
since the engine and transmission are
relatively prone to overheating under
these conditions. If the water temperature
gauge pointer approaches the OVER-
HEAT zone or the AT OIL TEMP warning
light illuminates, immediately switch off the air conditioner and stop the vehicle at the
nearest safe place. Refer to the
“Engine
overheating ”section in chapter 9, and
“Warning and indicator lights ”section in
chapter 3.
NOTEThe temperature of engine coolant is
less likely to rise to the OVERHEAT
zone in the “D ” position than in the
manual mode position.
. Avoid using the accelerator pedal to
stay stationary on an uphill slope instead
of using the parking brake or foot brake.
That may cause the transmission fluid to
overheat.
! Parking on a grade
Always block the wheels under both
vehicle and trailer when parking. Apply
the parking brake firmly. You should not
park on a hill or slope. But if parking on a
hill or slope cannot be avoided, you
should take the following steps:
1. Apply the brakes and hold the pedal
down.
2. Have someone place wheel blocks
under both the vehicle and trailer wheels.
3. When the wheel blocks are in place,
release the regular brakes slowly until the
blocks absorb the load.
4. Apply the regular brakes and then apply the parking brake; slowly release
the regular brakes.
5. Shift into
“P”and shut off the engine.
Driving tips
8-27
ProCarManuals.com
Page 323 of 409

Maintenance schedule................................... 11-3
Maintenance precautions............................... 11-3
Before checking or servicing in the engine compartment ................................................. 11-4
When you do checking or servicing in the engine compartment while the engine is running ....... 11-4
Engine hood................................................... 11-4
Engine compartment overview ...................... 11-6
Engine oil ........................................................ 11-7
Checking the oil level ...................................... 11-7
Changing the oil and oil filter ........................... 11-8
Recommended grade and viscosity ................. 11-9
Recommended grade and viscosity under severe driving conditions ....................................... 11-10
Cooling system............................................ 11-11
Hose and connections ................................... 11-11
Engine coolant .............................................. 11-11
Air cleaner element ...................................... 11-14
Replacing the air cleaner element .................. 11-14
Spark plugs.................................................. 11-15
Recommended spark plugs ........................... 11-15
Drive belts.................................................... 11-15
Automatic transmission fluid ...................... 11-15
Checking the fluid level................................. 11-15
Recommended fluid ...................................... 11-16
Front differential gear oil ............................. 11-17
Checking the oil level.................................... 11-17
Recommended grade and viscosity ............... 11-17
Rear differential gear oil.............................. 11-18
Checking the gear oil level ............................ 11-18 Recommended grade and viscosity
............... 11-18
Power steering fluid..................................... 11-19
Checking the fluid level ................................. 11-19
Recommended fluid ...................................... 11-20
Brake fluid..................................................... 11-20
Checking the fluid level ................................. 11-20
Recommended brake fluid ............................ 11-21
Brake booster............................................... 11-21
Brake pedal ................................................... 11-21
Checking the brake pedal free play ............... 11-21
Checking the brake pedal reserve distance ..................................................... 11-22
Replacement of brake pad and lining ......... 11-22
Breaking-in of new brake pads and
linings ........................................................ 11-22
Parking brake stroke .................................... 11-23
Tires and wheels ........................................... 11-23
Types of tires................................................ 11-23
Tire pressure monitoring system (TPMS) ....... 11-24
Tire inspection .............................................. 11-25
Tire pressures and wear ............................... 11-25
Wheel balance .............................................. 11-27
Wear indicators ............................................ 11-28
Tire rotation direction mark ........................... 11-28
Tire rotation .................................................. 11-28
Tire replacement ........................................... 11-29
Wheel replacement ....................................... 11-29
Aluminum wheels......................................... 11-30
Chrome plated wheels (if equipped) ........... 11-31
Windshield washer fluid ............................... 11-32
Maintenance and service
11
ProCarManuals.com
Page 328 of 409

11-6
Maintenance and service
Engine compartment overview
1) Air cleaner element (page 11-14)
2) Power steering fluid reservoir(page 11-19)
3) Differential gear oil level gauge (page 11-17)
4) Automatic transmission fluid level gauge (page 11-15)
5) Brake fluid reservoir (page 11-20)
6) Fuse box (page 11-38)
7) Battery (page 11-37)
8) Windshield washer tank (page 11-32)
9) Radiator cap (page 11-11)
10) Engine oil filler cap (page 11-7)
11) Engine coolant reservoir (page 11-11)
12) Engine oil level gauge (page 11-7)
ProCarManuals.com
Page 337 of 409

Spark plugsIt may be difficult to replace the spark
plugs. It is recommended that you have
the spark plugs replaced by your
SUBARU dealer.
The spark plugs should be replaced
according to the maintenance schedule
in the“Warranty and Maintenance Book-
let ”.& Recommended spark plugsSILFR6A (NGK)
Drive beltsThe alternator, power steering pump, and
air conditioner compressor depend on
drive belts. Satisfactory performance re-
quires that belt tension be correct.
It is unnecessary to check belt tension
periodically because your engine is
equipped with an automatic belt tension
adjuster. However, replacement of the belt
should be done according to the main-
tenance schedule in the “Warranty and
Maintenance Booklet ”. Consult your
SUBARU dealer for replacement.
If a belt is loose, cracked, or worn, contact
your SUBARU dealer.
Automatic transmission fluid& Checking the fluid levelThe automatic transmission fluid expands
largely as its temperature rises; the fluid
level differs according to fluid temperature.
Therefore, there are two different scales
for checking the level of hot fluid and cold
fluid on the dipstick.
Though the fluid level can be checked
without warming up the fluid on the
“COLD ”range, we recommend checking
the fluid level when the fluid is at operating
temperature.
! Checking the fluid level when the
fluid is hot
Check the fluid level monthly.
1. Drive the vehicle several miles to raise
the temperature of the transmission fluid
up to normal operating temperature; 158
to 1768 F (70 to 80 8C) is normal.
2. Park the vehicle on a level surface and
set the parking brake.
3. First shift the selector lever in each
position. Then shift it in the “P ” position,
and run the engine at idling speed.
Maintenance and service
11-15
– CONTINUED –
ProCarManuals.com