2008 SUBARU TRIBECA navigation system
[x] Cancel search: navigation systemPage 3 of 409
Warranties&Warranties for U.S.A.All SUBARU vehicles distributed by
Subaru of America, Inc. and sold at retail
by an authorized SUBARU dealer in the
United States come with the following
warranties:
. SUBARU Limited Warranty
. Emission Control Systems Warranty
. Emissions Performance Warranty
All warranty information, including details
of coverage and exclusions, is in the
“ Warranty and Maintenance Booklet ”.
Please read these warranties carefully.& Warranties for CanadaAll SUBARU vehicles distributed by
Subaru Canada, Inc. and sold at retail by
an authorized SUBARU dealer in Canada
come with the following warranties:
. SUBARU Limited Warranty
. Anti-Corrosion Warranty
. Emission Control Warranty
All warranty information, including details
of coverage and exclusions, is in the
“Warranty and Service Booklet ”. Please
read these warranties carefully.
CAUTION
. If your vehicle is equipped with a
navigation system and/or Rear
Seat Entertainment System, the
displays contain mercury. There-
fore, the displays of the naviga-
tion system and/or Rear Seat
Entertainment System must be
removed before vehicle disposal.
Once the displays have been
removed, please reuse, recycle
or dispose of them as hazardous
waste.
. If your vehicle is equipped with
High Intensity Discharge (HID)
headlights, the HID headlights
contain mercury. Therefore, it is
necessary to remove HID head-
lights before vehicle disposal.
Once removed, please reuse, re-
cycle or dispose of the HID head-
lights as hazardous waste.
How to use this Owner ’s
Manual& Using your Owner ’s ManualBefore you operate your vehicle, carefully
read this manual. To protect yourself and
extend the service life of your vehicle,
follow the instructions in this manual.
Failure to observe these instructions may
result in serious injury and damage to your
vehicle.
This manual is composed of fourteen
chapters. Each chapter begins with a brief
table of contents, so you can usually tell at
a glance if that chapter contains the
information you want.
Chapter 1: Seat, seatbelt and SRS
airbags
This chapter informs you how to use the
seat and seatbelt and contains precau-
tions for the SRS airbags.
Chapter 2: Keys and doors
This chapter informs you how to operate
the keys, locks and windows.
Chapter 3: Instruments and controls
This chapter informs you about the opera-
tion of instrument panel indicators and
how to use the instruments and other
switches.
1
– CONTINUED –
ProCarManuals.com
Page 24 of 409

22Function settingsA SUBARU dealer can change the settings of the functions shown in the following table to meet your personal requirements. Contact
the nearest SUBARU dealer for details. If your vehicle is equipped with navigation system, the settings for some of these functions can
be changed using the monitor. For details, please refer to the Owner’s Manual supplement for the monitor.Item Function Possible settingsDefault setting Page
Alarm system Alarm system Operation / Non-operationOperation 2-15
Monitoring start delay time (after closure of
doors) 0 second / 30 seconds
30 seconds 2-15
Impact sensor operation (only vehicles with
shock sensors (dealer option)) Operation / Non-operation
Non-operation 2-18
Passive arming Operation / Non-operationNon-operation 2-17
Remote keyless entry system Hazard warning flasher Operation / Non-operationOperation 2-7
Audible signal Operation / Non-operationOperation 2-10
Key lock-in prevention Key lock-in prevention Operation / Non-operationOperation 2-6
Rear window defogger Rear window defogger Operation for 15 minutes / Continuous
operation Operation for 15
minutes3-37
Windshield wiper deicer (if
equipped) Windshield wiper deicer
Operation for 15 minutes / Continuous
operation Operation for 15
minutes3-36
Map light/Dome light Operation in interlock with remote keyless
entry system OFF / Short / Normal / Long
Normal6-2
Battery drainage prevention
function Battery drainage prevention function Operation / Non-operation
Operation 2-6
ProCarManuals.com
Page 121 of 409
Ignition switch.................................................. 3-3
LOCK............................................................... 3-3
Acc.................................................................. 3-4
ON................................................................... 3-4
START ............................................................. 3-4
Key reminder chime ......................................... 3-4
Ignition switch light .......................................... 3-4
Hazard warning flasher .................................... 3-5
Meters and gauges. .......................................... 3-5
Combination meter illumination ........................ 3-5
Canceling the function for meter needle/gauge movement and combination meter sequential
illumination upon turning on the ignition
switch ............................................................ 3-5
Speedometer .................................................... 3-6
Odometer ......................................................... 3-6
Double trip meter ............................................. 3-7
Tachometer ...................................................... 3-7
Fuel gauge ....................................................... 3-8
Temperature gauge .......................................... 3-9
Warning and indicator lights ........................... 3-9
Seatbelt warning light and chime .................... 3-10
SRS airbag system warning light ..................... 3-11
Front passenger ’s frontal airbag ON and OFF
indicators ..................................................... 3-12
CHECK ENGINE warning light/Malfunction indicator lamp .............................................. 3-12
Charge warning light ...................................... 3-13
Oil pressure warning light .............................. 3-13
AT OIL TEMPerature warning light. .................. 3-13Rear differential oil temperature warning
light ............................................................. 3-14
Low tire pressure warning light ....................... 3-14
ABS warning light ........................................... 3-15
Brake system warning light ............................. 3-16
Low fuel warning light .................................... 3-17
Door open warning light ................................. 3-17
Windshield washer fluid warning light ............. 3-18
All-Wheel Drive warning light .......................... 3-18
Vehicle Dynamics Control operation indicator light ............................................................. 3-18
Vehicle Dynamics Control warning light/Traction Control system OFF indicator light ................ 3-18
Security indicator light .................................... 3-19
SPORT mode indicator light ............................ 3-20
Selector lever/Gear position indicator .............. 3-20
Turn signal indicator lights .............................. 3-20
High beam indicator light ................................ 3-20
Cruise control indicator light ........................... 3-20
Cruise control set indicator light ..................... 3-21
Headlight indicator light .................................. 3-21
Front fog light indicator light ........................... 3-21
Clock.............................................................. 3-21
Outside temperature indicator ...................... 3-22
Low outside temperature warning ................... 3-22
Multi function display (Vehicle without
Navigation System) .................................... 3-23
Current fuel consumption ............................... 3-23
Average fuel consumption .............................. 3-24
Driving range on remaining fuel ...................... 3-24
Journey time .................................................. 3-25
Instruments and controls
3
ProCarManuals.com
Page 141 of 409
ing driving, have the vehicle checked
by your nearest SUBARU dealer.&
Cruise control set in-
dicator light
The cruise control set indicator light
comes on when the ignition switch is
turned to the“ON”position and goes out
after approximately 3 seconds.
This light comes on when vehicle speed
has been set.&
Headlight indicator
light
This indicator light comes on when the
light switch is turned to the “
”position
(to turn on the parking lights) or to the
“
” position (to turn on the headlights).
&
Front fog light indicator
light
This indicator light is on while the front fog
lights are on.
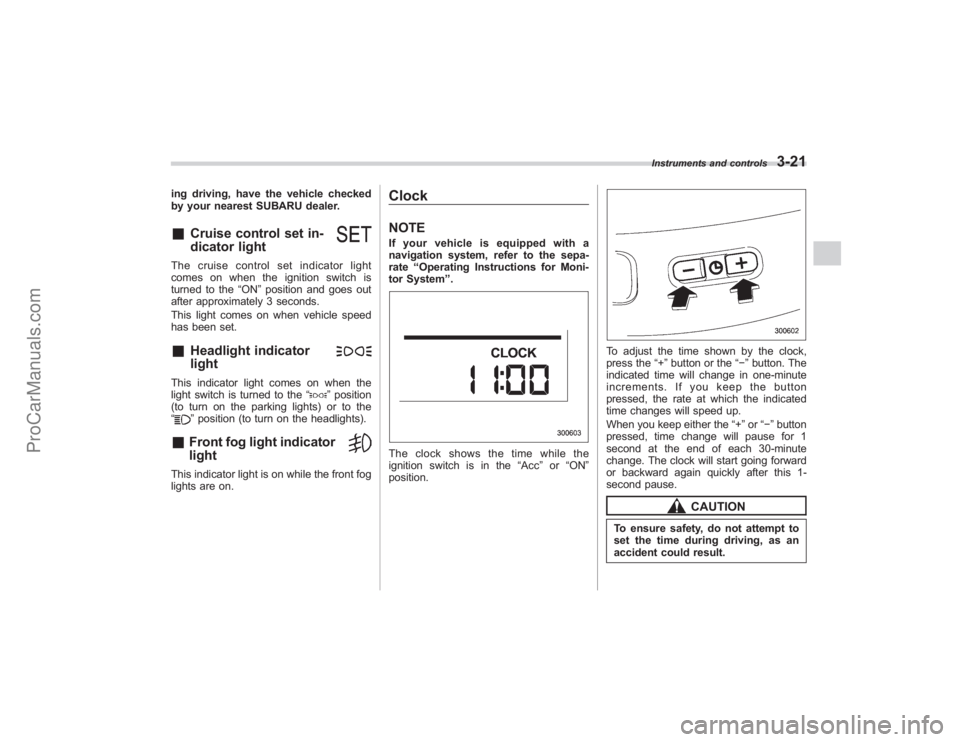
ClockNOTEIf your vehicle is equipped with a
navigation system, refer to the sepa-
rate “Operating Instructions for Moni-
tor System ”.The clock shows the time while the
ignition switch is in the “Acc”or “ON ”
position.
To adjust the time shown by the clock,
press the “+”button or the “−”button. The
indicated time will change in one-minute
increments. If you keep the button
pressed, the rate at which the indicated
time changes will speed up.
When you keep either the “+”or “− ” button
pressed, time change will pause for 1
second at the end of each 30-minute
change. The clock will start going forward
or backward again quickly after this 1-
second pause.
CAUTION
To ensure safety, do not attempt to
set the time during driving, as an
accident could result.
Instruments and controls
3-21
ProCarManuals.com
Page 142 of 409
3-22
Instruments and controls
Outside temperature indica-
torNOTEIf your vehicle is equipped with a
navigation system, refer to the sepa-
rate“Operating Instructions for Moni-
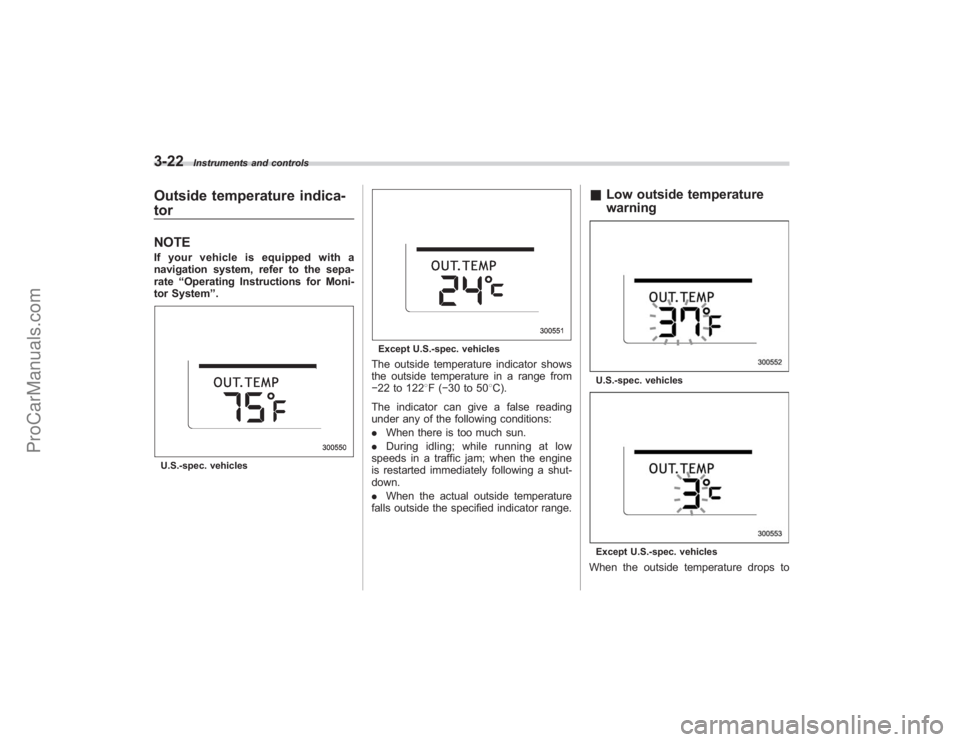
tor System ”.U.S.-spec. vehicles
Except U.S.-spec. vehiclesThe outside temperature indicator shows
the outside temperature in a range from
− 22 to 122 8F( −30 to 50 8C).
The indicator can give a false reading
under any of the following conditions:
. When there is too much sun.
. During idling; while running at low
speeds in a traffic jam; when the engine
is restarted immediately following a shut-
down.
. When the actual outside temperature
falls outside the specified indicator range.
& Low outside temperature
warningU.S.-spec. vehiclesExcept U.S.-spec. vehiclesWhen the outside temperature drops to
ProCarManuals.com
Page 143 of 409
378F(3 8C) or lower, the temperature
indication flashes to show that the road
surface may be frozen.
If the outside temperature drops to 37 8F
(3 8C) or lower while the display is giving
an indication other than the outside
temperature, the display switches to the
outside temperature indication and flashes
for 5 seconds before returning to its
original indication.
If the display is already indicating an
outside temperature of 37 8F(3 8C) or lower
when the ignition switch is turned to the
“ ON ”position, the indication does not
flash.NOTEThe outside temperature indication
may differ from the actual outside
temperature. The road surface freeze
warning indication should be treated
only as a guide. Be sure to check the
condition of the road surface before
driving.
Multi function display (Vehi-
cle without Navigation Sys-
tem)NOTE. If your vehicle is equipped with a
navigation system, refer to the sepa-
rate “Operating Instructions for Moni-
tor System ”.
. A liquid-crystal display is used in
the multi function display. You will find
its indications hard to see if you wear
polarized glasses.
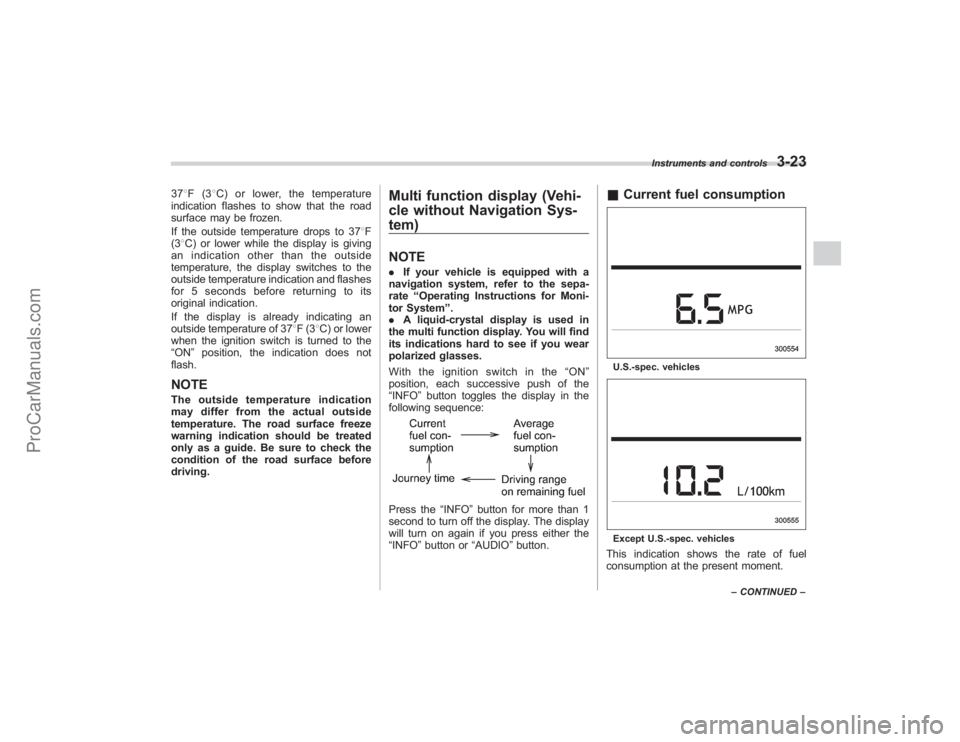
Withtheignitionswitchinthe“ ON”
position, each successive push of the
“INFO ”button toggles the display in the
following sequence:Press the “INFO”button for more than 1
second to turn off the display. The display
will turn on again if you press either the
“INFO ”button or “AUDIO”button.
& Current fuel consumptionU.S.-spec. vehiclesExcept U.S.-spec. vehiclesThis indication shows the rate of fuel
consumption at the present moment.
Instruments and controls
3-23
–CONTINUED –
ProCarManuals.com
Page 204 of 409
5-28
Audio
waveband will be displayed.
*2: Only when a CD is in the player.
*3: Only vehicle equipped with RSE (Rear Seat Entertainment)
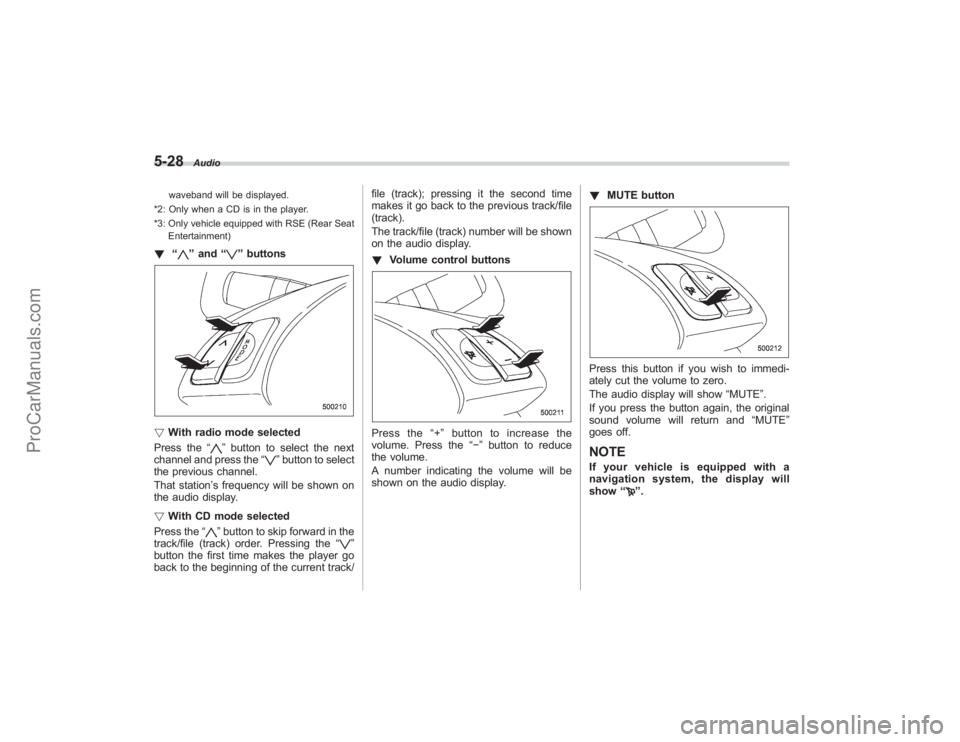
! “
”and “
”buttons
! With radio mode selected
Press the “
”button to select the next
channel and press the “
”button to select
the previous channel.
That station ’s frequency will be shown on
the audio display.
! With CD mode selected
Press the “
”button to skip forward in the
track/file (track) order. Pressing the “
”
button the first time makes the player go
back to the beginning of the current track/ file (track); pressing it the second time
makes it go back to the previous track/file
(track).
The track/file (track) number will be shown
on the audio display.
!
Volume control buttons
Press the “+ ” button to increase the
volume. Press the “−”button to reduce
the volume.
A number indicating the volume will be
shown on the audio display. !
MUTE button
Press this button if you wish to immedi-
ately cut the volume to zero.
The audio display will show “MUTE”.
If you press the button again, the original
sound volume will return and “MUTE ”
goes off.NOTEIf your vehicle is equipped with a
navigation system, the display will
show “
”.
ProCarManuals.com
Page 205 of 409
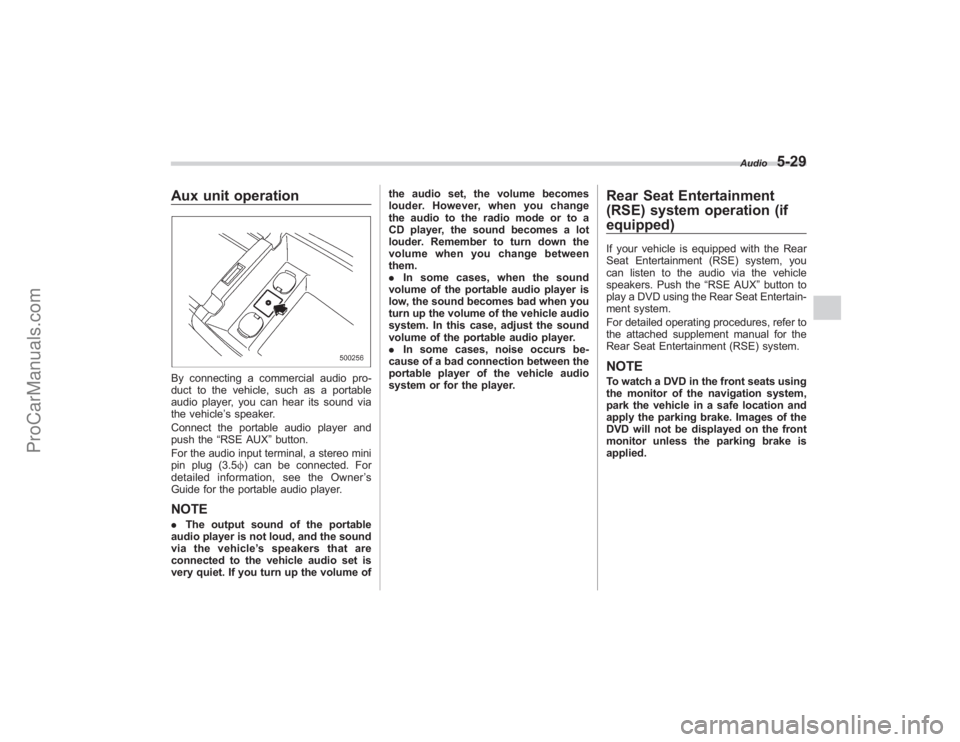
Aux unit operationBy connecting a commercial audio pro-
duct to the vehicle, such as a portable
audio player, you can hear its sound via
the vehicle’s speaker.
Connect the portable audio player and
push the “RSE AUX ”button.
For the audio input terminal, a stereo mini
pin plug (3.5 f) can be connected. For
detailed information, see the Owner ’s
Guide for the portable audio player.NOTE. The output sound of the portable
audio player is not loud, and the sound
via the vehicle ’s speakers that are
connected to the vehicle audio set is
very quiet. If you turn up the volume of the audio set, the volume becomes
louder. However, when you change
the audio to the radio mode or to a
CD player, the sound becomes a lot
louder. Remember to turn down the
volume when you change between
them.
.
In some cases, when the sound
volume of the portable audio player is
low, the sound becomes bad when you
turn up the volume of the vehicle audio
system. In this case, adjust the sound
volume of the portable audio player.
. In some cases, noise occurs be-
cause of a bad connection between the
portable player of the vehicle audio
system or for the player.
Rear Seat Entertainment
(RSE) system operation (if
equipped)If your vehicle is equipped with the Rear
Seat Entertainment (RSE) system, you
can listen to the audio via the vehicle
speakers. Push the “RSE AUX”button to
play a DVD using the Rear Seat Entertain-
ment system.
For detailed operating procedures, refer to
the attached supplement manual for the
Rear Seat Entertainment (RSE) system.NOTETo watch a DVD in the front seats using
the monitor of the navigation system,
park the vehicle in a safe location and
apply the parking brake. Images of the
DVD will not be displayed on the front
monitor unless the parking brake is
applied.
Audio
5-29
ProCarManuals.com