2008 SUBARU TRIBECA ECU
[x] Cancel search: ECUPage 291 of 409
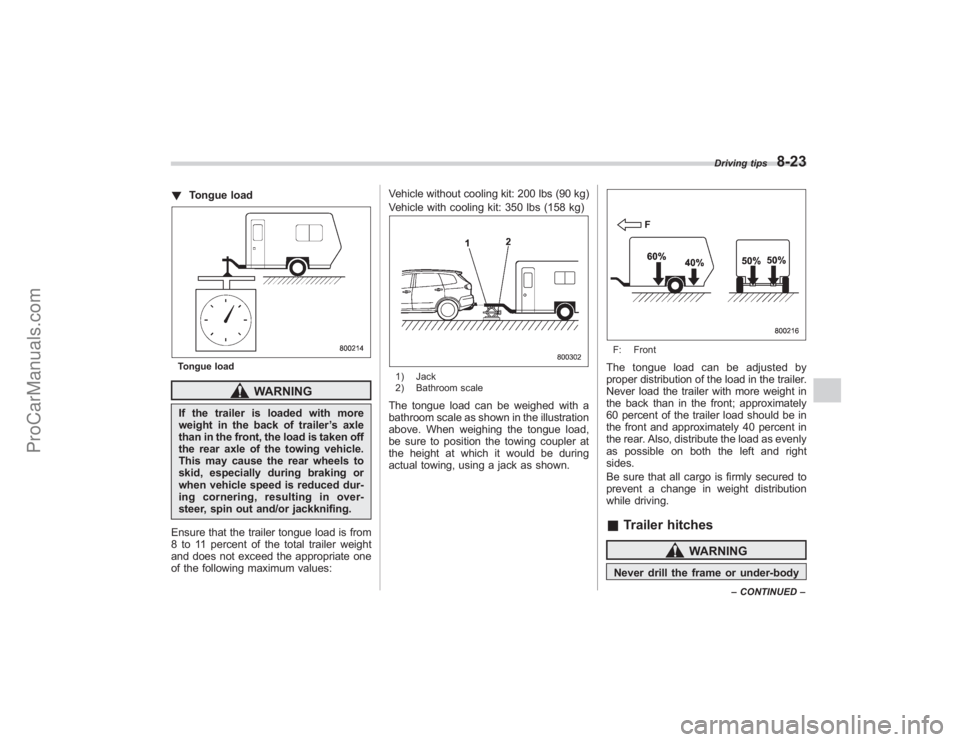
!Tongue loadTongue load
WARNING
If the trailer is loaded with more
weight in the back of trailer ’s axle
than in the front, the load is taken off
the rear axle of the towing vehicle.
This may cause the rear wheels to
skid, especially during braking or
when vehicle speed is reduced dur-
ing cornering, resulting in over-
steer, spin out and/or jackknifing.
Ensure that the trailer tongue load is from
8 to 11 percent of the total trailer weight
and does not exceed the appropriate one
of the following maximum values: Vehicle without cooling kit: 200 lbs (90 kg)
Vehicle with cooling kit: 350 lbs (158 kg)
1) Jack
2) Bathroom scaleThe tongue load can be weighed with a
bathroom scale as shown in the illustration
above. When weighing the tongue load,
be sure to position the towing coupler at
the height at which it would be during
actual towing, using a jack as shown.
F: FrontThe tongue load can be adjusted by
proper distribution of the load in the trailer.
Never load the trailer with more weight in
the back than in the front; approximately
60 percent of the trailer load should be in
the front and approximately 40 percent in
the rear. Also, distribute the load as evenly
as possible on both the left and right
sides.
Be sure that all cargo is firmly secured to
prevent a change in weight distribution
while driving.&
Trailer hitches
WARNING
Never drill the frame or under-body
Driving tips
8-23
–CONTINUED –
ProCarManuals.com
Page 293 of 409
create a traffic safety hazard.
For safety, always connect the towing
vehicle and trailer with trailer safety
chains. Pass the chains crossing each
other under the trailer tongue to prevent
the trailer from dropping onto the ground
in case the trailer tongue should discon-
nect from the hitch ball. Allow sufficient
slack in the chains taking tight-turn situa-
tions into account; however, be careful not
to let them drag on the ground.
For more information about the safety
chain connection, refer to the instructions
for your hitch and trailer.
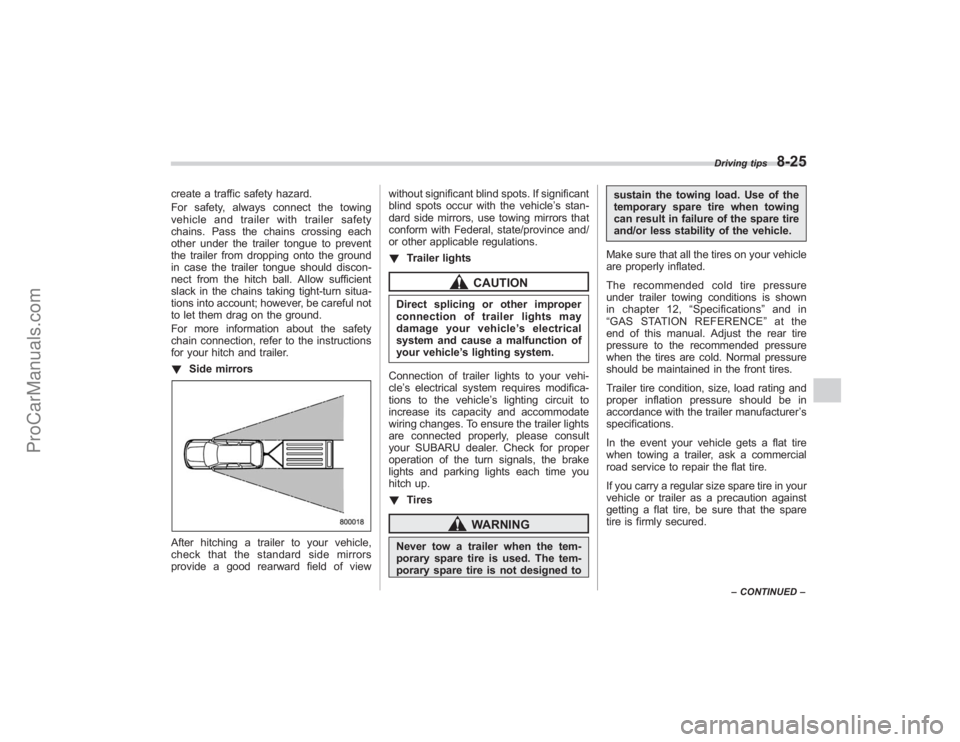
!Side mirrorsAfter hitching a trailer to your vehicle,
check that the standard side mirrors
provide a good rearward field of view without significant blind spots. If significant
blind spots occur with the vehicle’
s stan-
dard side mirrors, use towing mirrors that
conform with Federal, state/province and/
or other applicable regulations.
! Trailer lights
CAUTION
Direct splicing or other improper
connection of trailer lights may
damage your vehicle’ s electrical
system and cause a malfunction of
your vehicle ’s lighting system.
Connection of trailer lights to your vehi-
cle ’s electrical system requires modifica-
tions to the vehicle ’s lighting circuit to
increase its capacity and accommodate
wiring changes. To ensure the trailer lights
are connected properly, please consult
your SUBARU dealer. Check for proper
operation of the turn signals, the brake
lights and parking lights each time you
hitch up.
! Tires
WARNING
Never tow a trailer when the tem-
porary spare tire is used. The tem-
porary spare tire is not designed to sustain the towing load. Use of the
temporary spare tire when towing
can result in failure of the spare tire
and/or less stability of the vehicle.
Make sure that all the tires on your vehicle
are properly inflated.
The recommended cold tire pressure
under trailer towing conditions is shown
in chapter 12, “Specifications ”and in
“ GAS STATION REFERENCE ”at the
end of this manual. Adjust the rear tire
pressure to the recommended pressure
when the tires are cold. Normal pressure
should be maintained in the front tires.
Trailer tire condition, size, load rating and
proper inflation pressure should be in
accordance with the trailer manufacturer ’s
specifications.
In the event your vehicle gets a flat tire
when towing a trailer, ask a commercial
road service to repair the flat tire.
If you carry a regular size spare tire in your
vehicle or trailer as a precaution against
getting a flat tire, be sure that the spare
tire is firmly secured.
Driving tips
8-25
– CONTINUED –
ProCarManuals.com
Page 294 of 409
8-26
Driving tips
&Trailer towing tips
CAUTION
. Never exceed 45 mph (72 km/h)
when towing a trailer in hilly
country on hot days.
. When towing a trailer, steering,
stability, stopping distance and
braking performance will be dif-
ferent from normal operation. For
safety’ s sake, you should employ
extra caution when towing a
trailer and you should never
speed. You should also keep the
following tips in mind:
! Before starting out on a trip
. Check that the vehicle and vehicle-to-
hitch mounting are in good condition. If
any problems are apparent, do not tow the
trailer.
. Check that the vehicle sits horizontally
with the trailer attached. If the vehicle is
tipped sharply up at the front and down at
the rear, check the total trailer weight,
GVW, GAWs and tongue load again, then
confirm that the load and its distribution
are acceptable.
. Check that the tire pressures are
correct. .
Check that the vehicle and trailer are
connected properly. Confirm that
–the trailer tongue is connected
properly to the hitch ball.
– the trailer lights connector is con-
nected properly and trailer ’sbrake
lights illuminate when the vehicle ’s
brake pedal is pressed, and that the
trailer ’s turn signal lights flash when
the vehicle’ s turn signal lever is oper-
ated.
– the safety chains are connected
properly.
– all cargo in the trailer is secured
safely in position.
– the side mirrors provide a good
rearward field of view without a sig-
nificant blind spot.
. Sufficient time should be taken to learn
the “feel ”of the vehicle/trailer combination
before starting out on a trip. In an area free
of traffic, practice turning, stopping and
backing up.
! Driving with a trailer
. You should allow for considerably more
stopping distance when towing a trailer.
Avoid sudden braking because it may
result in skidding or jackknifing and loss of
control.
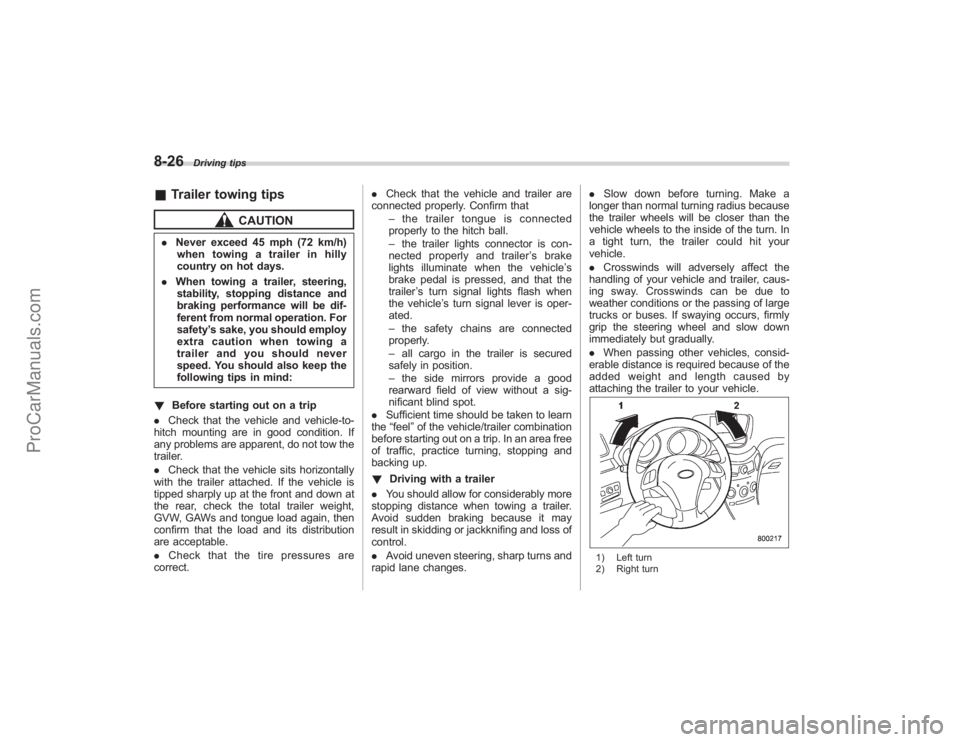
. Avoid uneven steering, sharp turns and
rapid lane changes. .
Slow down before turning. Make a
longer than normal turning radius because
the trailer wheels will be closer than the
vehicle wheels to the inside of the turn. In
a tight turn, the trailer could hit your
vehicle.
. Crosswinds will adversely affect the
handling of your vehicle and trailer, caus-
ing sway. Crosswinds can be due to
weather conditions or the passing of large
trucks or buses. If swaying occurs, firmly
grip the steering wheel and slow down
immediately but gradually.
. When passing other vehicles, consid-
erable distance is required because of the
added weight and length caused by
attaching the trailer to your vehicle.
1) Left turn
2) Right turn
ProCarManuals.com
Page 300 of 409
9-4
In case of emergency
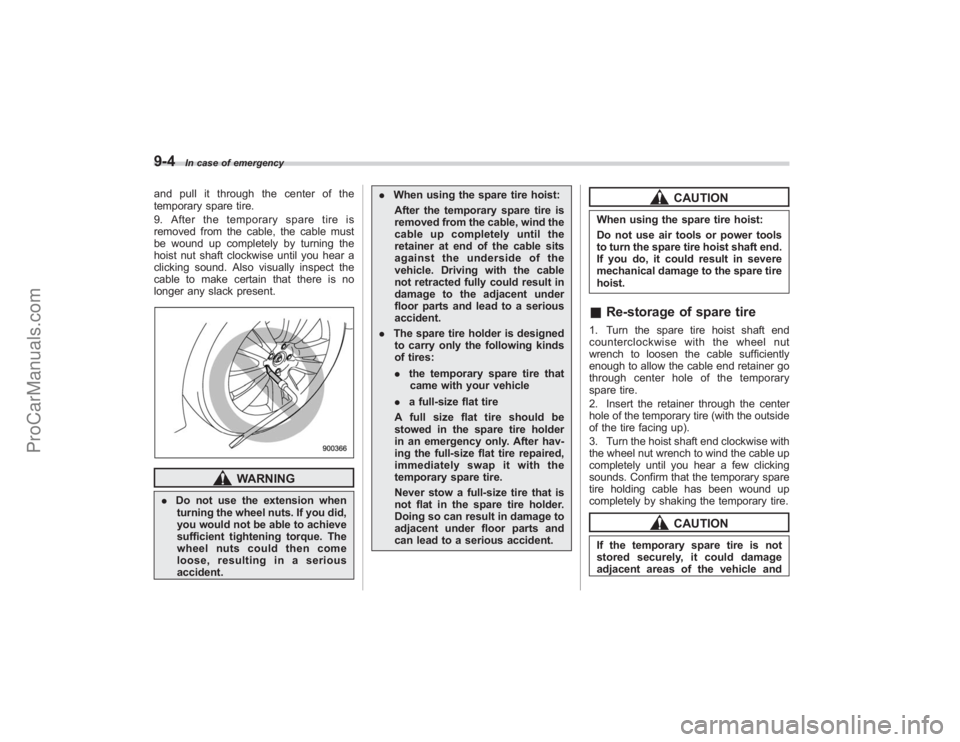
and pull it through the center of the
temporary spare tire.
9. After the temporary spare tire is
removed from the cable, the cable must
be wound up completely by turning the
hoist nut shaft clockwise until you hear a
clicking sound. Also visually inspect the
cable to make certain that there is no
longer any slack present.
WARNING
.Do not use the extension when
turning the wheel nuts. If you did,
you would not be able to achieve
sufficient tightening torque. The
wheel nuts could then come
loose, resulting in a serious
accident. .
When using the spare tire hoist:
After the temporary spare tire is
removed from the cable, wind the
cable up completely until the
retainer at end of the cable sits
against the underside of the
vehicle. Driving with the cable
not retracted fully could result in
damage to the adjacent under
floor parts and lead to a serious
accident.
. The spare tire holder is designed
to carry only the following kinds
of tires:
. the temporary spare tire that
came with your vehicle
. a full-size flat tire
A full size flat tire should be
stowed in the spare tire holder
in an emergency only. After hav-
ing the full-size flat tire repaired,
immediatelyswapitwiththe
temporary spare tire.
Never stow a full-size tire that is
not flat in the spare tire holder.
Doing so can result in damage to
adjacent under floor parts and
can lead to a serious accident.
CAUTION
When using the spare tire hoist:
Do not use air tools or power tools
to turn the spare tire hoist shaft end.
If you do, it could result in severe
mechanical damage to the spare tire
hoist.& Re-storage of spare tire1. Turn the spare tire hoist shaft end
counterclockwise with the wheel nut
wrench to loosen the cable sufficiently
enough to allow the cable end retainer go
through center hole of the temporary
spare tire.
2. Insert the retainer through the center
hole of the temporary tire (with the outside
of the tire facing up).
3. Turn the hoist shaft end clockwise with
the wheel nut wrench to wind the cable up
completely until you hear a few clicking
sounds. Confirm that the temporary spare
tire holding cable has been wound up
completely by shaking the temporary tire.
CAUTION
If the temporary spare tire is not
stored securely, it could damage
adjacent areas of the vehicle and
ProCarManuals.com
Page 302 of 409
9-6
In case of emergency
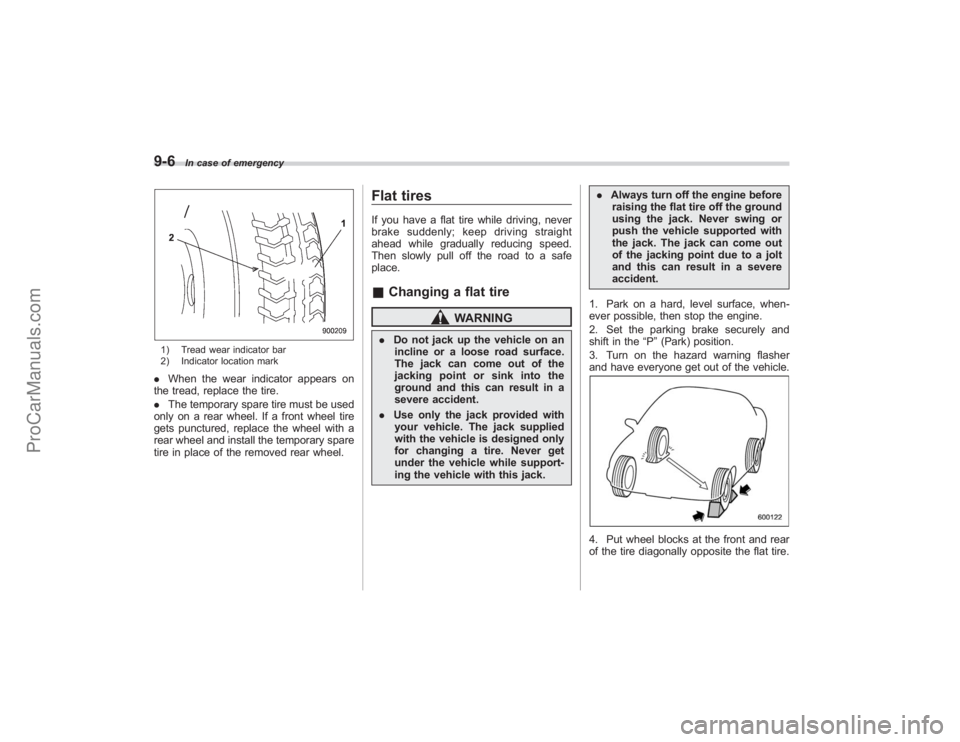
1) Tread wear indicator bar
2) Indicator location mark.When the wear indicator appears on
the tread, replace the tire.
. The temporary spare tire must be used
only on a rear wheel. If a front wheel tire
gets punctured, replace the wheel with a
rear wheel and install the temporary spare
tire in place of the removed rear wheel.
Flat tiresIf you have a flat tire while driving, never
brake suddenly; keep driving straight
ahead while gradually reducing speed.
Then slowly pull off the road to a safe
place.& Changing a flat tire
WARNING
. Do not jack up the vehicle on an
incline or a loose road surface.
The jack can come out of the
jacking point or sink into the
ground and this can result in a
severe accident.
. Use only the jack provided with
your vehicle. The jack supplied
with the vehicle is designed only
for changing a tire. Never get
under the vehicle while support-
ing the vehicle with this jack. .
Always turn off the engine before
raising the flat tire off the ground
using the jack. Never swing or
push the vehicle supported with
the jack. The jack can come out
of the jacking point due to a jolt
and this can result in a severe
accident.
1. Park on a hard, level surface, when-
ever possible, then stop the engine.
2. Set the parking brake securely and
shift in the “P”(Park) position.
3. Turn on the hazard warning flasher
and have everyone get out of the vehicle.
4. Put wheel blocks at the front and rear
of the tire diagonally opposite the flat tire.
ProCarManuals.com
Page 305 of 409
WARNING
Do not use oil or grease on the
wheel studs or nuts when the spare
tire is installed. This could cause the
nuts to become loose and lead to an
accident.
15. Turn the jack handle counterclockwise
to lower the vehicle.
CAUTION
There are 2 types of wheel nut
wrenches that apply to different
lengths.
For an aluminum wheel vehicle, the
11.2-inch (285 mm) wheel nut
wrench is equipped as a mainte-
nance tool. And for a chrome plated
wheel vehicle, the 13.2-inch (335
mm) wheel nut wrench is equipped
as well. Confirm the equipped wheel
nut wrench type when you replace a
tire. If the wheel nut wrench is the
different type, it cannot be tightened
to the specified torque.
1) The length of the wheel nut wrench16. Confirm the length of the equipped
wheel nut wrench.
For an aluminum wheel vehicle, the 11.2-
inch (285 mm) wheel nut wrench is
equipped as a maintenance tool. And for
a chrome plated wheel vehicle, the 13.2-
inch (335 mm) wheel nut wrench is
equipped as well.
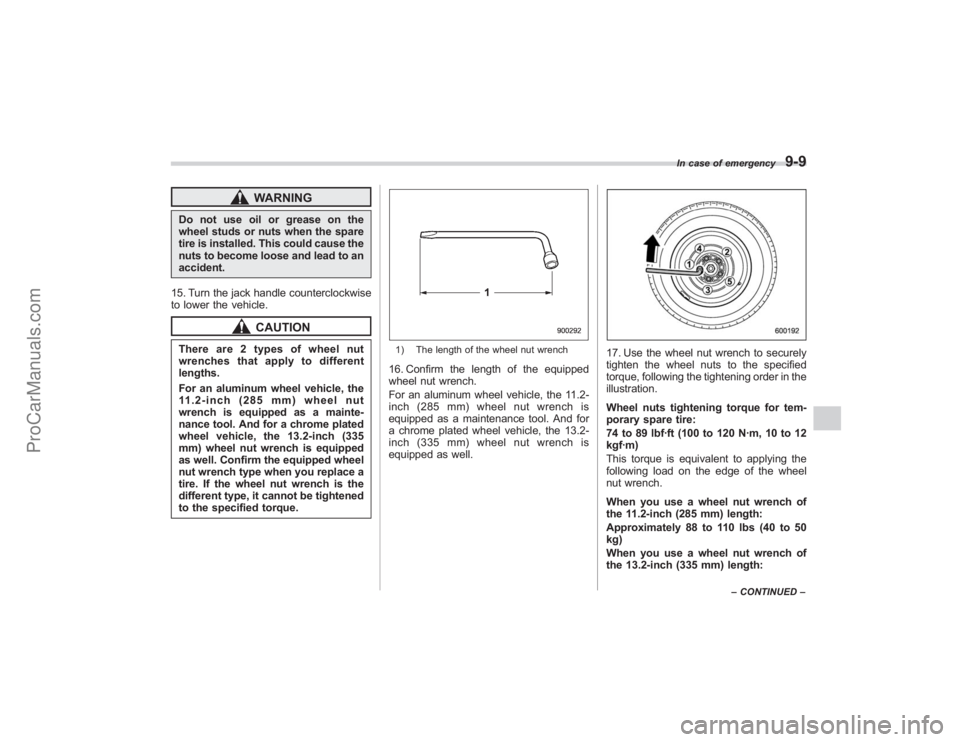
17. Use the wheel nut wrench to securely
tighten the wheel nuts to the specified
torque, following the tightening order in the
illustration.
Wheel nuts tightening torque for tem-
porary spare tire:
74 to 89 lbf·ft (100 to 120 N·m, 10 to 12
kgf·m)
This torque is equivalent to applying the
following load on the edge of the wheel
nut wrench.
When you use a wheel nut wrench of
the 11.2-inch (285 mm) length:
Approximately 88 to 110 lbs (40 to 50
kg)
When you use a wheel nut wrench of
the 13.2-inch (335 mm) length:
In case of emergency
9-9
– CONTINUED –
ProCarManuals.com
Page 312 of 409
9-16
In case of emergency
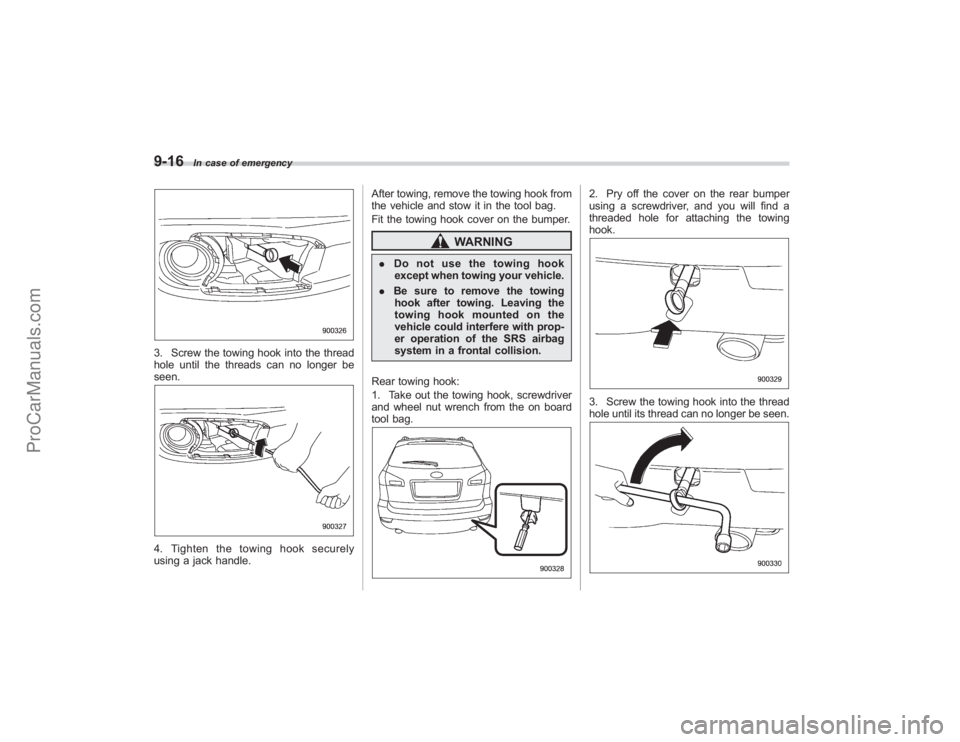
3. Screw the towing hook into the thread
hole until the threads can no longer be
seen.4. Tighten the towing hook securely
using a jack handle.After towing, remove the towing hook from
the vehicle and stow it in the tool bag.
Fit the towing hook cover on the bumper.
WARNING
.
Do not use the towing hook
except when towing your vehicle.
. Be sure to remove the towing
hook after towing. Leaving the
towing hook mounted on the
vehicle could interfere with prop-
er operation of the SRS airbag
system in a frontal collision.
Rear towing hook:
1. Take out the towing hook, screwdriver
and wheel nut wrench from the on board
tool bag.
2. Pry off the cover on the rear bumper
using a screwdriver, and you will find a
threaded hole for attaching the towing
hook.3. Screw the towing hook into the thread
hole until its thread can no longer be seen.
ProCarManuals.com
Page 313 of 409
4. Tighten the towing hook securely
using a wheel nut wrench.
After towing, remove the towing hook from
the vehicle and stow it in the tool bag.
Put the thread hole cover on the rear
bumper.
WARNING
.Do not use the towing hook
except when towing your vehicle.
. Be sure to remove the towing
hook after towing. Leaving the
towing hook mounted on the
vehicle could interfere with prop-
er operation of the SRS airbag
system in a frontal collision.
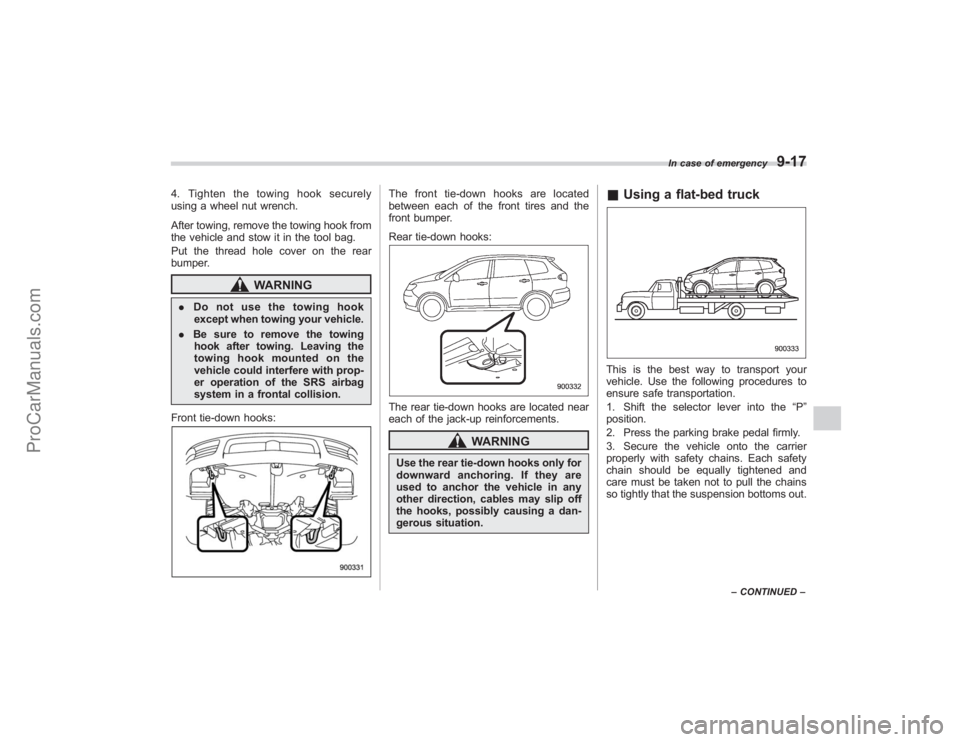
Front tie-down hooks:
The front tie-down hooks are located
between each of the front tires and the
front bumper.
Rear tie-down hooks:The rear tie-down hooks are located near
each of the jack-up reinforcements.
WARNING
Use the rear tie-down hooks only for
downward anchoring. If they are
used to anchor the vehicle in any
other direction, cables may slip off
the hooks, possibly causing a dan-
gerous situation.
& Using a flat-bed truckThis is the best way to transport your
vehicle. Use the following procedures to
ensure safe transportation.
1. Shift the selector lever into the “P ”
position.
2. Press the parking brake pedal firmly.
3. Secure the vehicle onto the carrier
properly with safety chains. Each safety
chain should be equally tightened and
care must be taken not to pull the chains
so tightly that the suspension bottoms out.
In case of emergency
9-17
– CONTINUED –
ProCarManuals.com