2008 SUBARU TRIBECA maintenance
[x] Cancel search: maintenancePage 134 of 409
3-14
Instruments and controls
&
Rear differential oil
temperature warning
light
CAUTION
Reduce vehicle speed and park the
vehicle in a safe place as soon as
possible if the R.DIFF TEMP light
comes on. Continued driving with
this light on can damage the rear
differential and other parts of the
powertrain.
If this light comes on when the engine is
running, it may indicate that the rear
differential oil temperature is too hot.
If the light comes on while driving, reduce
vehicle speed and stop the vehicle at the
nearest safe place.
Park the vehicle for several minutes. After
the light goes out, you can start driving.
If the light does not go out, contact the
nearest SUBARU dealer for service.NOTE. If the tire pressures are not correct
and/or the tires are not all the same
size and brand, the rear differential will
be heavily loaded when the vehicle is
driven, resulting in an abnormally high
oil temperature. .
The rear differential oil will deterio-
rate if its temperature increases en-
ough for the rear differential oil tem-
perature warning light to come on. It is
advisable to have the rear differential
oil replaced as soon as possible.
&
Low tire pressure
warning light
When the ignition switch is turned to the
“ON ”position, the low tire pressure warn-
ing light will come on for approximately 2
seconds to check that the tire pressure
monitoring system (TPMS) is functioning
properly. If there is no problem and all tires
are properly inflated, the light will go out.
Each tire, including the spare (if provided),
should be checked monthly when cold
and inflated to the inflation pressure
recommended by the vehicle manufac-
turer on the vehicle placard or tire inflation
pressure label. (If your vehicle has tires of
a different size than the size indicated on
the vehicle placard or tire inflation pres-
sure label, you should determine the
proper inflation pressure for those tires.)
As an added safety feature, your vehicle
has been equipped with a tire pressure
monitoring system (TPMS) that illuminates
a low tire pressure telltale when one or
more of your tires is significantly under- inflated. Accordingly, when the low tire
pressure telltale illuminates, you should
stop and check your tires as soon as
possible, and inflate them to the proper
pressure. Driving on a significantly under-
inflated tire causes the tire to overheat and
can lead to tire failure. Under-inflation also
reduces fuel efficiency and tire tread life,
and may affect the vehicle
’s handling and
stopping ability.
Please note that the TPMS is not a
substitute for proper tire maintenance,
and it is the driver ’s responsibility to
maintain correct tire pressure, even if
under-inflation has not reached the level
to trigger illumination of the TPMS low tire
pressure telltale.
Your vehicle has also been equipped with
a TPMS malfunction indicator to indicate
when the system is not operating properly.
The TPMS malfunction indicator is com-
bined with the low tire pressure telltale.
When the system detects a malfunction,
the telltale will flash for approximately one
minute and then remain continuously
illuminated. This sequence will continue
upon subsequent vehicle start-ups as long
as the malfunction exists. When the
malfunction indicator is illuminated, the
system may not be able to detect or signal
low tire pressure as intended. TPMS
malfunctions may occur for a variety of
ProCarManuals.com
Page 184 of 409
5-8
Audio
NOTEWhile you are holding down either side
of the TUNE TRACK button, the tuning
frequency will not stop changing even
if the frequency of a receivable station
is reached.
!Seek tuning
If you press the “
”or “
”side of the
SEEK FLDR button (7), the radio will
automatically search for a receivable
station and stop at the first one it finds.
This function may not be available, how-
ever, when radio signals are weak. In such
a situation, perform manual tuning to
select the desired station.
! Automatic tuning (SCAN)
Press the “SCAN”button (8) to change the
radio to the SCAN mode. In this mode, the
radio scans through the radio band until a
station is found. The radio will stop at the
station for 5 seconds while displaying the
frequency, after which scanning will con-
tinue until the entire band has been
scanned from the low end to the high
end. Press the “SCAN”button again to
cancel the SCAN mode and to stop on any
displayed frequency.
Press the “
”or “
”side of the SEEK
FLDR (7) button again to cancel the scan
mode and to stop on any displayed frequency.
When the
“SCAN”button is pressed for
automatic tuning, stations are scanned in
the direction of low frequencies to high
frequencies only.
Automatic tuning may not function prop-
erly if the station reception is weakened by
distance from the station or proximity to
tall buildings and hills.
! Selecting preset stations
Presetting a station with a preset button
(10) allows you to select that station in a
single operation. Up to six, AM, FM1 and
FM2 stations each may be preset.
! How to preset stations
1. Press the “FM AM”button (2) to select
FM1, FM2, or AM reception.
2. Press the “SCAN”button (8) or tune
the radio manually until the desired station
frequency is displayed.
3. Press one of the preset buttons (10)
for more than 1.5 seconds to store the
frequency. If the button is pressed for less
than 1.5 seconds, the preceding selection
will remain in memory.
NOTE. If the connection between the radio
and battery is broken for any reason
such as vehicle maintenance or radio removal, all stations stored in the
preset buttons are cleared. If this
occurs, it is necessary to reset the
preset buttons.
.
If a cell phone is placed near the
radio, it may cause the radio to emit
noise when it receives calls. This noise
does not indicate a radio fault.
! Satellite radio mode (if equipped)
To receive satellite radio, it is necessary to
install the Subaru genuine satellite recei-
ver (optional part) and to enter into a
contract. For details, please contact your
SUBARU dealer.
! Sirius satellite radio
Sirius satellite radio is a recent innovation
that allows the listener to experience
digital sound quality and to have a greater
variety of channels to choose from (more
than 160 channels with the relevant
subscription).
Use of satellite radio (Sirius) requires a
tuner, antenna and a service contract. For
details, please contact your SUBARU
dealer or visit Sirius Satellite Radio at
www.sirius.com or call 1-888-539-SIRIUS
(7474) for more information. Sirius, the
Sirius dog logo, channel names and logos
are trademarks of SIRIUS Satellite Radio
Inc.
ProCarManuals.com
Page 186 of 409
5-10
Audio
2. Press the“SCAN”button (8) or the
TUNE TRACK button (4) to select the
channel.
3. Press one of the preset buttons (10)
for more than 1.5 seconds to store the
channel. If the button is pressed for less
than 1.5 seconds, the preceding selection
will remain in memory.NOTEIf the connection between the radio and
battery is broken for any reason such
as vehicle maintenance or radio re-
moval, all channels stored in the preset
buttons are cleared. If this occurs, it is
necessary to reset the preset buttons.
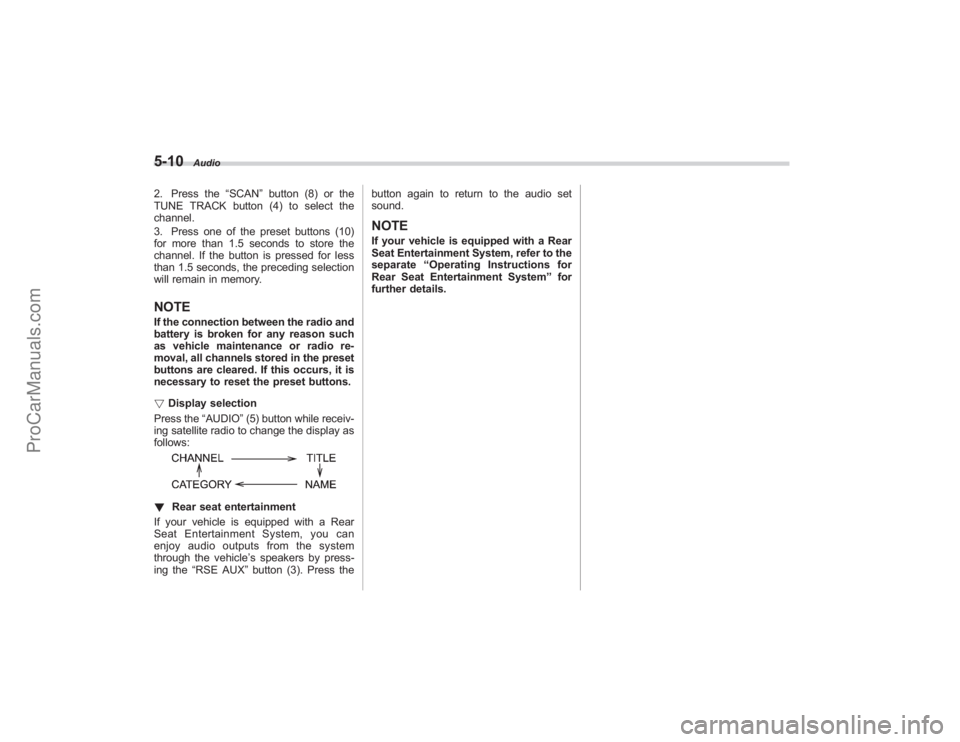
! Display selection
Press the “AUDIO”(5) button while receiv-
ing satellite radio to change the display as
follows:! Rear seat entertainment
If your vehicle is equipped with a Rear
Seat Entertainment System, you can
enjoy audio outputs from the system
through the vehicle ’s speakers by press-
ing the “RSE AUX ”button (3). Press the button again to return to the audio set
sound.
NOTEIf your vehicle is equipped with a Rear
Seat Entertainment System, refer to the
separate
“Operating Instructions for
Rear Seat Entertainment System ”for
further details.
ProCarManuals.com
Page 195 of 409
NOTEWhile you are holding down either side
of the TUNE/TRACK button, the tuning
frequency will not stop changing even
if the frequency of a receivable station
is reached.
!Seek tuning (SEEK)
If you press the “
”or “
”side of the
SEEK FLDR button (7), the radio will
automatically search for a receivable
station and stop at the first one it finds.
This function may not be available, how-
ever, when radio signals are weak. In such
a situation, perform manual tuning to
select the desired station.
! Scan tuning (SCAN)
Press the “SCAN”button (8) to change the
radio to the SCAN mode. In this mode, the
radio scans through the radio band until a
station is found. The radio will stop at the
station for 5 seconds while displaying the
frequency, after which scanning will con-
tinue until the entire band has been
scanned from the low end to the high
end. Press the “SCAN”button again to
cancel the SCAN mode and to stop on any
displayed frequency.
Press the “
”or “
”side of the SEEK
FLDR button (7) again to cancel the scan
mode and to stop on any displayed frequency.
When the
“SCAN”button is pressed for
automatic tuning, stations are scanned in
the direction of low frequencies to high
frequencies only.
Automatic tuning may not function prop-
erly if the station reception is weakened by
distance from the station or proximity to
tall buildings and hills.
! Selecting preset stations
Presetting a station with a preset button
allows you to select that station in a single
operation. Up to six AM, FM1 and FM2
stations each may be preset.
! How to preset stations
1. Press the “FM AM”button (2) to select
FM1, FM2 or AM reception.
2. Press the “SCAN”button (8) or tune
the radio manually until the desired station
frequency is displayed.
3. Press one of the preset buttons for
more than 1.5 seconds to store the
frequency. If the button is pressed for less
than 1.5 seconds, the preceding selection
will remain in memory.
NOTE. If the connection between the radio
and battery is broken for any reason
such as vehicle maintenance or radio removal, all stations stored in the
preset buttons are cleared. If this
occurs, it is necessary to reset the
preset buttons.
.
If a cell phone is placed near the
radio, it may cause the radio to emit
noise when it receives calls. This noise
does not indicate a radio fault.
! Satellite radio mode (if equipped)
To receive satellite radio, it is necessary to
install the Subaru genuine satellite recei-
ver (optional part) and to enter into a
contract. For details, please contact your
SUBARU dealer.
! Sirius satellite radio
Sirius satellite radio is a recent innovation
that allows the listener to experience
digital sound quality and to have a greater
variety of channels to choose from (more
than 160 channels with the relevant
subscription).
Use of satellite radio (Sirius) requires a
tuner, antenna and a service contract. For
details, please contact your SUBARU
dealer or visit Sirius Satellite Radio at
www.sirius.com or call 1-888-539-SIRIUS
(7474) for more information. Sirius, the
Sirius dog logo, channel names and logos
are trademarks of SIRIUS Satellite Radio
Inc.
Audio
5-19
– CONTINUED –
ProCarManuals.com
Page 197 of 409
2. Press the“SCAN”button (8) or the
TUNE TRACK button (4) to select the
channel.
3. Press one of the preset buttons (10)
for more than 1.5 seconds to store the
channel. If the button is pressed for less
than 1.5 seconds, the preceding selection
will remain in memory.NOTEIf the connection between the radio and
battery is broken for any reason such
as vehicle maintenance or radio re-
moval, all channels stored in the preset
buttons are cleared. If this occurs, it is
necessary to reset the preset buttons.
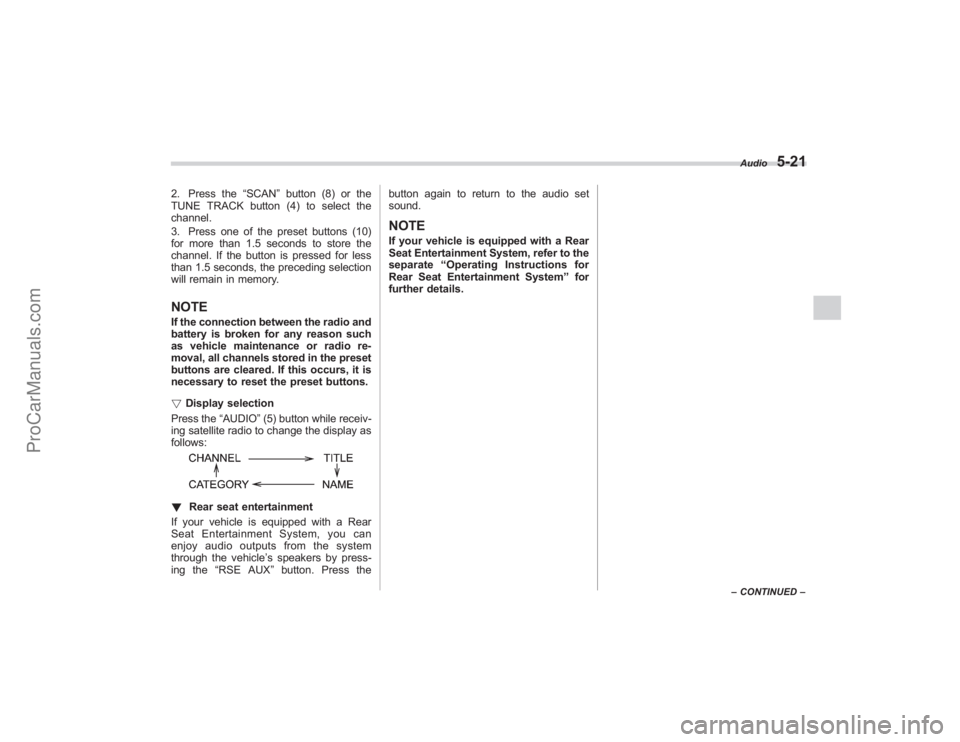
! Display selection
Press the “AUDIO”(5) button while receiv-
ing satellite radio to change the display as
follows:! Rear seat entertainment
If your vehicle is equipped with a Rear
Seat Entertainment System, you can
enjoy audio outputs from the system
through the vehicle ’s speakers by press-
ing the “RSE AUX ”button. Press the button again to return to the audio set
sound.
NOTEIf your vehicle is equipped with a Rear
Seat Entertainment System, refer to the
separate
“Operating Instructions for
Rear Seat Entertainment System ”for
further details.
Audio
5-21
– CONTINUED –
ProCarManuals.com
Page 235 of 409
Fuel................................................................... 7-2
Fuel requirements ............................................ 7-2
Fuel filler lid and cap ........................................ 7-3
State emission testing (U.S. only) ................... 7-5
Preparing to drive ............................................ 7-7
Starting the engine ........................................... 7-7
Stopping the engine ......................................... 7-8
Remote engine start system (dealer option) ............................................... 7-8
Starting your vehicle ........................................ 7-9
Remote start safety features ............................. 7-9
Entering the vehicle while it is running via remote start ............................................................... 7-9
Entering the vehicle following remote engine start shutdown ....................................................... 7-9
Pre-heating or pre-cooling the interior of the vehicle ......................................................... 7-10
Service mode ................................................. 7-10
Remote transmitter programming and programmable feature option ........................ 7-10
System maintenance ....................................... 7-11
Automatic transmission ................................. 7-12
Selector lever................................................. 7-13
Selector lever reverse inhibiting function . ....... 7-14
Selection of manual mode .............................. 7-15
Maximum speeds ........................................... 7-16
Driving tips .................................................... 7-16
SPORT mode ................................................. 7-17 Shift lock release
............................................ 7-17
Power steering............................................... 7-18
Braking ........................................................... 7-18
Braking tips .................................................... 7-18
Brake system ................................................. 7-19
Disc brake pad wear warning indicators .......... 7-19
ABS (Anti-lock Brake System)...................... 7-20
ABS system self-check................................... 7-20
ABS warning light ........................................... 7-21
Electronic Brake Force Distribution (EBD)
system ......................................................... 7-22
Steps to take if EBD system fails .................... 7-22
Vehicle Dynamics Control system ................ 7-23
Vehicle Dynamics Control system monitor....... 7-25
Traction Control system OFF switch ................ 7-26
Tire pressure monitoring system
(TPMS) ......................................................... 7-27
Parking your vehicle ..................................... 7-29
Parking brake................................................. 7-29
Parking tips .................................................... 7-29
Cruise control ................................................ 7-30
To set cruise control ....................................... 7-30
To temporarily cancel the cruise control .......... 7-31
To turn off the cruise control ........................... 7-31
To change the cruising speed .. ....................... 7-32
Cruise control indicator light ........................... 7-33
Cruise control set indicator light ..................... 7-33
Starting and operating
7
ProCarManuals.com
Page 245 of 409
feature ON or OFF each time.
7. To exit the remote transmitter and
feature programming mode, turn the igni-
tion switch to the“LOCK”position, remove
the key from the ignition switch and test
operation of the remote transmitter(s) and
horn confirmation feature.& System maintenance! Changing the remote control bat-
teries
The two 3-volt lithium batteries (model
CR-1220) supplied in your remote control
should last approximately three years,
depending on usage. When the batteries
begin to weaken, you will notice a
decrease in range (distance from the
vehicle that your remote control operates).
Follow the instructions below to change
the remote control batteries.
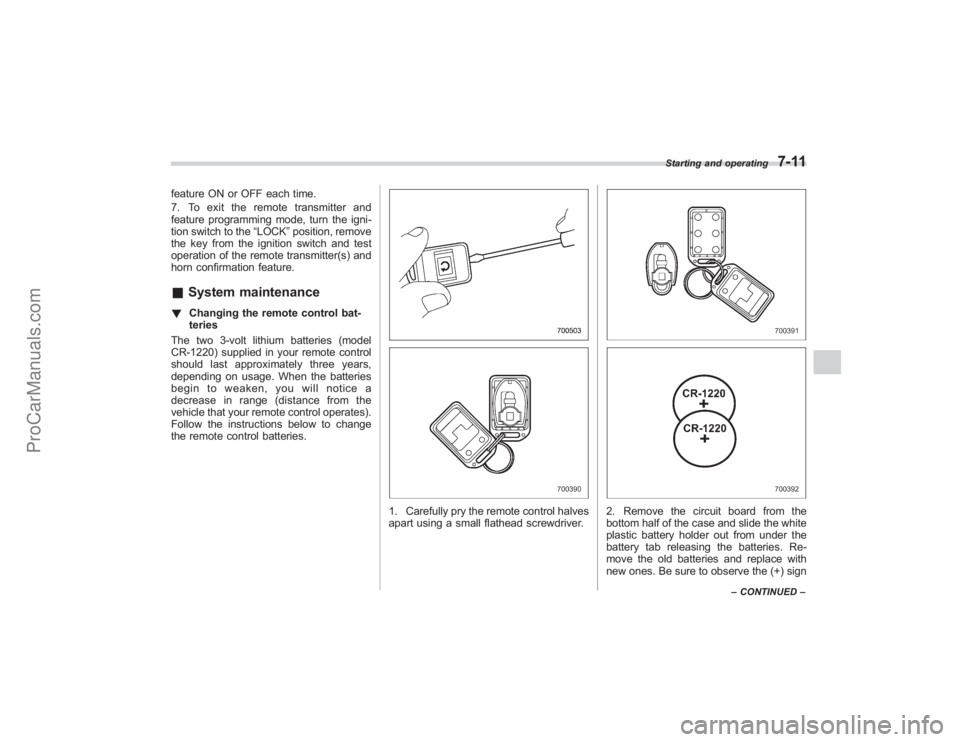
1. Carefully pry the remote control halves
apart using a small flathead screwdriver.
2. Remove the circuit board from the
bottom half of the case and slide the white
plastic battery holder out from under the
battery tab releasing the batteries. Re-
move the old batteries and replace with
new ones. Be sure to observe the (+) sign
Starting and operating
7-11
– CONTINUED –
ProCarManuals.com
Page 269 of 409

New vehicle break-in driving–the first
1,000 miles (1,600 km) .................................. 8-2
Fuel economy hints ......................................... 8-2
Engine exhaust gas (Carbon monoxide) ........ 8-2
Catalytic converter ........................................... 8-3
Periodic inspections ........................................ 8-4
Driving in foreign countries ............................ 8-4
Driving tips for AWD vehicles ......................... 8-4
On-pavement and off road driving .................. 8-5
Winter driving ................................................... 8-7
Operation during cold weather .......................... 8-7
Driving on snowy and icy roads ....................... 8-9
Corrosion protection ...................................... 8-10
Snow tires ..................................................... 8-10
Tire chains ...................................................... 8-11
Rocking the vehicle ......................................... 8-11
Loading your vehicle ...................................... 8-11
Vehicle capacity weight ................................... 8-12
GVWR and GAWR (Gross Vehicle Weight Rating and Gross Axle Weight Rating) ..................... 8-12
Roof rails and crossbar (if equipped) ............... 8-13
Roof molding and crossbar (if equipped) ......... 8-16
Trailer hitch (if equipped).............................. 8-18
Connecting a trailer........................................ 8-18
When you do not tow a trailer .. ....................... 8-20
Trailer towing................................................. 8-20
Warranties and maintenance ........................... 8-20
Maximum load limits ....................................... 8-20
Trailer hitches ................................................. 8-23
Connecting a trailer ........................................ 8-24
Trailer towing tips ........................................... 8-26
Driving tips
8
ProCarManuals.com