2008 MERCEDES-BENZ SL ROADSTER tire pressure
[x] Cancel search: tire pressurePage 10 of 317
7
Resettin
g.................... .81
Storing settings ................ 82
Exterior view
Overview ..................... 20F
Fire extinguisher ................ 201
First-aid kit ..................... 202
Flat tyre Equipment ................... 266
MOExtended run-fla tsystem ..... 275
Preparing the vehicle ...........266
TIREFIT kit ................... 266
Floormat ....................... 171
Foglamps Display message .............. 223
Fording ........................ 192
Frequencies Garage door opene r............ 307
Telephone ................... 288
Fron tairbag ..................... 44
Front-passenger ai rbag ............ 44
Fuel ........................... 300
Loss ........................ 243
Petrol ....................... 175
Fue lcon sumption ........... 301, 302
Fue lfiller flap
Opening/closing .............. 175Fue
lline
Malfunction .................. 243
Fue ltank
Malfunction .................. 243
Fuse allocatio nchart ............ 283
Fuse box Engine compartment ...........283
Fuses .......................... 283 G
Garage door Opening/closing (with the remote
control) ..................... 170
Garage door opener ..............169
Clearing the memory ...........171
Frequencies .................. 307
Programming the remote control ..169
Gear indicator (on-board computer) 111
Gearshift program Manual .................. 102, 104
SETUP (on-board computer) .....111
Genuine Mercedes-Benz parts .....286
Glass roof Roller sunblind ................ 159
Glove compartment ..............161
Emergency unlocking ...........257
Gross vehiclew eight, maximum
permissible ..................... 299 H
Head/thorax airbags ..............45
Headlamp Misting up ................... 248
Headlamps
Cleaning ..................... 196
Cleaning system ................ 90
Headlamps delaye dswitch-off
see Exterior lighting delayed switch-off
Head restraint
Adjusting (front) ................ 75
Heating
see Air conditioning
High-pressure cleaners ...........195
HomeLink ®
see Garage door opener I
Immobiliser ..................... 59
Indicator an dwarning lamp
Brake s(red ).................. 235
Coolant ..................... 236
Distronic (red )................ 233
DTR ........................ 131
Engine diagnostic .............. 237
ESP ®
........................ 54
PASSENGER AIRB AGOFF .... 49, 231
Reserve fuel .................. 239
Roll-over bar .................. 237 Index
230_AKB; 5; 4, en-GB
bjanott,
Version: 2.9.6 2008-04-08T15:09:54+02:00-Seite 7 Dateiname: 6515_3089_02_buchblock.pdf; preflight
Page 16 of 317
13
Vehicle weights
............... 299
Wheels .................. 293, 295
Telephone
see Mobile phone
Temperature
Coolant ..................... 106
Engine oil (on-board computer) ...111
Outside temperature ...........106
Third brake lamp
Display message .............. 222
Tightening torque ............... 274
Time Lap time (on-board computer) ....112
Timer (on-board computer) .......112
TIREFIT kit Using ....................... 266
Total distanc erecorder ....... 26, 108
Resetting the trip meter .........106
Tow-away protection ..............60
Towing ........................ 282
Towing eye Fitting ....................... 281
Removing .................... 282
Traction control .................. 55
Transmission output (maximum) Telephone/two-wa yradio ....... 287
Transport (vehicle) ..............282
Trip computer Menu (on-board computer) ......122Trip meter
...................... 110
Resetting .................... 106
Turn signal lamps
Display message .............. 221
TV
Operation (on-board computer) ...114
Two-way radio
Installatio n................... 287
Tyre grip ....................... 192
Tyre pressure ................... 184
Calling up (on-board computer) ..186
Display message ..209, 210, 211, 225
Table (see Fuel filler flap) ........175
see Tyr epressure
Tyre pressure los swarning system 185
Tyre pressure monitor Warning lamp ................. 238
Tyres
Direction of rotatio n............ 183
General notes ................. 182
Technical data ............ 293, 295
Tyre tread ...................... 184 U
Unladen weight ................. 299
Unlocking Emergency unlocking ...........255
From the insid e(central unlocking
button) ....................... 68Up (display message)
............111 V
Variable Speedtronic .............134
Vario-roof see Roof
Vehicle
Emergency unlocking .......255, 256
Individua lsettings (on-board com-
puter) ....................... 116
Leaving parked up .............254
Towing ...................... 282
Transporting .................. 282
Vehicle battery ................. 276
Vehicle dimensions ..............298
Vehicle electronics ..............287
Vehicle identification number
(VIN) ...................... 288, 289
Vehicle identification plates ......288
Vehicle level .................... 139
Adjusting .................... 140
Vehicle tool kit .................. 200
Vehicle weights ................. 299 W
Warning and indicator lamp ABS/ESP ®
................... 234
ABS (yellow) .................. 233
ESP ®
OFF .................... 234 Index
230_AKB; 5; 4, en-GB
bjanott,
Version: 2.9.6
2008-04-08T15:09:54+02:00
-Seite 13 Dateiname: 6515_3089_02_buchblock.pdf; preflight
Page 186 of 317
Tyre
sand wheels 183
Note
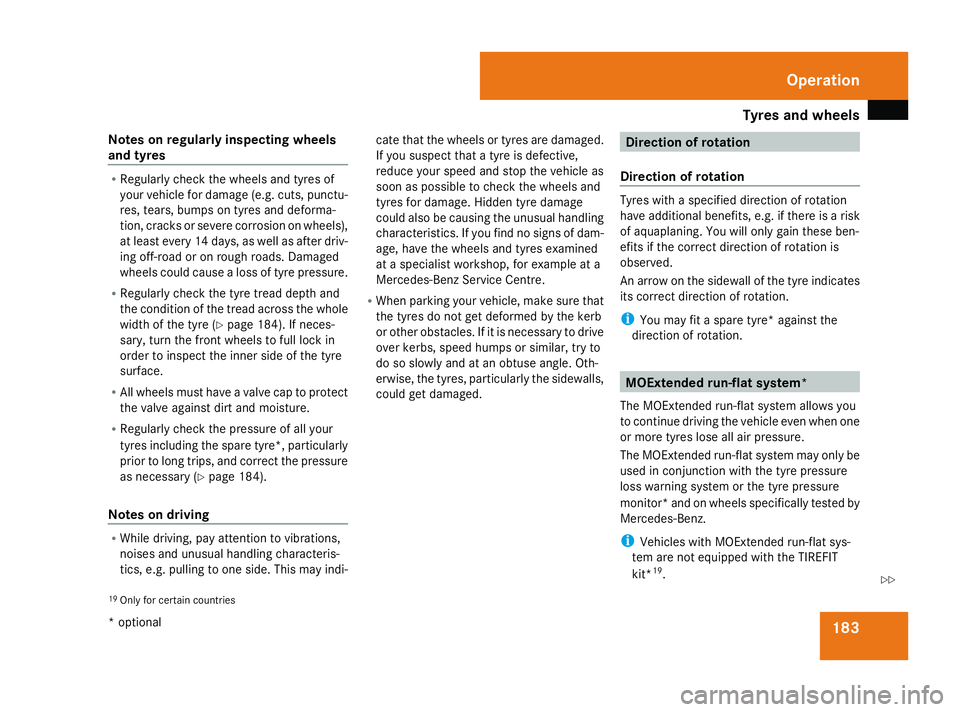
sonr egularly inspecting wheels
and tyres R
Regularl ycheck the wheels and tyres of
your vehicl efor damage (e.g. cuts, punctu-
res ,tears, bumps on tyres and deforma-
tion, cracks or sever ecorrosio nonwheels),
at leas tevery 14 days ,aswellasa fter driv-
ing off-roa doronrough roads .Damaged
wheels could cause alos soft yrep ressure.
R Regularl ycheck the tyr etrea ddepth and
the condition of the trea dacros sthe whole
width of the tyr e(Ypage 184) .Ifneces-
sary ,tur nt he front wheels to full lock in
order to inspect the inne rsideoft he tyre
surface.
R All wheels must have avalve cap to protect
the valv eagain st dirt and moisture.
R Regularl ycheck the pressure of al lyour
tyres including the spar etyre* ,particularly
prior to long trips ,and correc tthe pressure
as necessary (Y page 184).
Note sond riving R
Whil edriving, pa yattentio ntovibrations,
noise sand unusual handling characteris-
tics ,e.g.p ulli ng to one side .Thism ayindi- cate tha
tthe wheels or tyres ar edamaged.
If yo ususpe ct tha tatyreisd efective,
reduc eyours peed and sto pthe vehicl eas
soon as possibl etocheck the wheels and
tyres for damage .Hidde ntyred amage
could also be causing the unusual handling
characteristics .Ifyoufind no signs of dam-
age, have the wheels and tyres examined
at as pecialis tworkshop ,for exampl eata
Mercedes-Benz Service Centre.
R When parking your vehicle, make sure that
the tyres do not ge tdeformed by the kerb
or other obstacles. If it is necessary to drive
ove rkerbs, spee dhum ps or similar, try to
do so slowly and at an obtus eangle .Oth-
erwise, the tyres ,particularl ythe sidewalls,
could ge tdamaged. Directio
nofrotation
Directio nofrotation Tyres with
aspecified directio nofrotation
have additional benefits, e.g .ifthere is arisk
of aquaplaning. Yo uwillo nlyg aint hese ben-
efits if the correc tdirectio nofr otatio nis
observed.
An arrow on the sidewall of the tyr eindicates
its correc tdirectio nofr otation.
i Youm ayfitas pare tyre* against the
directio nofrotation. MOExtende
drun-flat system*
Th eM OExtended run-flat syste mallow syou
to continue driving the vehicl eevenw heno ne
or mor etyres lose al lairpressure.
Th eM OExtended run-flat syste mmayonl ybe
used in conjunctio nwitht he tyr epressure
loss warning syste morthe tyrepressure
monitor* and on wheels specifically tested by
Mercedes-Benz.
i Vehicle swithM OExtended run-flat sys-
tem ar enot equipped with the TIREFIT
kit* 19
.
19 Onl yfor certai ncountries Operation
*o ptional
230_AKB; 5; 4, en-GB
bjanott,
Version: 2.9.6 2008-04-08T15:09:54+02:00-Seite 183 ZDateiname: 6515_3089_02_buchblock.pdf; preflight
Page 187 of 317
Tyre
sand wheels 184It is therefore recommended to additionally
equi pyourv ehicl ewitht he TIREFIT kit*
when fitting tyres tha tdon ot featur erun-
flat properties ,e.g.w inter tyres.
i ATIREFIT kit* is availabl efroma ny quali-
fied specialis tworkshop ,e.g.aM ercedes-
Benz Service Centre.
Yo uw illf indn ote sond riving with aflatt yre
in the "Practical advice" section
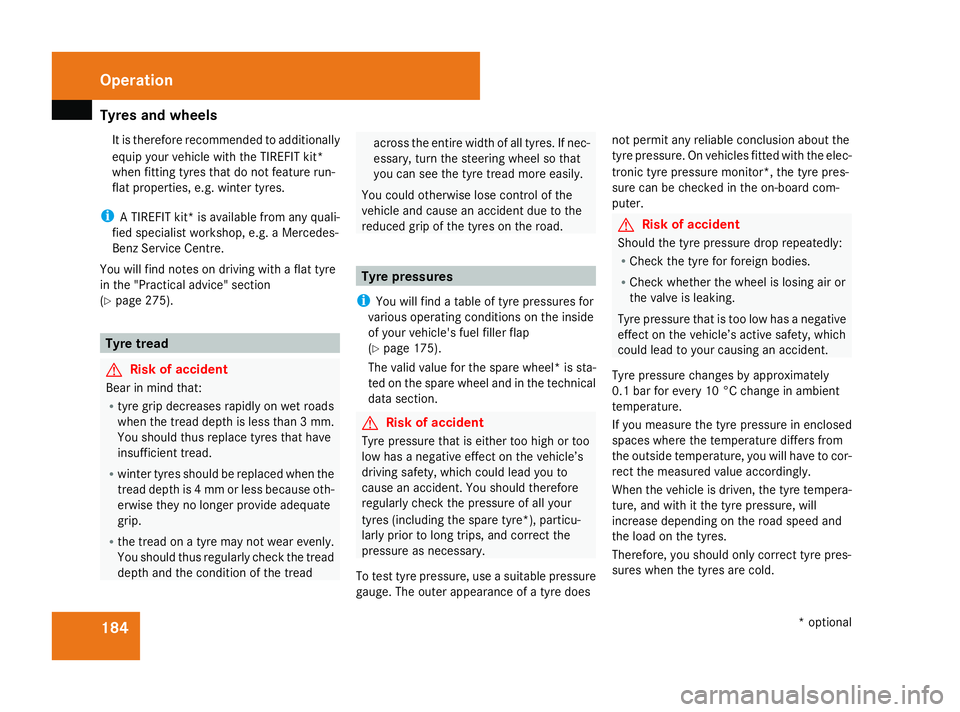
(Y page 275). Tyre tread
G
Ris
kofa ccident
Bea rinm indt hat:
R tyr eg ripd ecreases rapidl yonwetroads
when the trea ddepth is less tha n3mm.
Yo us houl dthusr eplace tyres tha thave
insufficient tread.
R winter tyres shoul dbereplaced when the
trea ddepth is 4mmorl essb ecause oth-
erwis etheynol ongerp rovide adequate
grip.
R the trea donatyrem aynot wear evenly.
Yo us houl dthu sregularly check the tread
depth and the condition of the tread acros
sthe entire width of al ltyres .Ifnec-
essary ,tur nt he steering whee lsothat
yo uc an seet he tyr etrea dm oree asily.
Yo uc ould otherwis elosec ontrol of the
vehicl eand caus eanaccident du etothe
reduced gri pofthe tyres on the road. Tyre pressures
i Youw illf indat able of tyr epressures for
variou soperating conditions on the inside
of your vehicle' sfue lfiller flap
(Y page 175).
Th ev alid valuefor the spar ewheel *iss ta-
ted on the spar ewheel and in the technical
data section. G
Ris
kofa ccident
Tyre pressure tha tise ithe rtoo high or too
lo wh asan egative effect on the vehicle’s
driving safety ,which could lead yo uto
caus eana ccident. Yo ushoul dtherefore
regularly check the pressure of al lyour
tyres (including the spar etyre*), particu-
larl yprior to long trips ,and correc tthe
pressure as necessary.
To tes ttyrep ressure, us easuitabl epressure
gauge. Th eouter appearanc eofatyred oes not permi
tany reliabl econclusio nabout the
tyr ep ressure. On vehicles fitted with the elec-
troni ctyrep ressure monitor* ,the tyr epres-
sure ca nbechecked in the on-board com-
puter. G
Ris
kofa ccident
Shoul dthe tyr epressure dro prepeatedly:
R Check the tyr efor foreign bodies.
R Check whether the whee lislosin gairor
the valv eisleaking.
Tyre pressure tha tist oo lo whasan egative
effect on the vehicle’ sactive safety ,which
could lead to your causing an accident.
Tyre pressure change sbyapproximately
0.1 ba rfor every 10 °C change in ambient
temperature.
If yo umeasure the tyr epressure in enclosed
spaces where the temperatur ediffers from
the outside temperature, yo uwillh avetoc or-
rec tthe measured valu eaccordingly.
When the vehicl eisdriven, the tyr etempera-
ture, and with it the tyr epressure, will
increase depending on the roa dspeed and
the load on the tyres.
Therefore, yo ushoul donlyc orrec ttyrep res-
sures when the tyres ar ecold. Operation
*optional
230_AKB; 5; 4, en-GB
bjanott,
Version: 2.9.6 2008-04-08T15:09:54+02:00-Seite 184 Dateiname: 6515_3089_02_buchblock.pdf; preflight
Page 270 of 317
Flat tyre
2671
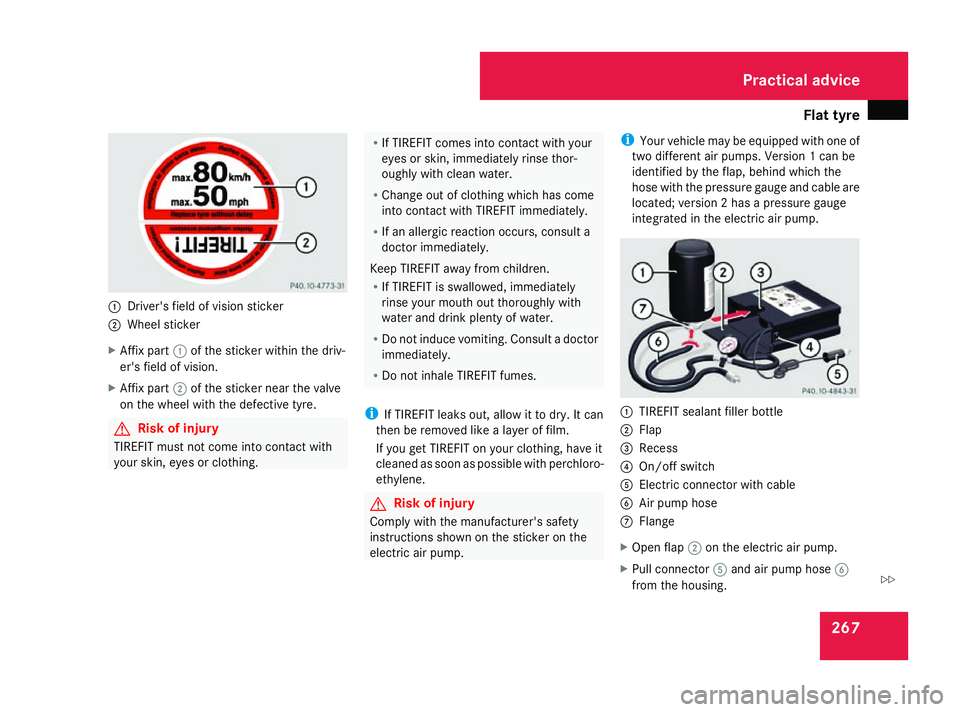
Driver's field of vision sticker
2 Wheel sticker
X Affix part 1of th esticker within th edriv-
er' sfield of vision.
X Affix part 2of th esticker near th evalve
on th ewheel with th edefective tyre. G
Risk of injury
TIREFI Tmust not com eintoc ontac twith
your skin, eyes or clothing. R
If TIREFI Tcomes int ocontac twith your
eyes or skin, immediately rinse thor-
oughly with clean water.
R Chang eout of clothing whic hhas come
int oc ontac twith TIREFI Timmediately.
R If an allergic reactio noccurs, consult a
docto rimmediately.
Keep TIREFI Taway from children.
R If TIREFI Tisswallowed ,immediately
rinse your mout hout thoroughly with
water and drin kplenty of water.
R Do not induce vomiting. Consult adoctor
immediately.
R Do not inhale TIREFI Tfumes.
i If TIREFI Tleak sout, allow it to dry. It can
then be removed lik ealayer of film.
If you get TIREFI Tonyour clothing ,have it
cleaned as soon as possible with perchloro-
ethylene. G
Risk of injury
Comply with th emanufacturer' ssafety
instruction sshown on th esticker on the
electric air pump. i
Your vehicle may be equipped with one of
two differen tair pumps. Version 1can be
identified by th eflap, behin dwhichthe
hose with th epressure gauge and cable are
located ;version 2hasap ressure gauge
integrated in th eelectric air pump. 1
TIREFI Tsealan tfille rbottle
2 Flap
3 Recess
4 On/of fswitch
5 Electric connecto rwith cable
6 Air pump hose
7 Flange
X Open flap 2on th eelectric air pump.
X Pull connector 5and air pump hose 6
from th ehousing. Practical advice
230_AKB
;5;4,en-GB
bjanott, Version:2.9.6
2008-04-08T15:09:54+02:00
-Seite 267 ZDateiname: 6515_3089_02_buchblock.pdf; preflight
Page 271 of 317
Flat tyre
268
X
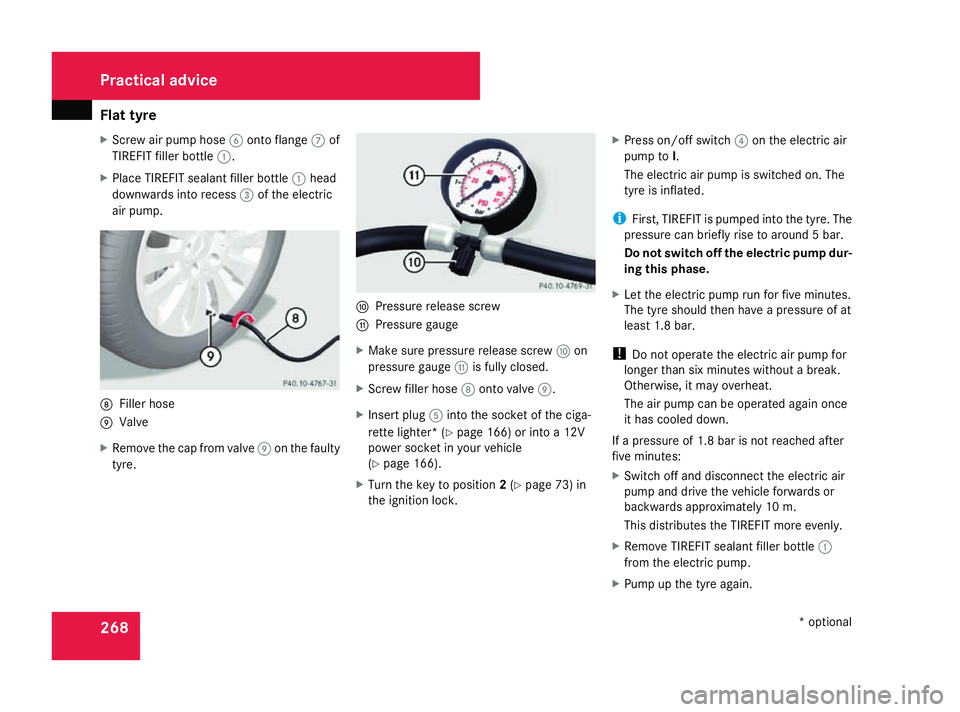
Screw air pump hose 6onto flange 7of
TIREFI Tfiller bottle 1.
X Plac eTIREFI Tsealant filler bottle 1head
downward sintor ecess 3of th eelectric
air pump. 8
Fille rhose
9 Valve
X Remov ethe cap from valve 9on th efaulty
tyre. a
Pressure release screw
b Pressure gauge
X Make sure pressure release screw aon
pressure gauge bis fully closed.
X Screw fille rhose 8ontovalve 9.
X Inser tplug 5intot he socket of th eciga-
rette lighter* (Y page 166) or intoa12V
power socket in your vehicle
(Y page 166).
X Turn th ekey to position 2(Y page 73 )in
th ei gnition lock. X
Pres son/off switch 4on th eelectric air
pump to I.
The electric air pump is switche don. The
tyr eisi nflated.
i First ,TIREFI Tispumped int othe tyre. The
pressure can briefly rise to aroun d5bar.
Do not switch off th eelectric pump dur-
ing this phase.
X Let th eelectric pump run for fiv eminutes.
The tyr eshould then have apressure of at
least 1. 8bar.
! Do not operate th eelectric air pump for
longer than six minutes without abreak.
Otherwise, it may overheat.
The air pump can be operated again once
it has cooled down.
If ap ressure of 1. 8bar is not reached after
fiv em inutes:
X Switch off and disconnect th eelectric air
pump and driv ethe vehicle forwards or
backwards approximatel y10m.
This distributes th eTIREFI Tmoree venly.
X Remov eTIREFI Tsealan tfille rbottle 1
from th eelectric pump.
X Pump up th etyrea gain. Practical advice
*optional
230_AKB
;5;4,en-GB
bjanott, Version:2.9.6
2008-04-08T15:09:54+02:00
-Seite 268 Dateiname: 6515_3089_02_buchblock.pdf; preflight
Page 272 of 317
Flat tyre
269G
Risk of accident
If ap ressur eof1.8bar is no tachieved after
fiv em inutes, th etyreist oobadly damaged.
Do no tdrive any further. Consult aqualified
specialist workshop whic hhas th eneces-
sar yspecialist knowledge and tools to carry
out th eworkr equired. Mercedes-Ben zrec-
ommends that you use aMercedes-Benz
Service Centr efor this purpose .Inparticu-
lar, wor krelevan ttosafetyoro nsafety-
relate dsystems mus tbecarriedout at a
qualified specialist workshop.
If at yrep ressur eof1.8bar is reached:
X Press on/off switch 4on th eelectric air
pump to 0.
The electric air pump is switched off.
X Disconnect th eelectric air pump and stow
it away.
X Fold up th ewarnin gtriangle and stow it
away.
X Pull away immediately.
This distribute sthe TIREFI Tmoree venly
around th etyre.
X Stop after drivin gfor approximately ten
minute sand chec kthe tyrep ressur ewith
th ee lectric air pump. G
Risk of accident
If th etyrep ressur eisnowlower than
1. 3b ar, th etyreist oobadly damaged. Do
no td rive any further. Consult aqualified
specialist workshop whic hhas th eneces-
sar yspecialist knowledge and tools to carry
out th eworkr equired. Mercedes-Ben zrec-
ommends that you use aMercedes-Benz
Service Centr efor this purpose .Inparticu-
lar, wor krelevan ttosafetyoro nsafety-
relate dsystems mus tbecarriedout at a
qualified specialist workshop.
X If th etyrep ressur eisstill at leas t1.3bar,
correc tit(seef uel filler flap fo rvalues).
To increas ethe tyre pressure: switch on
th ee lectric air pump.
To reduce th etyrep ressure: open pres-
sur erelease screw aon pressure
gauge b.
X Drive to th eneares tworkshop and hav ethe
tyr ec hanged there.
X Hav ethe TIREFI Tkitreplaced as soo nas
possibl eataq ualified specialist workshop,
e.g. at aMercedes-Ben zServi ce Centre. G
Risk of accident
Do no texcee dthe maximum speed of
80 km/h.
The "max .80km/h" sticker mus tbeaffixed
within th edriver's field of vision.
The vehicle's handlin gcharacteristics may
be affected. H
Environmental note
Hav ethe used TIREFI Tkitdispose dofpro-
fessionally, e.g. at aMercedes-Benz
Service Centre.
X Hav ethe TIREFI Tkitreplaced every four
years at aqualified specialist workshop,
e.g. aMercedes-Ben zServi ce Centre. Practical advice
230_AKB; 5; 4, en-GB
bjanott
,V ersion: 2.9.6
2008-04-08T15:09:54+02:00
-Seite 269 ZDateiname: 6515_3089_02_buchblock.pdf; preflight
Page 295 of 317
Tyre
sand wheels 292 Tyre
sand wheels Points to remember
! For safety reasons, Mercedes-Benz rec-
ommend sthaty ou onlyusetyres which
have been approved by Mercedes-Benz
specifically for your vehicle. Thes etyres are
specially adapted for us ewitht he control
systems, such as ABS or ESP ®
,a nd are
marked as follows:
R MO =Mercedes-Benz Original
R MOE =Mercedes-Benz Original Exten-
ded* (with run-flat characteristics)
If yo uuseother tyres ,Mercedes-Benz can-
not accep tany responsibility for damage
which ma yoccur. Informatio nabout tyres
can be obtained fro many Mercedes-Benz
Service Centre.
i Vehicle swithM OExtended run-flat sys-
tem ar enot equipped with the TIREFIT
kit* 27
.
It is therefore recommended to additionally
equi pyourv ehicl ewitht he TIREFIT kit*
when fitting tyres tha tdon ot featur erun-
flat properties ,e.g.w inter tyres. i
ATIREFIT kit* is availabl efroma ny quali-
fied specialis tworkshop ,e.g.aM ercedes-
Benz Service Centre.
! If yo ufittyres other tha nthose tested and
recommended by Mercedes-Benz, charac-
teristics such as handling ,noise level sand
fuel consumption, etc. could be adversely
affected .Inaddition, when driving with a
load ,dimensiona lvaria tions and different
tyr ed eformatio ncharacteristics could
caus ethe tyres to com einto contact with
the bodywork and axl ecomponents .This
could resul tindamag etothe tyres or the
vehicle.
i Furthe rinformation abou ttyres and
wheels ca nbeobtained fro many
Mercedes-Benz Service Centre.
Yo uw illf in dat able of tyr epressures on the
insid eofy ourv ehicle' sfue lfiller flap.You
will find furthe rinformation abou ttyrep res-
sures in the "Operation" section
(Y page 184).
27 Onl yfor certai ncountries. Technica
ldata
*optional
230_AKB; 5; 4, en-GB
bjanott, Version: 2.9.6
2008-04-08T15:09:54+02:0
0-Seite 292 Dateiname: 6515_3089_02_buchblock.pdf; preflight