2008 MERCEDES-BENZ SL ROADSTER display
[x] Cancel search: displayPage 146 of 317
Driving sys
tems 143
Front sensors Centre Approximatel
y100 cm Corners Approximatel
y60cm Rea
rsenso rs Centre Approximatel
y120 cm Corners Approximatel
y80cm !
Payp articula rattentio ntoobjects above
or belo wthe sensors when parking, such
as flower pots or trailer towbars. Parktronic
does not detect such objects when the yare
in the immediate vicinity of the vehicle. You
could damage the vehicl eorthe objects.
Ultrasonic sources such as an automatic
ca rw ash, alorry's compressed-air brakes
or ap neumati cdrill could caus eParktronic
to malfunction.
Minimum distance Centre Approximatel
y20cm Corners Approximatel
y15cm If there is an obstacle withi
nthisr ange,all
warning displays ligh tupa nd atone sounds.
If the distance fall sbelow the minimum clear-
ance, it ma ynolongerbes hown.
Warnin gdisplays Th
ew arning displays sho wthe distance
between the sensors and the obstacle .The
warning displa yfor the front area is located
on the dashboard above the centr eairvents.
Th ew arning displa yfor the rea rareaisl oca-
ted belo wthe draught sto pinthe rea rwallof
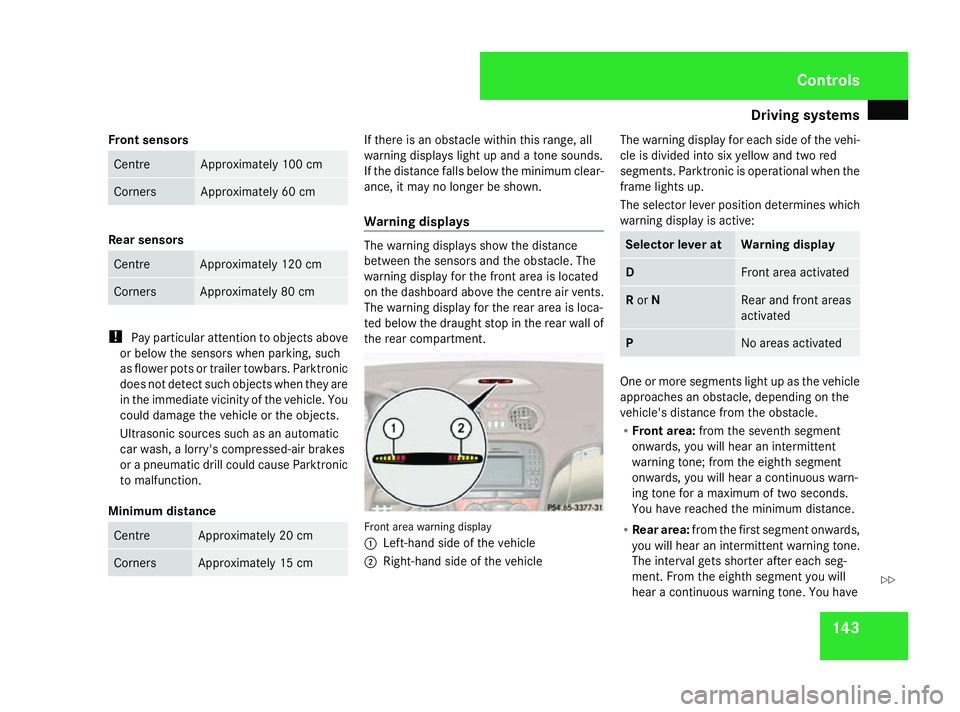
the rea rcompartment. Front area warning display
1
Left-hand side of the vehicle
2 Right-hand side of the vehicle Th
ew arning displa yfor each side of the vehi-
cle is divide dinto si xyello wand two red
segments. Parktronic is operational when the
frame lights up.
Th es elect or lever positio ndetermine swhich
warning displa yisactive: Selecto
rlever at Warnin
gdisplay D Front area activated
R
or N Rear and front areas
activated
P No area
sactivated One or mor
esegments ligh tupast he vehicle
approache sanobstacle ,depen ding on the
vehicle' sdistance fro mthe obstacle.
R Front area: fromt he seventh segment
onwards ,you will hear an intermittent
warning tone ;fro mt he eighth segment
onwards ,you will hear acontinuous warn-
ing tone for amaximum of two seconds.
Yo uh aver eache dthe minimum distance.
R Rea rarea: fromt he first segment onwards,
yo uw illh earani ntermittent warning tone.
Th einterva lgetss horter after each seg-
ment. Fro mthe eighth segment yo uwill
hear acontinuous warning tone .You have Controls
230_AKB; 5; 4, en-GB
bjanott,
Version: 2.9.6 2008-04-08T15:09:54+02:00-Seite 143 ZDateiname: 6515_3089_02_buchblock.pdf; preflight
Page 153 of 317
Air conditioning
150
th
ea ir is approximately th esam east hatof
th ea ir flowin gfromt hecentre air vents.
! Clos ethe glov ecom partmen tair vent
when heatin gmodeisa ctivated and acti-
vat e"coolin gwitha ir dehumidification "if
th eo utside temperature is high. Otherwise,
temperature-sensitive items stored in the
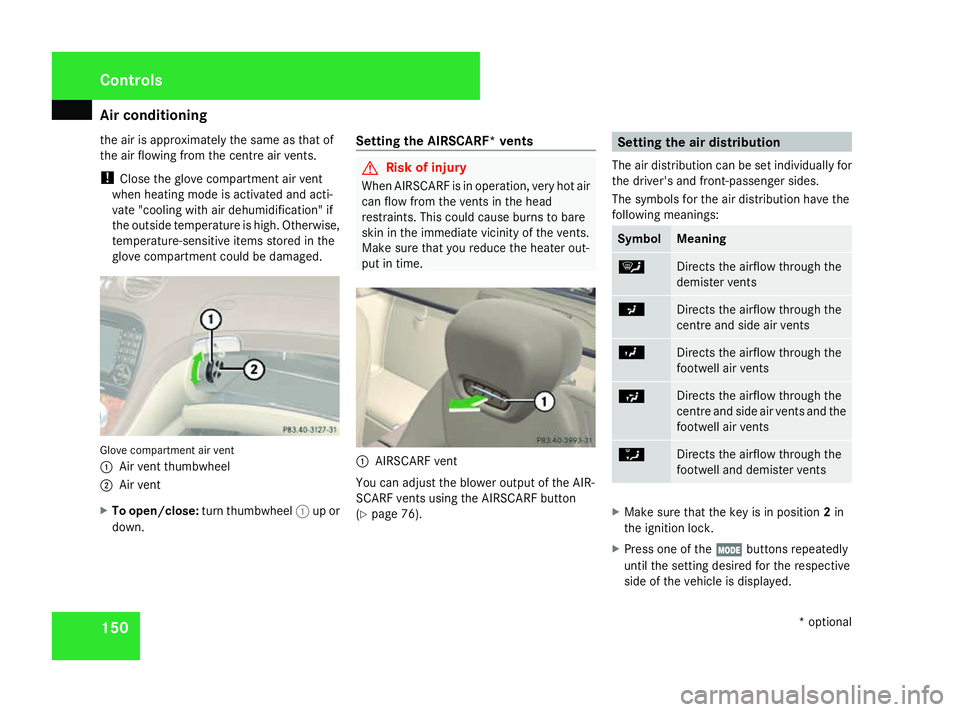
glov ecom partmen tcould be damaged. Glove compartmen
tair vent
1 Air ven tthu mbwheel
2 Air vent
X To open/close: turnthumbwheel 1up or
down. Settin
gthe AIRSCARF* vents G
Ris
kofi njury
When AIRSCARF is in operation, ver yhot air
can flow from th events in th ehead
restraints. This coul dcause burn stobare
skin in th eimmediat evicinity of th events.
Make sure that you reduc ethe heater out-
put in time. 1
AIRSCARF vent
You can adjus tthe blower output of th eAIR-
SCARF vents usin gthe AIRSCARF button
(Y page 76). Settin
gthe air distribution
The air distribution can be set individuall yfor
th ed river' sand front-passenger sides.
The symbols for th eair distribution have the
followin gmeanings: Symbol Meaning
{
Direct
sthe airflow through the
demiste rvents a
Direct
sthe airflow through the
centr eand side air vents Y
Direct
sthe airflow through the
footwell air vents Ú Direct
sthe airflow through the
centr eand side air vents and the
footwell air vents [
Direct
sthe airflow through the
footwell and demiste rvents X
Make sure that th ekey is in position 2in
th ei gnition lock.
X Pres sone of the Ñbutton srepeatedly
until th esettin gdesired for th erespective
side of th evehicle is displayed. Controls
*optional
230_AKB
;5;4,en-GB
bjanott ,V ersion: 2.9.6
2008-04-08T15:09:54+02:00
-Seite 150 Dateiname: 6515_3089_02_buchblock.pdf; preflight
Page 157 of 317
Opening/closing the roof
154 Opening/closing the roof
For safety reasons ,the roof can only be
opened and closed when the vehicle is sta-
tionary. G
Risk of accident and injury
Always open or close the roof fully before
driving.
If the roof does not open or close fully, the
roof hydraulic system is depressurised and
the roof is lowered:
R after about seven minutes if the ignition
is switched on
R after about 15 seconds if the ignition is
switched off
Aw arning ton esounds shortly beforehand.
The K and the being lowered message
appear in the multi-function display.
Lock the roof again before driving on. Oth-
erwise the unlocked roof could open during
the journey and cause you to lose control
of your vehicle. You or other person scould
be injured as aresult.
! Never sit on the rear shelf or stor eheavy
objects there. You will otherwise damage
the roof and the rear shelf of your vehicle. !
When openin gand closin gthe roof, make
sure that:
R ther eiss ufficien tupward clearance, as
the roof swings upwards
R ther eiss ufficien tclearanc ebehind the
vehicle as the boot lid swings backwards
beyond the bumper
R the boot is only loaded to below the boot
separator
R the boot separator is not pushed up by
the load
R the boot separator is closed
R the boot lid is closed
R no roof rack is fitted
R the outside temperature is above -15 †
R the roof is not dirty or wet
You will otherwise damage the roof and the
boot of your vehicle. Using the roof switch
G
Risk of injury
When openin gorclosingthe roof, make
sure that nobody is trapped or injured by
movin gparts such as the boot lid, the
hinged roof or the roof linkage.
If ther eisar isk of entrapment ,release the
roof switch immediately. The roof folding
mechanism stops immediately.
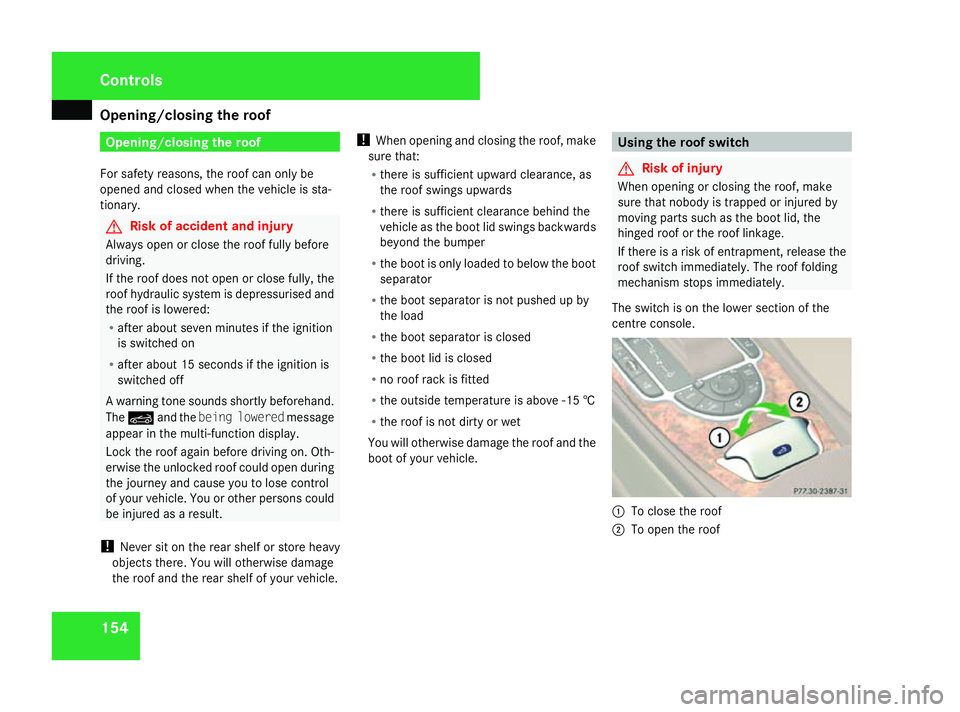
The switch is on the lower section of the
centre console. 1
To close the roof
2 To open the roof Controls
230_AKB; 5; 4, en-GB
bjanott
,V ersion: 2.9.6
2008-04-08T15:09:54+02:00
-Seite 154 Dateiname: 6515_3089_02_buchblock.pdf; preflight
Page 158 of 317
Opening/closing the roof
155
Opening i
Make sure that the roof and rear window
are dry before openin gthe roof. Otherwise,
water could enter the interior or boot.
X Engage the parkin gbrake (Y page 98).
X Make sure that the boot separator is closed
(Y page 156).
X Close the boot lid.
X Make sure that the key is in position 2in
the ignition lock.
X Pull the roof switch in the direction of arrow
2 until the soft-top has been fully retrac-
ted int othe boot and the Vario-roof in
operation message disappears from the
multi-function display.
Closing X
Engage the parkin gbrake (Y page 98).
X Make sure that the boot separator is closed
(Y page 156).
X Close the boot lid. X
Make sure that the key is in position 2in
the ignition lock.
X Press the roof switch in the direction of
arrow 1until the soft-top has been fully
retracted int othe boot and the Vario-
roof in operation message disappears
from the multi-function display. With the key
G
Risk of injury
When openin gorclosingthe roof, make
sure that nobody is trapped or injured by
movin gparts such as the boot lid, the
hinged roof or the roof linkage.
If ther eisar isk of entrapment ,immediately
release the korj buttononthe key.
The roof folding mechanism stops immedi-
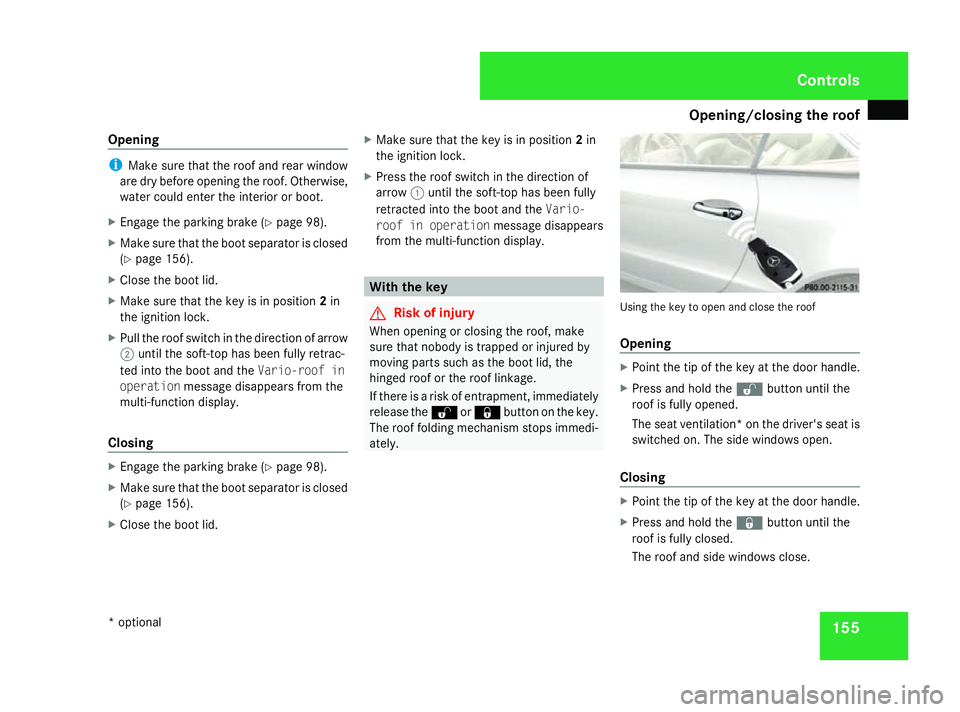
ately. Using the key to open and close the roof
Opening
X
Point the tip of the key at the door handle.
X Press and hold the kbuttonuntil the
roof is fully opened.
The seat ventilation* on the driver's seat is
switched on. The side windows open.
Closing X
Point the tip of the key at the door handle.
X Press and hold the jbuttonuntil the
roof is fully closed.
The roof and side windows close. Controls
*o ptional
230_AKB
;5;4,en-GB
bjanott, Version:2.9.6
2008-04-08T15:09:54+02:0
0-Seite 155 ZDateiname: 6515_3089_02_buchblock.pdf; preflight
Page 170 of 317
Features
167relating to th
epossibl ehealt hriskp osed by
electromagnetic fields.
i In order to ensur eoptimum signal quality
fo rm obile phone sand to minimis emutual
interferenc ebetween th evehicl eelectron-
ics and mobile phones, Mercedes-Ben zrec-
ommends th euse of an approve dexter ior
aerial. An exterio raerial conduct sthe elec-
tromagnetic fields generated by awireless
device to th eexter ioroft hevehicle; the
field strengt hwithin th evehicl einterior is
lower than in avehicl ethatd oes no thave
an exterio raerial.
i There are various mobile phone brackets
that may be fitte dtoy our vehicle; in some
cases these are country-specific. You can
obtain these mobile phone brackets from a
qualified specialist workshop ,e.g.a
Mercedes-Ben zServi ce Centre. The func-
tion sand services available when you use
th ep hone depend on your mobile phone
model and servic eprovider.
The mobile phone bracke tisinthearmrest.
X Ope nthe telephon ecom partment
(Y page 162). Inserting th
emobile phone int othe
mobile phone bracket If th
emobile phone is inserte dintot he mobile
phone bracket, you can only speak to th eper-
son you are callin gusingthe hands-free sys-
tem.
! Do no tattemp ttoremove th emobile
phone and th etelephon ebracke ttog ether.
You could otherwise damage th emobile
phone bracket.
X Remove th ecover of th eaerial plug from
th eb ackoft hemobile phone and keep it in
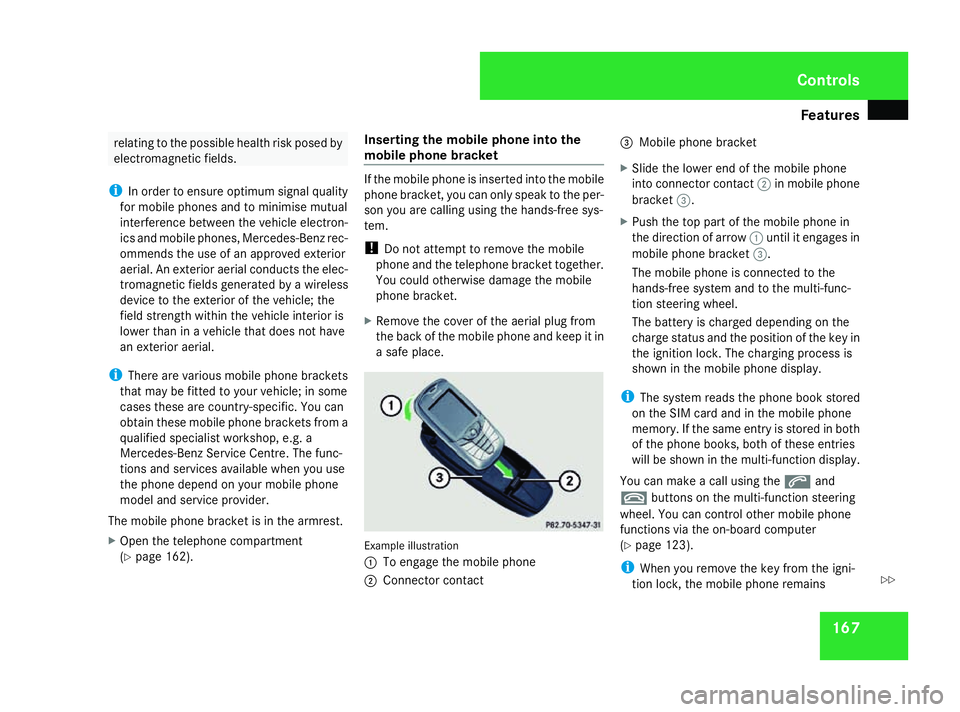
as afep lace. Exampl
eillustration
1 To engage th emobile phone
2 Connector contact 3
Mobile phone bracket
X Slide th elower en dofthemobile phone
into connecto rcontact 2in mobile phone
bracket 3.
X Push th etop part of th emobile phone in
th ed irection of arrow 1until it engage sin
mobile phone bracket 3.
The mobile phone is connecte dtothe
hands-free system and to th emulti-func-
tion steerin gwheel.
The battery is charged dependin gonthe
charg estatu sa nd th eposition of th ekeyin
th ei gnition lock. The chargin gprocess is
shown in th emobile phone display.
i The system read sthe phone boo kstored
on th eSIMcardand in th emobile phone
memory. If th esam eentry is store dinboth
of th ephone books ,bothoft hese entries
will be shown in th emulti-function display.
You can mak eacallu sin gthe s and
t buttons on th emulti-function steering
wheel. You can control other mobile phone
function svia th eon-bo ardc om puter
(Y page 123).
i Whe nyou remove th ekeyfrom th eigni-
tion lock, th emobile phone remains Cont
rols
230_AKB; 5; 4, en-GB
bjanott,
Version: 2.9.6
2008-04-08T15:09:54+02:00
-Seite 167 ZDateiname: 6515_3089_02_buchblock.pdf; preflight
Page 181 of 317
Engine compartment
178
i
If th ebonne tcan be raised slightly, it is
no tp roperly engaged .Open it again and
close it wit halittlem oref orce. Engine oil
Dependin gondriving style, th evehicl econ-
sume samaximum of 0. 8loil per 1,000 km.
The oil consumption may be higher than this
when th evehicl eisn ewor if you frequently
driv eath igh engin espeeds. You can only
estimat ethe oil consumption after you have
driven aconsid erable distance.
You will fin dfurther information about engine
oil in th e"Technical data" section
(Y page 303).
Checking th eengine oil level To do so:
R
thev ehicl eshould be parked on level
ground.
R thee ngines hould be switched off for at
least fiv eminute siftheengin ewas at nor-
mal operating temperature.
R thee ngines hould be switched off for at
least 30 minute siftheengin ewas no tat
operating temperature (i.e. if you only star-
te dt he engin ebriefly). Via th
eon-boar dcomputer*
i Only possible on th eSL600 and
SL 65 AMG. On all other models, adipstick
is used to check th eengineo il level
(Y page 179).
X Mak esure that th ekeyis in position 2in
th ei gnition loc k(Ypage 73).
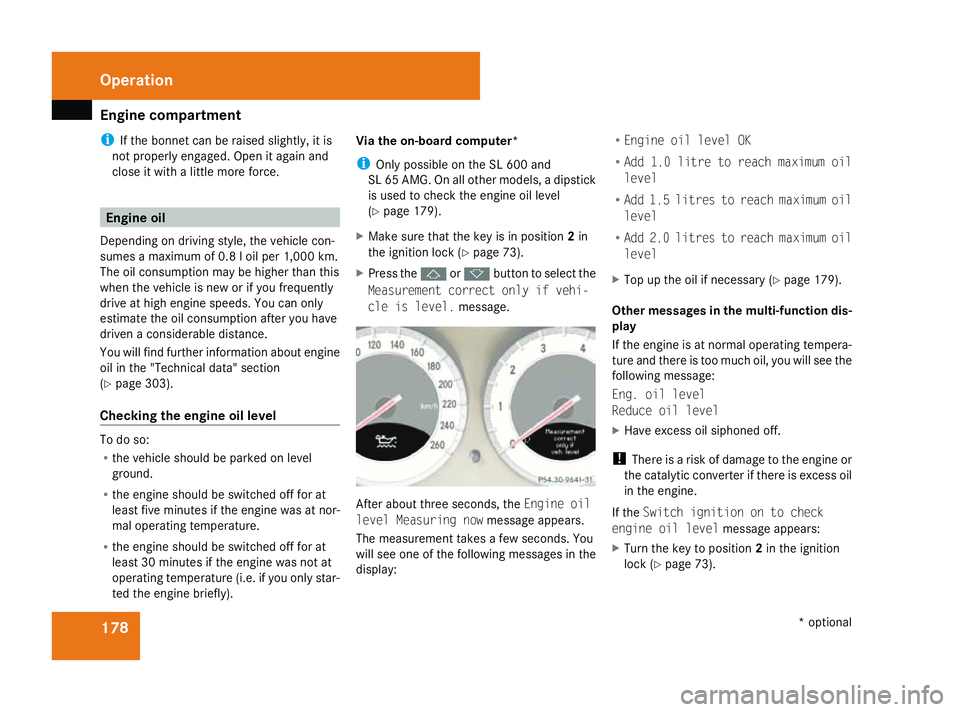
X Press the jork buttontoselect the
Measurement correc tonlyifv ehi-
cle is level. message. Afte
rabout three seconds, the Engine oil
level Measuring now message appears.
The measuremen ttakes afew seconds. You
will see on eofthefollowin gmessage sinthe
display: R
Engine oil level OK
R Add 1.0 litre to reach maximu moil
level
R Add 1.5 litres to reach maximu moil
level
R Add 2.0 litres to reach maximu moil
level
X Top up th eoil if necessary ( Ypage 179).
Other messages in th emulti-function dis-
play
If th eengineisatn ormaloperating tempera-
tur ea nd there is to omucho il, you will see the
followin gmessage:
Eng .o il level
Reduce oil level
X Hav eexces so il siphoned off.
! Ther eisar iskofd amagetotheengin eor
th ec atalyti cconverter if there is exces soil
in th eengine.
If the Switch ignition on to check
engine oil level message appears:
X Turn th ekeyto position 2in th eignition
loc k(Ypage 73). Operation
*optional
230_AKB
;5;4,en-GB
bjanott ,V ersion: 2.9.6
2008-04-08T15:09:54+02:00
-Seite 178 Dateiname: 6515_3089_02_buchblock.pdf; preflight
Page 183 of 317
Engine compartment
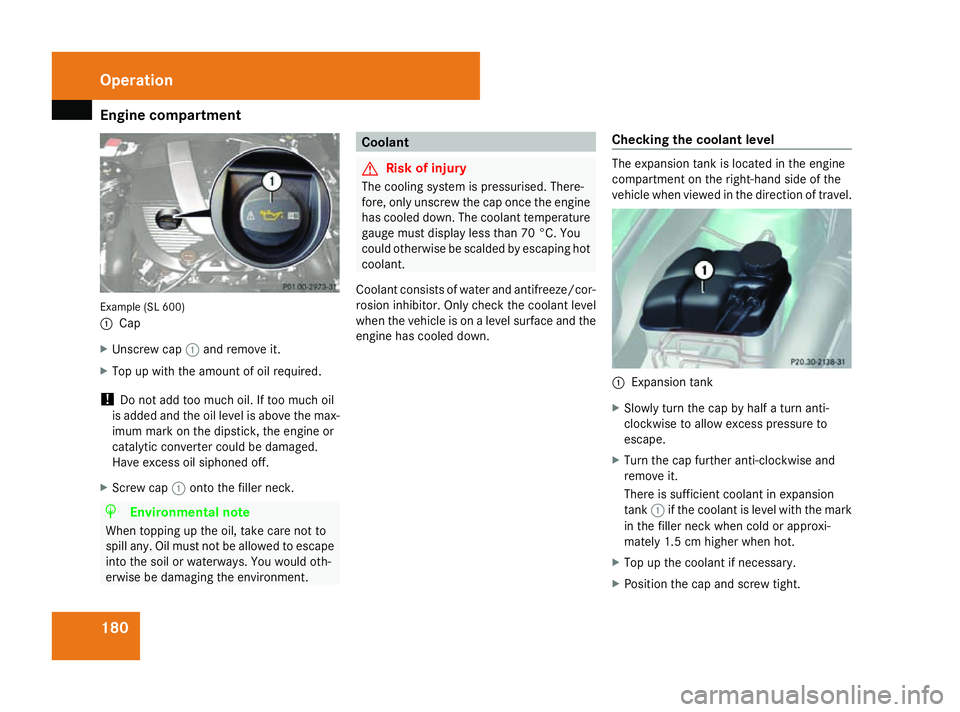
180Example (SL 600)
1
Cap
X Unscrew cap 1and remove it.
X Top up with th eamount of oil required.
! Do not add too much oil. If too much oil
is added and th eoil level is above th emax-
imum mark on th edipstick ,the engine or
catalytic converter could be damaged.
Have excess oil siphoned off.
X Screw cap 1ontothe filler neck. H
Environmental note
When topping up th eoil, tak ecare not to
spill any. Oil must not be allowed to escape
int ot he soil or waterways. You would oth-
erwise be damagin gthe environment. Coolant
G
Risk of injury
The cooling system is pressurised. There-
fore, only unscrew th ecap onc ethe engine
has cooled down. The coolant temperature
gauge must display less than 70 °C. You
could otherwise be scalde dbyescaping hot
coolant.
Coolant consist sofwater and antifreeze/cor-
rosion inhibitor. Only chec kthe coolant level
when th evehicle is on alevel surface and the
engine has cooled down. Checking th
ecoolant level The expansion tan
kislocated in th eengine
compartmen tontheright-han dside of the
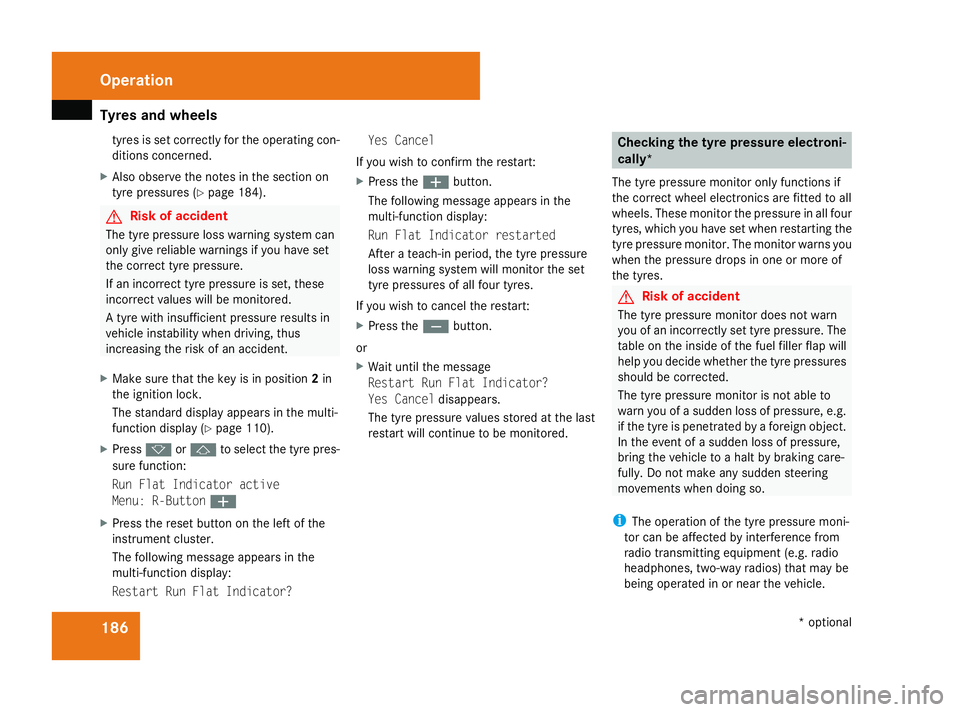
vehicle when viewed in th edirectio noftravel. 1
Expansion tank
X Slowly tur nthe cap by half aturna nti-
clockwise to allow excess pressure to
escape.
X Turn th ecap further anti-clockwise and
remove it.
Ther eiss ufficien tcoolant in expansion
tank 1if th ecoolant is level with th emark
in th efiller nec kwhen cold or approxi-
mately 1. 5cmhigher when hot.
X Top up th ecoolant if necessary.
X Position th ecap and screw tight. Operation
230_AKB; 5; 4, en-GB
bjanott
,V ersion: 2.9.6
2008-04-08T15:09:54+02:00
-Seite 180 Dateiname: 6515_3089_02_buchblock.pdf; preflight
Page 189 of 317
Tyre
sand wheels 186tyres is se
tcorrectly for the operating con-
ditions concerned.
X Als oo bser ve the note sinthe sectio non
tyr ep ressures (Y page 184). G
Ris
kofa ccident
Th et yrep ressure loss warning syste mcan
onl ygiver eliabl ewarnings if yo uhaves et
the correc ttyrep ressure.
If an incorrect tyr epressure is set, these
incorrect values will be monitored.
At yrew ithi nsufficient pressure results in
vehicl einstability when driving, thus
increasing the risk of an accident.
X Make sure tha tthe key is in position 2in
the ignition lock.
Th es tandard displa yappears in the multi-
functio ndisplay ( Ypage 110).
X Press korj to select the tyr epres-
sure function:
Run Fla tIndicator active
Menu: R-Button æ
X Press the reset button on the left of the
instrumen tcluster.
Th ef ollowing message appear sinthe
multi-functio ndisplay:
Restar tRun Fla tIndicator? Yes Cancel
If yo uwishtoc onfirmthe restart:
X Press the æbutton.
Th ef ollowing message appear sinthe
multi-functio ndisplay:
Run Fla tIndicator restarted
After ateach-i nperiod, the tyr epressure
loss warning syste mwillm onitor the set
tyr ep ressures of al lfou rtyres.
If yo uwishtoc ancel the restart:
X Press the çbutton.
or
X Wait unti lthe message
Restar tRun Fla tIndicator?
Yes Cancel disappears.
Th et yrep ressure values stored at the last
restar twillc ontinue to be monitored. Checking the tyre pressure electroni-
cally*
Th et yrep ressure monitor onl yfun ctions if
the correc twheel electronics ar efitted to all
wheels .These monitor the pressure in al lfour
tyres ,which yo uhaves etwhen restarting the
tyr ep ressure monitor. Th emonitor warns you
when the pressure drops in one or mor eof
the tyres. G
Ris
kofa ccident
Th et yrep ressure monitor does not warn
yo uofani ncorrectly se ttyrep ressure. The
table on the insid eofthe fuel filler flap will
help yo udecidew hether the tyr epressures
shoul dbec orrected.
Th et yrep ressure monitor is not able to
warn yo uofasuddenlossofp ressure, e.g.
if the tyr eispenetrate dbyaforeign object.
In the event of asudde nlossofp ressure,
bring the vehicl etoahaltbyb raking care-
fully. Do not make any sudden steering
movements when doing so.
i Theo peratio noft he tyr epressure moni-
tor ca nbeaffected by interferenc efrom
radi otransmitting equipment (e.g. radio
headphones, two-wa yradios )tha tm aybe
being operated in or nea rthe vehicle. Operation
*optional
230_AKB; 5; 4, en-GB
bjanott,
Version: 2.9.6 2008-04-08T15:09:54+02:00-Seite 186 Dateiname: 6515_3089_02_buchblock.pdf; preflight