2008 MERCEDES-BENZ SL ROADSTER roof
[x] Cancel search: roofPage 124 of 317
On-boar
dcomputer 121
Priming/deactivating the interior
motion sensor* Vehicles for the Netherlands: this function is
not available. The interior motion sensor is
alway
sprimed, even when the roof is open.
This function allows you to prime the interior
motion sensor ,even when the roof is open.
However, false alarms can be caused by fall-
ing leaves or insects, for example.
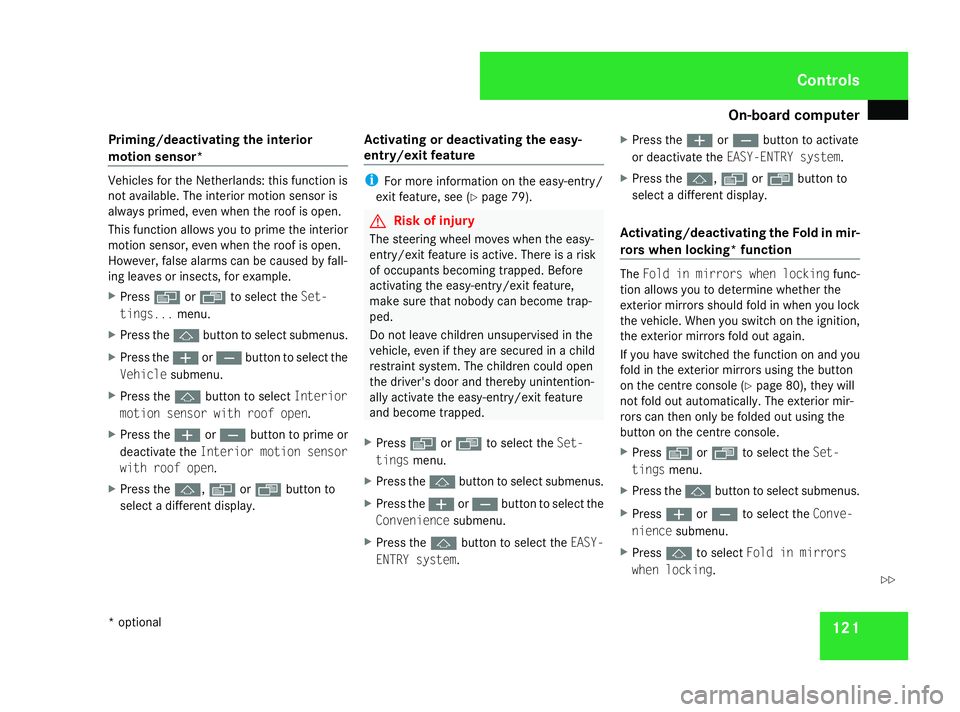
X Press èor· to select the Set-
tings... menu.
X Press the jbuttontos elect submenus.
X Press the æorç buttontoselect the
Vehicle submenu.
X Press the jbuttontos electInterior
motion sensor with roof open.
X Press the æorç buttontop rime or
deactivate the Interiormotion sensor
with roof open.
X Press the j,èorÿ buttonto
select adifferen tdisplay. Activating or deactivating the easy-
entry/exit feature i
For more information on the easy-entry/
exit feature, see (Y page 79). G
Risk of injury
The steering wheel moves when the easy-
entry/exit feature is active. There is arisk
of occupants becomin gtrapped. Before
activating the easy-entry/exit feature,
make sure that nobody can become trap-
ped.
Do not leave children unsupervised in the
vehicle, even if they are secured in achild
restraint system. The children could open
the driver's door and thereby unintention-
ally activate the easy-entry/exit feature
and become trapped.
X Press èor· to select the Set-
tings menu.
X Press the jbuttontos elect submenus.
X Press the æorç buttontoselect the
Convenience submenu.
X Press the jbuttontos elect the EASY-
ENTRY system. X
Press the æorç buttontoa ctivate
or deactivate the EASY-ENTRY system.
X Press the j,èorÿ buttonto
select adifferen tdisplay.
Activating/deactivating the Fold in mir-
rorsw hen locking* function The
Fold in mirrors when locking func-
tion allows you to determine whether the
exterior mirror sshould fold in when you lock
the vehicle. When you switch on the ignition,
the exterior mirror sfold out again.
If you have switched the function on and you
fold in the exterior mirror susing the button
on the centre console (Y page 80), they will
not fold out automatically. The exterior mir-
rors can then only be folded out using the
butto nont he centre console.
X Press èor· to select the Set-
tings menu.
X Press the jbuttontos elect submenus.
X Press æorç to select the Conve-
nience submenu.
X Press jto select Fold in mirrors
when locking . Controls
*o ptional
230_AKB
;5;4,en-GB
bjanott, Version:2.9.6
2008-04-08T15:09:54+02:0
0-Seite 121 ZDateiname: 6515_3089_02_buchblock.pdf; preflight
Page 157 of 317
Opening/closing the roof
154 Opening/closing the roof
For safety reasons ,the roof can only be
opened and closed when the vehicle is sta-
tionary. G
Risk of accident and injury
Always open or close the roof fully before
driving.
If the roof does not open or close fully, the
roof hydraulic system is depressurised and
the roof is lowered:
R after about seven minutes if the ignition
is switched on
R after about 15 seconds if the ignition is
switched off
Aw arning ton esounds shortly beforehand.
The K and the being lowered message
appear in the multi-function display.
Lock the roof again before driving on. Oth-
erwise the unlocked roof could open during
the journey and cause you to lose control
of your vehicle. You or other person scould
be injured as aresult.
! Never sit on the rear shelf or stor eheavy
objects there. You will otherwise damage
the roof and the rear shelf of your vehicle. !
When openin gand closin gthe roof, make
sure that:
R ther eiss ufficien tupward clearance, as
the roof swings upwards
R ther eiss ufficien tclearanc ebehind the
vehicle as the boot lid swings backwards
beyond the bumper
R the boot is only loaded to below the boot
separator
R the boot separator is not pushed up by
the load
R the boot separator is closed
R the boot lid is closed
R no roof rack is fitted
R the outside temperature is above -15 †
R the roof is not dirty or wet
You will otherwise damage the roof and the
boot of your vehicle. Using the roof switch
G
Risk of injury
When openin gorclosingthe roof, make
sure that nobody is trapped or injured by
movin gparts such as the boot lid, the
hinged roof or the roof linkage.
If ther eisar isk of entrapment ,release the
roof switch immediately. The roof folding
mechanism stops immediately.
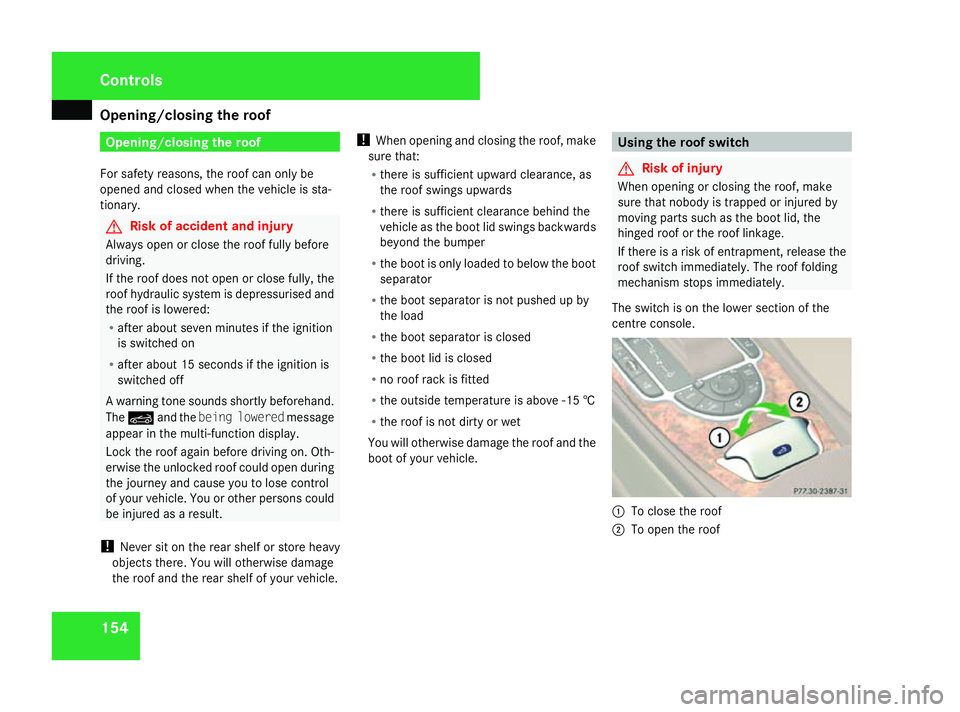
The switch is on the lower section of the
centre console. 1
To close the roof
2 To open the roof Controls
230_AKB; 5; 4, en-GB
bjanott
,V ersion: 2.9.6
2008-04-08T15:09:54+02:00
-Seite 154 Dateiname: 6515_3089_02_buchblock.pdf; preflight
Page 158 of 317
Opening/closing the roof
155
Opening i
Make sure that the roof and rear window
are dry before openin gthe roof. Otherwise,
water could enter the interior or boot.
X Engage the parkin gbrake (Y page 98).
X Make sure that the boot separator is closed
(Y page 156).
X Close the boot lid.
X Make sure that the key is in position 2in
the ignition lock.
X Pull the roof switch in the direction of arrow
2 until the soft-top has been fully retrac-
ted int othe boot and the Vario-roof in
operation message disappears from the
multi-function display.
Closing X
Engage the parkin gbrake (Y page 98).
X Make sure that the boot separator is closed
(Y page 156).
X Close the boot lid. X
Make sure that the key is in position 2in
the ignition lock.
X Press the roof switch in the direction of
arrow 1until the soft-top has been fully
retracted int othe boot and the Vario-
roof in operation message disappears
from the multi-function display. With the key
G
Risk of injury
When openin gorclosingthe roof, make
sure that nobody is trapped or injured by
movin gparts such as the boot lid, the
hinged roof or the roof linkage.
If ther eisar isk of entrapment ,immediately
release the korj buttononthe key.
The roof folding mechanism stops immedi-
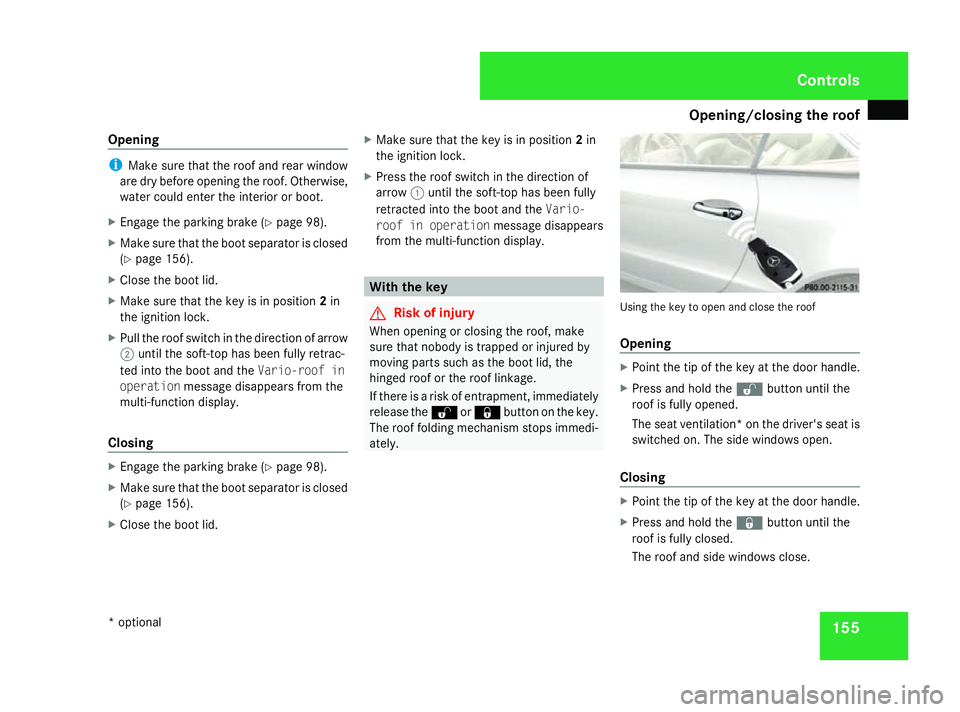
ately. Using the key to open and close the roof
Opening
X
Point the tip of the key at the door handle.
X Press and hold the kbuttonuntil the
roof is fully opened.
The seat ventilation* on the driver's seat is
switched on. The side windows open.
Closing X
Point the tip of the key at the door handle.
X Press and hold the jbuttonuntil the
roof is fully closed.
The roof and side windows close. Controls
*o ptional
230_AKB
;5;4,en-GB
bjanott, Version:2.9.6
2008-04-08T15:09:54+02:0
0-Seite 155 ZDateiname: 6515_3089_02_buchblock.pdf; preflight
Page 159 of 317
Opening/closing the roof
156 Locking the roof again
The roof is unlocked when:
R the K Vario-roof in operation
message appears in the multi-function dis-
play
R you hear awarning ton eorthe indicator
lamp flashes for up to ten seconds when
pulling away or while driving
You can lock the roof again if it is not locked
fully.
Befor edriving on X
Make sure that the key is in position 2in
the ignition lock.
X Push the roof switch forwards
(Y page 154).
While driving X
Stop the vehicle immediately, paying atten-
tion to road and traffic conditions.
X Push the roof switch forwards
(Y page 154). Boot separator
The boot separator can be used to cover lug-
gage and loads in the boot.
! To avoid damaging the roof or luggage
when folding back the roof, you should:
R only load the boot to below the boot sep-
arator
R not place any objects on or in fron tofthe
boot separator
R not place any objects on the cover
behind the roll-over bars
R not allow the load to push up the boot
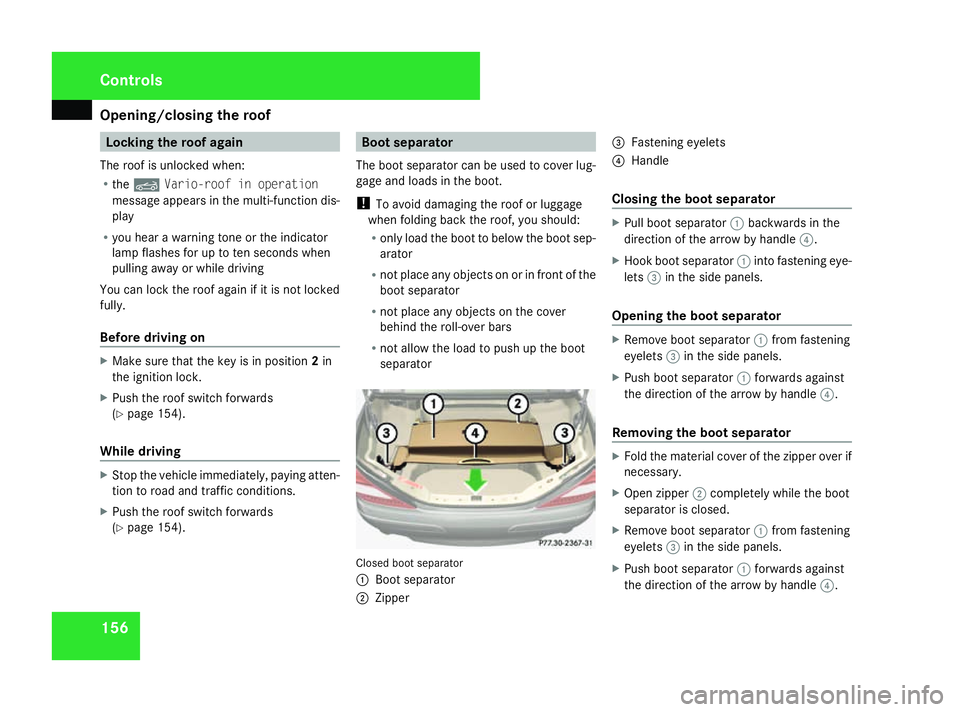
separator Closed boot separator
1
Boot separator
2 Zipper 3
Fastenin geyelets
4 Handle
Closing the boot separator X
Pull boot separator 1backwards in the
direction of the arrow by handle 4.
X Hook boot separator 1intofastening eye-
lets 3in the side panels.
Opening the boot separator X
Remove boot separator 1from fastening
eyelets 3in the side panels.
X Push boot separator 1forwards against
the direction of the arrow by handle 4.
Removing the boot separator X
Fold the material cover of the zipper over if
necessary.
X Open zipper 2completely while the boot
separator is closed.
X Remove boot separator 1from fastening
eyelets 3in the side panels.
X Push boot separator 1forwards against
the direction of the arrow by handle 4.Controls
230_AKB
;5;4,en-GB
bjanott, Version:2.9.6
2008-04-08T15:09:54+02:0
0-Seite 156 Dateiname: 6515_3089_02_buchblock.pdf; preflight
Page 160 of 317
Opening/closing the roof
157
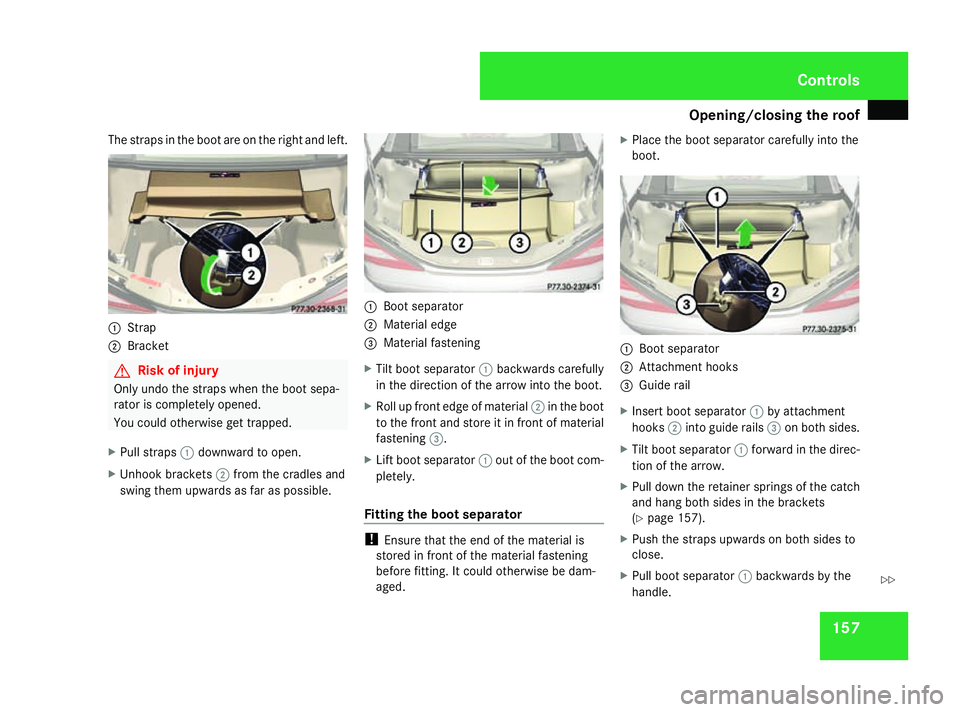
The straps in the boot are on the right and left.
1
Strap
2 Bracket G
Risk of injury
Only undo the straps when the boot sepa-
rator is completely opened.
You could otherwise get trapped.
X Pull straps 1downward to open.
X Unhook brackets 2from the cradles and
swing them upwards as far as possible. 1
Boot separator
2 Material edge
3 Material fastening
X Tilt boot separator 1backwards carefully
in the direction of the arrow into the boot.
X Roll up front edge of material 2in the boot
to the front and store it in front of material
fastening 3.
X Lift boot separator 1out of the boot com-
pletely.
Fitting the boot separator !
Ensure that the end of the material is
stored in front of the material fastening
before fitting. It could otherwise be dam-
aged. X
Place the boot separator carefully into the
boot. 1
Boot separator
2 Attachment hooks
3 Guider ail
X Insert boot separator 1by attachment
hooks 2into guide rails 3on both sides.
X Tilt boot separator 1forward in the direc-
tion of the arrow.
X Pull down the retainer springs of the catch
and hang both sides in the brackets
(Y page 157).
X Push the straps upwards on both sides to
close.
X Pull boot separator 1backwards by the
handle. Controls
230_AKB; 5; 4, en-GB
bjanott
,V ersion: 2.9.6
2008-04-08T15:09:54+02:00
-Seite 157 ZDateiname: 6515_3089_02_buchblock.pdf; preflight
Page 161 of 317
Opening/closing the roof
158
X
Hook boot separator 1intot he fastening
eyelets in the side panels.
X Fully close the zipper (Y page 156).
X Fold back the material covering of the zip-
per along the whole lengt hofthe boot
separator if necessary. Draught stop
The draught stop is awind protection device
for driving with the soft top open. It is stored
in ab ag or sheath in the boot*. G
Risk of accident
Fold back the top part of the draught stop
if it restrict syour vision or when it is dark.
It could otherwise impair your rear view.
and you could cause an accident.
Fitting X
Take the draught stop out of the bag.
X Leave the draught stop folded and place it
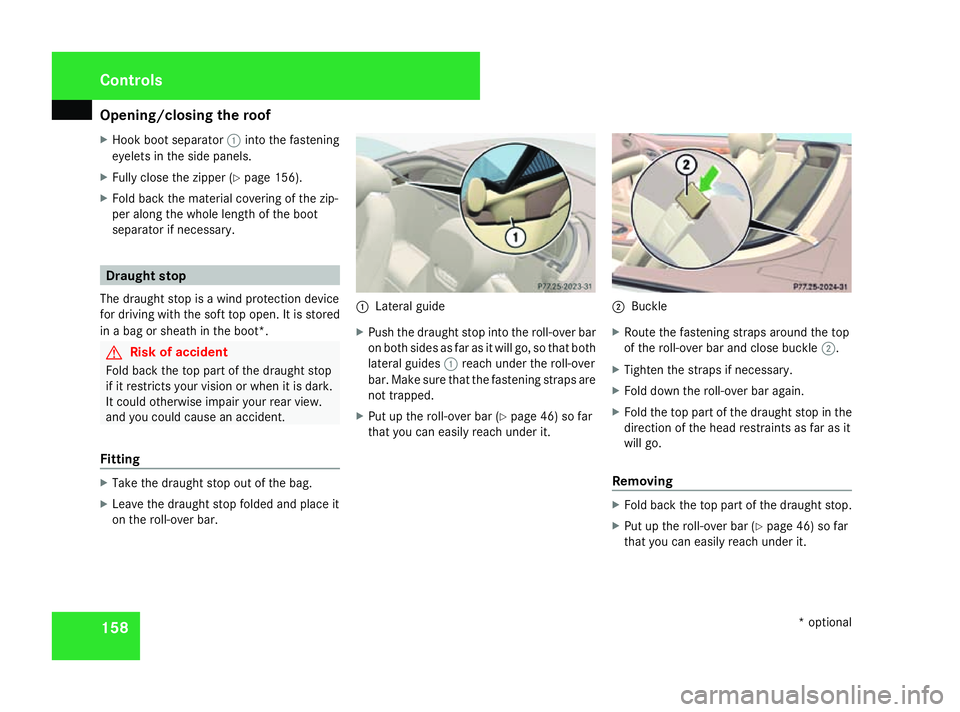
on the roll-over bar. 1
Lateral guide
X Push the draught stop int othe roll-over bar
on both sides as far as it will go, so that both
lateral guides 1reach under the roll-over
bar. Make sure that the fastening straps are
not trapped.
X Put up the roll-over bar ( Ypage 46) so far
that you can easily reach under it. 2
Buckle
X Route the fastening straps around the top
of the roll-over bar and close buckle 2.
X Tighten the straps if necessary.
X Fold down the roll-over bar again.
X Fold the top part of the draught stop in the
direction of the head restraint sasfar as it
will go.
Removing X
Fold back the top part of the draught stop.
X Put up the roll-over bar ( Ypage 46) so far
that you can easily reach under it. Controls
*optional
230_AKB
;5;4,en-GB
bjanott, Version:2.9.6
2008-04-08T15:09:54+02:0
0-Seite 158 Dateiname: 6515_3089_02_buchblock.pdf; preflight
Page 162 of 317
Loading and stowing
1591
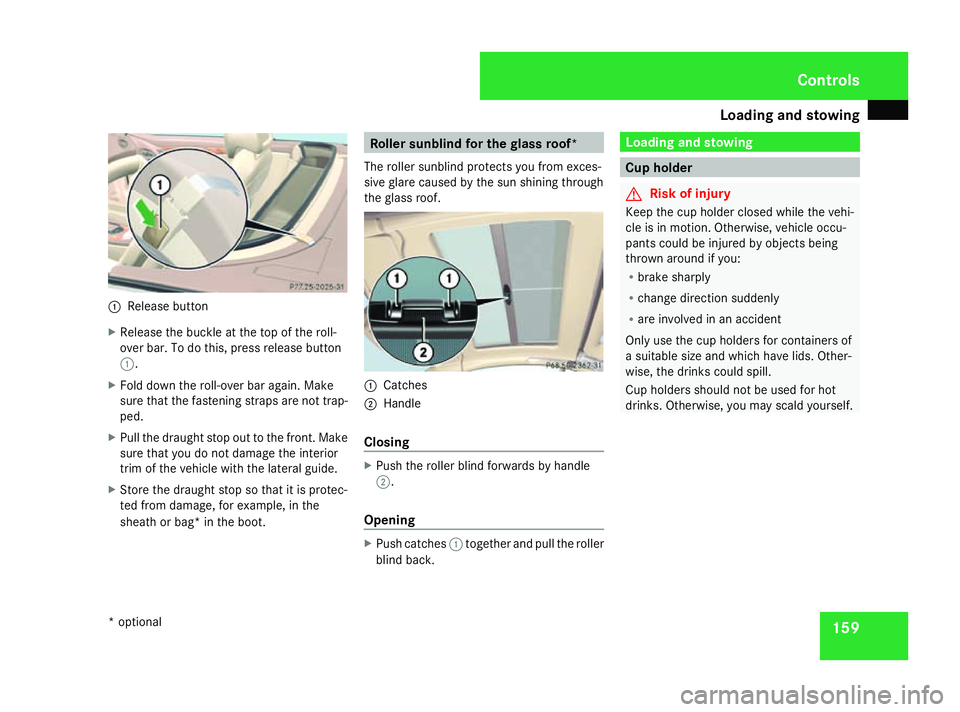
Release button
X Release the buckle at the top of the roll-
over bar. To do this, press release button
1.
X Fold down the roll-over bar again. Make
sure that the fastenin gstraps are not trap-
ped.
X Pull the draught stop out to the front .Make
sure that you do not damage the interior
trim of the vehicle with the lateral guide.
X Store the draught stop so that it is protec-
ted fro mdamage, for example, in the
sheat horb ag* in the boot. Roller sunblind for th
eglass roof*
The roller sunblin dprotect syou fro mexces-
sive glare caused by the sun shining through
the glass roof. 1
Catches
2 Handle
Closing X
Push the roller blind forwards by handle
2.
Opening X
Push catches 1together and pull the roller
blind back. Loading and stowing
Cup holder
G
Risk of injury
Keep the cup holder closed while the vehi-
cle is in motion. Otherwise, vehicle occu-
pant scould be injured by object sbeing
thrown around if you:
R brak esharply
R change direction suddenly
R are involved in an accident
Only use the cup holder sfor containers of
as uitable siz eand which have lids. Other-
wise, the drinks could spill.
Cup holder sshould not be used for hot
drinks. Otherwise, you may scald yourself. Controls
*o ptional
230_AKB; 5; 4, en-GB
bjanott
,V ersion: 2.9.6
2008-04-08T15:09:54+02:00
-Seite 159 ZDateiname: 6515_3089_02_buchblock.pdf; preflight
Page 163 of 317
Loading and stowing
1601
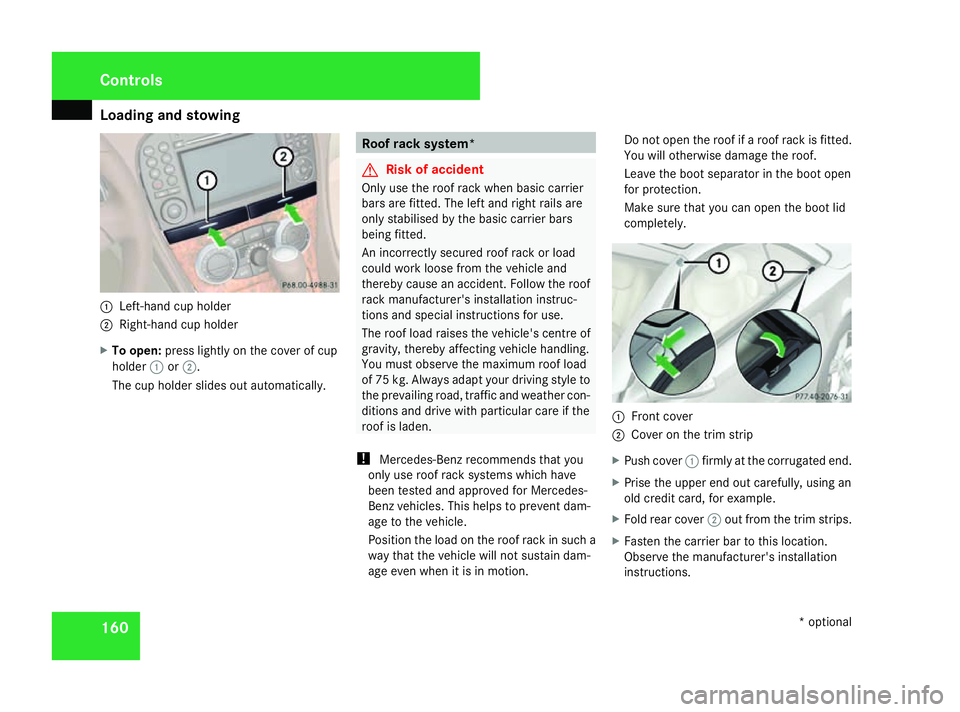
Left-han dcup holder
2 Right-hand cup holder
X To open: press lightly on the cover of cup
holder 1or2.
The cup holder slides out automatically. Roof rack system*
G
Risk of accident
Only use the roof rack when basic carrier
bars are fitted. The left and right rails are
only stabilised by the basic carrier bars
being fitted.
An incorrectly secured roof rack or load
could work loose fro mthe vehicle and
thereby cause an accident .Follow the roof
rack manufacturer' sinstallation instruc-
tion sand special instructions for use.
The roof load raises the vehicle's centr eof
gravity, thereby affectin gvehicle handling.
You must observe the maximum roof load
of 75 kg. Always adapt your driving style to
the prevailing road, traffic and weather con-
ditions and drive with particular care if the
roof is laden.
! Mercedes-Ben zrecommends that you
only use roof rack systems which have
been tested and approved for Mercedes-
Ben zvehicles. This helps to prevent dam-
age to the vehicle.
Position the load on the roof rack in such a
way that the vehicle will not sustain dam-
age even when it is in motion. Do not open the roof if
aroof rack is fitted.
You will otherwise damage the roof.
Leave the boot separator in the boot open
for protection.
Make sure that you can open the boot lid
completely. 1
Front cover
2 Cover on the trim strip
X Push cover 1firmly at the corrugated end.
X Prise the upper end out carefully, using an
old credit card, for example.
X Fold rear cover 2out fro mthe trim strips.
X Fasten the carrier bar to thi slocation.
Observe the manufacturer' sinstallation
instructions. Controls
*optional
230_AKB; 5; 4, en-GB
bjanott ,V ersion: 2.9.6
2008-04-08T15:09:54+02:00
-Seite 160 Dateiname: 6515_3089_02_buchblock.pdf; preflight