2008 MERCEDES-BENZ CLS COUPE turn signal bulb
[x] Cancel search: turn signal bulbPage 7 of 329
4
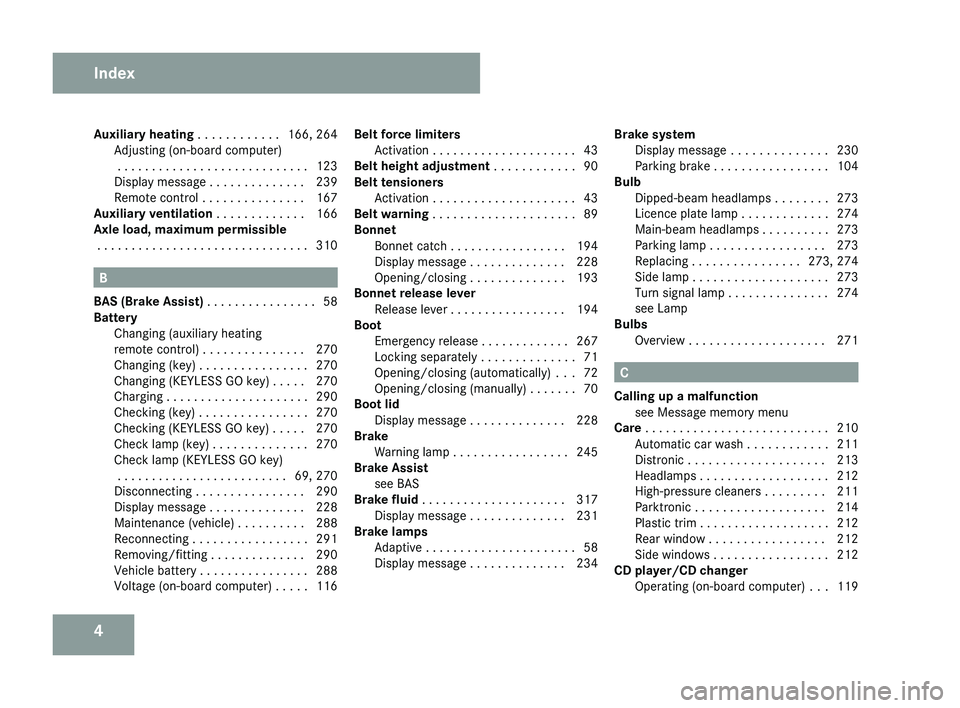
Auxiliary heating
. . . . . . . . . . . . 166, 264
Adjusting (on-board computer)
. . . . . . . . . . . . . . . . . . . . . . . . . . . . 123
Display message . . . . . . . . . . . . . . 239
Remote control . . . . . . . . . . . . . . . 167
Auxiliary ventilation . . . . . . . . . . . . . 166
Axle load, maximum permissible
. . . . . . . . . . . . . . . . . . . . . . . . . . . . . . . 310 B
BAS (Brake Assist)
. . . . . . . . . . . . . . . . 58
Battery Changing (auxiliary heating
remote control) . . . . . . . . . . . . . . . 270
Changing (key) . . . . . . . . . . . . . . . . 270
Changing (KEYLESS GO key) . . . . . 270
Charging . . . . . . . . . . . . . . . . . . . . . 290
Checking (key) . . . . . . . . . . . . . . . . 270
Checking (KEYLESS GO key) . . . . . 270
Check lamp (key) . . . . . . . . . . . . . . 270
Check lamp (KEYLESS GO key)
. . . . . . . . . . . . . . . . . . . . . . . . . 69, 270
Disconnecting . . . . . . . . . . . . . . . . 290
Display message . . . . . . . . . . . . . . 228
Maintenance (vehicle) . . . . . . . . . . 288
Reconnecting . . . . . . . . . . . . . . . . . 291
Removing/fitting . . . . . . . . . . . . . . 290
Vehicle battery . . . . . . . . . . . . . . . . 288
Voltage (on-board computer) . . . . . 116 Belt force limiters
Activation
. . . . . . . . . . . . . . . . . . . . . 43
Belt height adjustment . . . . . . . . . . . . 90
Belt tensioners Activation . . . . . . . . . . . . . . . . . . . . . 43
Belt warning . . . . . . . . . . . . . . . . . . . . . 89
Bonnet Bonnet catch . . . . . . . . . . . . . . . . . 194
Display message . . . . . . . . . . . . . . 228
Opening/closing . . . . . . . . . . . . . . 193
Bonnet release lever
Release lever . . . . . . . . . . . . . . . . . 194
Boot
Emergency release . . . . . . . . . . . . . 267
Locking separately . . . . . . . . . . . . . . 71
Opening/closing (automatically) . . . 72
Opening/closing (manually) . . . . . . . 70
Boot lid
Display message . . . . . . . . . . . . . . 228
Brake
Warning lamp . . . . . . . . . . . . . . . . . 245
Brake Assist
see BAS
Brake fluid . . . . . . . . . . . . . . . . . . . . . 317
Display message . . . . . . . . . . . . . . 231
Brake lamps
Adaptive . . . . . . . . . . . . . . . . . . . . . . 58
Display message . . . . . . . . . . . . . . 234 Brake system
Display message . . . . . . . . . . . . . . 230
Parking brake . . . . . . . . . . . . . . . . . 104
Bulb
Dipped-beam headlamps . . . . . . . . 273
Licence plate lamp . . . . . . . . . . . . . 274
Main-beam headlamps . . . . . . . . . . 273
Parking lamp . . . . . . . . . . . . . . . . . 273
Replacing . . . . . . . . . . . . . . . . 273, 274
Side lamp . . . . . . . . . . . . . . . . . . . . 273
Turn signal lamp . . . . . . . . . . . . . . . 274
see Lamp
Bulbs
Overview . . . . . . . . . . . . . . . . . . . . 271 C
Calling up a malfunction see Message memory menu
Care . . . . . . . . . . . . . . . . . . . . . . . . . . . 210
Automatic car wash . . . . . . . . . . . . 211
Distronic . . . . . . . . . . . . . . . . . . . . 213
Headlamps . . . . . . . . . . . . . . . . . . . 212
High-pressure cleaners . . . . . . . . . 211
Parktronic . . . . . . . . . . . . . . . . . . . 214
Plastic trim . . . . . . . . . . . . . . . . . . . 212
Rear window . . . . . . . . . . . . . . . . . 212
Side windows . . . . . . . . . . . . . . . . . 212
CD player/CD changer
Operating (on-board computer) . . . 119 Index
219_AKB; 2; 4, en-GB
mkalafa,
2007-11-13T09:28:36+01:00 - Seite 4
Page 236 of 329
Display messages
233Display messages Possible cause/consequence Possible solution
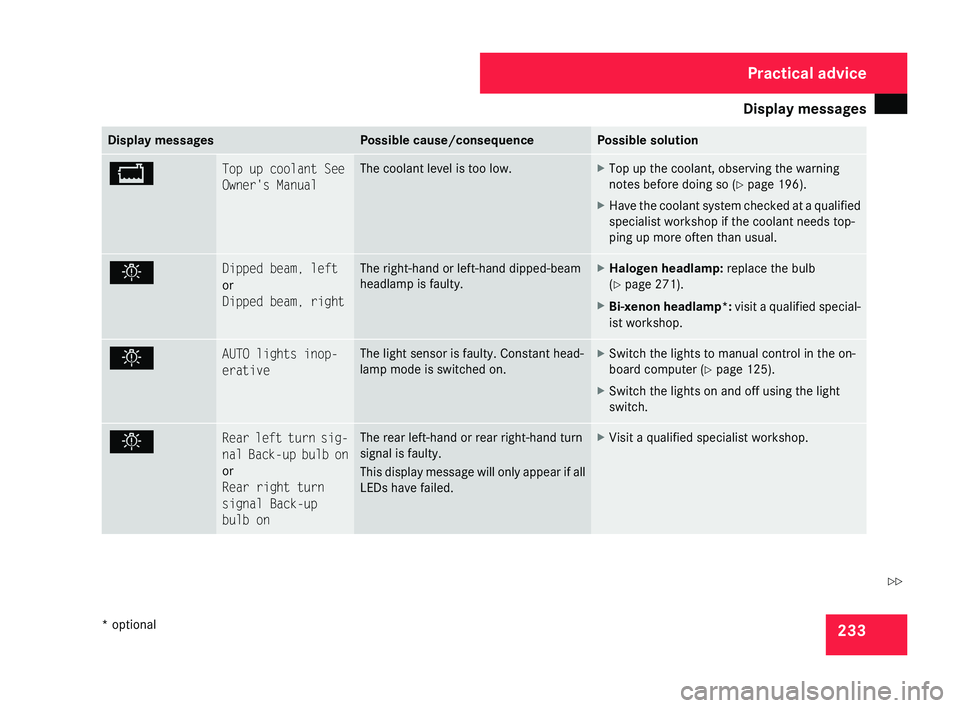
B Top up coolant See
Owner's Manual The coolant level is too low. X
Top up the coolant, observing the warning
notes before doing so (Y page 196).
X Have the coolant system checked at a qualified
specialist workshop if the coolant needs top-
ping up more often than usual. . Dipped beam, left
or
Dipped beam, right The right-hand or left-hand dipped-beam
headlamp is faulty. X
Halogen headlamp: replace the bulb
(Y page 271).
X Bi-xenon headlamp*: visit a qualified special-
ist workshop. . AUTO lights inop-
erative The light sensor is faulty. Constant head-
lamp mode is switched on. X
Switch the lights to manual control in the on-
board computer ( Y page 125).
X Switch the lights on and off using the light
switch. . Rear left turn sig-
nal
Back-up bulb on
or
Rear right turn
signal Back-up
bulb on The rear left-hand or rear right-hand turn
signal is faulty.
This
display message will only appear if all
LEDs have failed. X
Visit a qualified specialist workshop. Practical advice
* optional
219_AKB; 2; 4, en-GB
mkalafa,
2007-11-13T09:28:36+01:00 - Seite 233 Z
Page 237 of 329
Display messages
234 Display messages Possible cause/consequence Possible solution
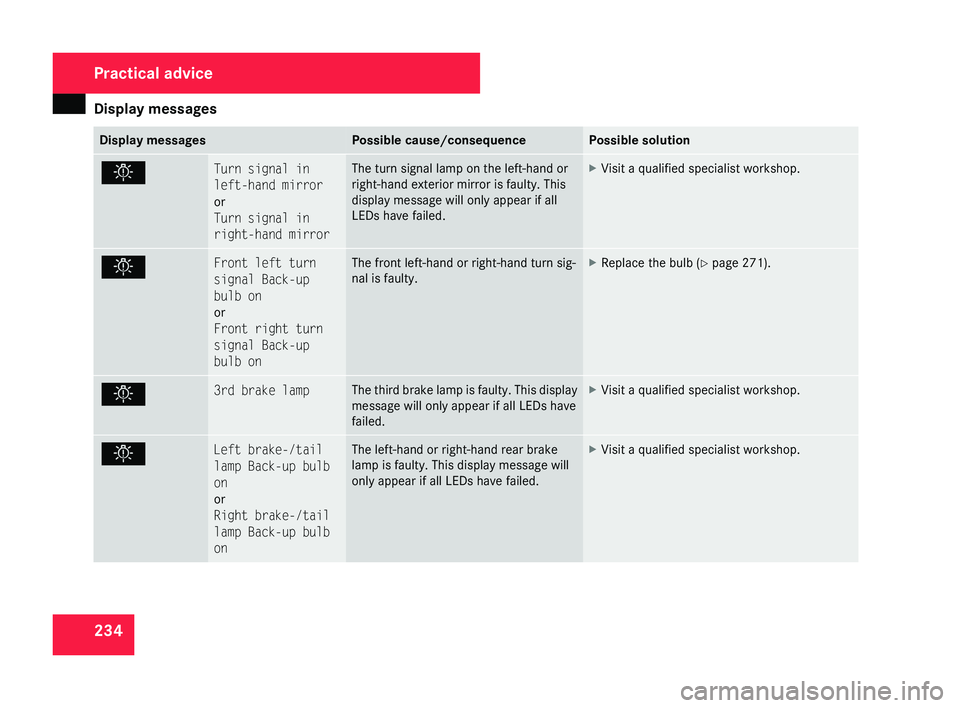
. Turn signal in
left-hand mirror
or
Turn signal in
right-hand mirror The turn signal lamp on the left-hand or
right-hand exterior mirror is faulty. This
display message will only appear if all
LEDs have failed. X
Visit a qualified specialist workshop. . Front left turn
signal Back-up
bulb on
or
Front right turn
signal Back-up
bulb on The front left-hand or right-hand turn sig-
nal is faulty. X
Replace the bulb ( Y page 271). . 3rd brake lamp The third brake lamp is faulty. This display
message will only appear if all LEDs have
failed. X
Visit a qualified specialist workshop. . Left brake-/tail
lamp Back-up bulb
on
or
Right brake-/tail
lamp Back-up bulb
on The left-hand or right-hand rear brake
lamp is faulty. This display message will
only appear if all LEDs have failed. X
Visit a qualified specialist workshop. Practical advice
219_AKB; 2; 4, en-GB
mkalafa,
2007-11-13T09:28:36+01:00 - Seite 234
Page 275 of 329
Changing the bulbs
272
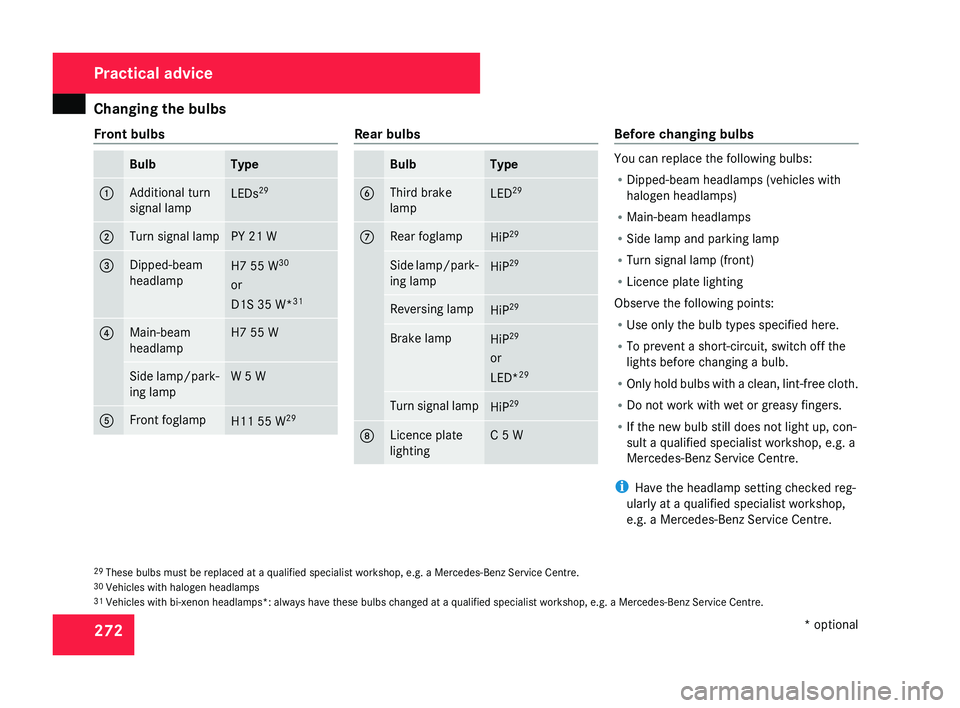
Front bulbs Bulb Type
1 Additional turn
signal lamp
LEDs
29 2 Turn signal lamp PY 21 W
3 Dipped-beam
headlamp
H7 55 W
30
or
D1S 35 W* 31 4 Main-beam
headlamp H7 55 W
Side lamp/park-
ing lamp W 5 W
5 Front foglamp
H11 55 W
29 Rear bulbs
Bulb Type
6 Third brake
lamp
LED
29 7 Rear foglamp
HiP
29 Side lamp/park-
ing lamp
HiP
29 Reversing lamp
HiP
29 Brake lamp
HiP
29
or
LED* 29 Turn signal lamp
HiP
29 8 Licence plate
lighting C 5 W Before changing bulbs
You can replace the following bulbs:
R
Dipped-beam headlamps (vehicles with
halogen headlamps)
R Main-beam headlamps
R Side lamp and parking lamp
R Turn signal lamp (front)
R Licence plate lighting
Observe the following points:
R Use only the bulb types specified here.
R To prevent a short-circuit, switch off the
lights before changing a bulb.
R Only
hold bulbs with a clean, lint-free cloth.
R Do not work with wet or greasy fingers.
R If the new bulb still does not light up, con-
sult a qualified specialist workshop, e.g. a
Mercedes-Benz Service Centre.
i Have the headlamp setting checked reg-
ularly at a qualified specialist workshop,
e.g. a Mercedes-Benz Service Centre.
29 These bulbs must be replaced at a qualified specialist workshop, e.g. a Mercedes-Benz Service Centre.
30 Vehicles with halogen headlamps
31 Vehicles with bi-xenon headlamps*: always have these bulbs changed at a qualified specialist workshop, e.g. a Mercedes-Benz Service Centre. Practical advice
* optional
219_AKB; 2; 4, en-GB
mkalafa,
2007-11-13T09:28:36+01:00 - Seite 272
Page 276 of 329
Changing the bulbs
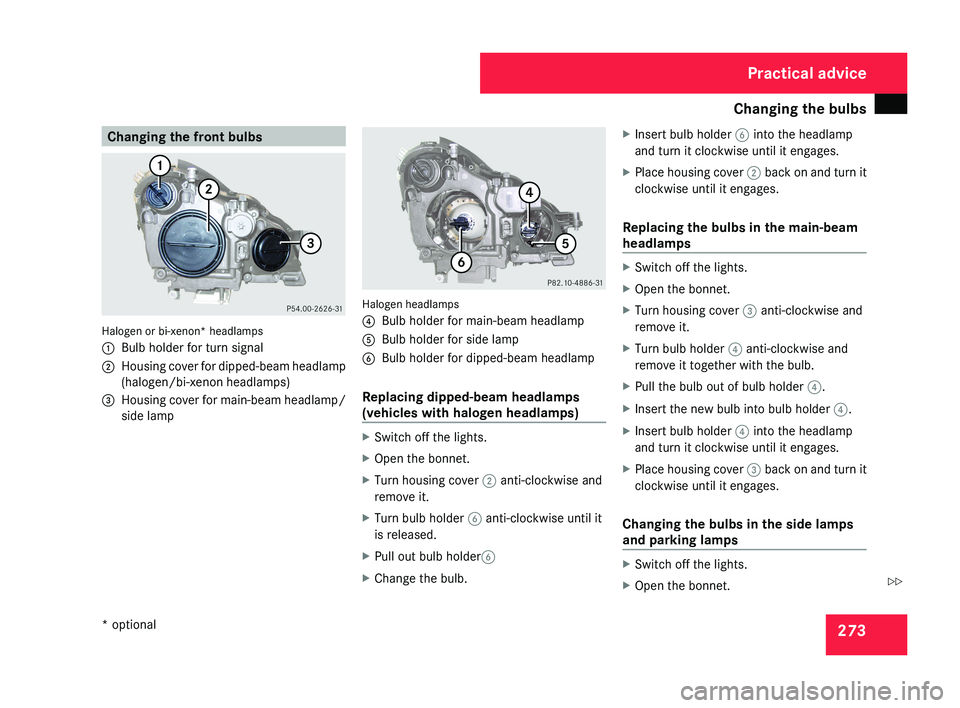
273Changing the front bulbsHalogen or bi-xenon* headlamps
1
Bulb holder for turn signal
2 Housing cover for dipped-beam headlamp
(halogen/bi-xenon headlamps)
3 Housing cover for main-beam headlamp/
side lamp
Halogen headlamps
4Bulb holder for main-beam headlamp
5 Bulb holder for side lamp
6 Bulb holder for dipped-beam headlamp
Replacing dipped-beam headlamps
(vehicles with halogen headlamps)
X Switch off the lights.
X Open the bonnet.
X Turn housing cover 2 anti-clockwise and
remove it.
X Turn bulb holder 6 anti-clockwise until it
is released.
X Pull out bulb holder 6
X Change the bulb. X
Insert bulb holder 6 into the headlamp
and turn it clockwise until it engages.
X Place housing cover 2 back on and turn it
clockwise until it engages.
Replacing the bulbs in the main-beam
headlamps
X Switch off the lights.
X Open the bonnet.
X Turn housing cover 3 anti-clockwise and
remove it.
X Turn bulb holder 4 anti-clockwise and
remove it together with the bulb.
X Pull the bulb out of bulb holder 4.
X Insert the new bulb into bulb holder 4.
X Insert bulb holder 4 into the headlamp
and turn it clockwise until it engages.
X Place housing cover 3 back on and turn it
clockwise until it engages.
Changing the bulbs in the side lamps
and parking lamps
X Switch off the lights.
X Open the bonnet.
Practical advice
* optional
219_AKB; 2; 4, en-GB
mkalafa,
2007-11-13T09:28:36+01:00 - Seite 273
Z
Page 277 of 329
Changing the bulbs
274
X
Turn housing cover 3 anti-clockwise and
remove it.
X Turn main-beam headlamp bulb holder 4
anti-clockwise until it disengages and then
remove it together with the bulb.
X Turn the bulb anti-clockwise, applying
slight pressure, and remove it from bulb
holder 5.
X Insert the new bulb into bulb holder 5 and
turn it clockwise.
X Pull out bulb holder 5.
X Insert main-beam headlamp bulb
holder 4 into the headlamp and turn it
clockwise until it engages.
X Place housing cover 3 back on and turn it
clockwise until it engages.
Replacing the turn signal lamps X
Switch off the lights.
X Open the bonnet.
X Turn bulb holder 1 anti-clockwise and
remove it along with the bulb.
X Turn the bulb anti-clockwise, applying
slight pressure, and remove it from bulb
holder 1. X
Insert the new bulb into bulb holder 1 and
turn it clockwise.
X Insert bulb holder 1 into the headlamp
and turn it clockwise until it engages. Changing the rear bulbs
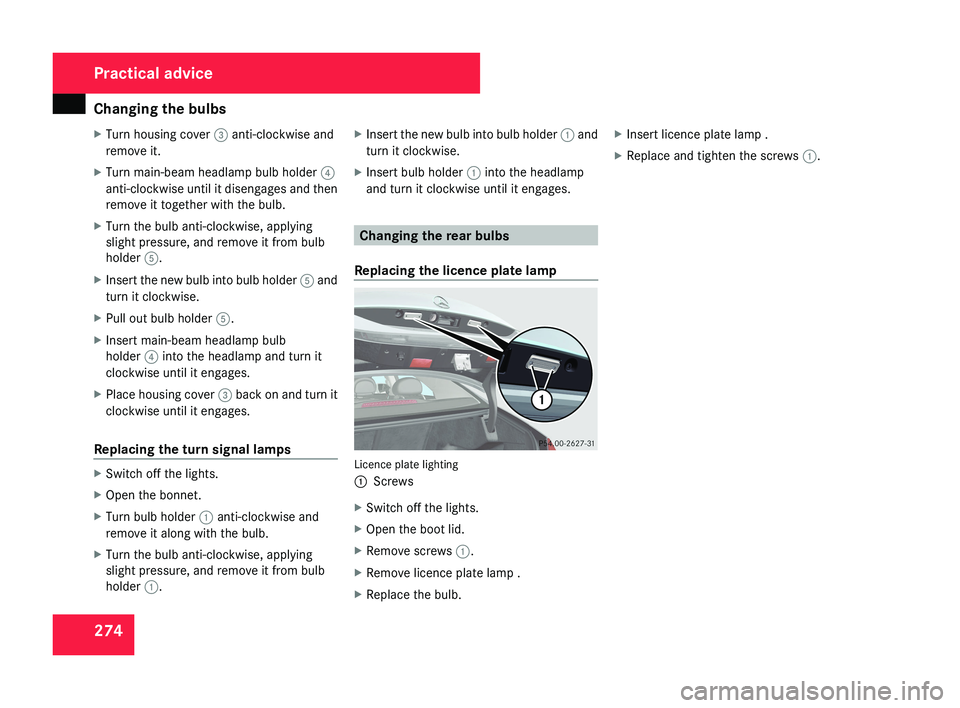
Replacing the licence plate lamp Licence plate lighting
1
Screws
X Switch off the lights.
X Open the boot lid.
X Remove screws 1.
X Remove licence plate lamp .
X Replace the bulb. X
Insert licence plate lamp .
X Replace and tighten the screws 1.Practical advice
219_AKB; 2; 4, en-GB
mkalafa,
2007-11-13T09:28:36+01:00 - Seite 274