2008 MERCEDES-BENZ CLS COUPE bulb
[x] Cancel search: bulbPage 7 of 329
4
Auxiliary heating
. . . . . . . . . . . . 166, 264
Adjusting (on-board computer)
. . . . . . . . . . . . . . . . . . . . . . . . . . . . 123
Display message . . . . . . . . . . . . . . 239
Remote control . . . . . . . . . . . . . . . 167
Auxiliary ventilation . . . . . . . . . . . . . 166
Axle load, maximum permissible
. . . . . . . . . . . . . . . . . . . . . . . . . . . . . . . 310 B
BAS (Brake Assist)
. . . . . . . . . . . . . . . . 58
Battery Changing (auxiliary heating
remote control) . . . . . . . . . . . . . . . 270
Changing (key) . . . . . . . . . . . . . . . . 270
Changing (KEYLESS GO key) . . . . . 270
Charging . . . . . . . . . . . . . . . . . . . . . 290
Checking (key) . . . . . . . . . . . . . . . . 270
Checking (KEYLESS GO key) . . . . . 270
Check lamp (key) . . . . . . . . . . . . . . 270
Check lamp (KEYLESS GO key)
. . . . . . . . . . . . . . . . . . . . . . . . . 69, 270
Disconnecting . . . . . . . . . . . . . . . . 290
Display message . . . . . . . . . . . . . . 228
Maintenance (vehicle) . . . . . . . . . . 288
Reconnecting . . . . . . . . . . . . . . . . . 291
Removing/fitting . . . . . . . . . . . . . . 290
Vehicle battery . . . . . . . . . . . . . . . . 288
Voltage (on-board computer) . . . . . 116 Belt force limiters
Activation
. . . . . . . . . . . . . . . . . . . . . 43
Belt height adjustment . . . . . . . . . . . . 90
Belt tensioners Activation . . . . . . . . . . . . . . . . . . . . . 43
Belt warning . . . . . . . . . . . . . . . . . . . . . 89
Bonnet Bonnet catch . . . . . . . . . . . . . . . . . 194
Display message . . . . . . . . . . . . . . 228
Opening/closing . . . . . . . . . . . . . . 193
Bonnet release lever
Release lever . . . . . . . . . . . . . . . . . 194
Boot
Emergency release . . . . . . . . . . . . . 267
Locking separately . . . . . . . . . . . . . . 71
Opening/closing (automatically) . . . 72
Opening/closing (manually) . . . . . . . 70
Boot lid
Display message . . . . . . . . . . . . . . 228
Brake
Warning lamp . . . . . . . . . . . . . . . . . 245
Brake Assist
see BAS
Brake fluid . . . . . . . . . . . . . . . . . . . . . 317
Display message . . . . . . . . . . . . . . 231
Brake lamps
Adaptive . . . . . . . . . . . . . . . . . . . . . . 58
Display message . . . . . . . . . . . . . . 234 Brake system
Display message . . . . . . . . . . . . . . 230
Parking brake . . . . . . . . . . . . . . . . . 104
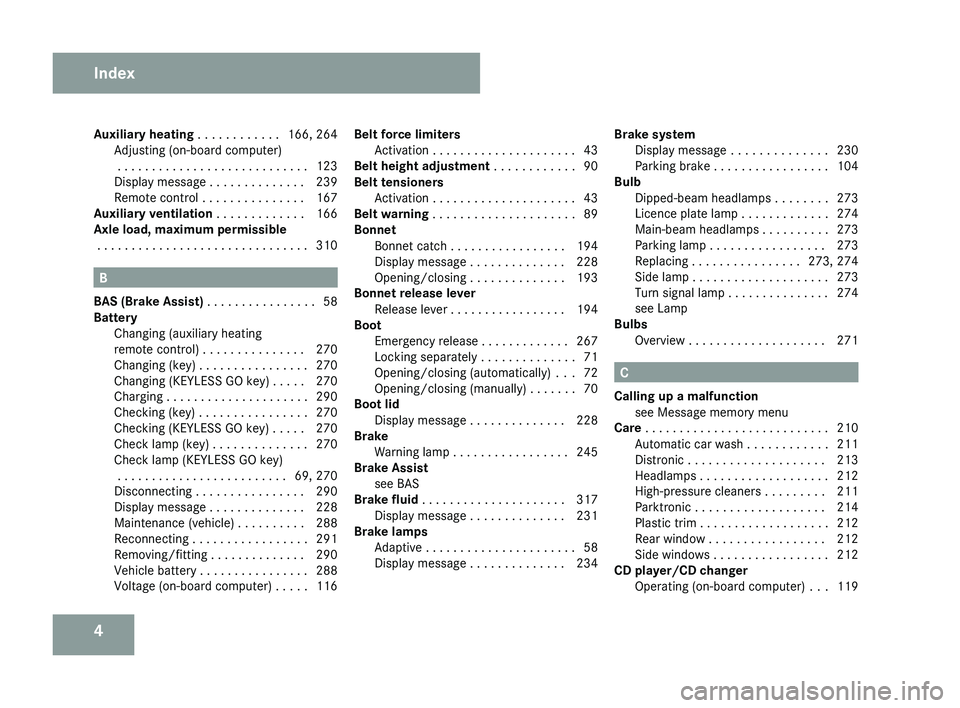
Bulb
Dipped-beam headlamps . . . . . . . . 273
Licence plate lamp . . . . . . . . . . . . . 274
Main-beam headlamps . . . . . . . . . . 273
Parking lamp . . . . . . . . . . . . . . . . . 273
Replacing . . . . . . . . . . . . . . . . 273, 274
Side lamp . . . . . . . . . . . . . . . . . . . . 273
Turn signal lamp . . . . . . . . . . . . . . . 274
see Lamp
Bulbs
Overview . . . . . . . . . . . . . . . . . . . . 271 C
Calling up a malfunction see Message memory menu
Care . . . . . . . . . . . . . . . . . . . . . . . . . . . 210
Automatic car wash . . . . . . . . . . . . 211
Distronic . . . . . . . . . . . . . . . . . . . . 213
Headlamps . . . . . . . . . . . . . . . . . . . 212
High-pressure cleaners . . . . . . . . . 211
Parktronic . . . . . . . . . . . . . . . . . . . 214
Plastic trim . . . . . . . . . . . . . . . . . . . 212
Rear window . . . . . . . . . . . . . . . . . 212
Side windows . . . . . . . . . . . . . . . . . 212
CD player/CD changer
Operating (on-board computer) . . . 119 Index
219_AKB; 2; 4, en-GB
mkalafa,
2007-11-13T09:28:36+01:00 - Seite 4
Page 214 of 329
Care
211
Automatic car wash G
Risk of accident
The vehicle is braked when HOLD is activa-
ted. Therefore, deactivate HOLD before the
vehicle is washed in an automatic car wash.
You can wash the vehicle in an automatic car
wash from the very start.
! Do not use a touch-free automatic car
wash that uses chemical agents to wash
the vehicle.
Preferably use one with high-pressure jets for
prewashing.
If the vehicle is very dirty, prewash it before
cleaning it in an automatic car wash.
! Make sure that the automatic car wash is
suitable for the size of the vehicle. Fold in
the exterior mirrors before the vehicle is
washed. There is otherwise a risk of dam-
age to the exterior mirrors.
! Make sure the side windows are com-
pletely closed, the ventilation/heater
blower is fully turned off and the wind-
screen wiper switch is set to 0. The rain
sensor may otherwise be activated, for
instance, leading to inadvertent wiper sweeps being triggered. This could cause
damage to the vehicle.
After using an automatic car wash, wipe off
wax from the windscreen and the wiper
blades. This will prevent smears and reduce
wiping
noises caused by residue on the wind-
screen.
High-pressure cleaners G
Risk of accident
Do not use high-pressure cleaners with cir-
cular-jet nozzles (dirt grinders) to clean
your vehicle or - especially - the tyres. You
could otherwise damage the tyres and
cause an accident.
! Observe the instructions issued by the
equipment manufacturer concerning the
distance to be maintained between the
nozzle
of the high-pressure cleaner and the
vehicle (at least 30 cm).
Move the high-pressure cleaner nozzle
around when cleaning your vehicle.
Do not aim directly at any of the following:
R Tyres
R Door joint
R Electrical components R
Battery
R Connectors
R Bulbs
R Seals
Damaged seals or electrical components
can lead to failures or leaks.
Cleaning the wiper blades and the out-
side of the windscreen G
Risk of injury
Turn the key to position 0 in the ignition
lock
before cleaning the windscreen or the
wiper blades. There is otherwise a risk of
the windscreen wipers being set in motion
and causing injury.
X Turn the key to position 1 in the ignition
lock (Y page 74).
X Set the windscreen wipers to the u
position on the combination switch
(Y page 97).
X Turn the key to position 0
or remove it when
the wiper arms are vertical ( Y page 74). Operation
219_AKB; 2; 4, en-GB
mkalafa,
2007-11-13T09:28:36+01:00 - Seite 211
Page 218 of 329
215
Where will I find...? ...........................
216
Display messages ............................. 219
Troubleshooting ................................ 241
Locking/unlocking in an emer-
gency ................................................. 266
Resetting triggered NECK-PRO
head restraints .................................. 269
Changing the batteries .....................269
Changing the bulbs ...........................271
Replacing the wiper blades ..............275
Flat tyre ............................................. 276
Battery ............................................... 288
Jump-starting .................................... 291
Towing and tow-starting .................. 293
Fuses .................................................. 295
Practical advice
219_AKB; 2; 4, en-GB
mkalafa,
2007-11-13T09:28:36+01:00 - Seite 215
Page 236 of 329
Display messages
233Display messages Possible cause/consequence Possible solution
B Top up coolant See
Owner's Manual The coolant level is too low. X
Top up the coolant, observing the warning
notes before doing so (Y page 196).
X Have the coolant system checked at a qualified
specialist workshop if the coolant needs top-
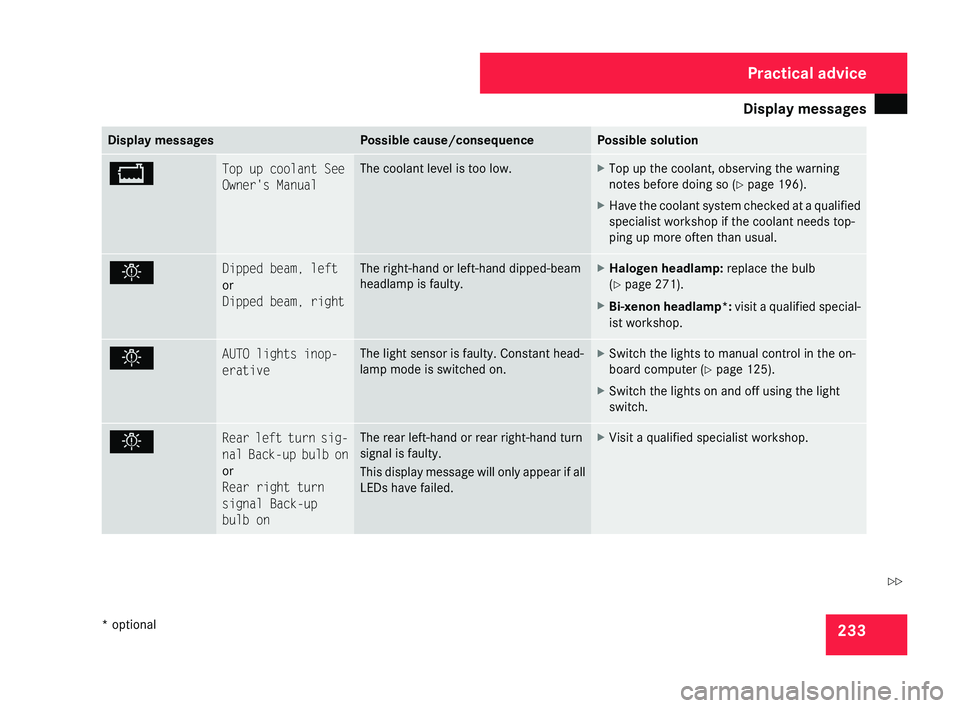
ping up more often than usual. . Dipped beam, left
or
Dipped beam, right The right-hand or left-hand dipped-beam
headlamp is faulty. X
Halogen headlamp: replace the bulb
(Y page 271).
X Bi-xenon headlamp*: visit a qualified special-
ist workshop. . AUTO lights inop-
erative The light sensor is faulty. Constant head-
lamp mode is switched on. X
Switch the lights to manual control in the on-
board computer ( Y page 125).
X Switch the lights on and off using the light
switch. . Rear left turn sig-
nal
Back-up bulb on
or
Rear right turn
signal Back-up
bulb on The rear left-hand or rear right-hand turn
signal is faulty.
This
display message will only appear if all
LEDs have failed. X
Visit a qualified specialist workshop. Practical advice
* optional
219_AKB; 2; 4, en-GB
mkalafa,
2007-11-13T09:28:36+01:00 - Seite 233 Z
Page 237 of 329
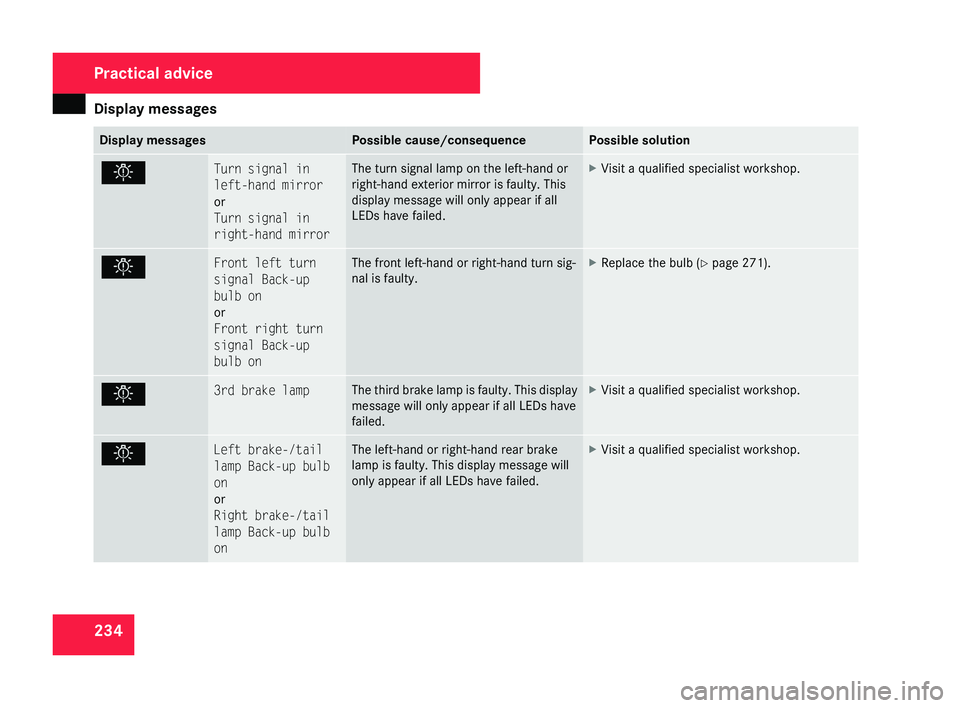
Display messages
234 Display messages Possible cause/consequence Possible solution
. Turn signal in
left-hand mirror
or
Turn signal in
right-hand mirror The turn signal lamp on the left-hand or
right-hand exterior mirror is faulty. This
display message will only appear if all
LEDs have failed. X
Visit a qualified specialist workshop. . Front left turn
signal Back-up
bulb on
or
Front right turn
signal Back-up
bulb on The front left-hand or right-hand turn sig-
nal is faulty. X
Replace the bulb ( Y page 271). . 3rd brake lamp The third brake lamp is faulty. This display
message will only appear if all LEDs have
failed. X
Visit a qualified specialist workshop. . Left brake-/tail
lamp Back-up bulb
on
or
Right brake-/tail
lamp Back-up bulb
on The left-hand or right-hand rear brake
lamp is faulty. This display message will
only appear if all LEDs have failed. X
Visit a qualified specialist workshop. Practical advice
219_AKB; 2; 4, en-GB
mkalafa,
2007-11-13T09:28:36+01:00 - Seite 234
Page 238 of 329
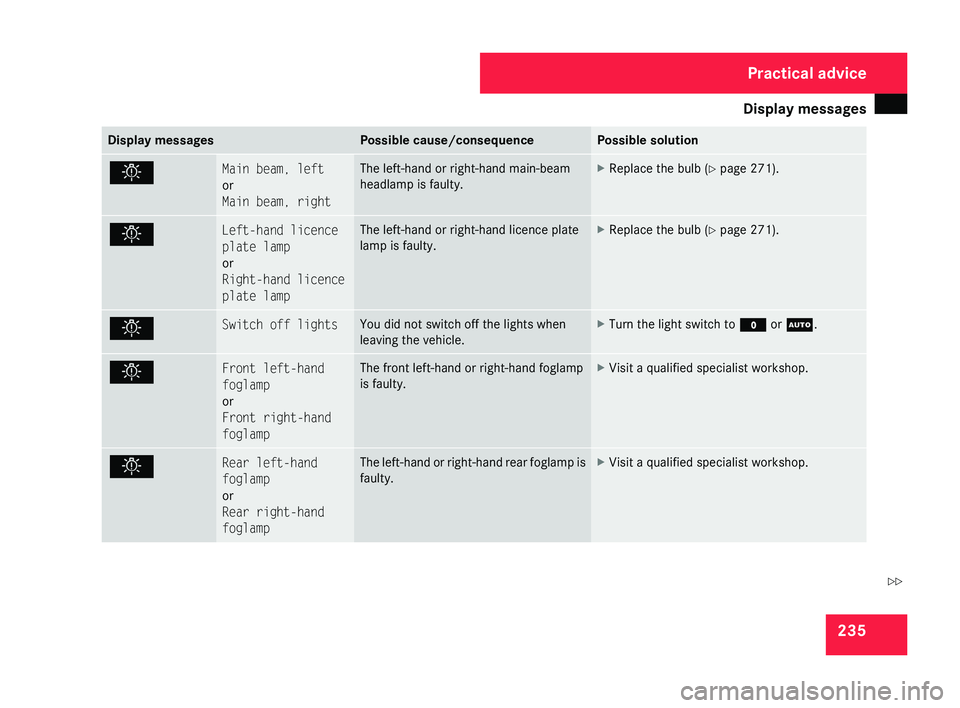
Display messages
235Display messages Possible cause/consequence Possible solution
. Main beam, left
or
Main beam, right The left-hand or right-hand main-beam
headlamp is faulty. X
Replace the bulb ( Y page 271). . Left-hand licence
plate lamp
or
Right-hand licence
plate lamp The left-hand or right-hand licence plate
lamp is faulty. X
Replace the bulb ( Y page 271). . Switch off lights You did not switch off the lights when
leaving the vehicle. X
Turn the light switch to M or U.. Front left-hand
foglamp
or
Front right-hand
foglamp The front left-hand or right-hand foglamp
is faulty. X
Visit a qualified specialist workshop. . Rear left-hand
foglamp
or
Rear right-hand
foglamp The left-hand or right-hand rear foglamp is
faulty. X
Visit a qualified specialist workshop. Practical advice
219_AKB; 2; 4, en-GB
mkalafa,
2007-11-13T09:28:36+01:00 - Seite 235 Z
Page 239 of 329
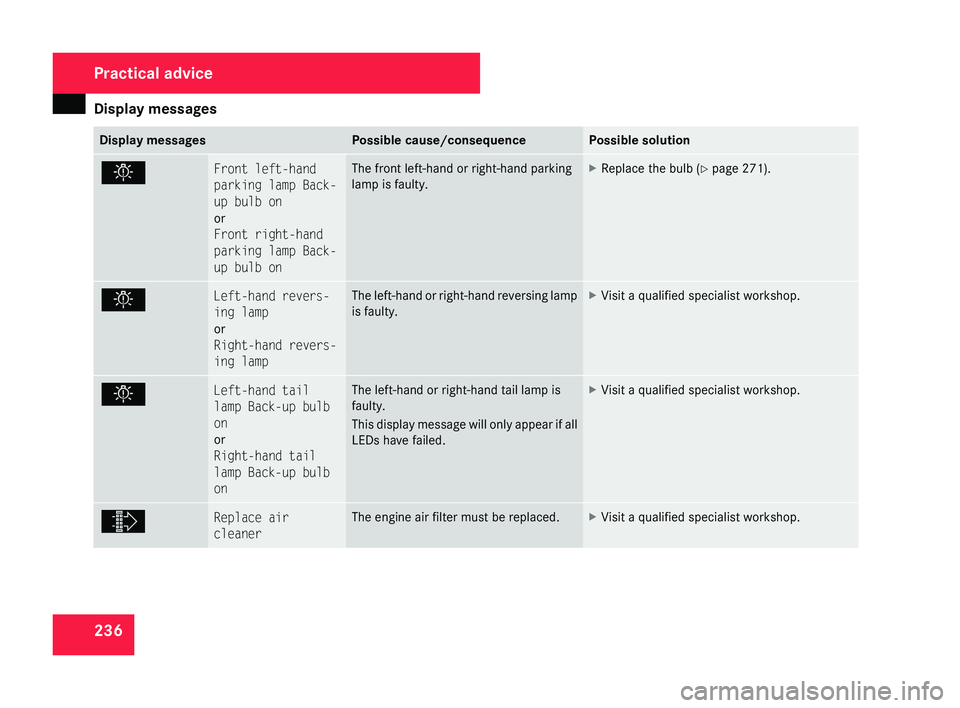
Display messages
236 Display messages Possible cause/consequence Possible solution
. Front left-hand
parking lamp Back-
up bulb on
or
Front right-hand
parking lamp Back-
up bulb on The front left-hand or right-hand parking
lamp is faulty. X
Replace the bulb ( Y page 271). . Left-hand revers-
ing lamp
or
Right-hand revers-
ing lamp The left-hand or right-hand reversing lamp
is faulty. X
Visit a qualified specialist workshop. . Left-hand tail
lamp Back-up bulb
on
or
Right-hand tail
lamp Back-up bulb
on The left-hand or right-hand tail lamp is
faulty.
This
display message will only appear if all
LEDs have failed. X
Visit a qualified specialist workshop. ò Replace air
cleaner The engine air filter must be replaced. X
Visit a qualified specialist workshop. Practical advice
219_AKB; 2; 4, en-GB
mkalafa,
2007-11-13T09:28:36+01:00 - Seite 236
Page 274 of 329
Changing the bulbs
271Changing the bulbs
Notes on changing bulbs
Bulbs and lamps are an important aspect of
vehicle safety. You must therefore make sure
that all bulbs function correctly at all times. G
Risk of injury
Bulbs and lamps can be very hot. You
should therefore allow them to cool down
before you change them. Otherwise, you
could be burned if you touch them.
Keep bulbs out of the reach of children.
Otherwise, they could damage them, for
example, and injure themselves.
Never use a bulb which has been dropped.
Such a bulb may explode and injure you.
H7 bulbs are pressurised and could explode
when you change them, particularly if they
are very hot. You should therefore wear eye
protection and gloves when you are chang-
ing them. G
Risk of injury
Xenon bulbs carry a high voltage. You could
get an electric shock and be seriously or
even fatally injured if you touch the electric
contacts on xenon bulbs. Therefore, never
remove the cover from xenon bulbs. Do not change xenon bulbs yourself, but
have them replaced at a qualified specialist
workshop which has the necessary special-
ist knowledge and tools to carry out the
work required.
Mercedes-Benz recommends that you use
a Mercedes-Benz Service Centre for this
purpose. In particular, work relevant to
safety or on safety-related systems must be
carried out at a qualified specialist work-
shop.
G
Risk of injury
HiP bulbs are pressurised and may explode
when you change them, thereby injuring
you.
Do not change HiP bulbs yourself; have
them replaced at a qualified specialist
workshop which has the necessary special-
ist knowledge and tools to carry out the
work required.
Mercedes-Benz recommends that you use
a Mercedes-Benz Service Centre for this
purpose. In particular, work relevant to
safety or on safety-related systems must be
carried out at a qualified specialist work-
shop. !
Do not change the LEDs yourself. You
could otherwise damage the LEDs or parts
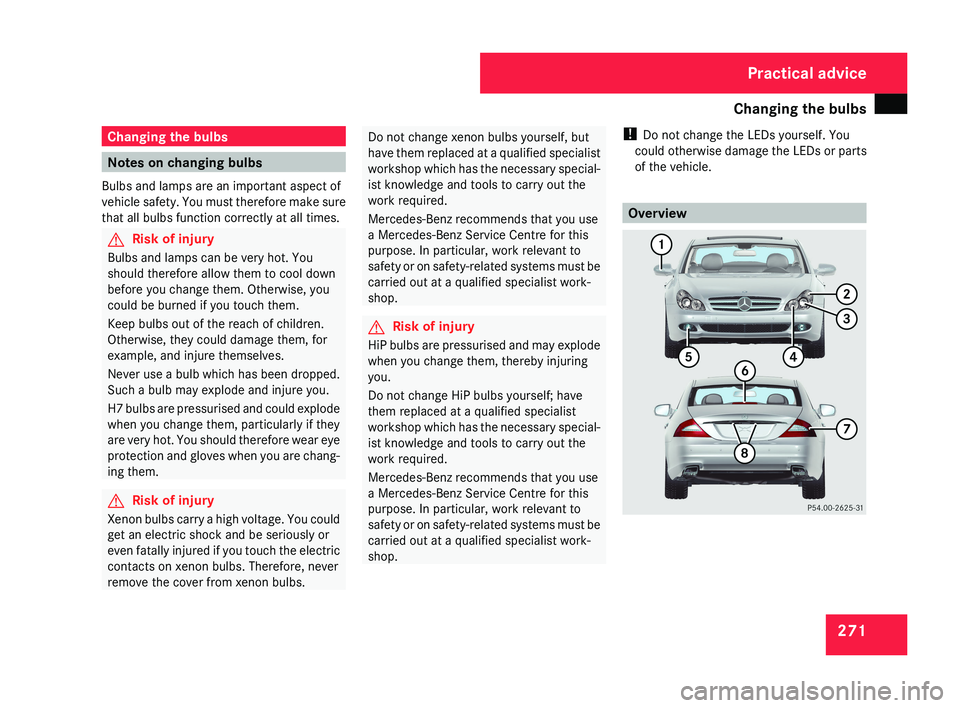
of the vehicle. OverviewPractical advice
219_AKB; 2; 4, en-GB
mkalafa,
2007-11-13T09:28:36+01:00 - Seite 271