2008 MERCEDES-BENZ CLS COUPE light
[x] Cancel search: lightPage 103 of 329
Side windows
100
If a side window locks up again during closing
and has reopened again slightly:
X
Immediately after the window locks up, pull
the switch upwards until the window is fully
closed.
The side window is closed without the anti-
entrapment feature. Resetting the windows
Each side window must be reset if the battery
was disconnected or discharged.
X Make sure that the key is in position 2 in
the ignition lock.
X Pull the switch upwards until the window is
closed, and hold it in this position for
another second. Summer opening
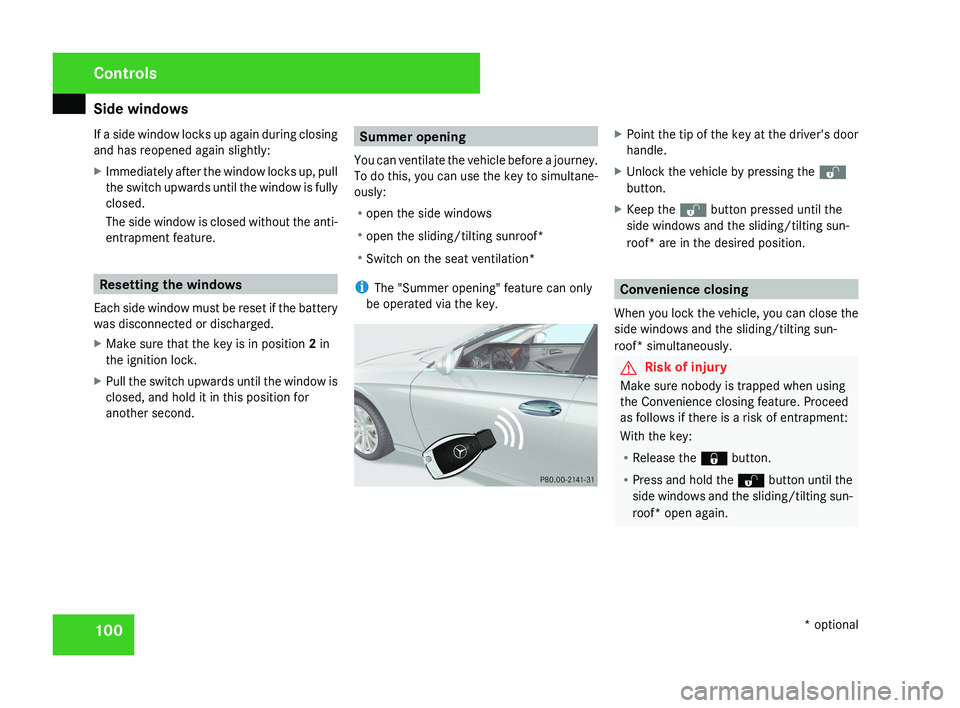
You can ventilate the vehicle before a journey.
To do this, you can use the key to simultane-
ously:
R open the side windows
R open the sliding/tilting sunroof*
R Switch on the seat ventilation*
i The "Summer opening" feature can only
be operated via the key.X Point the tip of the key at the driver's door
handle.
X Unlock the vehicle by pressing the k
button.
X Keep the k button pressed until the
side windows and the sliding/tilting sun-
roof* are in the desired position.
Convenience closing
When you lock the vehicle, you can close the
side windows and the sliding/tilting sun-
roof* simultaneously.
G Risk of injury
Make sure nobody is trapped when using
the Convenience closing feature. Proceed
as follows if there is a risk of entrapment:
With the key:
R Release the j button.
R Press and hold the k button until the
side windows and the sliding/tilting sun-
roof* open again.
Controls
* optional
219_AKB; 2; 4, en-GB
mkalafa,
2007-11-13T09:28:36+01:00 - Seite 100
Page 105 of 329
Driving and parking
102
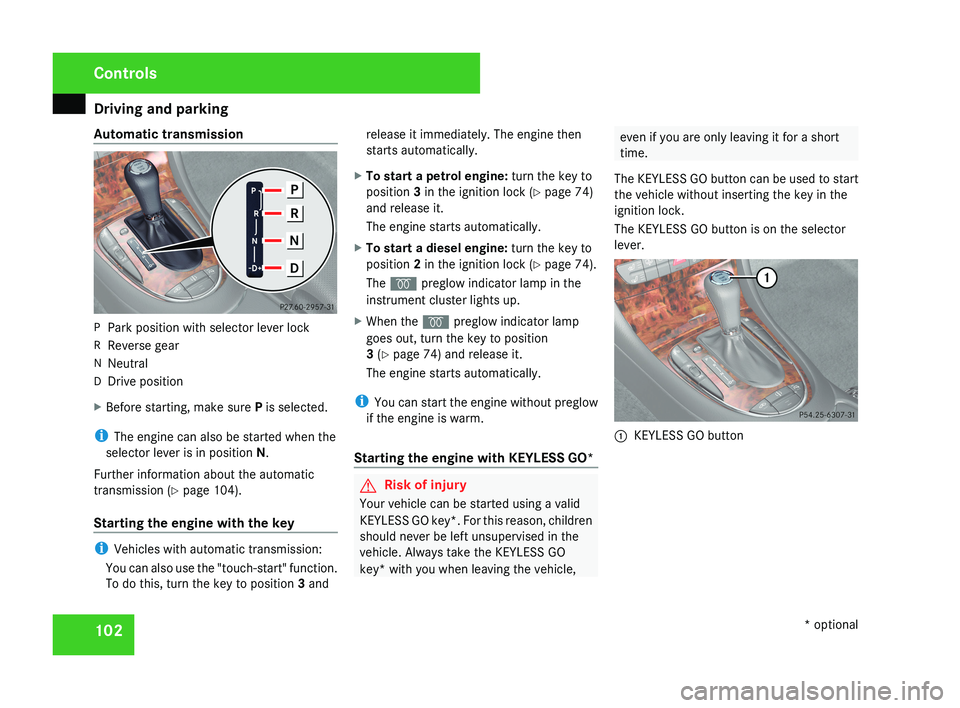
Automatic transmission
P
Park position with selector lever lock
R Reverse gear
N Neutral
D Drive position
X Before starting, make sure P is selected.
i The engine can also be started when the
selector lever is in position N.
Further information about the automatic
transmission (Y page 104).
Starting the engine with the key i
Vehicles with automatic transmission:
You can also use the "touch-start" function.
To do this, turn the key to position 3 and release it immediately. The engine then
starts automatically.
X To start a petrol engine: turn the key to
position 3 in the ignition lock (Y page 74)
and release it.
The engine starts automatically.
X To start a diesel engine: turn the key to
position 2 in the ignition lock (Y page 74).
The q preglow indicator lamp in the
instrument cluster lights up.
X When the q preglow indicator lamp
goes out, turn the key to position
3 (Y page 74) and release it.
The engine starts automatically.
i You can start the engine without preglow
if the engine is warm.
Starting the engine with KEYLESS GO* G
Risk of injury
Your vehicle can be started using a valid
KEYLESS GO key*. For this reason, children
should never be left unsupervised in the
vehicle. Always take the KEYLESS GO
key* with you when leaving the vehicle, even if you are only leaving it for a short
time.
The KEYLESS GO button can be used to start
the vehicle without inserting the key in the
ignition lock.
The KEYLESS GO button is on the selector
lever. 1
KEYLESS GO button Controls
* optional
219_AKB; 2; 4, en-GB
mkalafa,
2007-11-13T09:28:36+01:00 - Seite 102
Page 107 of 329
Transmission
104
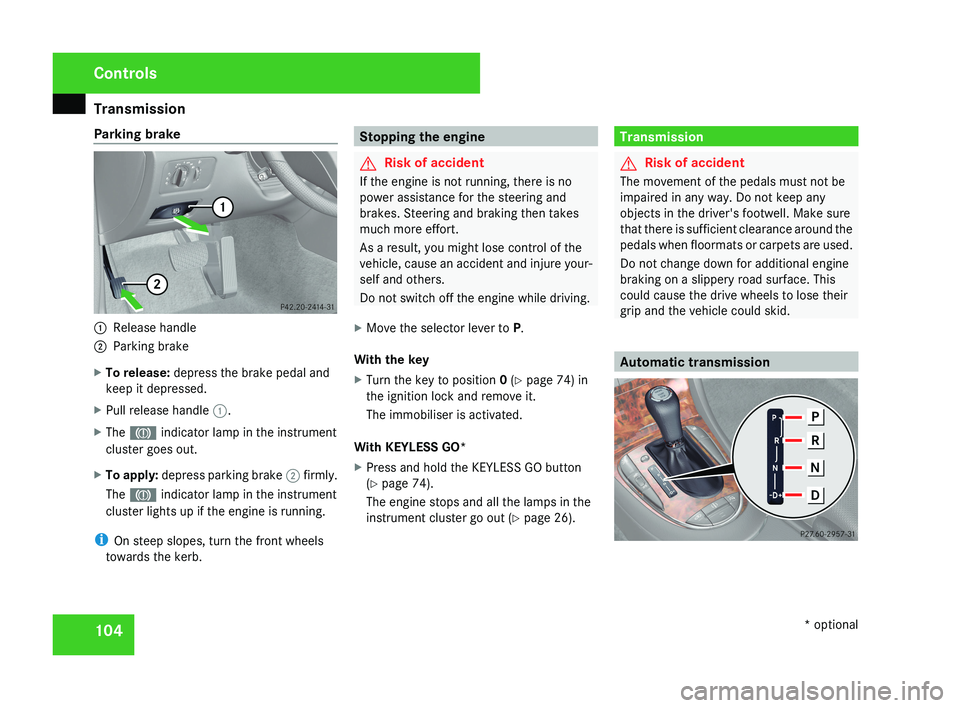
Parking brake
1
Release handle
2 Parking brake
X To release: depress the brake pedal and
keep it depressed.
X Pull release handle 1.
X The 3 indicator lamp in the instrument
cluster goes out.
X To apply: depress parking brake 2 firmly.
The 3 indicator lamp in the instrument
cluster lights up if the engine is running.
i On steep slopes, turn the front wheels
towards the kerb. Stopping the engine
G
Risk of accident
If the engine is not running, there is no
power assistance for the steering and
brakes. Steering and braking then takes
much more effort.
As a result, you might lose control of the
vehicle, cause an accident and injure your-
self and others.
Do not switch off the engine while driving.
X Move the selector lever to P.
With the key
X Turn the key to position 0 (Y page 74) in
the ignition lock and remove it.
The immobiliser is activated.
With KEYLESS GO*
X Press and hold the KEYLESS GO button
(Y page 74).
The engine stops and all the lamps in the
instrument cluster go out ( Y page 26). Transmission
G
Risk of accident
The movement of the pedals must not be
impaired in any way. Do not keep any
objects in the driver's footwell. Make sure
that there is sufficient clearance around the
pedals when floormats or carpets are used.
Do not change down for additional engine
braking on a slippery road surface. This
could cause the drive wheels to lose their
grip and the vehicle could skid. Automatic transmissionControls
* optional
219_AKB; 2; 4, en-GB
mkalafa,
2007-11-13T09:28:36+01:00 - Seite 104
Page 113 of 329
Instrument cluster
110 Activating the multi-function display
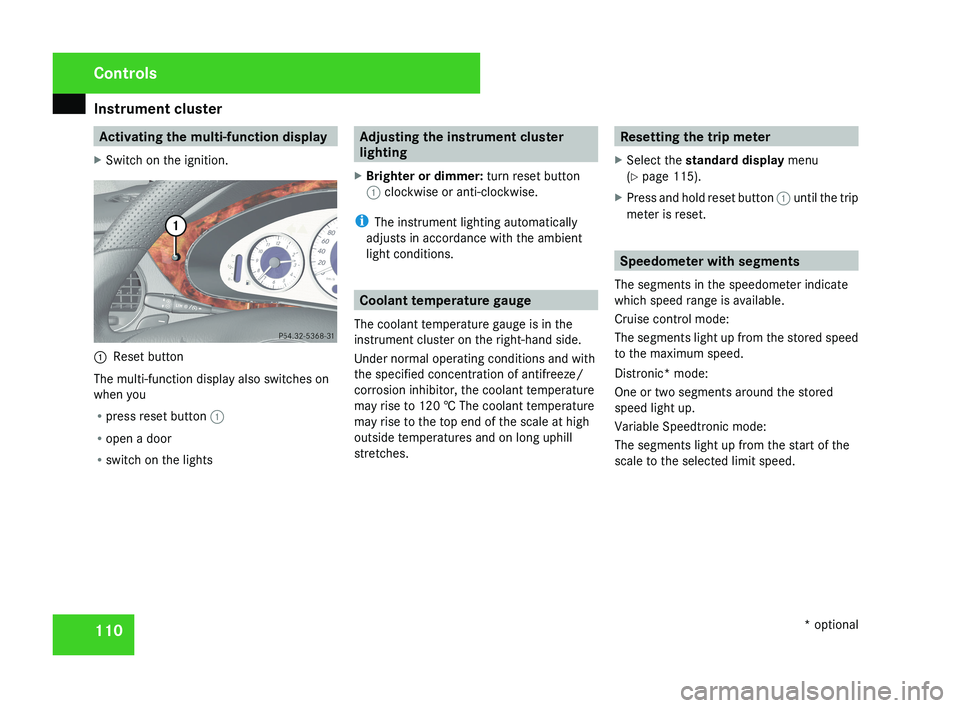
X Switch on the ignition.1 Reset button
The multi-function display also switches on
when you
R press reset button 1
R open a door
R switch on the lights
Adjusting the instrument cluster
lighting
X Brighter or dimmer: turn reset button
1 clockwise or anti-clockwise.
i The instrument lighting automatically
adjusts in accordance with the ambient
light conditions.
Coolant temperature gauge
The coolant temperature gauge is in the
instrument cluster on the right-hand side.
Under normal operating conditions and with
the specified concentration of antifreeze/
corrosion inhibitor, the coolant temperature
may rise to 120 † The coolant temperature
may rise to the top end of the scale at high
outside temperatures and on long uphill
stretches.
Resetting the trip meter
X Select the standard display menu
(Y page 115).
X Press and hold reset button 1 until the trip
meter is reset.
Speedometer with segments
The segments in the speedometer indicate
which speed range is available.
Cruise control mode:
The segments light up from the stored speed
to the maximum speed.
Distronic* mode:
One or two segments around the stored
speed light up.
Variable Speedtronic mode:
The segments light up from the start of the
scale to the selected limit speed.
Controls
* optional
219_AKB; 2; 4, en-GB
mkalafa,
2007-11-13T09:28:36+01:00 - Seite 110
Page 118 of 329
On-board computer
115Function
1 Basic display menu (Y page 115)
R
Digital speedometer 12
(Y page 116)
R Outside tempera-
ture 12
(Y page 116)
R ASSYST PLUS service display
(Y page 209)
R Tyre pressure loss warning system
(Y page 201) or tyre pressure mon-
itor* (Y page 202) 2
AMG* menu (Y page 116)
3
Audio/TV*/DVD*
(Y page 118)
menu
R Radio station ( Y page 119)
R Audio drive or media ( Y page 119)
R TV* (Y page 119)
R DVD video* (Y page 120) 4
Navigation* menu (Y page 120) Function
5
Distronic
* menu (distance display)
(Y page 135) 6
Message memory menu
13
(fault and
warning messages) ( Y page 121) 7 Settings menu (Y page 121)
R
Resetting to factory settings
(Y page 121)
R Selecting a submenu ( Y page 122) 8 Trip computer
menu
R Consumption statistics
(Y page 130)
R Range ( Y page 130) 9
Telephone*
menu (Y page 130) This is what the displays look like when you
scroll through the menus.
The generic terms in the table overview are
intended to help you navigate through the
menus. The terms themselves are not always
displayed in the multi-function display.The Audio
, Navi* and Tel* menus are dis-
played slightly differently in vehicles with
audio equipment and vehicles with COMAND
APS*. The examples given in this Owner's
Manual apply to vehicles equipped with
COMAND APS*. Standard display menu
i Menu overview: see ( Y page 114).
Use the buttons on the multi-function steer-
ing wheel.
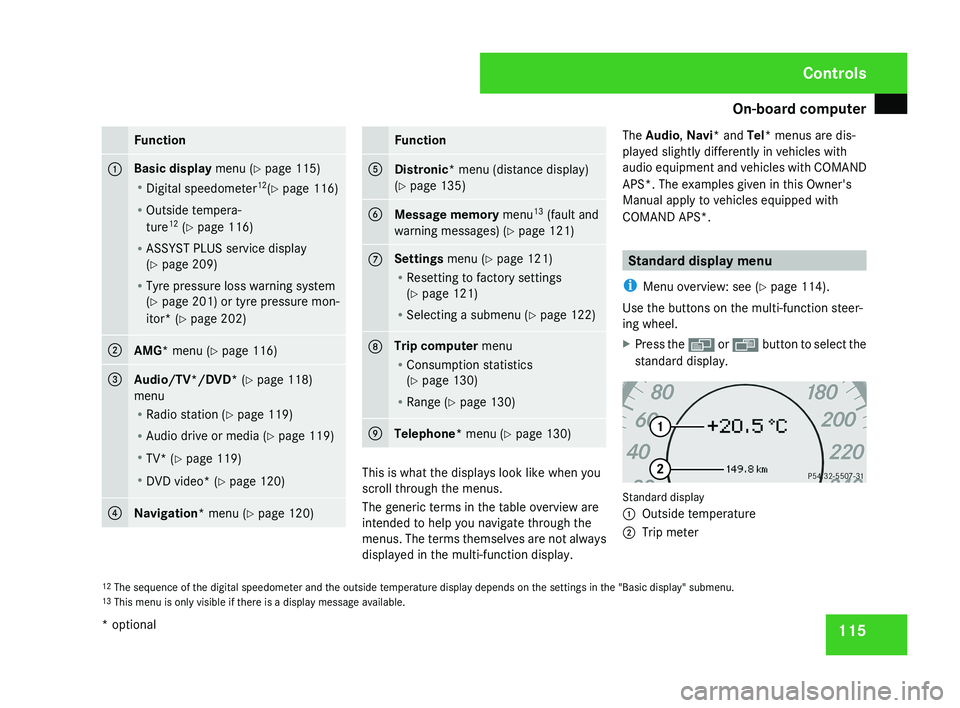
X Press the è or · button to select the
standard display. Standard display
1
Outside temperature
2 Trip meter
12 The sequence of the digital speedometer and the outside temperature display depends on the settings in the "Basic display" submenu.
13 This menu is only visible if there is a display message available. Controls
* optional
219_AKB; 2; 4, en-GB
mkalafa,
2007-11-13T09:28:36+01:00 - Seite 115
Page 124 of 329
On-board computer
121Distronic* menu
You can read the current Distronic settings in
the Distronic menu. (Y page 135)
i Menu overview: see ( Y page 114).Message memory menu
Previous display messages can be called up
in
the Message memory menu. You will only
see the Message memory menu if there are
any display messages. G
Risk of accident
The on-board computer only records and
displays messages and warnings from cer-
tain systems. For this reason, you should
always make sure that your vehicle is safe
to
drive. You could otherwise cause an acci-
dent by driving an unsafe vehicle.
Switching off the ignition clears the Message
memory except for the highest priority dis-
play messages. The on-board computer will
delete these display messages only after the
reason for the message has been rectified.
i Menu overview: see ( Y page 114). Displaying messages Use the buttons on the multi-function steer-
ing wheel.
X
Press the è or · button repeatedly
until either the original menu or the Mes-
sage memory menu appears.
If the Message memory menu does not
appear, there are no display messages.
If there are messages, the following mes-
sage may appear in the multi-function dis-
play, for example: 2 messages.
X Press the j or k
button to call up a
display message.
You can scroll through the display mes-
sages in sequence. The possible display
messages are explained in the "Practical
advice" section ( Y page 219). Settings menu
There are two functions in the Settings...
menu:
the To reset: Press reset button
for 3 seconds function, which you can use
to reset most settings to the factory settings.
There are also submenus in which you can
make individual settings for your vehicle.
i Menu overview: see ( Y page 114).
Use the buttons on the multi-function steer-
ing wheel.
Resetting to factory settings For safety reasons, not all functions are reset:
permanent
Speedtronic can only be set in the
Vehicle menu. The Headlamp mode function
in the Lighting submenu is only reset if the
vehicle is stationary.
X Press the è
or · button to select the
Settings... menu.
X Press and hold the reset button on the left-
hand side of the instrument cluster for
approximately three seconds.
A
prompt appears in the multi-function dis-
play asking you to press the reset button
again to confirm. Controls
* optional
219_AKB; 2; 4, en-GB
mkalafa,
2007-11-13T09:28:36+01:00 - Seite 121 Z
Page 125 of 329
On-board computer
122
X
Press the reset button again.
The functions of most submenus are
restored to the factory settings.
or
X If you want to retain the settings, do not
press the reset button a second time.
After approximately 5 seconds, the Set-
tings... menu appears again.
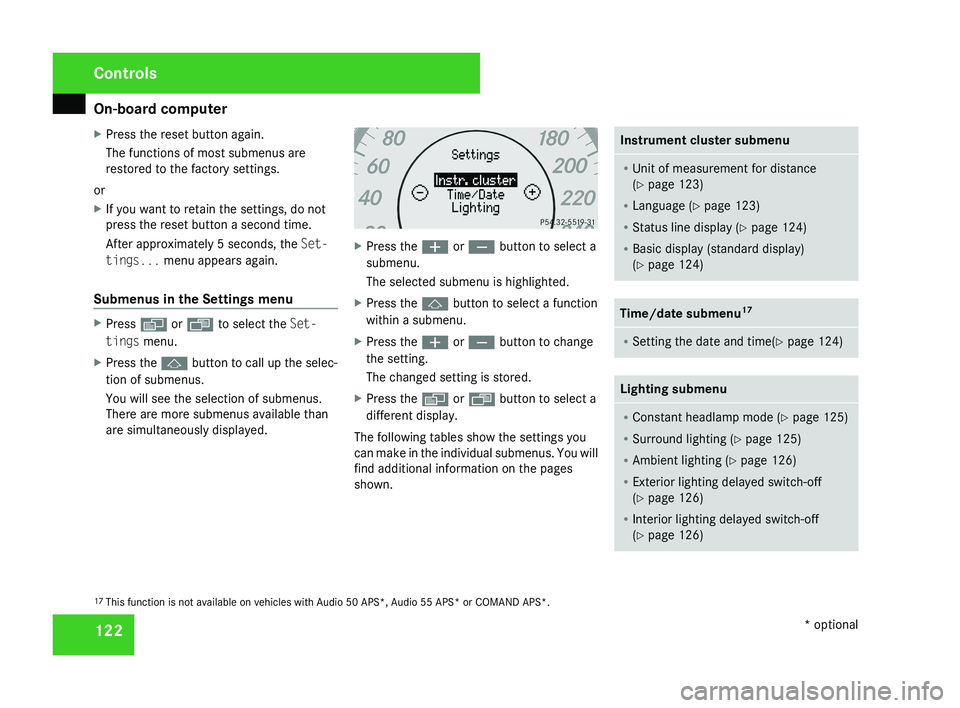
Submenus in the Settings menu X
Press è or · to select the Set-
tings menu.
X Press the j button to call up the selec-
tion of submenus.
You will see the selection of submenus.
There are more submenus available than
are simultaneously displayed. X
Press the æ or ç button to select a
submenu.
The selected submenu is highlighted.
X Press the j button to select a function
within a submenu.
X Press the æ or ç button to change
the setting.
The changed setting is stored.
X Press the è or ÿ button to select a
different display.
The following tables show the settings you
can make in the individual submenus. You will
find additional information on the pages
shown. Instrument cluster submenu
R
Unit of measurement for distance
(Y page 123)
R Language (Y page 123)
R Status line display ( Y page 124)
R Basic display (standard display)
(Y page 124) Time/date submenu
17 R
Setting the date and time(Y page 124) Lighting submenu
R
Constant headlamp mode (Y page 125)
R Surround lighting ( Y page 125)
R Ambient lighting (Y page 126)
R Exterior lighting delayed switch-off
(Y page 126)
R Interior lighting delayed switch-off
(Y page 126) 17
This function is not available on vehicles with Audio 50 APS*, Audio 55 APS* or COMAND APS*. Controls
* optional
219_AKB; 2; 4, en-GB
mkalafa,
2007-11-13T09:28:36+01:00 - Seite 122
Page 128 of 329
On-board computer
125
X
Press the è or · button to select the
Settings... menu.
X Press the j
button to call up the selec-
tion of submenus.
X Press the æ
or ç button to select the
Time/Date submenu.
Setting the time
X Use j to select Clock, hours Con-
firm by press. R (or Clock, minutes
Confirm by press. R).
X Press the æ or ç button to set a
value.
X Press the reset button on the left of the
instrument cluster.
The set time is stored.
Setting the date
X Press the j
button to select Set date
Day (or Set date Month or Set date
Year).
X Press the æ or ç button to set the
values.
X Press the j, è or ÿ button to
select a different display. Setting constant headlamp mode If you have set constant headlamp mode and
the light switch is in position M orU,
the
side lamps, dipped-beam headlamps and
licence plate lighting are switched on auto-
matically when the engine is running. Turning
the light switch to a different position
switches on the corresponding lights.
For safety reasons, it is only possible to set
this function when the vehicle is stationary.
In countries in which constant headlamp
mode is a legal requirement, Constant is the
factory setting.
X Press the è
or · button to select the
Settings... menu.
X Press the j
button to call up the selec-
tion of submenus.
X Press the æ
or ç button to select the
Lighting submenu.
X Press the j button to select Headlamp
mode.
X Press the æ or ç button to set the
mode
for the headlamps to Manual or Con-
stant (constant headlamp mode).
X Press the j, è or ÿ button to
select a different display. Switching the surround lighting on or
off If the surround lighting is switched on, the
following lights will be switched on automat-
ically
in the dark after you have unlocked the
vehicle using the key:
R the side lamps
R the tail lamps
R the licence plate lighting
R the front foglamps
R the lights* in the exterior mirrors
The surround lighting switches off automati-
cally if you open the driver's door or after 40
seconds.
X Press the è
or · button to select the
Settings... menu.
X Press the j
button to call up the selec-
tion of submenus.
X Press the æ
or ç button to select the
Lighting submenu.
X Press the j button to select the Sur-
round lighting function. Controls
* optional
219_AKB; 2; 4, en-GB
mkalafa,
2007-11-13T09:28:36+01:00 - Seite 125 Z