Page 233 of 509

232 Controls in detail
Audio system
Placing a “911” emergency call with the
phone lockedCDMA network phones
Placing a “911” emergency call using
audio control unit with the phone un-
locked
�Press hbutton to switch to tele-
phone mode.
�Enter 911 using the number keypad on
the audio control unit.
�Press sbutton.
or
�Press n for dialing to begin.
DIALING appears in the audio display
while the telephone establishes the
connection.
�Wait until the emergency call center
answers, then describe the emergency.
Placing a “911” emergency call with the
phone locked
iIf no SIM card is in the mobile phone, with a
few types of mobile phones
NO SERVICE ap-
pears in the audio display. In that case, you only
can make an emergency call on the mobile
phone itself, without the use of the audio control
unit.
iIf the mobile phone is locked, you only can
make an emergency call on the mobile phone it-
self, without the use of the audio control unit.
iIf the mobile phone is locked, you only can
make an emergency call on the mobile phone it-
self, without the use of the audio control unit.
Page 254 of 509
 while the engine is run-
ning.
The indicator")
253 Controls in detail
Dual-zone automatic climate control
Operating the climate control system
in automatic mode
�Activating: Press buttonU
(
�page 250) while the engine is run-
ning.
The indicator lamp in the button comes
on. The air volume and air distribution
are adjusted automatically.
�Use temperature controls1 and6
(
�page 250) to separately adjust the
air temperature on each side of the
passenger compartment.
The temperature of the vehicle interior
is adjusted automatically.
�Deactivating: Press buttonU
(
�page 250) again.
The indicator lamp in the button goes
out. The automatic operation of air vol-
ume and air distribution switches off.
The symbols of air distribution and air
volume appear in displayb.
�Adjust air distribution (�page 254).
�Adjust air volume (�page 254).
Setting the temperature
Use temperature controls1 and6
(
�page 250) to separately adjust the air
temperature on each side of the passenger
compartment. You should raise or lower
the temperature setting in small incre-
ments, preferably starting at 72°F (22°C).
The climate control will adjust to the set
temperature as fast as possible.
�Increasing: Turn temperature
control1 and/or6 (
�page 250)
slightly clockwise.
The climate control system will corre-
spondingly adjust the interior air tem-
perature.
�Decreasing: Turn temperature
control1 and/or6 (
�page 250)
slightly counterclockwise.
The climate control system will corre-
spondingly adjust the interior air tem-
perature.
iWhen operating the climate control system
in automatic mode, you will only rarely need to
adjust the temperature, air volume and air distri-
bution.
In automatic mode, cooling with dehumidify is
switched on. This function can be switched off if
necessary (
�page 258).
Page 263 of 509

�Deactivating: Press buttonU
(
�page 259) again.
The indicator lamp in the button goes
out. The automatic operation of air vol-")
262 Controls in detail
3-zone automatic climate control* (Canada only)
�Deactivating: Press buttonU
(
�page 259) again.
The indicator lamp in the button goes
out. The automatic operation of air vol-
ume and air distribution switches off.
The symbols of air distribution and air
volume appear in displayd.
�Adjust air distribution (�page 263).
�Adjust air volume (�page 263).
Setting the temperature
Use temperature controls1 and/or8
(
�page 259) to separately adjust the air
temperature on each side of the passenger
compartment. You should raise or lower
the temperature setting in small incre-
ments, preferably starting at 72°F (22°C).
The climate control will adjust to the set
temperature as fast as possible.
�Increasing: Turn temperature
control1 and/or8 (
�page 259)
slightly clockwise.
The climate control system will corre-
spondingly adjust the interior air tem-
perature.
�Decreasing: Turn temperature
control1 and/or8 (
�page 259)
slightly counterclockwise.
The climate control system will corre-
spondingly adjust the interior air tem-
perature.
iYou can also adjust the temperature in the
rear passenger compartment (
�page 268).
iIf you turn the temperature control fully
clockwise for one side of the vehicle, you are in-
creasing the temperature for the other side of
the vehicle as well.
iIf you turn the temperature control fully
counterclockwise for one side of the vehicle, you
are decreasing the temperature for the other
side of the vehicle as well.
Page 270 of 509
269 Controls in detail
Trunk
�Trunk
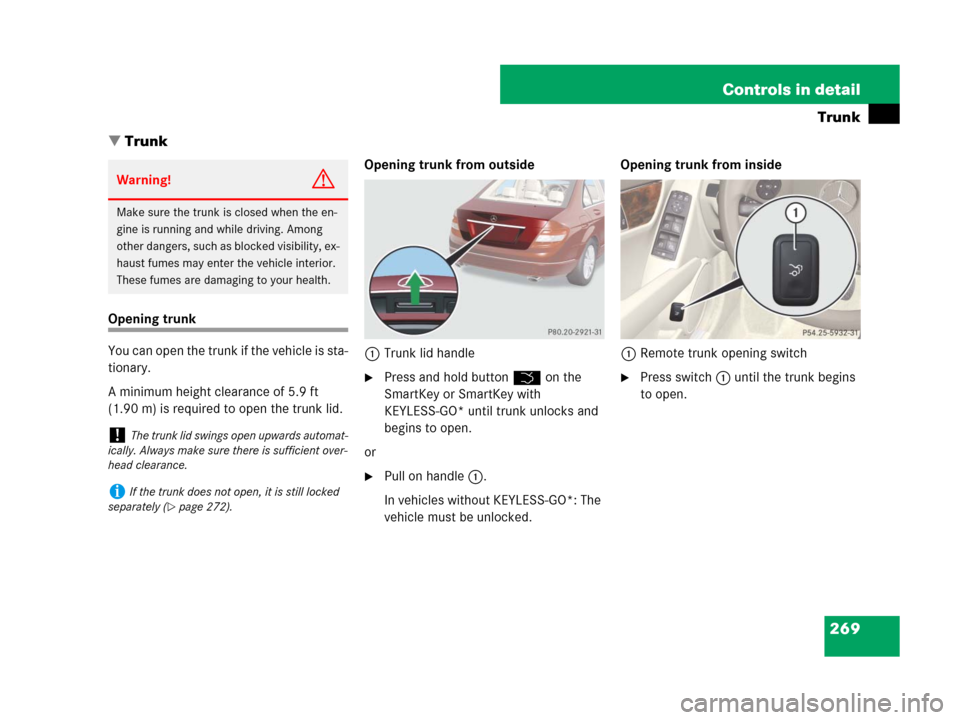
Opening trunk
You can open the trunk if the vehicle is sta-
tionary.
A minimum height clearance of 5.9 ft
(1.90 m) is required to open the trunk lid.Opening trunk from outside
1Trunk lid handle
�Press and hold button Š on the
SmartKey or SmartKey with
KEYLESS-GO* until trunk unlocks and
begins to open.
or
�Pull on handle1.
In vehicles without KEYLESS-GO*: The
vehicle must be unlocked.Opening trunk from inside
1Remote trunk opening switch
�Press switch1 until the trunk begins
to open.
Warning!G
Make sure the trunk is closed when the en-
gine is running and while driving. Among
other dangers, such as blocked visibility, ex-
haust fumes may enter the vehicle interior.
These fumes are damaging to your health.
!The trunk lid swings open upwards automat-
ically. Always make sure there is sufficient over-
head clearance.
iIf the trunk does not open, it is still locked
separately (
�page 272).
Page 271 of 509

270 Controls in detail
Trunk
Closing trunk Closing trunk from outside manually
1Handles
�Lower trunk lid by pulling firmly on
handles1 or2.
�Close the trunk with hands placed flat
on the trunk lid.
iDo not place the SmartKey in the open
trunk. You may lock yourself out.
iIf the vehicle was previously centrally
locked, the trunk will lock automatically after
closing it. All turn signal lamps flash three times
and an acoustic signal sounds three times to
confirm locking.
Vehicles with KEYLESS-GO* (Canada only): To
prevent a possible inadvertent lockout, the trunk
will open automatically if a SmartKey with
KEYLESS-GO* (Canada only) is recognized
inside the vehicle or in the trunk.
The vehicle is only locked when the turn signals
flash three times and an acoustic signal sounds
three times. If you are carrying a second
SmartKey with KEYLESS-GO* (Canada only) with
you, you can still lock the vehicle.
Warning!G
To prevent possible personal injury, always
keep hands and fingers away from the trunk
lid opening when closing the trunk. Be espe-
cially careful when small children are
around.
When leaving the vehicle, always remove the
SmartKey or SmartKey with KEYLESS-GO*
(Canada only) from the starter switch, take
it with you, and lock the vehicle. Do not
leave children unattended in the vehicle, or
with access to an unlocked vehicle. A child’s
unsupervised access to a vehicle could re-
sult in an accident and/or serious personal
injury.
Page 272 of 509
271 Controls in detail
Trunk
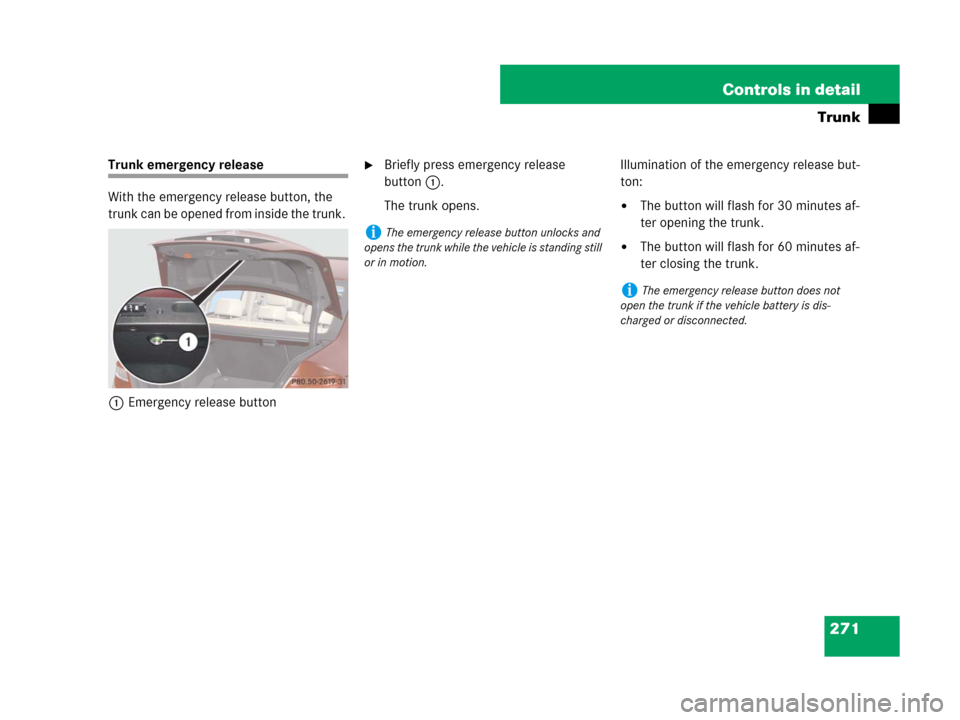
Trunk emergency release
With the emergency release button, the
trunk can be opened from inside the trunk.
1Emergency release button�Briefly press emergency release
button1.
The trunk opens.Illumination of the emergency release but-
ton:
�The button will flash for 30 minutes af-
ter opening the trunk.
�The button will flash for 60 minutes af-
ter closing the trunk.iThe emergency release button unlocks and
opens the trunk while the vehicle is standing still
or in motion.
iThe emergency release button does not
open the trunk if the vehicle battery is dis-
charged or disconnected.
Page 273 of 509
272 Controls in detail
Trunk
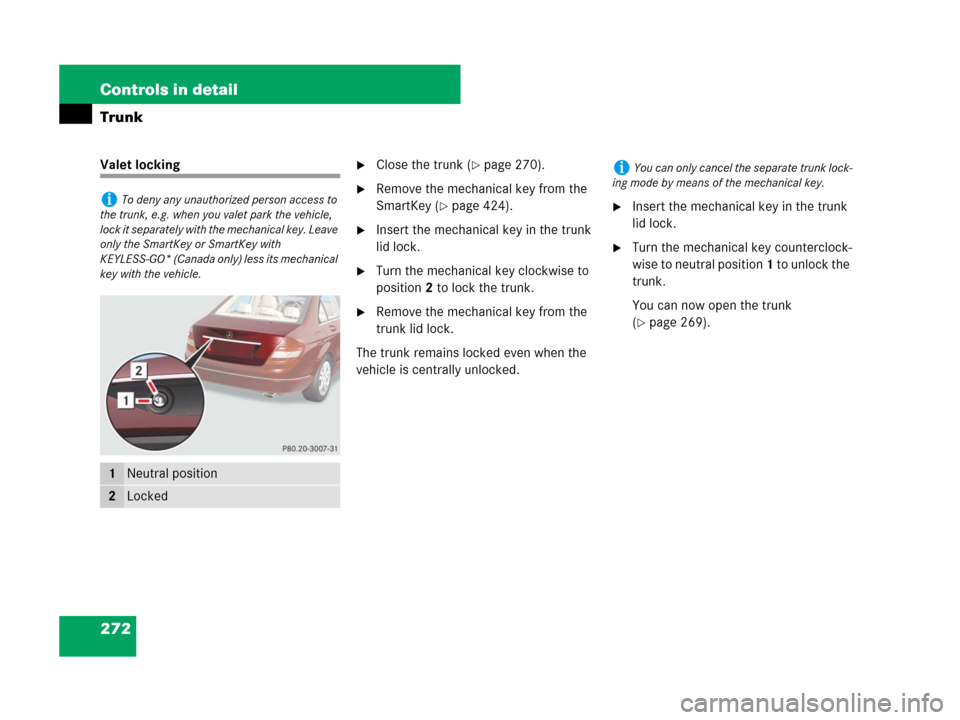
Valet locking�Close the trunk (�page 270).
�Remove the mechanical key from the
SmartKey (
�page 424).
�Insert the mechanical key in the trunk
lid lock.
�Turn the mechanical key clockwise to
position 2 to lock the trunk.
�Remove the mechanical key from the
trunk lid lock.
The trunk remains locked even when the
vehicle is centrally unlocked.
�Insert the mechanical key in the trunk
lid lock.
�Turn the mechanical key counterclock-
wise to neutral position 1 to unlock the
trunk.
You can now open the trunk
(
�page 269).
iTo deny any unauthorized person access to
the trunk, e.g. when you valet park the vehicle,
lock it separately with the mechanical key. Leave
only the SmartKey or SmartKey with
KEYLESS-GO* (Canada only) less its mechanical
key with the vehicle.
1Neutral position
2Locked
iYou can only cancel the separate trunk lock-
ing mode by means of the mechanical key.
Page 274 of 509

273 Controls in detail
Power tilt/sliding sunroof
�Power tilt/sliding sunroof
Opening and closing power tilt/sliding
sunroof
Warning!G
When closing the tilt/sliding sunroof, make
sure there is no danger of anyone being
harmed by the closing procedure.
If the tilt/sliding sunroof is blocked while
closing and reopens, it can be closed with
greater force if you pull the switch to the re-
sistance point in the direction indicated by
arrow
3 within 2 seconds.
If the tilt/sliding sunroof is blocked again
and reopens, you can close it with deactivat-
ed obstruction sensor function by pulling
the switch again to the resistance point in
the direction indicated by arrow
3 within 2
seconds.
When closing the tilt/sliding sunroof with
the obstruction sensor function deactivated,
make sure no one can become trapped, as
this could result in serious or fatal injuries.
The opening/closing procedure of the
tilt/sliding sunroof can be immediately halt-
ed by releasing the switch or, if the switch
was moved past the resistance point and re-
leased, by moving the switch in any direc-
tion.
The tilt/sliding sunroof is made out of glass.
In the event of an accident, the glass may
shatter. This may result in an opening in the
roof.
In a vehicle rollover, occupants not wearing
their seat belts or not wearing them properly
may be thrown out of the opening. Such an
opening also presents a potential for injury
for occupants wearing their seat belts
properly as entire body parts or portions of
them may protrude from the passenger
compartment.When leaving the vehicle, always remove the
SmartKey or SmartKey with KEYLESS-GO*
from the starter switch, take it with you, and
lock the vehicle. Do not leave children unat-
tended in the vehicle, or with access to an
unlocked vehicle. A child’s unsupervised ac-
cess to a vehicle could result in an accident
and/or serious personal injury.
!To avoid damaging the seals, do not trans-
port any objects with sharp edges which can
stick out of the tilt/sliding sunroof.
Do not open the tilt/sliding sunroof if there is
snow or ice on the roof, as this could result in
malfunctions.
!Please keep in mind that weather conditions
can sometimes change rapidly. Make sure to
close the tilt/sliding sunroof when leaving the
vehicle. If water enters the vehicle interior, vehi-
cle electronics could be damaged which is not
covered by the Mercedes-Benz Limited
Warranty.