Page 236 of 509
235 Controls in detail
Audio system
�To delete an entire entry:
Selectõ and press and holdn un-
til the entire entry has been deleted.
or
�Press and hold î until the entire en-
try has been deleted.
�Ending search: Switch from the
search speller to the list.
The top list entry is highlighted auto-
matically.
Selecting via list
�Switch if necessary from the search
speller to the list.
�Slideqmror rotateymz the audio
controller until the desired entry is
highlighted.
�Press n to confirm and a call will be
initiated.Displaying details on an entry
The audio system can also fully display an
abbreviated entry.
�Select entry.
�Slidemp to select Options.
�Press n to confirm.
�Select Details.
A screen with the details of the select-
ed entry appears.
�To close details screen: Slideqmr,
or omp, or rotateymz, or press
buttonî.Deleting entry
�Select entry
�Slidemp to select Options.
�Press n to confirm.
�Select Delete.
You will be prompted to confirm that
you really want to delete the entry.
�Select Yes or No.
If you select
Yes the actual entry is de-
leted from the phone book.
Page 237 of 509
236 Controls in detail
Audio system
Call lists
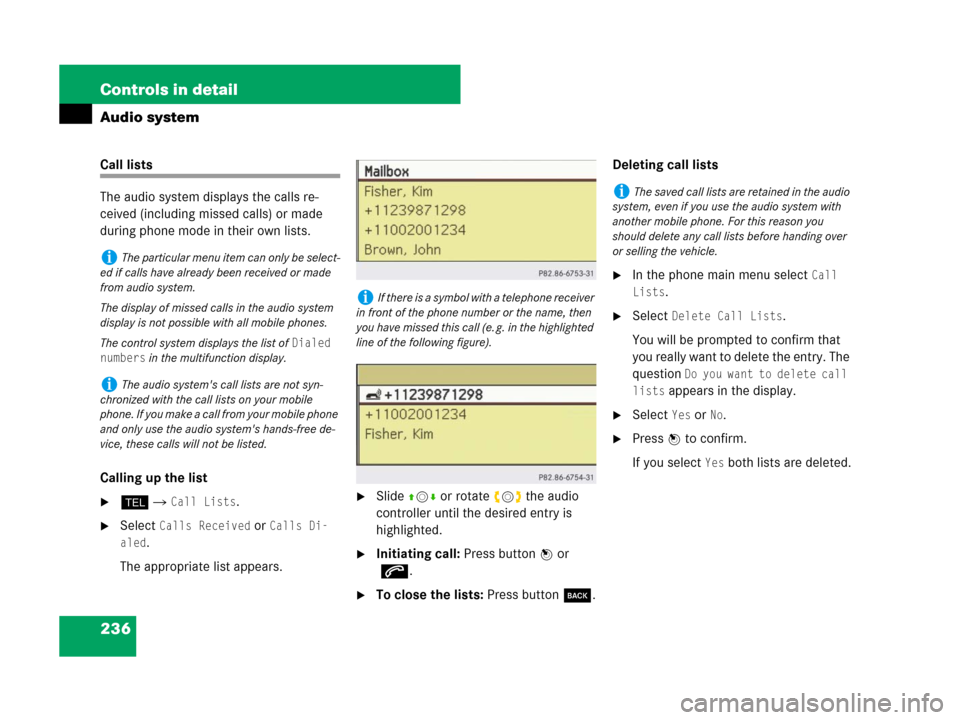
The audio system displays the calls re-
ceived (including missed calls) or made
during phone mode in their own lists.
Calling up the list
�h � Call Lists.
�Select Calls Received or Calls Di-
aled
.
The appropriate list appears.
�Slideqmror rotateymz the audio
controller until the desired entry is
highlighted.
�Initiating call: Press buttonn or
s.
�To close the lists: Press button í.Deleting call lists
�In the phone main menu select Call
Lists
.
�Select Delete Call Lists.
You will be prompted to confirm that
you really want to delete the entry. The
question
Do you want to delete call
lists
appears in the display.
�Select Yes or No.
�Press n to confirm.
If you select
Yes both lists are deleted.
iThe particular menu item can only be select-
ed if calls have already been received or made
from audio system.
The display of missed calls in the audio system
display is not possible with all mobile phones.
The control system displays the list of
Dialed
numbers
in the multifunction display.
iThe audio system's call lists are not syn-
chronized with the call lists on your mobile
phone. If you make a call from your mobile phone
and only use the audio system's hands-free de-
vice, these calls will not be listed.
iIf there is a symbol with a telephone receiver
in front of the phone number or the name, then
you have missed this call (e. g. in the highlighted
line of the following figure).
iThe saved call lists are retained in the audio
system, even if you use the audio system with
another mobile phone. For this reason you
should delete any call lists before handing over
or selling the vehicle.
Page 238 of 509
237 Controls in detail
Audio system
Making calls
�Press buttonh on the audio control
unit to call up the telephone mode.
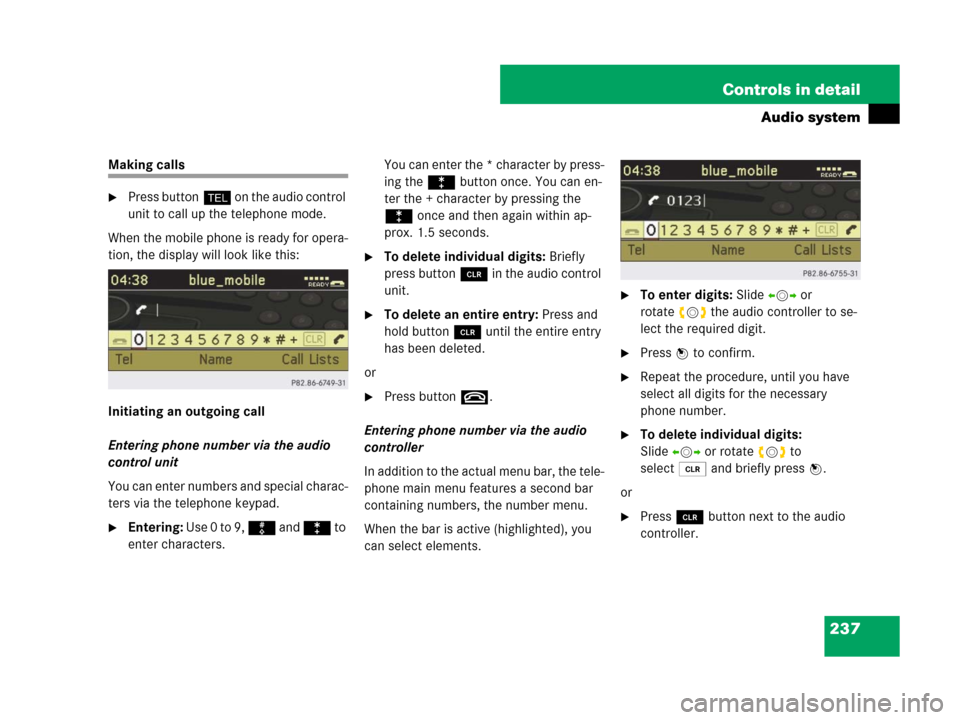
When the mobile phone is ready for opera-
tion, the display will look like this:
Initiating an outgoing call
Entering phone number via the audio
control unit
You can enter numbers and special charac-
ters via the telephone keypad.
�Entering: Use 0 to 9, ô and ó to
enter characters.You can enter the * character by press-
ing the ó button once. You can en-
ter the + character by pressing the
ó once and then again within ap-
prox. 1.5 seconds.
�To delete individual digits: Briefly
press buttonî in the audio control
unit.
�To delete an entire entry: Press and
hold buttonî until the entire entry
has been deleted.
or
�Press buttont.
Entering phone number via the audio
controller
In addition to the actual menu bar, the tele-
phone main menu features a second bar
containing numbers, the number menu.
When the bar is active (highlighted), you
can select elements.
�To enter digits: Slideompor
rotateymz the audio controller to se-
lect the required digit.
�Press n to confirm.
�Repeat the procedure, until you have
select all digits for the necessary
phone number.
�To delete individual digits:
Slideompor rotateymz to
selectõ and briefly pressn.
or
�Press îbutton next to the audio
controller.
Page 239 of 509
238 Controls in detail
Audio system
�To delete entire phone number:
Slideompor rotateymz to
selectõ, press and hold n until
the phone number has been deleted.
or
�Press and hold î until the entire en-
try has been deleted.
or
�Press buttont.
�To initiate a call: Slideompor
rotateymz the audio controller to se-
lect ö.
�Press n to confirm.
or
�Press buttons.
Initiating a call to a phone book entry
�h � Name.
�Select entry (�page 234).
�Press buttons or n.Initiating a call to a call list entry
�h � Call Lists.
�Select Calls Received or Calls Di-
aled
.
The appropriate list appears.
�Select entry (�page 236).
�Press buttons or n.
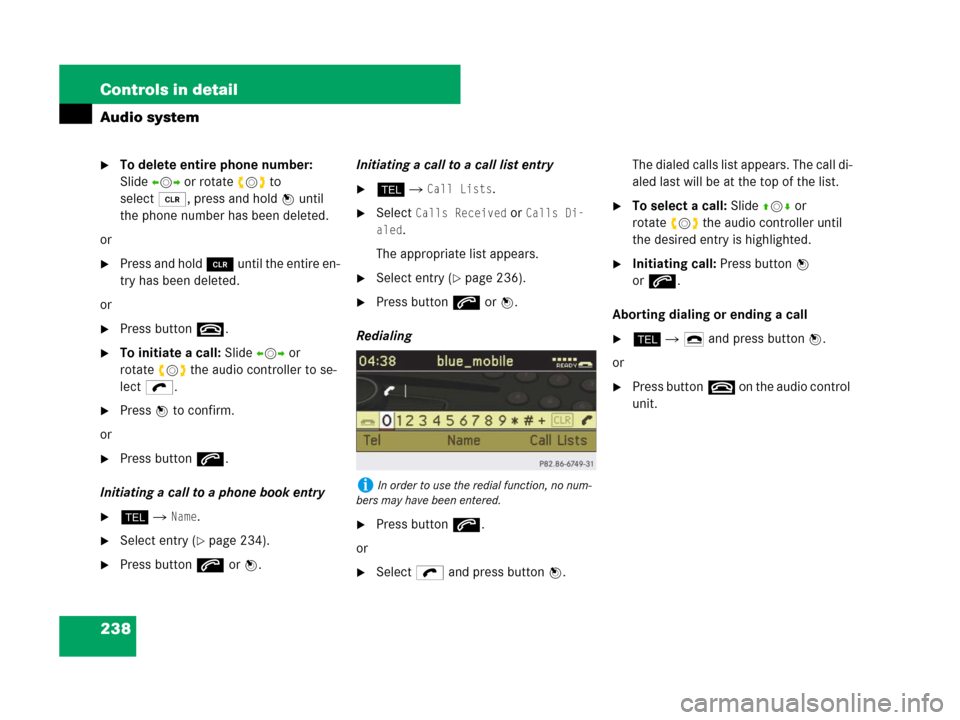
Redialing
�Press buttons.
or
�Selectö and press button n.The dialed calls list appears. The call di-
aled last will be at the top of the list.
�To select a call: Slideqmror
rotateymz the audio controller until
the desired entry is highlighted.
�Initiating call: Press buttonn
ors.
Aborting dialing or ending a call
�h � 4 and press buttonn.
or
�Press buttont on the audio control
unit.
iIn order to use the redial function, no num-
bers may have been entered.
Page 254 of 509
253 Controls in detail
Dual-zone automatic climate control
Operating the climate control system
in automatic mode
�Activating: Press buttonU
(
�page 250) while the engine is run-
ning.
The indicator lamp in the button comes
on. The air volume and air distribution
are adjusted automatically.
�Use temperature controls1 and6
(
�page 250) to separately adjust the
air temperature on each side of the
passenger compartment.
The temperature of the vehicle interior
is adjusted automatically.
�Deactivating: Press buttonU
(
�page 250) again.
The indicator lamp in the button goes
out. The automatic operation of air vol-
ume and air distribution switches off.
The symbols of air distribution and air
volume appear in displayb.
�Adjust air distribution (�page 254).
�Adjust air volume (�page 254).
Setting the temperature
Use temperature controls1 and6
(
�page 250) to separately adjust the air
temperature on each side of the passenger
compartment. You should raise or lower
the temperature setting in small incre-
ments, preferably starting at 72°F (22°C).
The climate control will adjust to the set
temperature as fast as possible.
�Increasing: Turn temperature
control1 and/or6 (
�page 250)
slightly clockwise.
The climate control system will corre-
spondingly adjust the interior air tem-
perature.
�Decreasing: Turn temperature
control1 and/or6 (
�page 250)
slightly counterclockwise.
The climate control system will corre-
spondingly adjust the interior air tem-
perature.
iWhen operating the climate control system
in automatic mode, you will only rarely need to
adjust the temperature, air volume and air distri-
bution.
In automatic mode, cooling with dehumidify is
switched on. This function can be switched off if
necessary (
�page 258).
Page 263 of 509
262 Controls in detail
3-zone automatic climate control* (Canada only)
�Deactivating: Press buttonU
(
�page 259) again.
The indicator lamp in the button goes
out. The automatic operation of air vol-
ume and air distribution switches off.
The symbols of air distribution and air
volume appear in displayd.
�Adjust air distribution (�page 263).
�Adjust air volume (�page 263).
Setting the temperature
Use temperature controls1 and/or8
(
�page 259) to separately adjust the air
temperature on each side of the passenger
compartment. You should raise or lower
the temperature setting in small incre-
ments, preferably starting at 72°F (22°C).
The climate control will adjust to the set
temperature as fast as possible.
�Increasing: Turn temperature
control1 and/or8 (
�page 259)
slightly clockwise.
The climate control system will corre-
spondingly adjust the interior air tem-
perature.
�Decreasing: Turn temperature
control1 and/or8 (
�page 259)
slightly counterclockwise.
The climate control system will corre-
spondingly adjust the interior air tem-
perature.
iYou can also adjust the temperature in the
rear passenger compartment (
�page 268).
iIf you turn the temperature control fully
clockwise for one side of the vehicle, you are in-
creasing the temperature for the other side of
the vehicle as well.
iIf you turn the temperature control fully
counterclockwise for one side of the vehicle, you
are decreasing the temperature for the other
side of the vehicle as well.
Page 275 of 509
274 Controls in detail
Power tilt/sliding sunroof
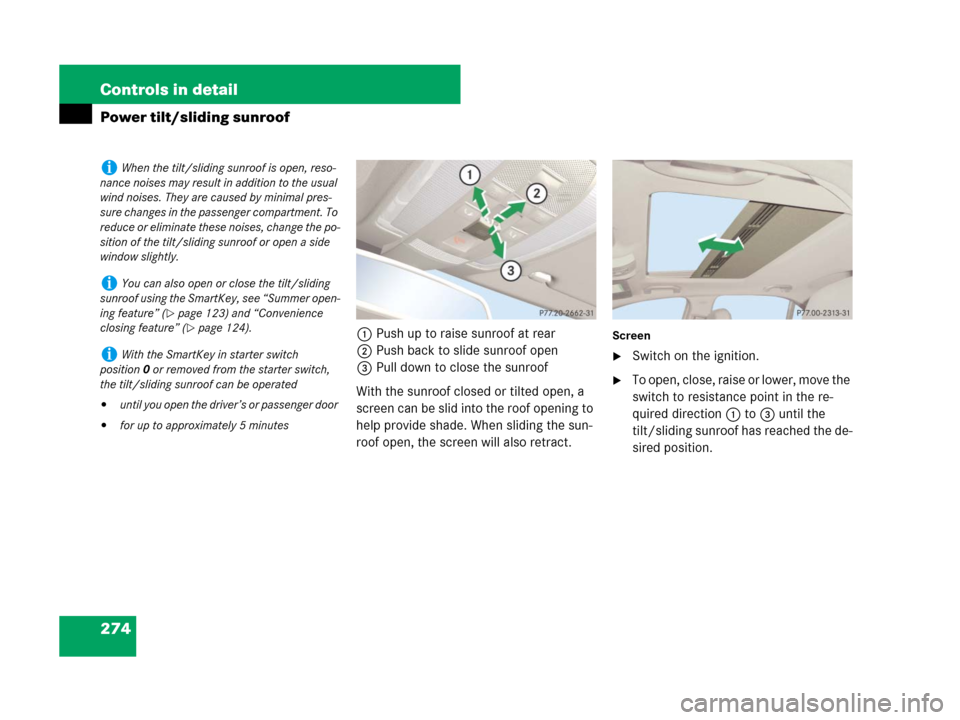
1Push up to raise sunroof at rear
2Push back to slide sunroof open
3Pull down to close the sunroof
With the sunroof closed or tilted open, a
screen can be slid into the roof opening to
help provide shade. When sliding the sun-
roof open, the screen will also retract.Screen
�Switch on the ignition.
�To open, close, raise or lower, move the
switch to resistance point in the re-
quired direction1to3 until the
tilt/sliding sunroof has reached the de-
sired position.
iWhen the tilt/sliding sunroof is open, reso-
nance noises may result in addition to the usual
wind noises. They are caused by minimal pres-
sure changes in the passenger compartment. To
reduce or eliminate these noises, change the po-
sition of the tilt/sliding sunroof or open a side
window slightly.
iYou can also open or close the tilt/sliding
sunroof using the SmartKey, see “Summer open-
ing feature” (
�page 123) and “Convenience
closing feature” (
�page 124).
iWith the SmartKey in starter switch
position0 or removed from the starter switch,
the tilt/sliding sunroof can be operated
�until you open the driver’s or passenger door
�for up to approximately 5 minutes
Page 276 of 509
275 Controls in detail
Power tilt/sliding sunroof
�Express-operation: To open, close,
raise or lower, move the switch past
the resistance point in the required
direction1to3 and release.
The tilt/sliding sunroof opens or closes
completely.
�Stopping during Express-opening/
closing: Move the switch in any direc-
tion.
Synchronizing
The tilt/sliding sunroof must be synchro-
nized
�after the tilt/sliding sunroof has been
closed manually
�if the tilt/sliding sunroof can only be
opened with a jerking motion
�after a malfunction
�Switch on the ignition (�page 82).
�Press and hold the sunroof switch in
the direction of arrow1 until the
tilt/sliding sunroof is fully raised at the
rear.
�Keep holding the sunroof switch in the
direction of arrow1 for approximately
1 second.
�Check the Express-operation feature
(
�page 275).
If the tilt/sliding sunroof opens com-
pletely, the sunroof is synchronized.
Otherwise repeat the above steps.
iIf the movement of the tilt/sliding sunroof is
blocked during the closing procedure, the sun-
roof will stop and reopen slightly.
!Do not open the tilt/sliding sunroof com-
pletely if it is not aligned. Otherwise you could
damage the tilt/sliding sunroof.