2008 INFINITI QX56 clock
[x] Cancel search: clockPage 2113 of 4083

FUEL TANKFL-13
< REMOVAL AND INSTALLATION >
C
DE
F
G H
I
J
K L
M A
FL
NP
O
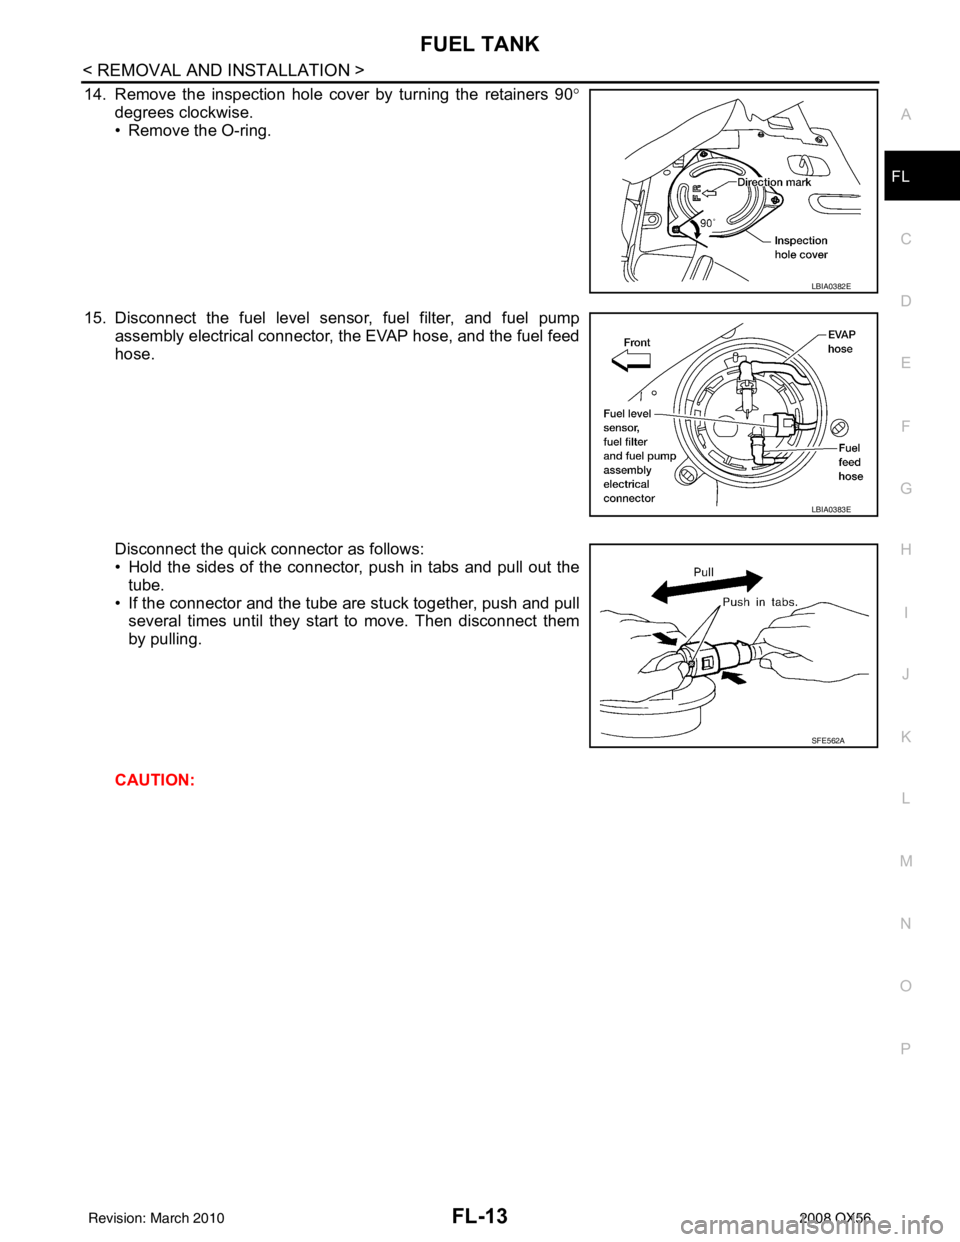
14. Remove the inspection hole cover by turning the retainers 90
°
degrees clockwise.
• Remove the O-ring.
15. Disconnect the fuel level sensor, fuel filter, and fuel pump assembly electrical connector, the EVAP hose, and the fuel feed
hose.
Disconnect the quick connector as follows:
• Hold the sides of the connector, push in tabs and pull out the
tube.
• If the connector and the tube are stuck together, push and pull several times until they start to move. Then disconnect them
by pulling.
CAUTION:
LBIA0382E
LBIA0383E
SFE562A
Revision: March 2010 2008 QX56
Page 2201 of 4083

FRONT DOOR GLASS AND REGULATORGW-11
< ON-VEHICLE REPAIR >
C
DE
F
G H
I
J
L
M A
B
GW
N
O P
• Removal and installation of the power window motor from the regulator.
• Installation of a new glass window.
• Installation of a new glass run.
Check the label on the power window motor for the part number. If the power window motor part number
matches one of the following, the limit switch must be reset using the "INSTALLATION WITHOUT RESET
SWITCH" procedure.
• 80730-ZT01A
• 80731-ZT01A
• 80730-ZM70B
• 80731-ZM70B
If the power window motor part number does not match one of the part numbers above, the limit switch must
be reset using the "INSTALLATION WITH RESET SWITCH" procedure.
NOTE:
Some of the power window motors with the part num bers above may appear to have a reset switch, but it will
not reset the limit switch.
INSTALLATION WITHOUT RESET SWITCH - (Motors listed above)
Check the label on the power window motor for the pa rt number. If the power window motor part number does
not match one of the above, use the "INS TALLATION WITH RESET SWITCH" procedure.
NOTE:
Some of the power window motors may appear to have a re set switch, but it will not reset the limit switch.
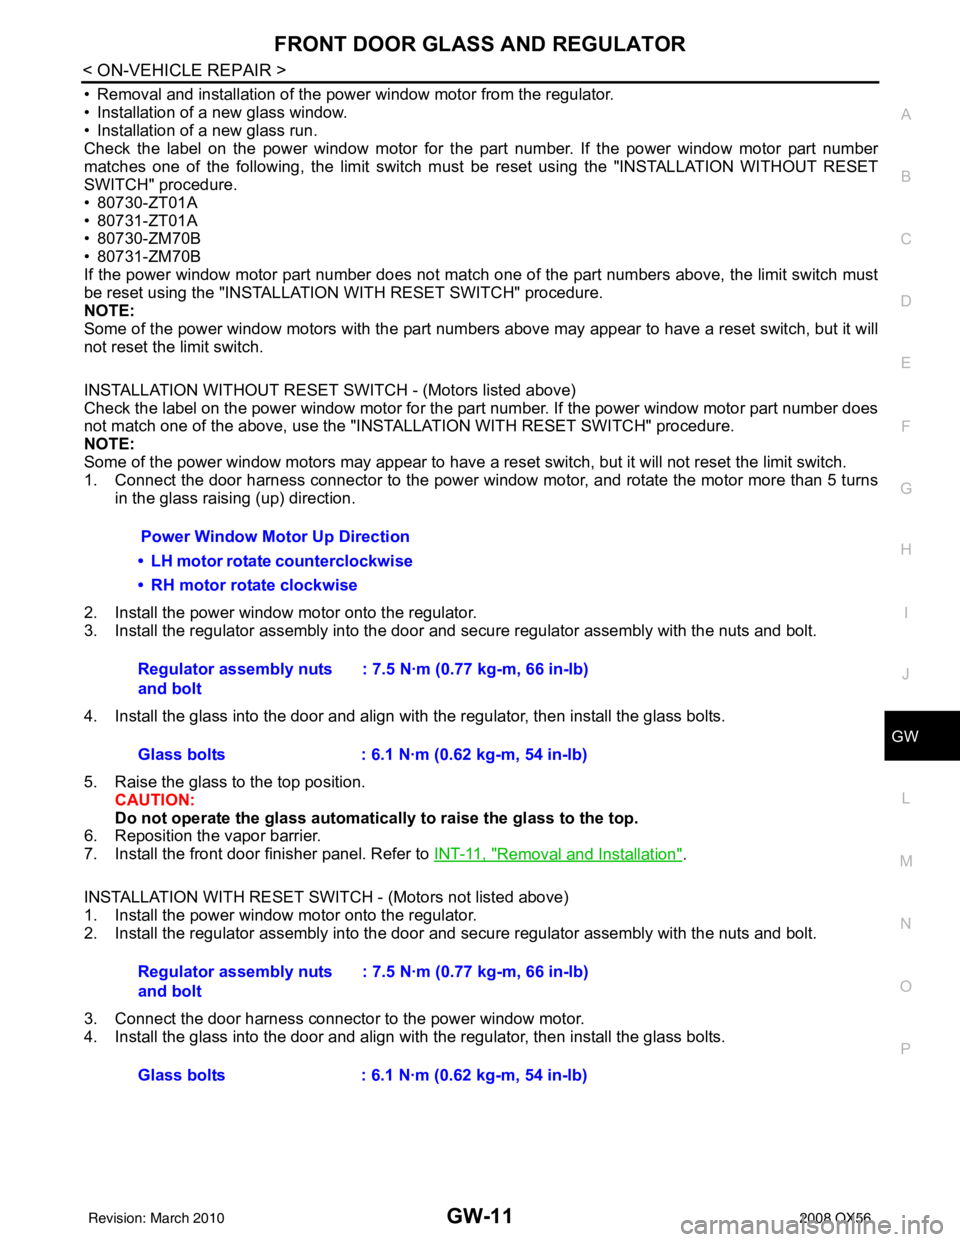
1. Connect the door harness connector to the power window motor, and rotate the motor more than 5 turns
in the glass raising (up) direction.
2. Install the power window motor onto the regulator.
3. Install the regulator assembly into the door and secure regulator assembly with the nuts and bolt.
4. Install the glass into the door and align with the regulator, then install the glass bolts.
5. Raise the glass to the top position. CAUTION:
Do not operate the glass automatical ly to raise the glass to the top.
6. Reposition the vapor barrier.
7. Install the front door finisher panel. Refer to INT-11, "
Removal and Installation".
INSTALLATION WITH RESET SWITCH - (Motors not listed above)
1. Install the power window motor onto the regulator.
2. Install the regulator assembly into the door and secure regulator assembly with the nuts and bolt.
3. Connect the door harness connector to the power window motor.
4. Install the glass into the door and align with the regulator, then install the glass bolts.
Power Window Motor Up Direction
• LH motor rotate counterclockwise
• RH motor rotate clockwise
Regulator assembly nuts
and bolt : 7.5 N·m (0.77 kg-m, 66 in-lb)
Glass bolts : 6.1 N·m (0.62 kg-m, 54 in-lb)
Regulator assembly nuts
and bolt : 7.5 N·m (0.77 kg-m, 66 in-lb)
Glass bolts : 6.1 N·m (0.62 kg-m, 54 in-lb)
Revision: March 2010 2008 QX56
Page 2217 of 4083

HA-12
< PRECAUTION >
PRECAUTIONS
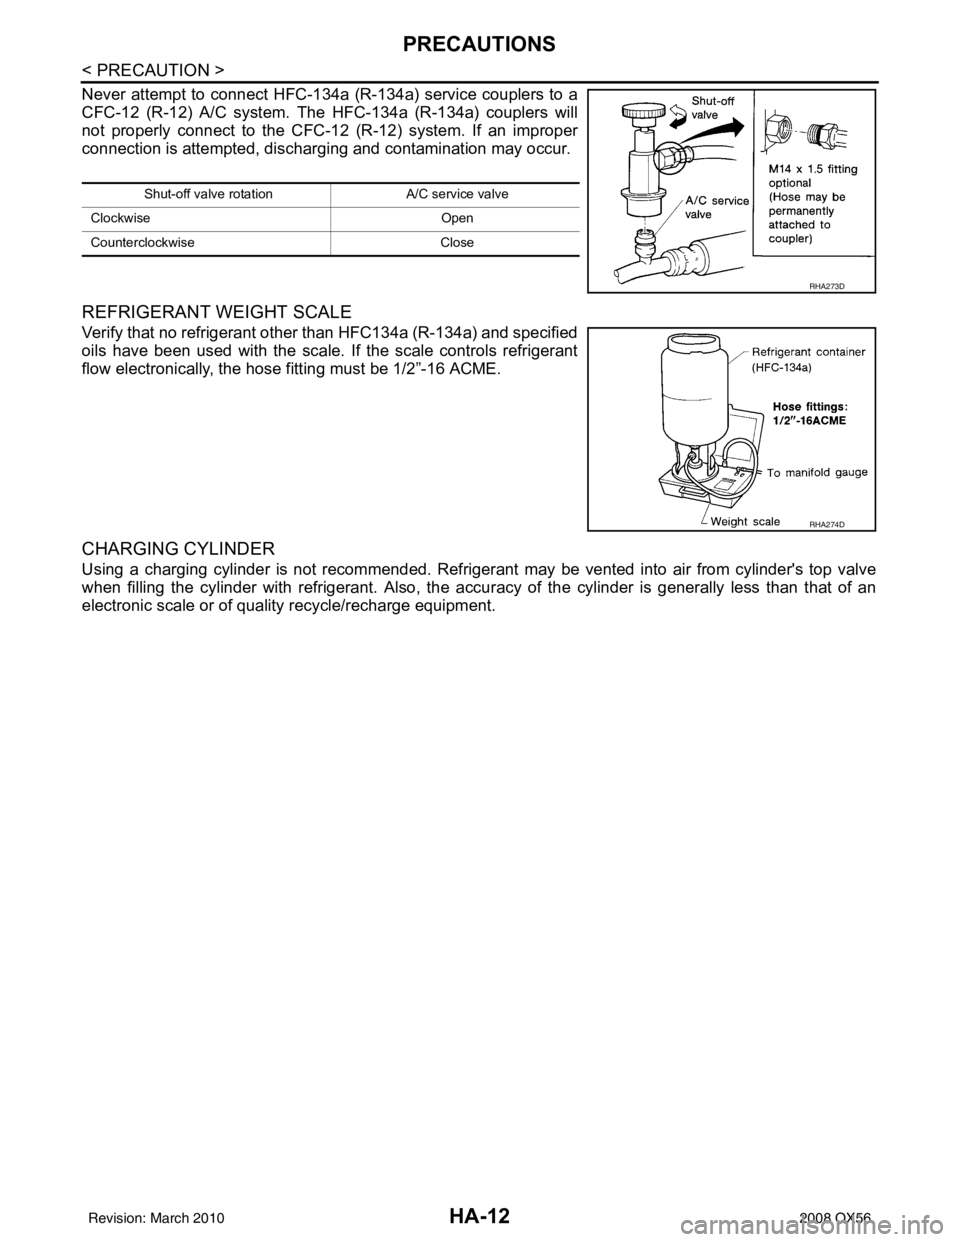
Never attempt to connect HFC-134a (R-134a) service couplers to a
CFC-12 (R-12) A/C system. The HFC-134a (R-134a) couplers will
not properly connect to the CFC-12 (R-12) system. If an improper
connection is attempted, discharging and contamination may occur.
REFRIGERANT WEIGHT SCALE
Verify that no refrigerant other than HFC134a (R-134a) and specified
oils have been used with the scale. If the scale controls refrigerant
flow electronically, the hose fitting must be 1/2”-16 ACME.
CHARGING CYLINDER
Using a charging cylinder is not recommended. Refrigerant may be vented into air from cylinder's top valve
when filling the cylinder with refrigerant. Also, the accu racy of the cylinder is generally less than that of an
electronic scale or of quality recycle/recharge equipment.
Shut-off valve rotati on A/C service valve
Clockwise Open
Counterclockwise Close
RHA273D
RHA274D
Revision: March 2010 2008 QX56
Page 2253 of 4083

HA-48
< SERVICE DATA AND SPECIFICATIONS (SDS)
SERVICE DATA AND SPECIFICATIONS (SDS)
SERVICE DATA AND SPECIFICATIONS (SDS)
SERVICE DATA AND SPECIFICATIONS (SDS)
Service Data and Specification (SDS)INFOID:0000000001516662
COMPRESSOR
OIL
REFRIGERANT
Make ZEXEL VALEO CLIMATE CONTROL
Model DKS-17D
Ty p e Swash plate
Displacement 175.5 cm
3 (10.7 in3 ) / revolution
Cylinder bore × stroke 30.5 mm (1.20 in) x 24.0 mm (0.94 in)
Direction of rotation Clockwise (viewed from drive end)
Drive belt Poly V
Name NISSAN A/C System Oil Type S
Capacity 290 m (9.8 US fl oz, 10.2 Imp fl oz)
Ty p eHFC 134a (R-134a)
Capacity 1.08 ± 0.05 kg (2.38 ± 0.11 lb)
Revision: March 2010 2008 QX56
Page 2257 of 4083
![INFINITI QX56 2008 Factory Service Manual HAC-4
< BASIC INSPECTION >[AUTOMATIC AIR CONDITIONER]
INSPECTION AND ADJUSTMENT
INSPECTION AND ADJUSTMENT
Operational Check (Front)INFOID:0000000001679764
The purpose of the operational check is to
c INFINITI QX56 2008 Factory Service Manual HAC-4
< BASIC INSPECTION >[AUTOMATIC AIR CONDITIONER]
INSPECTION AND ADJUSTMENT
INSPECTION AND ADJUSTMENT
Operational Check (Front)INFOID:0000000001679764
The purpose of the operational check is to
c](/manual-img/42/57030/w960_57030-2256.png)
HAC-4
< BASIC INSPECTION >[AUTOMATIC AIR CONDITIONER]
INSPECTION AND ADJUSTMENT
INSPECTION AND ADJUSTMENT
Operational Check (Front)INFOID:0000000001679764
The purpose of the operational check is to
confirm that the system operates properly.
CHECKING MEMORY FUNCTION
1. Set the temperature to 32 °C (90 °F).
2. Press the OFF switch.
3. Turn ignition switch OFF.
4. Turn ignition switch ON.
5. Press the AUTO switch.
6. Confirm that the set temperature remains at previous temperature.
7. Press the OFF switch.
If NG, go to trouble diagnosis procedure for HAC-121, "
Memory Function Check".
If OK, continue with next check.
CHECKING BLOWER
1. Press the blower speed control switch (+) once, blower should operate on low speed. The fan display should have one bar lit (on display).
2. Press the blower speed control switch (+) again, and continue checking blower speed and fan display until
all speeds are checked.
3. Leave blower on maximum speed.
If NG, go to trouble diagnosis procedure for HAC-51, "
Front Blower Motor Diagnosis Procedure".
If OK, continue with next check.
CHECKING DISCHARGE AIR
1. Press MODE switch four times and the DEF switch.
2. Each position indicator should change shape (on display).
3. Confirm that discharge air comes out according to the air distribution table. Refer to HAC-15, "
Discharge
Air Flow (Front)".
Mode door position is checked in the next step.
If NG, go to trouble diagnosis procedure for HAC-26, "
Mode Door Motor (Front) Diagnosis Procedure".
If OK, continue the check.
NOTE:
Confirm that the compressor clutch is engaged (sound or visual inspection) and intake door position is at
fresh when the DEF or D/F is selected.
CHECKING RECIRCULATION ( , ONLY)
1. Press recirculation ( ) switch one time. Recirculation indicator should illuminate.
2. Press recirculation ( ) switch one more time. Recirculation indicator should go off.
3. Listen for intake door position change (blower sound should change slightly).
If NG, go to trouble diagnosis procedure for HAC-42, "
Intake Door Motor Diagnosis Procedure".
If OK, continue the check.
NOTE:
Confirm that the compressor clutch is engaged (sound or vis ual inspection) and intake door position is at fresh
when the DEF or D/F is selected. REC ( ) is not allowed in DEF ( ) D/F ( ) or FOOT ( ).
CHECKING TEMPERATURE DECREASE
1. Rotate temperature control dial (drive or passenger) counterclockwise until 18° C (60°F) is displayed.
2. Check for cold air at appropriate discharge air outlets. Conditions : Engine running and at normal operating temperature
Revision: March 2010
2008 QX56
Page 2258 of 4083
![INFINITI QX56 2008 Factory Service Manual INSPECTION AND ADJUSTMENTHAC-5
< BASIC INSPECTION > [AUTOMATIC AIR CONDITIONER]
C
D
E
F
G H
J
K L
M A
B
HAC
N
O P
If NG, listen for sound of air mix door motor operat ion. If OK, go to trouble diagnos INFINITI QX56 2008 Factory Service Manual INSPECTION AND ADJUSTMENTHAC-5
< BASIC INSPECTION > [AUTOMATIC AIR CONDITIONER]
C
D
E
F
G H
J
K L
M A
B
HAC
N
O P
If NG, listen for sound of air mix door motor operat ion. If OK, go to trouble diagnos](/manual-img/42/57030/w960_57030-2257.png)
INSPECTION AND ADJUSTMENTHAC-5
< BASIC INSPECTION > [AUTOMATIC AIR CONDITIONER]
C
D
E
F
G H
J
K L
M A
B
HAC
N
O P
If NG, listen for sound of air mix door motor operat ion. If OK, go to trouble diagnosis procedure for HAC-109,
"Component Function Check". If air mix door motor appears to be malfunctioning, go to HAC-31, "Air Mix Door
Motor Component Function Check".
If OK, continue the check.
CHECKING TEMPERATURE INCREASE
1. Rotate temperature control dial clockwise (drive or passenger) until 32 °C (90° F) is displayed.
2. Check for hot air at appropriate discharge air outlets.
If NG, listen for sound of air mix door motor operat ion. If OK, go to trouble diagnosis procedure for HAC-117,
"Component Function Check". If air mix door motor appears to be malfunctioning, go to HAC-31, "Air Mix Door
Motor Component Function Check".
If OK, continue with next check.
CHECK A/C SWITCH
1. Press A/C switch when AUTO switch is ON, or in manual mode.
2. A/C switch indicator will turn ON. • Confirm that the compressor clutch engages (sound or visual inspection).
NOTE:
If current mode setting is DEF or D/F, compre ssor clutch will already be engaged and cannot be turned off.
If NG, go to trouble diagnosis procedure for HAC-72, "
Magnet Clutch Diagnosis Procedure".
If OK, continue with next check.
CHECKING AUTO MODE
1. Press AUTO switch.
2. Display should indicate AUTO.
• If ambient temperature is warm, and selected temperat ure is cool, confirm that the compressor clutch
engages (sound or visual inspection). (Discharge air and blower speed will depend on ambient, in-vehi-
cle, and set temperatures.)
If NG, go to trouble diagnosis procedure for HAC-89, "
A/C Auto Amp Power and Ground Diagnosis Proce-
dure", then if necessary, trouble diagnosis procedure for HAC-72, "Magnet Clutch Diagnosis Procedure".
If all operational checks are OK (symptom cannot be duplicated), go to malfunction Simulation Tests in HAC-
3, "How to Perform Trouble Diagnosis For Quick And Accurate Repair" and perform tests as outlined to simu-
late driving conditions environment. If symptom appears. Refer to HAC-108, "
SymptomMatrixChart", and
perform applicable troubl e diagnosis procedures.
Operational Check (Rear)INFOID:0000000001679765
The purpose of the operational check is to confirm that the system operates properly.
CHECKING REAR BLOWER MOTOR
1. Turn the ignition switch ON.
2. Rotate rear air control (front) blower control dial to low speed.
3. Rotate the blower control dial clockwise and continue checking blower speed until all speeds are checked.
4. Leave blower on maximum speed.
5. Press the REAR CTRL switch from the rear air control (front).
6. Rotate rear air control (rear) blower control dial to low speed.
7. Rotate the blower control dial clockwise and continue checking blower speed until all speeds are checked.
8. Leave blower on maximum speed.
If NG, go to trouble diagnosis procedure for HAC-56, "
Rear Blower Motor Component Function Check".
If OK, continue with next check.
CHECKING REAR DISCHARGE AIR
Conditions : Engine running and at normal operating temperature
Revision: March 2010 2008 QX56
Page 2259 of 4083
![INFINITI QX56 2008 Factory Service Manual HAC-6
< BASIC INSPECTION >[AUTOMATIC AIR CONDITIONER]
INSPECTION AND ADJUSTMENT
1. The REAR CTRL indicator must be off. Press each rear air con-
trol (front) mode door switches and confirm the dischar INFINITI QX56 2008 Factory Service Manual HAC-6
< BASIC INSPECTION >[AUTOMATIC AIR CONDITIONER]
INSPECTION AND ADJUSTMENT
1. The REAR CTRL indicator must be off. Press each rear air con-
trol (front) mode door switches and confirm the dischar](/manual-img/42/57030/w960_57030-2258.png)
HAC-6
< BASIC INSPECTION >[AUTOMATIC AIR CONDITIONER]
INSPECTION AND ADJUSTMENT
1. The REAR CTRL indicator must be off. Press each rear air con-
trol (front) mode door switches and confirm the discharge air
comes out relative to the icon on each switch and according to
the air distribution table. Refer to HAC-15, "
Discharge Air Flow
(Rear)".
2. Press the REAR CTRL switch (indicator on) from the rear air control (front).
3. Press each rear air control (rear) mode door switches and con-
firm the discharge air comes out relative to the icon on each
switch and according to the air distribution table. Refer to HAC-
15, "Discharge Air Flow (Rear)".
Air mix door position is checked in the next step.
If NG, go to HAC-31, "
Air Mix Door Motor Component Function
Check".
If OK, continue with next check.
CHECKING REAR TEMPERATURE DECREASE
1. Press the REAR CTRL switch (indicator off).
2. Rotate the rear air control (front) temperatur e control dial counterclockwise to maximum cold.
3. Check for cold air at appropriate discharge air outlets.
4. Press the REAR CTRL switch (indicator on) from the rear air control (front).
5. Rotate the rear air control (rear) temperature control dial counterclockwise to maximum cold.
6. Check for cold air at appropriate discharge air outlets.
If NG, listen for sound of air mix door motor operation. If OK, go to trouble diagnosis procedure for HAC-31,
"Air Mix Door Motor Component Function Check". If air mix door motor appears to be malfunctioning, go to
HAC-62, "
Air Mix Door Motor (Rear) Diagnosis Procedure".
If OK, continue with next check.
CHECKING REAR TEMPERATURE INCREASE
1. Press the REAR CTRL switch (indicator off).
2. Rotate the rear air control (front) temperature control dial clockwise to maximum heat.
3. Check for hot air at appropriate discharge air outlets.
4. Press the REAR CTRL switch (indictor on) from the rear air control (front).
5. Rotate the rear air control (rear) temperature control dial clockwise to maximum heat.
6. Check for hot air at appropriate discharge air outlets.
If NG, listen for sound of air mix door motor operation. If OK, go to trouble diagnosis procedure for HAC-31,
"Air Mix Door Motor Component Function Check". If air mix door motor appears to be malfunctioning, go to
HAC-62, "
Air Mix Door Motor (Rear) Diagnosis Procedure".
If NG, go to trouble diagnosis procedure for HAC-117, "
Component Function Check".
If all operational checks are OK (symptom cannot be duplicated), go to HAC-3, "
How to Perform Trouble Diag-
nosis For Quick And Accurate Repair" and perform tests as outlined. If symptom appears, refer to HAC-108,
"SymptomMatrixChart" and perform applicable trouble diagnosis procedures.
WJIA0541E
Revision: March 2010 2008 QX56
Page 2275 of 4083
![INFINITI QX56 2008 Factory Service Manual HAC-22
< FUNCTION DIAGNOSIS >[AUTOMATIC AIR CONDITIONER]
SELF-DIAGNOSIS FUNCTION
SELF-DIAGNOSIS FUNCTION
A/C Auto Amp. Self-DiagnosisINFOID:0000000001679779
A/C SYSTEM SELF-DIAGNOSIS FUNCTION
The self INFINITI QX56 2008 Factory Service Manual HAC-22
< FUNCTION DIAGNOSIS >[AUTOMATIC AIR CONDITIONER]
SELF-DIAGNOSIS FUNCTION
SELF-DIAGNOSIS FUNCTION
A/C Auto Amp. Self-DiagnosisINFOID:0000000001679779
A/C SYSTEM SELF-DIAGNOSIS FUNCTION
The self](/manual-img/42/57030/w960_57030-2274.png)
HAC-22
< FUNCTION DIAGNOSIS >[AUTOMATIC AIR CONDITIONER]
SELF-DIAGNOSIS FUNCTION
SELF-DIAGNOSIS FUNCTION
A/C Auto Amp. Self-DiagnosisINFOID:0000000001679779
A/C SYSTEM SELF-DIAGNOSIS FUNCTION
The self-diagnosis function is built into the A/C aut
o amp. to quickly locate the cause of malfunctions.
DESCRIPTION
The self-diagnostic system diagnoses sensors, CAN sys tem, and battery voltage on A/C auto amp. Refer to
applicable sections (items) for details. Fault codes (if any are present) will be displayed in the ambient temper-
ature display area. Refer to HAC-23, "
A/C System Self-Diagnosis Code Chart".
SELF-DIAGNOSTIC MODE
NOTE:
Radio must be off.
1. On the A/C and AV switch asse mbly, press the "SETTING" but-
ton and twist the volume knob clockwise and counterclockwise
until the Self-Diagnosis screen shows on the display.
2. Scroll down to "Confirmation/Adjustment" and press the "ENTER" button.
3. Scroll down to "Climate Control" and press the "ENTER" button.
4. The fan bars will flash on the display during the self-test, and then the fault codes will display in the ambient temperature area.
They will continue scrolling until diagnostic mode is exited.
5. Exit by pressing the "BACK" button on A/C and AV switch assembly until display returns to its normal operation screen.
HVAC system will be OFF.
The self-diagnostic system diagnoses sensors, CAN sys tem, and battery voltage on A/C auto amp. Refer to
applicable sections (items) for details. Fault codes (if any are present) will be displayed in the ambient temper-
ature display area. Refer to HAC-23, "
A/C System Self-Diagnosis Code Chart".
A/C and AV Switch Asse mbly Self-DiagnosisINFOID:0000000001679780
A/C and AV switch assembly self-diagnosis function
The ON/OFF operation (continuity) of each switch in the A/C and AV switch assembly can be checked.
Self-diagnosis mode
AWNIA0098ZZ
AWIIA0081ZZ
Revision: March 2010 2008 QX56