Page 134 of 494
automatically. Interior lighting also comes on when a
door is opened or the dimmer control is turned fully
upward, past the second detent.
There is a second light located midway back in the
headliner.
To protect the battery, the interior lights will turn off
automatically 10 minutes after the ignition switch is
moved to the LOCK position. This will occur if the
interior lights were switched on manually or are on
because a door is open. This includes the glove box light,
but not the trunk light. To restore interior light operation,
either turn the ignition switch ON or cycle the light
switch.Headlights, Parking Lights, Instrument Panel
Lights
Turn the end of the Multifunction Control Lever to the
first detent for parking light operation. Turn to the
second detent for headlight operation. Turn to the third
detent “A” for “Auto” headlight operation (if equipped).
Headlight Switch
132 UNDERSTANDING THE FEATURES OF YOUR VEHICLE
Page 135 of 494
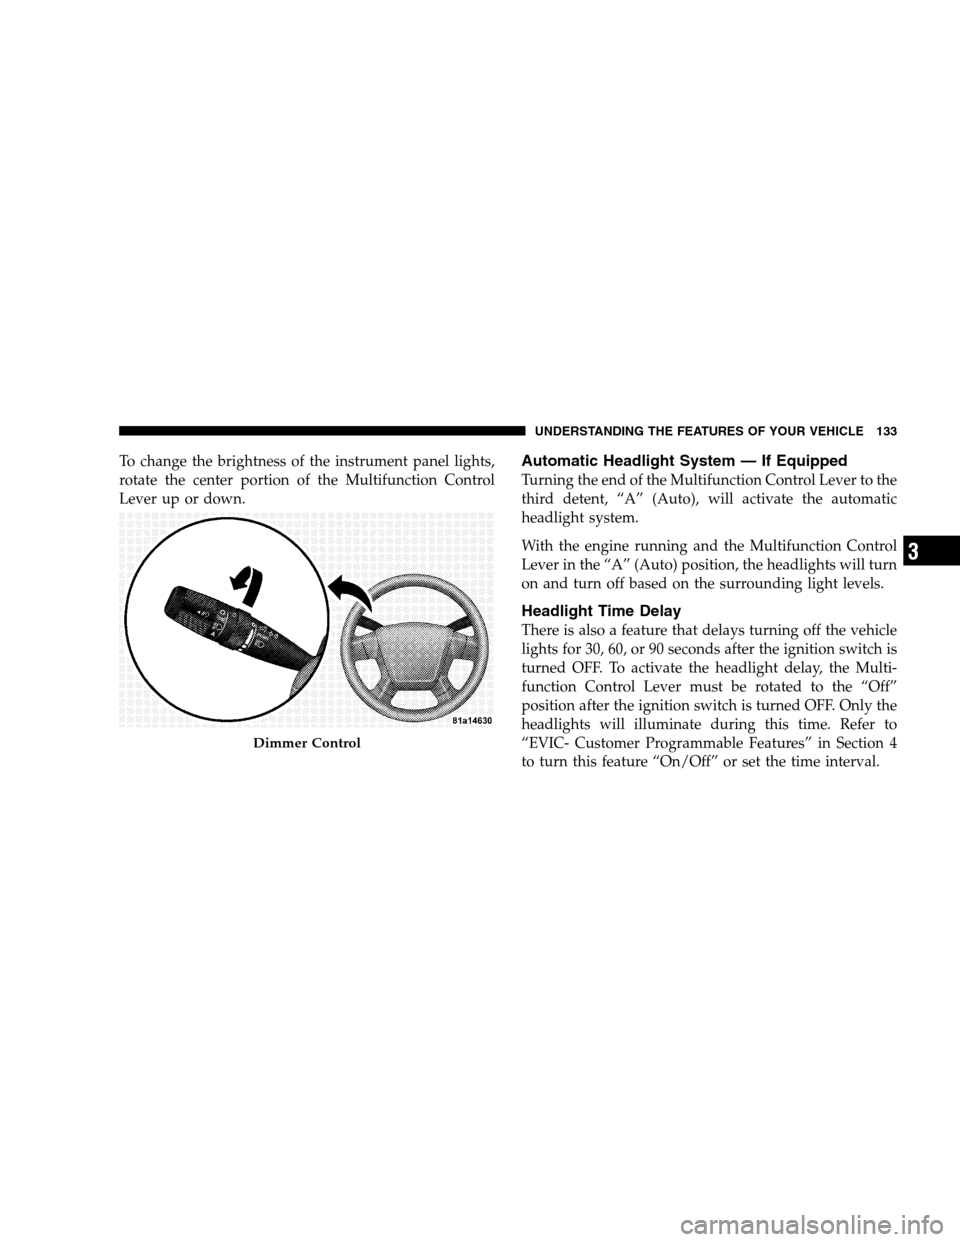
To change the brightness of the instrument panel lights,
rotate the center portion of the Multifunction Control
Lever up or down.Automatic Headlight System — If Equipped
Turning the end of the Multifunction Control Lever to the
third detent, “A” (Auto), will activate the automatic
headlight system.
With the engine running and the Multifunction Control
Lever in the “A” (Auto) position, the headlights will turn
on and turn off based on the surrounding light levels.
Headlight Time Delay
There is also a feature that delays turning off the vehicle
lights for 30, 60, or 90 seconds after the ignition switch is
turned OFF. To activate the headlight delay, the Multi-
function Control Lever must be rotated to the “Off”
position after the ignition switch is turned OFF. Only the
headlights will illuminate during this time. Refer to
“EVIC- Customer Programmable Features” in Section 4
to turn this feature “On/Off” or set the time interval.
Dimmer Control
UNDERSTANDING THE FEATURES OF YOUR VEHICLE 133
3
Page 136 of 494
Passing Light / Flash to Pass
You can signal another vehicle with your headlights by
lightly pulling the Multifunction Control Lever toward
you. This will cause the headlights to turn on at high
beam and remain on until the lever is released.
NOTE:If the Multifunction Control Lever is held in the
flash to pass position for more than 15 seconds, the high
beams will shut off. If this occurs, wait 30 seconds for the
next flash to pass operation.
Daytime Running Lights (DRL) — If Equipped
The high beam lights will come on as DRL at DRL
intensity (lower), whenever the ignition is on, the engine
is running, the headlight switch is off, the parking brake
is off, the turn signal is off, and the gear select lever is in
any position except PARK.NOTE:On this vehicle, the DRLwill automatically turn
off when the turn signal is in operation and automatically
turn back on when the turn signal is not operating.
Lights On Reminder
If the headlights or parking lights are on after the ignition
is turned OFF, a chime will sound to alert the driver
when the driver’s door is opened.
Fog Lights — If Equipped
The front fog light switch is on the Multifunction
Control Lever. To activate the front fog lights, turn
on the parking lights or the low beam headlights
and pull out the end of the control lever.
134 UNDERSTANDING THE FEATURES OF YOUR VEHICLE
Page 137 of 494
NOTE:The front fog lights will only operate with the
headlights on low beam. Selecting high beam headlights
will turn off the front fog lights.
Turn Signals
Move the Multifunction Control Lever up or down and
the arrows on each side of the instrument cluster flash to
show proper operation of the front and rear turn signal
lights. You can signal a lane change by moving the lever
partially up or down without moving beyond the detent.
Front Fog Light Control
Turn Signal Control
UNDERSTANDING THE FEATURES OF YOUR VEHICLE 135
3
Page 138 of 494
If either light remains on and does not flash, or there is a
very fast flash rate, check for a defective outside light
bulb. If an indicator fails to light when the lever is
moved, it would suggest that the fuse or indicator bulb is
defective.
Highbeam/Lowbeam Select Switch
Push the Multifunction Control Lever away from you to
switch the headlights to HIGH beam. Pull the Lever
toward you, to switch the headlights back to Low beam.
WINDSHIELD WIPERS AND WASHERS
The wipers and washers are operated by a switch
on the control lever. The lever is located on the
right side of the steering column.
Highbeam Functions
136 UNDERSTANDING THE FEATURES OF YOUR VEHICLE
Page 141 of 494
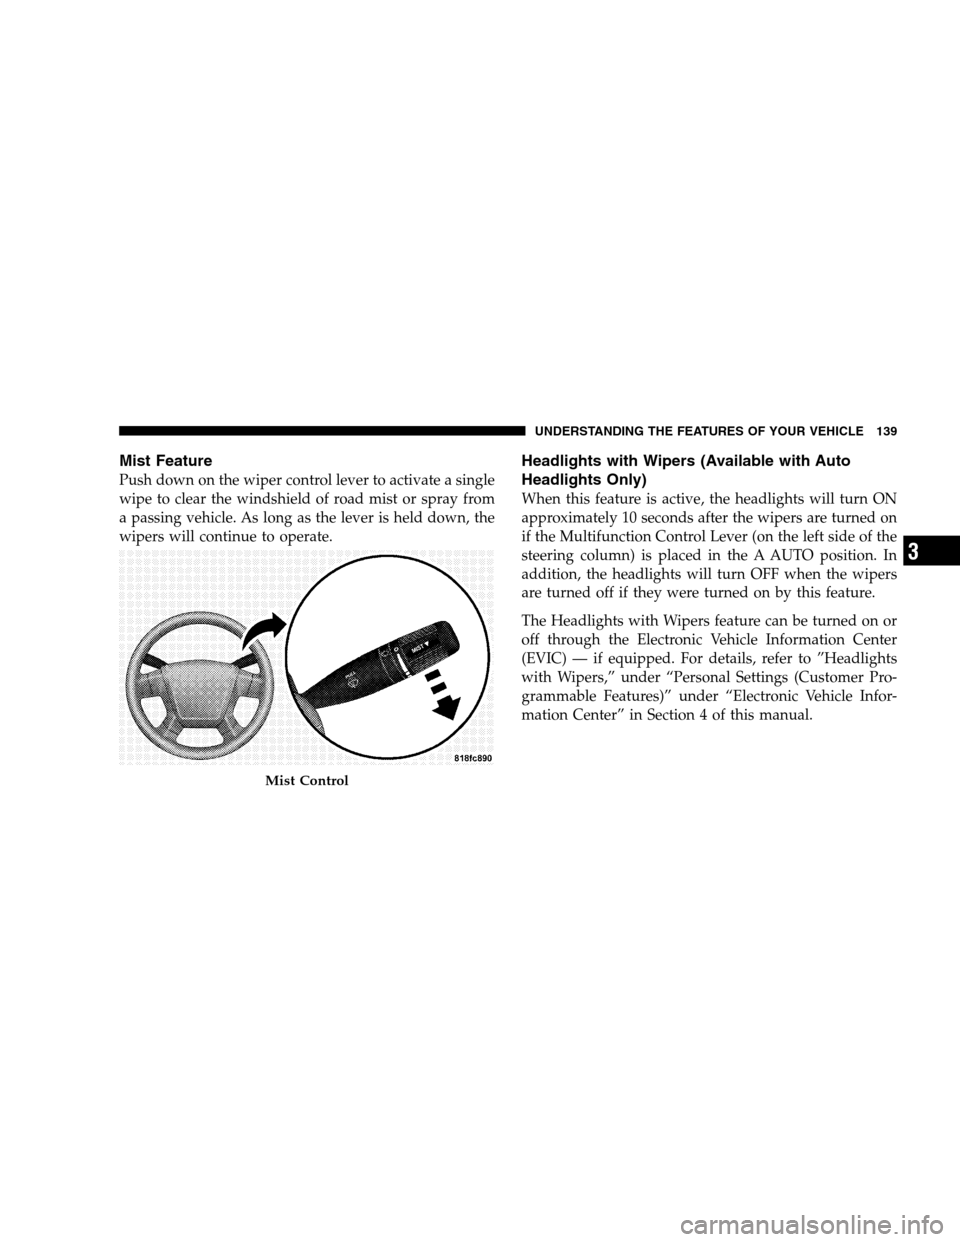
Mist Feature
Push down on the wiper control lever to activate a single
wipe to clear the windshield of road mist or spray from
a passing vehicle. As long as the lever is held down, the
wipers will continue to operate.
Headlights with Wipers (Available with Auto
Headlights Only)
When this feature is active, the headlights will turn ON
approximately 10 seconds after the wipers are turned on
if the Multifunction Control Lever (on the left side of the
steering column) is placed in the A AUTO position. In
addition, the headlights will turn OFF when the wipers
are turned off if they were turned on by this feature.
The Headlights with Wipers feature can be turned on or
off through the Electronic Vehicle Information Center
(EVIC) — if equipped. For details, refer to ”Headlights
with Wipers,” under “Personal Settings (Customer Pro-
grammable Features)” under “Electronic Vehicle Infor-
mation Center” in Section 4 of this manual.
Mist Control
UNDERSTANDING THE FEATURES OF YOUR VEHICLE 139
3
Page 146 of 494
Pushing down the SET DECEL button once will result in
a 1 mph (2 km/h) speed decrease. Each time the button is
pushed, speed decreases.
WARNING!
Speed Control can be dangerous where the system
can’t maintain a constant speed. Your vehicle could
go too fast for the conditions, and you could lose
control. An accident could be the result. Don’t use
Speed Control in heavy traffic or on roads that are
winding, icy, snow-covered, or slippery.
TO ACCELERATE FOR PASSING:
Depress the accelerator as you would normally. When the
pedal is released, the vehicle will return to the set speed.
Using Speed Control on Hills
NOTE:The speed control system maintains speed up
and down hills. A slight speed change on moderate hills
is normal.
On steep hills, a greater speed loss or gain may occur so
it may be preferable to drive without speed control.
GARAGE DOOR OPENER — IF EQUIPPED
HomeLink�replaces up to three remote controls (hand-
held transmitters) that operate devices such as garage
door openers, motorized gates, lighting, or home security
systems. The HomeLink�unit operates off your vehicle’s
battery.
144 UNDERSTANDING THE FEATURES OF YOUR VEHICLE
Page 148 of 494
WARNING!
Vehicle exhaust contains carbon monoxide, a danger-
ous gas. Do not run your vehicle in the garage while
training the transceiver. Exhaust gas can cause seri-
ous injury or death.
Programming HomeLink�
Before You Begin
If you have not trained any of the HomeLink�buttons,
erase all channels before you begin training.
To do this, press and hold the two outside buttons for 20
seconds until the red indicator flashes.
It is recommended that a new battery be placed in the
hand-held transmitter of the device being programmed
to HomeLink�for more efficient training and accurate
transmission of the radio-frequency signal.Your vehicle should be parked outside of the garage
when programming.
1. Turn the ignition switch to the ON/RUN position.
2. Hold the battery side of the hand-held transmitter
away from the HomeLink�button you wish to program.
Place the hand-held transmitter 1–3 in (3-8 cm) away
from the HomeLink�button you wish to program while
keeping the indicator light in view.
3. Simultaneously press and hold both the chosen
HomeLink�button and the hand-held transmitter button
until the HomeLink�indicator changes from a slow to a
rapidly blinking light, then release both the HomeLink�
and hand-held transmitter buttons.
Watch for the HomeLink�indicator to change flash rates.
When it changes, it is programmed. It may take up to 30
seconds, or longer in rare cases. The garage door may
open and close while you train.
146 UNDERSTANDING THE FEATURES OF YOUR VEHICLE