2008 CHEVROLET MALIBU lock
[x] Cancel search: lockPage 142 of 412
Heavy snow or ice can overload the wiper motor.
A circuit breaker stops the motor until it cools. Clear
away snow or ice to prevent an overload. If the motor
gets stuck, turn the wipers off, clear away the snow
or ice, and then turn the wipers back on.
As an added safety feature, if the wipers are on for
more than 15 seconds, the vehicle’s headlamps turn on
automatically. They turn off 15 seconds after the
wipers are turned off.
Windshield Washer
To wash the windshield, press the button at the end of
the lever until the washers begin.
{CAUTION:
In freezing weather, do not use your washer
until the windshield is warmed. Otherwise the
washer �uid can form ice on the windshield,
blocking your vision.
When the button is released, the washers stop, but the
wipers continue to wipe about three times or resume
the previous speed.
Cruise Control
Cruise control lets you maintain a speed of about
25 mph (40 km/h) or more without keeping your foot on
the accelerator. This can really help on long trips.
Cruise control does not work at speeds below 25 mph
(40 km/h).
{CAUTION:
Cruise control can be dangerous where you
cannot drive safely at a steady speed. So, do
not use your cruise control on winding roads
or in heavy traffic.
Cruise control can be dangerous on slippery
roads. On such roads, fast changes in tire
traction can cause excessive wheel slip, and
you could lose control. Do not use cruise
control on slippery roads.
3-10
Page 146 of 412
Headlamps on Reminder
If you open the driver’s door and turn off the
ignition while leaving the lamps on, you will hear a
warning chime.
Headlamps Off in Park
This feature works when the ignition is in the ON/RUN
position and it is dark outside. To turn the headlamps
off when it is dark outside but keep other exterior lights
on, turn the exterior lamp control to the parking lamp
position.
To turn on the headlamps along with the other lamps
when it is dark outside, turn the exterior lamp control to
the AUTO or headlamp position.
This function does not work for vehicles �rst sold in
Canada.
Delayed Headlamps
The delayed headlamps feature keeps the headlamps
on for 20 seconds after the key is turned to LOCK/OFF,
then the headlamps automatically turn off.
To override the 20 second delayed headlamp feature
while it is active turn the turn signal/multifunction
lever up one position and then back to AUTO.
Daytime Running Lamps (DRL)
Daytime Running Lamps (DRL) can make it easier for
others to see the front of your vehicle during the
day. DRL are helpful in many different driving conditions,
but they can be especially helpful in the short periods
after dawn and before sunset. Fully functional DRL
are required on all vehicles �rst sold in Canada. The
vehicle has a light sensor on top of the instrument panel
that controls the DRL. Make sure it is not covered, or
the head lamps will be on when they are not needed.
The DRL system makes the low-beam headlamps come
on at a reduced brightness when the following conditions
are met:
The ignition is on.
The exterior lamps control is in AUTO.
The exterior lamps control is in the parking lamps
only position (This applies only to vehicles that are
�rst sold in Canada).
The light sensor detects daytime light.
The parking brake is released or the vehicle is
not in PARK.
When the DRL system is on, the taillamps, sidemarker
lamps, parking lamps, and instrument panel lights
are not on unless you turn the exterior lamps control to
the parking lamp position.
As with any vehicle, you should turn on the regular
headlamp system when they are needed.
3-14
Page 148 of 412
Fog Lamps
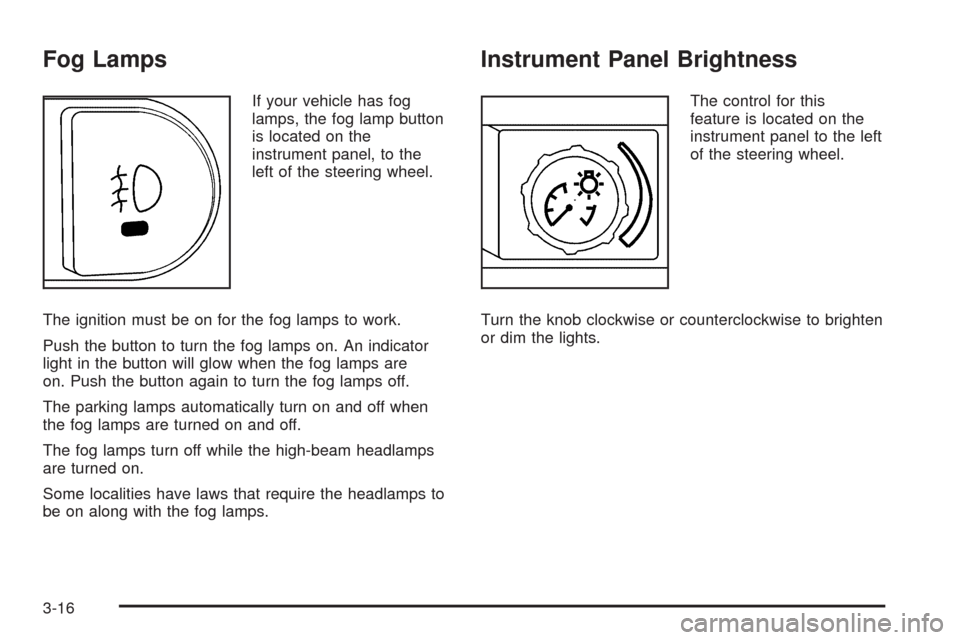
If your vehicle has fog
lamps, the fog lamp button
is located on the
instrument panel, to the
left of the steering wheel.
The ignition must be on for the fog lamps to work.
Push the button to turn the fog lamps on. An indicator
light in the button will glow when the fog lamps are
on. Push the button again to turn the fog lamps off.
The parking lamps automatically turn on and off when
the fog lamps are turned on and off.
The fog lamps turn off while the high-beam headlamps
are turned on.
Some localities have laws that require the headlamps to
be on along with the fog lamps.
Instrument Panel Brightness
The control for this
feature is located on the
instrument panel to the left
of the steering wheel.
Turn the knob clockwise or counterclockwise to brighten
or dim the lights.
3-16
Page 149 of 412
Dome Lamp
If the vehicle has a dome lamp with a switch, the
following are the settings.
9(Off):Move the lever to this position to turn the
lamp off, even when a door is open.
1(Door):Move the lever to this position so that the
lamp comes on when a door is opened.
+(On):Move the lever to this position to turn the
dome lamp on.
Entry/Exit Lighting
The lamps inside the vehicle come on when any door is
opened. These lamps fade out about 20 seconds
after all of the doors have been closed or when the
ignition is turned to ON/RUN. They also come on when
the unlock symbol button or the horn symbol is
pressed on the Remote Keyless Entry (RKE) system
transmitter.
The lamps inside the vehicle stay on for about
20 seconds after the key is removed from the ignition to
provide light as you exit.
Parade Dimming
Parade dimming is a separate lighting mode that comes
on while the parking lamps are turned on during the
day. It prevents the display lights and indicator
lights from being dim, while the parking lamps are
used during the day.
Front Reading Lamps
Press the lens to turn the reading lamps on and off.
The reading lamps will turn on when the door is open
if the dome lamp is in the door position. The reading
lamps will also turn on with the dome lamp switch in the
on position. The lamps will not turn on if the door is
open and the dome lamp is in the off position.
Overhead Console Reading Lamps
The vehicle may have reading lamps on the overhead
console. These lamps come on when the doors are
opened if the lamp switch is not in the OFF position.
Press the side of each lamp to turn them on and
off, while the doors are closed.
3-17
Page 150 of 412
Overhead Ambient Lighting
These lamps will automatically turn on and off as
controlled by the light sensor located on top of the
instrument panel.
Rear Reading Lamps
The vehicle’s dome lamp may have two rear reading
lamps. Press the lens of the reading lamps to turn them
on or off.
Trunk Lamp
The trunk lamp comes on when the trunk is open and
turns off when it is closed.
Battery Run-Down Protection
Your vehicle has a battery run-down protection feature
designed to protect the vehicle’s battery.
When any interior lamp (trunk, reading, or visor vanity)
is left on while the ignition is turned off, the battery
run-down protection system will automatically shut the
lamp(s) off after 20 minutes. This will avoid draining
the battery.
To reactivate the interior lamps, do one of the following:
Turn on the ignition.
Turn the exterior lamp control off and then on.
Open a door.
Press any Remote Keyless Entry (RKE) transmitter
button (if equipped).
Press the remote trunk release button.
Press the power door lock switch.
The battery run-down feature will also be activated
when any door on the vehicle is left open and the
ignition is in LOCK/OFF.
3-18
Page 152 of 412
Power Outlet 115 Volt Alternating
Current
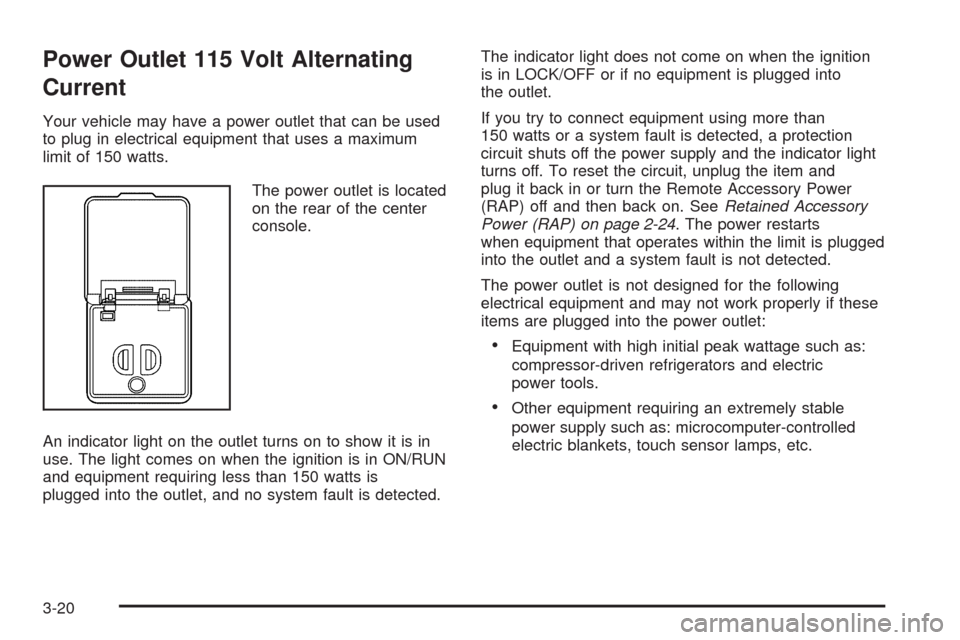
Your vehicle may have a power outlet that can be used
to plug in electrical equipment that uses a maximum
limit of 150 watts.
The power outlet is located
on the rear of the center
console.
An indicator light on the outlet turns on to show it is in
use. The light comes on when the ignition is in ON/RUN
and equipment requiring less than 150 watts is
plugged into the outlet, and no system fault is detected.The indicator light does not come on when the ignition
is in LOCK/OFF or if no equipment is plugged into
the outlet.
If you try to connect equipment using more than
150 watts or a system fault is detected, a protection
circuit shuts off the power supply and the indicator light
turns off. To reset the circuit, unplug the item and
plug it back in or turn the Remote Accessory Power
(RAP) off and then back on. SeeRetained Accessory
Power (RAP) on page 2-24. The power restarts
when equipment that operates within the limit is plugged
into the outlet and a system fault is not detected.
The power outlet is not designed for the following
electrical equipment and may not work properly if these
items are plugged into the power outlet:
Equipment with high initial peak wattage such as:
compressor-driven refrigerators and electric
power tools.
Other equipment requiring an extremely stable
power supply such as: microcomputer-controlled
electric blankets, touch sensor lamps, etc.
3-20
Page 153 of 412
Climate Controls
Climate Control System
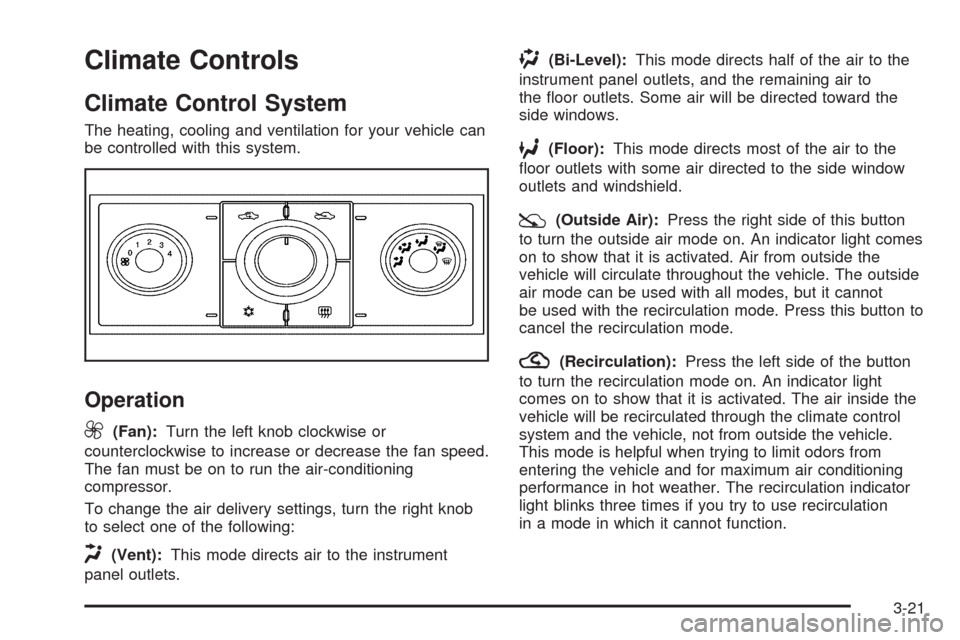
The heating, cooling and ventilation for your vehicle can
be controlled with this system.
Operation
9
(Fan):Turn the left knob clockwise or
counterclockwise to increase or decrease the fan speed.
The fan must be on to run the air-conditioning
compressor.
To change the air delivery settings, turn the right knob
to select one of the following:
H(Vent):This mode directs air to the instrument
panel outlets.
)(Bi-Level):This mode directs half of the air to the
instrument panel outlets, and the remaining air to
the �oor outlets. Some air will be directed toward the
side windows.
6(Floor):This mode directs most of the air to the
�oor outlets with some air directed to the side window
outlets and windshield.
:(Outside Air):Press the right side of this button
to turn the outside air mode on. An indicator light comes
on to show that it is activated. Air from outside the
vehicle will circulate throughout the vehicle. The outside
air mode can be used with all modes, but it cannot
be used with the recirculation mode. Press this button to
cancel the recirculation mode.
?(Recirculation):Press the left side of the button
to turn the recirculation mode on. An indicator light
comes on to show that it is activated. The air inside the
vehicle will be recirculated through the climate control
system and the vehicle, not from outside the vehicle.
This mode is helpful when trying to limit odors from
entering the vehicle and for maximum air conditioning
performance in hot weather. The recirculation indicator
light blinks three times if you try to use recirculation
in a mode in which it cannot function.
3-21
Page 154 of 412
Pressing this button will cancel the outside air mode.
When switching to the defog or defrost modes the
system automatically moves from recirculation to outside
air. When the vehicle or fan is turned off and back on,
the system defaults to outside air automatically.
Only use recirculation mode when it is needed for
comfort, since window fogging can occur.
Temperature Control:Turn the center knob clockwise
or counterclockwise to increase or decrease the
temperature inside the vehicle.
When it is cold outside 0°F (−18°C) or lower, use the
engine coolant heater, if vehicle has one, to provide
warmer air faster to the vehicle. An engine coolant
heater warms the coolant the engine uses that provides
heat to warm the inside of the vehicle. For more
information, seeEngine Coolant Heater on page 2-27.
#(Air Conditioning):Press this button to turn
the air conditioning system on or off. An indicator light
comes on to show it is activated.
The air-conditioning system removes moisture from the
air, so a small amount of water might drip under the
vehicle while it is idling or after the engine is turned off
is normal.
Maximum Air Conditioning
On hot days, open the windows to let hot inside air
escape; then close them. This helps reduce the time it
takes for the vehicle to cool down. It also helps the
air conditioning system operate more efficiently.
For quick cool down on hot days, do the following:
1. Select the
Cvent mode.
2. Select the highest fan speed.
3. Select
#air conditioning.
4. Select the
?recirculation mode.
5. Select the coolest temperature.
Using these settings together for long periods of time can
cause the air inside of the vehicle to become too dry. To
prevent this from happening, after the air in the vehicle
has cooled, turn the recirculation mode off.
3-22