2008 CHEVROLET EQUINOX parking brake
[x] Cancel search: parking brakePage 141 of 436
Using Cruise Control on Hills
How well your cruise control works on hills depends upon
the vehicle’s speed, load, and the steepness of the hills.
While going up steep hills, you might have to step on the
accelerator pedal to maintain the vehicle’s speed. While
going downhill, you might have to brake or shift to a lower
gear to keep the vehicle at a lower speed. However,
when the brakes are applied the cruise control turns off.
Many drivers �nd this to be too much trouble and do not
use cruise control on steep hills.
Ending Cruise Control
There are three ways to end cruise control:
Step lightly on the brake pedal.
Press the[button on the steering wheel.
Press theJbutton on the steering wheel.
Erasing Speed Memory
The cruise control set speed memory is erased when
the cruise control or the ignition is turned off.
Headlamps
The exterior lamp control is located on the turn
signal/multifunction lever.
O(Exterior Lamp Control):Turn the control with
this symbol on it to operate the exterior lamps.The exterior lamp control has the following positions:
AUTO (Off/Automatic Headlamps):Turn the control
to this position to put the headlamps in automatic mode.
Automatic mode will turn the exterior lamps on and
off depending upon how much light is available outside
of the vehicle.
;(Parking Lamps):Turn the control to this position to
turn on the parking lamps together with the following:
Sidemarker Lamps
Taillamps
License Plate Lamps
Instrument Panel Lights
53(Headlamps):Turning the control to this
position turns on the headlamps, together with the
previously listed lamps and lights.
Headlamps on Reminder
If you open the driver’s door with the ignition off and
the lamps on, you will hear a warning chime.
3-13
Page 142 of 436
Daytime Running Lamps (DRL)
Daytime Running Lamps (DRL) can make it easier for
others to see the front of your vehicle during the
day. DRL can be helpful in many different driving
conditions, but they can be especially helpful in the short
periods after dawn and before sunset. Fully functional
Daytime Running Lamps (DRL) are required on all
vehicles �rst sold in Canada.
The DRL system will make your low-beam headlamps
come on at a reduced brightness in daylight when
the following conditions are met:
The ignition is on.
The exterior lamp band is in the automatic position.
The transmission is not in PARK (P).
The light sensor determines it is daytime.
The parking brake is released.
When the DRL are on, the low-beam headlamps will be
on at a reduced brightness. The taillamps, sidemarker
and other lamps will not be on. The instrument panel will
not be lit up either.
When the exterior lamp band is turned to the headlamp
position, the low-beam headlamps come on. The
other lamps that come on with the headlamps will also
come on.When the headlamps are turned off, the regular lamps
will go off, and the low-beam headlamps come on
to the reduced brightness.
To idle your vehicle with the DRL off, move the shift
lever to PARK (P). The DRL will stay off until the shift
lever is moved out of the PARK (P) position.
The regular headlamp system should be turned on
when needed.
Automatic Headlamp System
When it is dark enough outside and the exterior lamps
control is in the automatic position, the headlamps
will come on automatically. SeeHeadlamps on
page 3-13.
Your vehicle has a light sensor located on top of the
instrument panel. Make sure it is not covered, or
the headlamps will be on when you do not need them.
The system may also turn on the headlamps when
driving through a parking garage or tunnel.
3-14
Page 159 of 436
Brake System Warning Light
Your vehicle’s hydraulic brake system is divided into
two parts. If one part is not working, the other part can
still work and stop you. For good braking, though,
you need both parts working well.
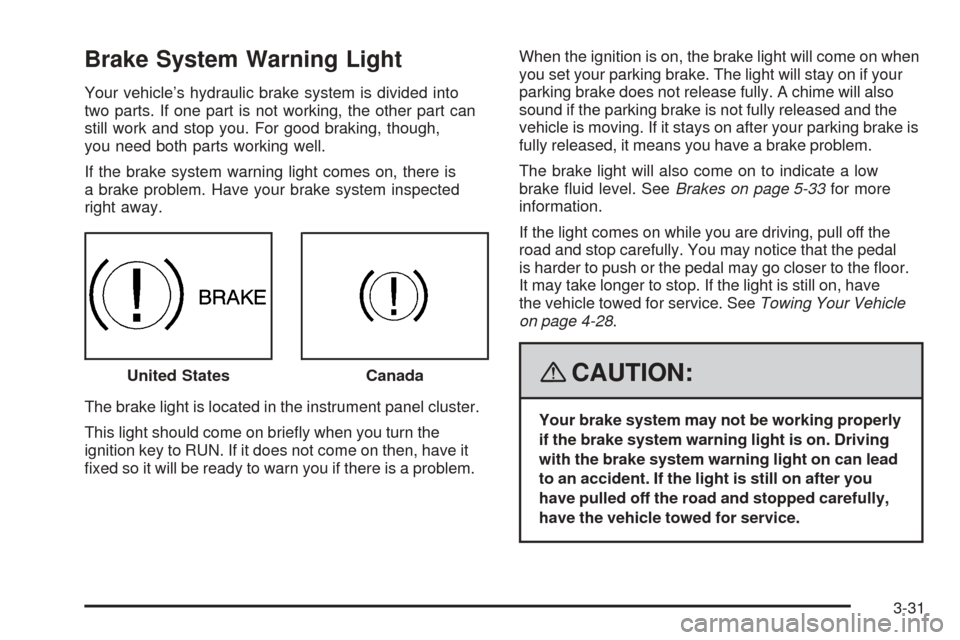
If the brake system warning light comes on, there is
a brake problem. Have your brake system inspected
right away.
The brake light is located in the instrument panel cluster.
This light should come on brie�y when you turn the
ignition key to RUN. If it does not come on then, have it
�xed so it will be ready to warn you if there is a problem.When the ignition is on, the brake light will come on when
you set your parking brake. The light will stay on if your
parking brake does not release fully. A chime will also
sound if the parking brake is not fully released and the
vehicle is moving. If it stays on after your parking brake is
fully released, it means you have a brake problem.
The brake light will also come on to indicate a low
brake �uid level. SeeBrakes on page 5-33for more
information.
If the light comes on while you are driving, pull off the
road and stop carefully. You may notice that the pedal
is harder to push or the pedal may go closer to the �oor.
It may take longer to stop. If the light is still on, have
the vehicle towed for service. SeeTowing Your Vehicle
on page 4-28.
{CAUTION:
Your brake system may not be working properly
if the brake system warning light is on. Driving
with the brake system warning light on can lead
to an accident. If the light is still on after you
have pulled off the road and stopped carefully,
have the vehicle towed for service. United States
Canada
3-31
Page 268 of 436
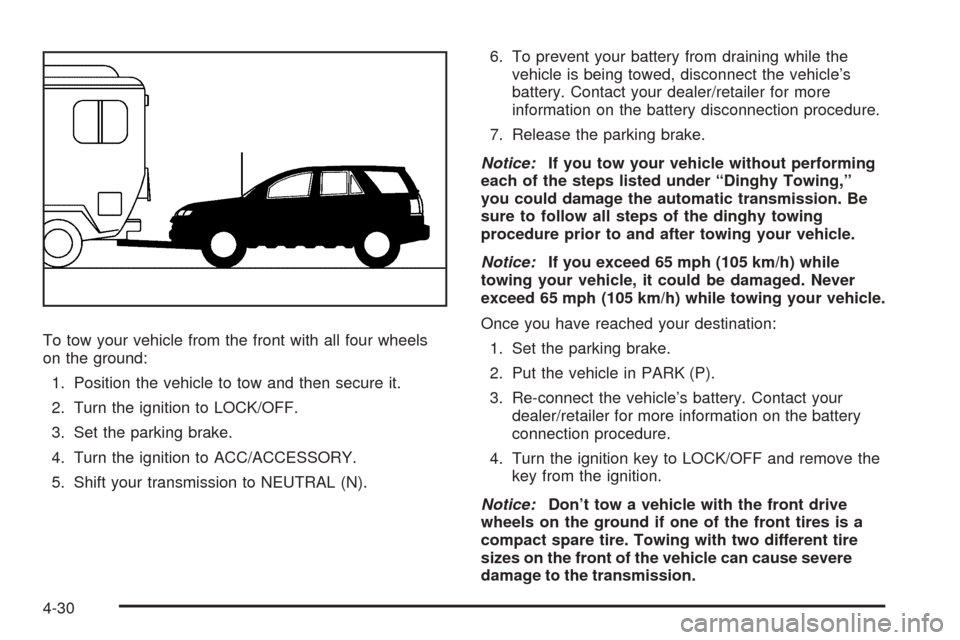
To tow your vehicle from the front with all four wheels
on the ground:
1. Position the vehicle to tow and then secure it.
2. Turn the ignition to LOCK/OFF.
3. Set the parking brake.
4. Turn the ignition to ACC/ACCESSORY.
5. Shift your transmission to NEUTRAL (N).6. To prevent your battery from draining while the
vehicle is being towed, disconnect the vehicle’s
battery. Contact your dealer/retailer for more
information on the battery disconnection procedure.
7. Release the parking brake.
Notice:If you tow your vehicle without performing
each of the steps listed under “Dinghy Towing,”
you could damage the automatic transmission. Be
sure to follow all steps of the dinghy towing
procedure prior to and after towing your vehicle.
Notice:If you exceed 65 mph (105 km/h) while
towing your vehicle, it could be damaged. Never
exceed 65 mph (105 km/h) while towing your vehicle.
Once you have reached your destination:
1. Set the parking brake.
2. Put the vehicle in PARK (P).
3. Re-connect the vehicle’s battery. Contact your
dealer/retailer for more information on the battery
connection procedure.
4. Turn the ignition key to LOCK/OFF and remove the
key from the ignition.
Notice:Don’t tow a vehicle with the front drive
wheels on the ground if one of the front tires is a
compact spare tire. Towing with two different tire
sizes on the front of the vehicle can cause severe
damage to the transmission.
4-30
Page 269 of 436
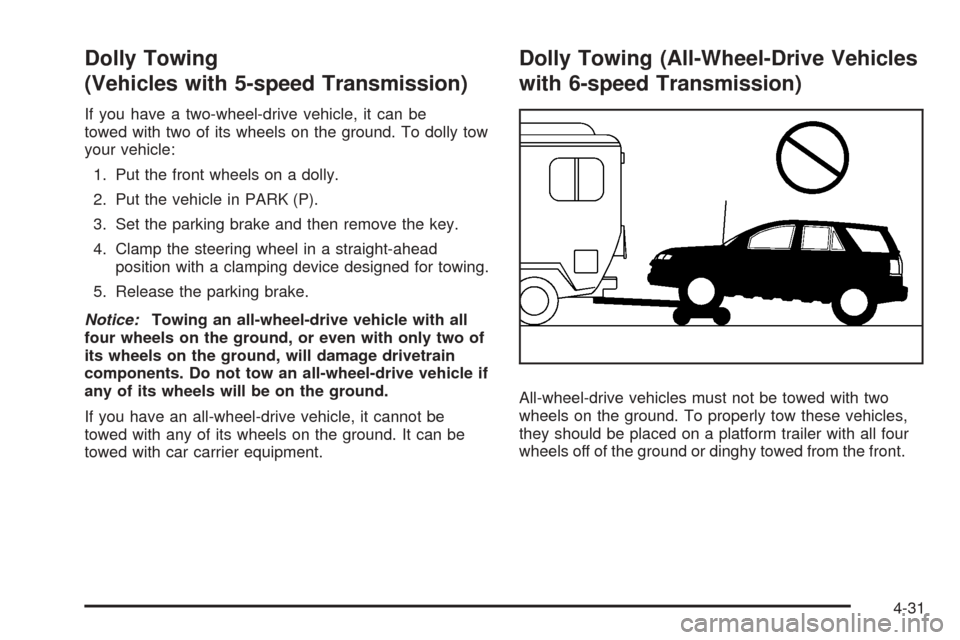
Dolly Towing
(Vehicles with 5-speed Transmission)
If you have a two-wheel-drive vehicle, it can be
towed with two of its wheels on the ground. To dolly tow
your vehicle:
1. Put the front wheels on a dolly.
2. Put the vehicle in PARK (P).
3. Set the parking brake and then remove the key.
4. Clamp the steering wheel in a straight-ahead
position with a clamping device designed for towing.
5. Release the parking brake.
Notice:Towing an all-wheel-drive vehicle with all
four wheels on the ground, or even with only two of
its wheels on the ground, will damage drivetrain
components. Do not tow an all-wheel-drive vehicle if
any of its wheels will be on the ground.
If you have an all-wheel-drive vehicle, it cannot be
towed with any of its wheels on the ground. It can be
towed with car carrier equipment.
Dolly Towing (All-Wheel-Drive Vehicles
with 6-speed Transmission)
All-wheel-drive vehicles must not be towed with two
wheels on the ground. To properly tow these vehicles,
they should be placed on a platform trailer with all four
wheels off of the ground or dinghy towed from the front.
4-31
Page 270 of 436
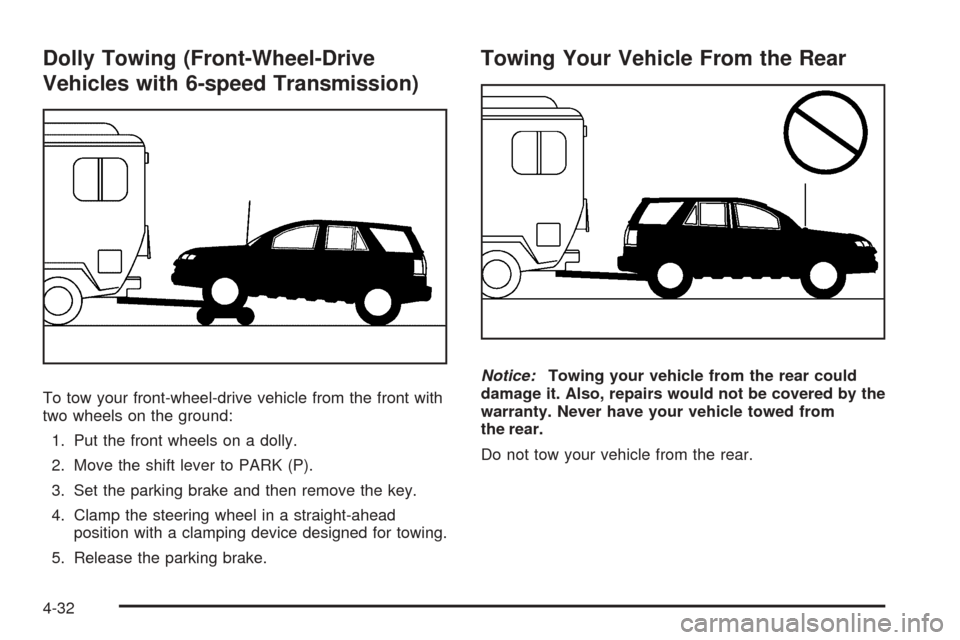
Dolly Towing (Front-Wheel-Drive
Vehicles with 6-speed Transmission)
To tow your front-wheel-drive vehicle from the front with
two wheels on the ground:
1. Put the front wheels on a dolly.
2. Move the shift lever to PARK (P).
3. Set the parking brake and then remove the key.
4. Clamp the steering wheel in a straight-ahead
position with a clamping device designed for towing.
5. Release the parking brake.
Towing Your Vehicle From the Rear
Notice:Towing your vehicle from the rear could
damage it. Also, repairs would not be covered by the
warranty. Never have your vehicle towed from
the rear.
Do not tow your vehicle from the rear.
4-32
Page 278 of 436
Parking on Hills
{CAUTION:
You really should not park your vehicle, with a
trailer attached, on a hill. If something goes
wrong, your rig could start to move. People
can be injured, and both your vehicle and the
trailer can be damaged.
But if you ever have to park your rig on a hill, do the
following:
1. Apply your regular brakes, but do not shift into
PARK (P) yet.
2. Have someone place chocks under the trailer
wheels.
3. When the wheel chocks are in place, release the
regular brakes until the chocks absorb the load.
4. Reapply the regular brakes. Then apply your
parking brake, and then shift to PARK (P).
5. Release the regular brakes.
When You Are Ready to Leave After
Parking on a Hill
1. Apply your regular brakes and hold the pedal down
while you do the following:
Start your engine.
Shift into a gear.
Release the parking brake.
2. Let up on the brake pedal.
3. Drive slowly until the trailer is clear of the chocks.
4. Stop and have someone pick up and store the
chocks.
Maintenance When Trailer Towing
Your vehicle will need service more often when you are
pulling a trailer. See the Maintenance Schedule for
more on this. Things that are especially important in
trailer operation are automatic transmission �uid, engine
oil, belts, cooling system and brake system. Each of
these is covered in this manual, and the Index will help
you �nd them quickly. If you are trailering, it is a good
idea to review these sections before you start your trip.
Check periodically to see that all hitch nuts and bolts
are tight.
4-40
Page 279 of 436
Service............................................................5-3
Accessories and Modi�cations..........................5-3
California Proposition 65 Warning.....................5-3
California Perchlorate Materials Requirements.....5-4
Doing Your Own Service Work.........................5-4
Adding Equipment to the Outside of Your
Vehicle......................................................5-5
Fuel................................................................5-5
Gasoline Octane............................................5-5
Gasoline Speci�cations....................................5-6
California Fuel...............................................5-6
Additives.......................................................5-7
Fuels in Foreign Countries...............................5-7
Filling the Tank..............................................5-8
Filling a Portable Fuel Container.....................5-10
Checking Things Under
the Hood....................................................5-10
Hood Release..............................................5-11
Engine Compartment Overview.......................5-12
Engine Oil...................................................5-15
Engine Oil Life System..................................5-18
Engine Air Cleaner/Filter................................5-19Automatic Transmission Fluid.........................5-21
Engine Coolant.............................................5-22
Engine Overheating.......................................5-24
Overheated Engine Protection Operating Mode . . .5-26
Cooling System............................................5-26
Power Steering Fluid.....................................5-31
Windshield Washer Fluid................................5-32
Brakes........................................................5-33
Battery........................................................5-35
Jump Starting...............................................5-36
All-Wheel Drive..............................................5-42
Headlamp Aiming...........................................5-44
Bulb Replacement..........................................5-44
Halogen Bulbs..............................................5-44
Headlamps, Front Turn Signal, Sidemarker,
and Parking Lamps....................................5-45
Taillamps, Turn Signal, Stoplamps and
Back-up Lamps.........................................5-48
License Plate Lamp......................................5-49
Replacement Bulbs.......................................5-50
Windshield Wiper Blade Replacement..............5-50
Section 5 Service and Appearance Care
5-1