2008 CHEVROLET EQUINOX tires
[x] Cancel search: tiresPage 1 of 436
Seats and Restraint Systems........................... 1-1
Front Seats
............................................... 1-2
Rear Seats
..............................................1-10
Safety Belts
.............................................1-12
Child Restraints
.......................................1-31
Airbag System
.........................................1-56
Restraint System Check
............................1-72
Features and Controls..................................... 2-1
Keys
........................................................ 2-3
Doors and Locks
......................................2-10
Windows
.................................................2-15
Theft-Deterrent Systems
............................2-17
Starting and Operating Your Vehicle
...........2-20
Mirrors
....................................................2-37
OnStar
®System
......................................2-39
Storage Areas
.........................................2-42
Sunroof
..................................................2-49
Instrument Panel............................................. 3-1
Instrument Panel Overview
.......................... 3-4
Climate Controls
......................................3-19
Warning Lights, Gages, and Indicators
........3-24
Driver Information Center (DIC)
..................3-42
Audio System(s)
.......................................3-64Driving Your Vehicle....................................... 4-1
Your Driving, the Road, and Your Vehicle
..... 4-2
Towing
...................................................4-28
Service and Appearance Care.......................... 5-1
Service
..................................................... 5-3
Fuel
......................................................... 5-5
Checking Things Under the Hood
...............5-10
All-Wheel Drive
........................................5-42
Headlamp Aiming
.....................................5-44
Bulb Replacement
....................................5-44
Windshield Wiper Blade Replacement
.........5-50
Tires
......................................................5-52
Appearance Care
.....................................5-89
Vehicle Identi�cation
.................................5-99
Electrical System
....................................5-100
Capacities and Speci�cations
...................5-107
Maintenance Schedule..................................... 6-1
Maintenance Schedule
................................ 6-2
Customer Assistance Information.................... 7-1
Customer Assistance and Information
........... 7-2
Reporting Safety Defects
...........................7-14
Vehicle Data Recording and Privacy
...........7-16
Index................................................................ 1
2008 Chevrolet Equinox Owner ManualM
Page 75 of 436
In addition, your vehicle has a passenger sensing
system for the right front passenger’s position,
which includes sensors that are part of the
passenger’s seat. The passenger sensing system
may not operate properly if the original seat
trim is replaced with non-GM covers, upholstery
or trim, or with GM covers, upholstery or trim
designed for a different vehicle. Any object, such as
an aftermarket seat heater or a comfort enhancing
pad or device, installed under or on top of the
seat fabric, could also interfere with the operation of
the passenger sensing system. This could either
prevent proper deployment of the passenger
airbag(s) or prevent the passenger sensing system
from properly turning off the passenger airbag(s).
SeePassenger Sensing System on page 1-65.
If you have any questions about this, you should
contact Customer Assistance before you modify
your vehicle. The phone numbers and addresses
for Customer Assistance are in Step Two of
the Customer Satisfaction Procedure in this manual.
SeeCustomer Satisfaction Procedure on page 7-2.If your vehicle has rollover roof-rail airbags, see
Different Size Tires and Wheels on page 5-71
for additional important information.
Q:Because I have a disability, I have to get my
vehicle modi�ed. How can I �nd out whether
this will affect my airbag system?
A:If you have questions, call Customer Assistance.
The phone numbers and addresses for Customer
Assistance are in Step Two of the Customer
Satisfaction Procedure in this manual. See
Customer Satisfaction Procedure on page 7-2.
In addition, your dealer/retailer and the service manual
have information about the location of the airbag
sensors, sensing and diagnostic module and airbag
wiring.
1-71
Page 104 of 436
DRIVE (D):This position is for normal driving with
the automatic transmission. It provides the best
fuel economy for your vehicle. If you need more
power for passing, and you are:
Going less than about 35 mph (55 km/h),
push your accelerator pedal about halfway down.
Going about 35 mph (55 km/h), push your
accelerator all the way down.
Downshifting the transmission in slippery road conditions
could result in skidding, see “Skidding” underLoss of
Control on page 4-13.
INTERMEDIATE (I):This position is also used for
normal driving. However, it reduces vehicle speed without
using your brakes for slight downgrades where the
vehicle would otherwise accelerate due to steepness
of grade. If constant upshifting or downshifting occurs
while driving up steep hills, this position can be used to
prevent repetitive types of shifts. You might choose
INTERMEDIATE (I) instead of DRIVE (D) when driving
on hilly, winding roads and when towing a trailer, so that
there is less shifting between gears.
LOW (L):This position reduces vehicle speed more
than INTERMEDIATE (I) without actually using
your brakes. You can use it on very steep hills, or in
deep snow or mud. If the shift lever is put in LOW (L),
the transmission will not shift into LOW (L) until the
vehicle is going slowly enough.Notice:Spinning the tires or holding the vehicle
in one place on a hill using only the accelerator
pedal may damage the transmission. The repair will
not be covered by your warranty. If you are stuck,
do not spin the tires. When stopping on a hill,
use the brakes to hold the vehicle in place.Transmission Overheating
If the transmission �uid temperature rises above 284°F
(140°C) or rises rapidly, the Engine Coolant
Temperature Warning Light will �ash. SeeEngine
Coolant Temperature Warning Light on page 3-33for
more information. When the transmission overheats
it will go into a protection mode and will default shift into
�fth gear if in the DRIVE (D) position, or second gear
if in the LOW (L) position. Continue driving the vehicle in
either position depending on the required vehicle
speed and load. Once the �uid temperature lowers to
the normal temperature range, the transmission will
return to the normal shift patterns. Towing or driving on
long hills can cause the transmission �uid temperature
to be higher than normal. If the transmission �uid
temperature will not cool, you may need to pull over and
check the transmission �uid level. You should also
check the engine coolant temperature. If it is hot, see
Engine Overheating on page 5-24.
2-26
Page 107 of 436
DRIVE (D):This position is for normal driving.
It provides the best fuel economy for your vehicle.
If the vehicle needs more power for passing, and it is:
Going less than 35 mph (55 km/h), push the
accelerator pedal about halfway down.
Going about 35 mph (55 km/h) or more,
push the accelerator pedal all the way down.
The vehicle will shift down to the next gear
and have more power.
Downshifting the transmission in slippery road conditions
could result in skidding, see Skidding underLoss of
Control on page 4-13.
Notice:Spinning the tires or holding the vehicle
in one place on a hill using only the accelerator
pedal may damage the transmission. The repair
will not be covered by your warranty. If you
are stuck, do not spin the tires. When stopping on
a hill, use the brakes to hold the vehicle in place.
MANUAL SHIFT MODE (M):This position, available
on the models with the Manual Shift Mode (MSM),
allows you to change gears similar to a manual
transmission. If your vehicle has this feature, see
“Manual Shift Mode (MSM)”.
Manual Shift Mode (MSM)
(Automatic Transmission)
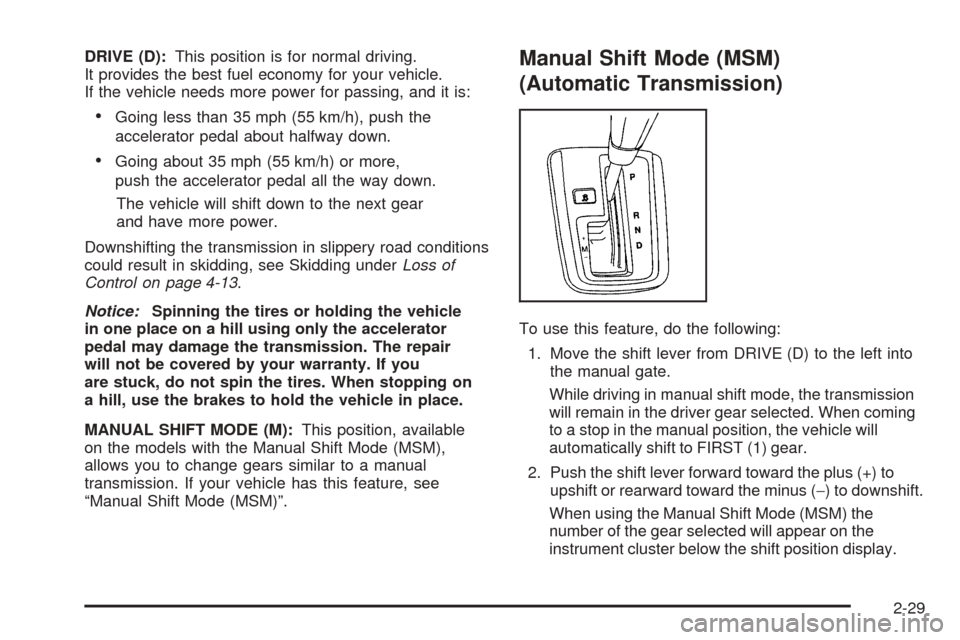
To use this feature, do the following:
1. Move the shift lever from DRIVE (D) to the left into
the manual gate.
While driving in manual shift mode, the transmission
will remain in the driver gear selected. When coming
to a stop in the manual position, the vehicle will
automatically shift to FIRST (1) gear.
2. Push the shift lever forward toward the plus (+) to
upshift or rearward toward the minus (−) to downshift.
When using the Manual Shift Mode (MSM) the
number of the gear selected will appear on the
instrument cluster below the shift position display.
2-29
Page 162 of 436
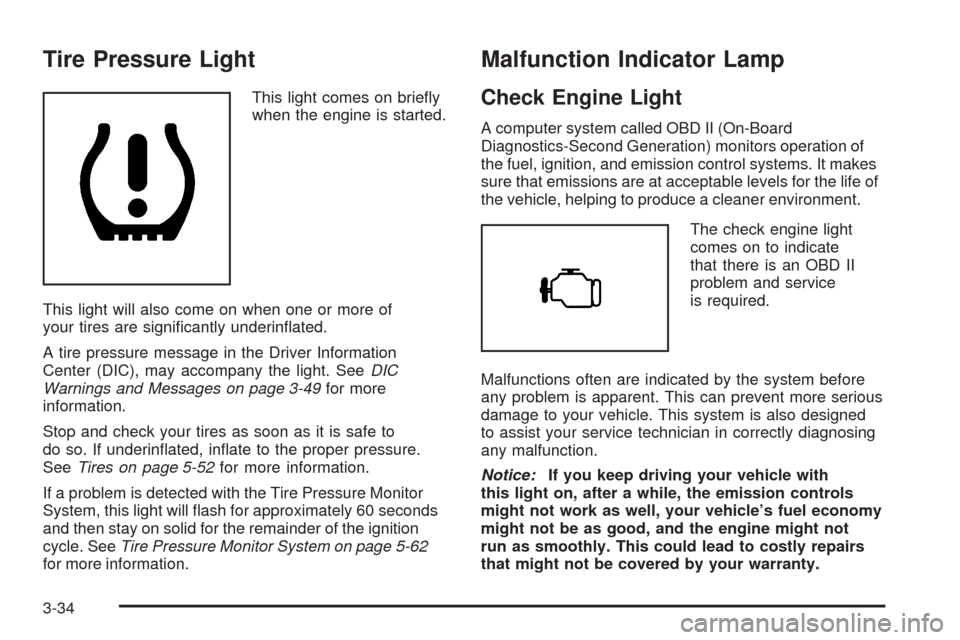
Tire Pressure Light
This light comes on brie�y
when the engine is started.
This light will also come on when one or more of
your tires are signi�cantly underin�ated.
A tire pressure message in the Driver Information
Center (DIC), may accompany the light. SeeDIC
Warnings and Messages on page 3-49for more
information.
Stop and check your tires as soon as it is safe to
do so. If underin�ated, in�ate to the proper pressure.
SeeTires on page 5-52for more information.
If a problem is detected with the Tire Pressure Monitor
System, this light will �ash for approximately 60 seconds
and then stay on solid for the remainder of the ignition
cycle. SeeTire Pressure Monitor System on page 5-62
for more information.
Malfunction Indicator Lamp
Check Engine Light
A computer system called OBD II (On-Board
Diagnostics-Second Generation) monitors operation of
the fuel, ignition, and emission control systems. It makes
sure that emissions are at acceptable levels for the life of
the vehicle, helping to produce a cleaner environment.
The check engine light
comes on to indicate
that there is an OBD II
problem and service
is required.
Malfunctions often are indicated by the system before
any problem is apparent. This can prevent more serious
damage to your vehicle. This system is also designed
to assist your service technician in correctly diagnosing
any malfunction.
Notice:If you keep driving your vehicle with
this light on, after a while, the emission controls
might not work as well, your vehicle’s fuel economy
might not be as good, and the engine might not
run as smoothly. This could lead to costly repairs
that might not be covered by your warranty.
3-34
Page 163 of 436
Notice:Modi�cations made to the engine,
transmission, exhaust, intake, or fuel system of
your vehicle or the replacement of the original tires
with other than those of the same Tire Performance
Criteria (TPC) can affect your vehicle’s emission
controls and can cause this light to come on.
Modi�cations to these systems could lead to costly
repairs not covered by your warranty. This could
also result in a failure to pass a required Emission
Inspection/Maintenance test. SeeAccessories
and Modifications on page 5-3.
This light comes on, as a check to show it is working,
when the ignition is turned ON/RUN but the engine is not
running. If the light does not come on, have it repaired.
This light also comes on during a malfunction in
one of two ways:
Light Flashing— A mis�re condition has been
detected. A mis�re increases vehicle emissions
and could damage the emission control system
on your vehicle. Diagnosis and service might
be required.
Light On Steady— An emission control system
malfunction has been detected on your vehicle.
Diagnosis and service might be required.
If the Light is Flashing
The following can prevent more serious damage
to your vehicle:
Reduce vehicle speed.
Avoid hard accelerations.
Avoid steep uphill grades.
If you are towing a trailer, reduce the amount
of cargo being hauled as soon as it is possible.
If the light stops �ashing and remains on steady,
see “If the Light Is On Steady” following.
If the light continues to �ash, when it is safe to do so,
stop the vehicle. Find a safe place to park the vehicle.
Turn the ignition off, wait at least 10 seconds, and restart
the engine. If the light remains on steady, see “If the
Light Is On Steady” following. If the light is still �ashing,
follow the previous steps and see your dealer/retailer
for service as soon as possible.
3-35
Page 173 of 436
When the remaining oil life is low, the CHANGE
ENGINE OIL SOON message will appear on the
display along with the Change Engine Oil Light on the
instrument panel cluster. See “CHANGE ENGINE
OIL SOON” underDIC Warnings and Messages on
page 3-49andChange Engine Oil Light on page 3-38.
You should change the oil as soon as possible. See
Engine Oil on page 5-15. In addition to the engine oil life
system monitoring the oil life, additional maintenance
is recommended in the Maintenance Schedule in
this manual. SeeScheduled Maintenance on page 6-4
for more information.
Remember, you must reset the OIL LIFE yourself
after each oil change. It will not reset itself. Also, be
careful not to reset the OIL LIFE accidentally at any
time other than when the oil has just been changed.
It cannot be reset accurately until the next oil change.
To reset the engine oil life system, seeEngine Oil
Life System on page 5-18.
UNITS
Press the vehicle information button until UNITS
displays. This display allows you to select between
English or Metric units of measurement. Once in this
display, press the set/reset button to select between
ENGLISH or METRIC units.
FRONT TIRES or REAR TIRES
The pressure for each tire can be viewed in the DIC.
The tire pressure will be shown in either pounds
per square inch (psi) or kilopascals (kPa). Press the
vehicle information button until the DIC displays
FRONT TIRES PSI (kPa) LF ## RF ##. Press the
vehicle information button again until the DIC displays
REAR TIRES PSI (kPa) LR ## RR ##.
If a low or high tire pressure condition is detected by
the system while driving, a message advising you
to check the pressure in a speci�c tire will appear in
the display. SeeInflation - Tire Pressure on page 5-59
andDIC Warnings and Messages on page 3-49for
more information.
If the tire pressure display shows dashes instead of a
value, there may be a problem with your vehicle. If this
consistently occurs, see your dealer/retailer for service.
BATTERY
Press the vehicle information button until BATTERY
displays. This display shows the current battery voltage.
If the voltage is normal, the display will show NORMAL.
If the voltage is low or high, the display will show
LOW or HIGH. Your vehicle’s charging system regulates
voltage based on the state of the battery. The battery
voltage may �uctuate when viewing this information
on the DIC. This is normal. SeeCharging System
Light on page 3-30for more information.
3-45
Page 179 of 436
CHECK TIRE PRESSURE
This message displays when the pressure in one or
more of the vehicle’s tires needs to be checked.
This message also displays LEFT FRONT, RIGHT
FRNT (Front), LEFT REAR, or RIGHT REAR to
indicate which tire needs to be checked. You can
receive more than one tire pressure message at
a time. To read the other messages that may have
been sent at the same time, press the set/reset button.
If a tire pressure message appears on the DIC, stop
as soon as you can. Have the tire pressures checked
and set to those shown on the Tire Loading Information
label. SeeTires on page 5-52,Loading Your Vehicle
on page 4-22, andInflation - Tire Pressure on
page 5-59. The DIC also shows the tire pressure
values. SeeDIC Operation and Displays on page 3-43.
If the tire pressure is low, the low tire pressure
warning light comes on. SeeTire Pressure Light
on page 3-34.
DRIVER DOOR OPEN
This message displays when the driver door is
not closed properly. Close the door completely.
ENGINE HOT A/C
(Air Conditioning) OFF
This message displays when the engine coolant
becomes hotter than the normal operating temperature.
To avoid added strain on a hot engine, the air
conditioning compressor is automatically turned off.
When the coolant temperature returns to normal,
the A/C operation automatically resumes. You can
continue to drive your vehicle.
ENGINE OVERHEATD (Overheated)
IDLE ENGINE
Notice:If you drive your vehicle while the engine
is overheating, severe engine damage may occur.
If an overheat warning appears on the instrument
panel cluster and/or DIC, stop the vehicle as soon
as possible. Do not increase the engine speed
above normal idling speed. SeeEngine Overheating
on page 5-24for more information.
This message displays when the engine coolant
temperature is too hot. Stop and allow the vehicle
to idle until it cools down.
3-51