2008 CHEVROLET EQUINOX change time
[x] Cancel search: change timePage 2 of 436
GENERAL MOTORS, GM, the GM Emblem,
CHEVROLET, the CHEVROLET Emblem, and
the name EQUINOX are registered trademarks of
General Motors Corporation.
This manual includes the latest information at the time
it was printed. We reserve the right to make changes
after that time without notice. For vehicles �rst sold
in Canada, substitute the name “General Motors
of Canada Limited” for Chevrolet Motor Division
whenever it appears in this manual.
This manual describes features that may be available
in this model, but your vehicle may not be have all
of them. For example, more than one entertainment
system may be offered or your vehicle may have been
ordered without a front passenger or rear seats.
Keep this manual in the vehicle for quick reference.
Canadian Owners
A French language copy of this manual can be obtained
from your dealer/retailer or from:
Helm, Incorporated
P.O. Box 07130
Detroit, MI 48207
1-800-551-4123
www.helminc.com
Propriétaires Canadiens
On peut obtenir un exemplaire de ce guide en français
auprès de concessionnaire ou à l’adresse suivante:
Helm Incorporated
P.O. Box 07130
Detroit, MI 48207
1-800-551-4123
www.helminc.com
Litho in U.S.A.
Part No. 15860879 A First Printing
©2007 General Motors Corporation. All Rights Reserved.
ii
Page 38 of 436
Infants and Young Children
Everyone in a vehicle needs protection! This includes
infants and all other children. Neither the distance
traveled nor the age and size of the traveler changes
the need, for everyone, to use safety restraints. In fact,
the law in every state in the United States and in every
Canadian province says children up to some age must
be restrained while in a vehicle.
{CAUTION:
Children can be seriously injured or strangled
if a shoulder belt is wrapped around their
neck and the safety belt continues to tighten.
Never leave children unattended in a vehicle
and never allow children to play with the
safety belts.
Every time infants and young children ride in vehicles,
they should have the protection provided by appropriate
restraints. Children who are not restrained properly can
strike other people, or can be thrown out of the vehicle.
In addition, young children should not use the vehicle’s
adult safety belts alone; they need to use a child restraint.
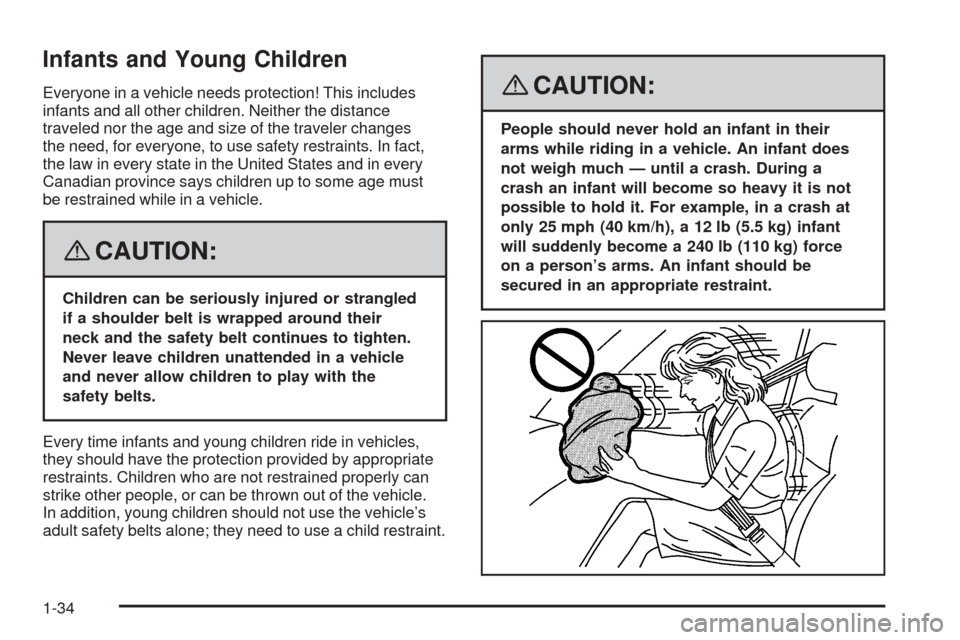
{CAUTION:
People should never hold an infant in their
arms while riding in a vehicle. An infant does
not weigh much — until a crash. During a
crash an infant will become so heavy it is not
possible to hold it. For example, in a crash at
only 25 mph (40 km/h), a 12 lb (5.5 kg) infant
will suddenly become a 240 lb (110 kg) force
on a person’s arms. An infant should be
secured in an appropriate restraint.
1-34
Page 82 of 436
Remote Keyless Entry (RKE)
System
If the vehicle has the Remote Keyless Entry (RKE)
system, it operates on a radio frequency subject
to Federal Communications Commission (FCC) Rules
and with Industry Canada.
This device complies with Part 15 of the FCC Rules.
Operation is subject to the following two conditions:
1. This device may not cause interference.
2. This device must accept any interference received,
including interference that may cause undesired
operation of the device.
This device complies with RSS-210 of Industry Canada.
Operation is subject to the following two conditions:
1. This device may not cause interference.
2. This device must accept any interference received,
including interference that may cause undesired
operation of the device.
Changes or modi�cations to this system by other than
an authorized service facility could void authorization to
use this equipment.At times you may notice a decrease in range. This is
normal for any RKE system. If the transmitter does not
work or if you have to stand closer to your vehicle
for the transmitter to work, try this:Check the distance. You may be too far from your
vehicle. You may need to stand closer during
rainy or snowy weather.
Check the location. Other vehicles or objects may
be blocking the signal. Take a few steps to the
left or right, hold the transmitter higher, and
try again.
Check to determine if battery replacement is
necessary. See “Battery Replacement” later in this
section.
If you are still having trouble, see your dealer/retailer
or a quali�ed technician for service.
2-4
Page 129 of 436
Instrument Panel Overview...............................3-4
Hazard Warning Flashers................................3-6
Other Warning Devices...................................3-6
Horn.............................................................3-6
Tilt Wheel.....................................................3-6
Turn Signal/Multifunction Lever.........................3-7
Turn and Lane-Change Signals........................3-8
Headlamp High/Low-Beam Changer..................3-8
Flash-to-Pass.................................................3-8
Windshield Wipers..........................................3-9
Windshield Washer.......................................3-10
Rear Window Wiper/Washer...........................3-10
Cruise Control..............................................3-10
Headlamps..................................................3-13
Headlamps on Reminder................................3-13
Daytime Running Lamps (DRL).......................3-14
Automatic Headlamp System..........................3-14
Fog Lamps..................................................3-15
Instrument Panel Brightness...........................3-15
Dome Lamp.................................................3-16
Entry Lighting...............................................3-16
Map Lamps.................................................3-16
Cargo Lamp.................................................3-16
Electric Power Management...........................3-17
Battery Run-Down Protection..........................3-17
Accessory Power Outlet(s).............................3-18Ashtray(s) and Cigarette Lighter......................3-18
Climate Controls............................................3-19
Climate Control System.................................3-19
Outlet Adjustment.........................................3-22
Passenger Compartment Air Filter...................3-22
Warning Lights, Gages, and Indicators............3-24
Instrument Panel Cluster................................3-25
Speedometer and Odometer...........................3-26
Trip Odometer..............................................3-26
Tachometer.................................................3-26
Safety Belt Reminders...................................3-27
Airbag Readiness Light..................................3-27
Passenger Airbag Status Indicator...................3-28
Charging System Light..................................3-30
Brake System Warning Light..........................3-31
Antilock Brake System Warning Light...............3-32
Traction Control System (TCS) Warning Light . . .3-32
Engine Coolant Temperature Warning Light......3-33
Engine Coolant Temperature Gage..................3-33
Tire Pressure Light.......................................3-34
Malfunction Indicator Lamp.............................3-34
Oil Pressure Light.........................................3-37
Change Engine Oil Light................................3-38
Security Light...............................................3-38
Fog Lamp Light............................................3-38
Cruise Control Light......................................3-38
Section 3 Instrument Panel
3-1
Page 167 of 436
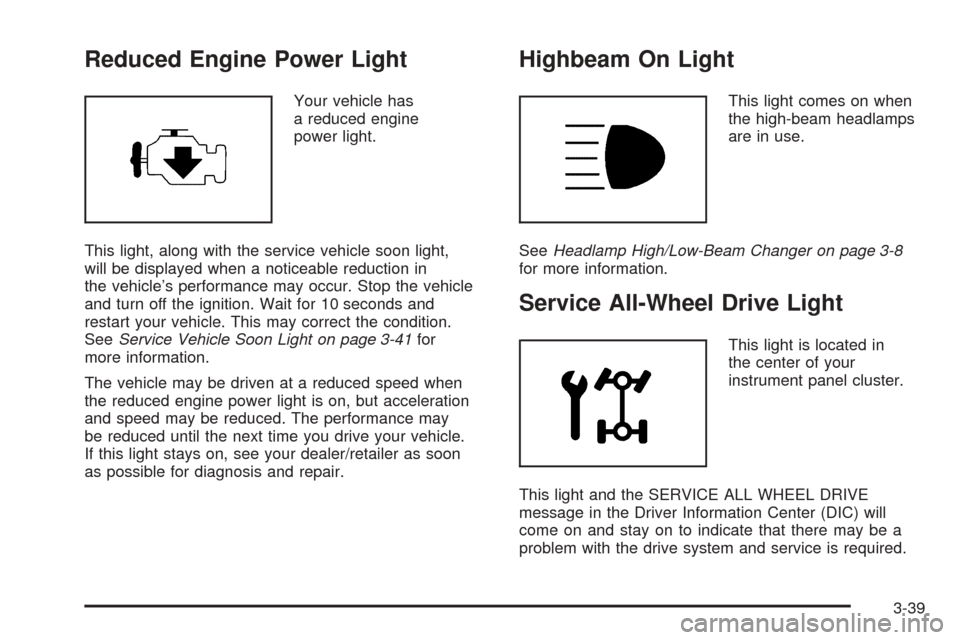
Reduced Engine Power Light
Your vehicle has
a reduced engine
power light.
This light, along with the service vehicle soon light,
will be displayed when a noticeable reduction in
the vehicle’s performance may occur. Stop the vehicle
and turn off the ignition. Wait for 10 seconds and
restart your vehicle. This may correct the condition.
SeeService Vehicle Soon Light on page 3-41for
more information.
The vehicle may be driven at a reduced speed when
the reduced engine power light is on, but acceleration
and speed may be reduced. The performance may
be reduced until the next time you drive your vehicle.
If this light stays on, see your dealer/retailer as soon
as possible for diagnosis and repair.
Highbeam On Light
This light comes on when
the high-beam headlamps
are in use.
SeeHeadlamp High/Low-Beam Changer on page 3-8
for more information.
Service All-Wheel Drive Light
This light is located in
the center of your
instrument panel cluster.
This light and the SERVICE ALL WHEEL DRIVE
message in the Driver Information Center (DIC) will
come on and stay on to indicate that there may be a
problem with the drive system and service is required.
3-39
Page 172 of 436
AVG (Average) SPD (Speed)
Press the trip/fuel button until AVG (Average) SPD
(Speed) displays. This display shows the average speed
of the vehicle in miles per hour (mph) or kilometers
per hour (km/h). This average is calculated based on
the various vehicle speeds recorded since the last reset
of this value. To reset the value, press and hold the
set/reset button. The display will return to zero.
AVG (Average) ECON (Economy)
Press the trip/fuel button until AVG (Average)
ECON (Economy) displays. This display shows the
approximate average miles per gallon (mpg) or liters per
100 kilometers (L/100 km). This number is calculated
based on the number of mpg (L/100 km) recorded
since the last time this menu item was reset. To reset
this display, press and hold the set/reset button.
The display will return to zero.
RANGE
Press the trip/fuel button until RANGE displays. This
display shows the approximate number of remaining
miles (mi) or kilometers (km) the vehicle can be
driven without refueling.
The fuel range estimate is based on an average of
the vehicle’s fuel economy over recent driving history
and the amount of fuel remaining in the fuel tank.
This estimate will change if driving conditions change.
For example, if driving in traffic and making frequentstops, this display may read one number, but if the
vehicle is driven on a freeway, the number may change
even though the same amount of fuel is in the fuel
tank. This is because different driving conditions produce
different fuel economies. Generally, freeway driving
produces better fuel economy than city driving.
If your vehicle is low on fuel, the FUEL LEVEL LOW
message will be displayed. See “FUEL LEVEL
LOW” underDIC Warnings and Messages on page 3-49
for more information.
Blank Display
This display shows no information.
Vehicle Information Menu Items
T
(Vehicle Information):Press this button to scroll
through the following displays:
OIL LIFE
Press the vehicle information button until OIL LIFE
REMAINING displays. This display shows an estimate
of the oil’s remaining useful life. If you see 99% OIL LIFE
REMAINING on the display, that means 99% of the
current oil life remains. The engine oil life system
will alert you to change the oil on a schedule consistent
with your driving conditions.
3-44
Page 173 of 436
When the remaining oil life is low, the CHANGE
ENGINE OIL SOON message will appear on the
display along with the Change Engine Oil Light on the
instrument panel cluster. See “CHANGE ENGINE
OIL SOON” underDIC Warnings and Messages on
page 3-49andChange Engine Oil Light on page 3-38.
You should change the oil as soon as possible. See
Engine Oil on page 5-15. In addition to the engine oil life
system monitoring the oil life, additional maintenance
is recommended in the Maintenance Schedule in
this manual. SeeScheduled Maintenance on page 6-4
for more information.
Remember, you must reset the OIL LIFE yourself
after each oil change. It will not reset itself. Also, be
careful not to reset the OIL LIFE accidentally at any
time other than when the oil has just been changed.
It cannot be reset accurately until the next oil change.
To reset the engine oil life system, seeEngine Oil
Life System on page 5-18.
UNITS
Press the vehicle information button until UNITS
displays. This display allows you to select between
English or Metric units of measurement. Once in this
display, press the set/reset button to select between
ENGLISH or METRIC units.
FRONT TIRES or REAR TIRES
The pressure for each tire can be viewed in the DIC.
The tire pressure will be shown in either pounds
per square inch (psi) or kilopascals (kPa). Press the
vehicle information button until the DIC displays
FRONT TIRES PSI (kPa) LF ## RF ##. Press the
vehicle information button again until the DIC displays
REAR TIRES PSI (kPa) LR ## RR ##.
If a low or high tire pressure condition is detected by
the system while driving, a message advising you
to check the pressure in a speci�c tire will appear in
the display. SeeInflation - Tire Pressure on page 5-59
andDIC Warnings and Messages on page 3-49for
more information.
If the tire pressure display shows dashes instead of a
value, there may be a problem with your vehicle. If this
consistently occurs, see your dealer/retailer for service.
BATTERY
Press the vehicle information button until BATTERY
displays. This display shows the current battery voltage.
If the voltage is normal, the display will show NORMAL.
If the voltage is low or high, the display will show
LOW or HIGH. Your vehicle’s charging system regulates
voltage based on the state of the battery. The battery
voltage may �uctuate when viewing this information
on the DIC. This is normal. SeeCharging System
Light on page 3-30for more information.
3-45
Page 174 of 436
If there is a problem with the battery charging system,
the DIC will display SERVICE BATTERY CHARGING
SYSTEM. See “SERVICE BATTERY CHARGING
SYSTEM” underDIC Warnings and Messages on
page 3-49. Also, seeElectric Power Management
on page 3-17for more information.
LEARN REMOTE KEY
This display allows you to match Remote Keyless
Entry (RKE) transmitters to your vehicle. To match
an RKE transmitter to your vehicle:
1. Make sure the vehicle is in PARK (P).
2. Press the vehicle information button until LEARN
REMOTE KEY PRESS
VTO BEGIN displays.
3. Press the set/reset button until REMOTE KEY
LEARNING ACTIVE is displayed.
4. Press and hold the lock and unlock buttons on
the �rst transmitter at the same time for about
15 seconds.
A chime will sound indicating that the transmitter
is matched.
5. To match additional transmitters at this time,
repeat Step 3.
Each vehicle can have a maximum of
four transmitters matched to it.
6. To exit the programming mode, you must
cycle the key to LOCK/OFF.
CALIBRATE COMPAS (Compass)
Your vehicle may have this feature. The compass can
be manually calibrated. To calibrate the compass
through the DIC, seeDIC Compass on page 3-46.
CHANGE COMPASS ZONE
Your vehicle may have this feature. To change the
compass zone through the DIC, seeDIC Compass
on page 3-46.
Blank Display
This display shows no information.
FEATURE SETTNGS (Settings):
PRESS
VTO SELCT (Select)
This display allows you to personalize the feature
settings on your vehicle. SeeDIC Vehicle
Personalization on page 3-58for more information.
DIC Compass
Your vehicle may have a compass in the
Driver Information Center (DIC).
Compass Zone
The zone is set to zone eight upon leaving the factory.
Your dealer/retailer will set the correct zone for your
location.
3-46