2008 CHEVROLET CORVETTE ECO mode
[x] Cancel search: ECO modePage 44 of 432
A label on your sun visor says, “Never put a rear-facing
child seat in the front.” This is because the risk to the
rear-facing child is so great, if the airbag deploys.
{CAUTION:
A child in a rear-facing child restraint can be
seriously injured or killed if the right front
passenger airbag in�ates. This is because the
back of the rear-facing child restraint would be
very close to the in�ating airbag. A child in a
forward-facing child restraint can be seriously
injured or killed if the right front passenger
airbag in�ates and the passenger seat is in a
forward position.
Even if the passenger sensing system has
turned off the right front passenger frontal
airbag, no system is fail-safe. No one can
guarantee that an airbag will not deploy under
some unusual circumstance, even though it is
turned off.
CAUTION: (Continued)
CAUTION: (Continued)
Secure rear-facing child restraints in a rear
seat, even if the airbag is off. If you secure a
forward-facing child restraint in the right front
seat, always move the front passenger seat as
far back as it will go. It is better to secure the
child restraint in a rear seat.
SeePassenger Sensing System on page 1-51
for additional information.
We recommend that rear-facing child restraints not be
transported in your vehicle, even if the airbag(s) are off.
If your child restraint has the LATCH system, see
Lower Anchors and Tethers for Children (LATCH)
(Z06 Models Only) on page 1-36orLower Anchors and
Tethers for Children (LATCH) (Coupe and Convertible
Models Only) on page 1-39for how to install your
child restraint using LATCH. If you secure a child
restraint using a safety belt and it uses a top tether,
seeLower Anchors and Tethers for Children (LATCH)
(Z06 Models Only) on page 1-36orLower Anchors
and Tethers for Children (LATCH) (Coupe and
Convertible Models Only) on page 1-39for top tether
anchor locations.
1-40
Page 47 of 432
7. If your child restraint manufacturer recommends
using a top tether anchor, attach and tighten the
top tether to the top tether anchor. Refer to
the instructions that came with the child restraint
and toLower Anchors and Tethers for Children
(LATCH) (Z06 Models Only) on page 1-36orLower
Anchors and Tethers for Children (LATCH)
(Coupe and Convertible Models Only) on page 1-39.
8. Push and pull the child restraint in different
directions to be sure it is secure.
If the airbag or airbags are off, the off indicator in the
passenger airbag status indicator will come on and stay
on when the vehicle is started.
If a child restraint has been installed and the on
indicator is lit, turn the vehicle off. Remove the child
restraint from the vehicle and reinstall the child restraint.
If, after reinstalling the child restraint and restarting
the vehicle, the on indicator is still lit, check to make
sure that the vehicle’s seatback is not pressing the child
restraint into the seat cushion. If this happens, slightly
recline the vehicle’s seatback and adjust the seat
cushion if possible.
Remove any additional material from the seat such
as blankets, cushions, seat covers, seat heaters or
seat massagers before reinstalling or securing the
child restraint.If the on indicator is still lit, do not install a child restraint
in this vehicle and check with your dealer/retailer.
To remove the child restraint, unbuckle the vehicle’s
safety belt and let it go back all the way.
Airbag System
Your vehicle has the following airbags:
A frontal airbag for the driver.
A frontal airbag for the right front passenger.
Your vehicle may have the following airbags:
A seat-mounted side impact airbag for the driver.
A seat-mounted side impact airbag for the right front
passenger.
All of the airbags in your vehicle will have the word
AIRBAG embossed in the trim or on an attached label
near the deployment opening.
For frontal airbags, the word AIRBAG will appear on the
middle part of the steering wheel for the driver and
on the instrument panel for the right front passenger.
With seat-mounted side impact airbags, the word
AIRBAG will appear on the side of the seatback closest
to the door.
1-43
Page 73 of 432
If additional transmitters need programing, take
transmitter 1 out of the transmitter pocket and place
transmitter 2 in the pocket. Up to four transmitters can
be programmed. The DIC then displays MAXIMUM
NUMBER OF FOBS LEARNED and exits the
programming mode.
Press the Acc. button (ignition switch) when all the
transmitters are programmed.
Battery Replacement
If NO FOBS DETECTED displays on the DIC when you
try to start the vehicle, the battery is weak. Place the
transmitter in the glove box transmitter pocket with the
buttons facing towards the passenger side. Then, with
the vehicle in PARK (P) for an automatic transmission,
press the brake pedal and the START button. If the
vehicle has a manual transmission, press the clutch and
the START button. This starts the vehicle, however, it is
recommended that the battery be replaced as soon as
possible. The DIC may display FOB BATTERY LOW.
Notice:When replacing the battery, do not touch
any of the circuitry on the transmitter. Static
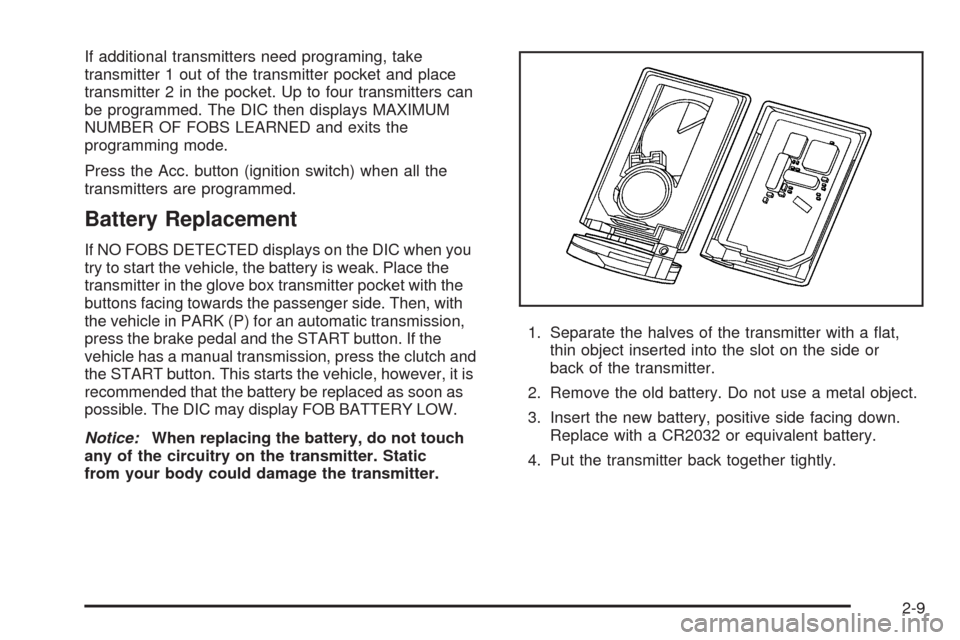
from your body could damage the transmitter.1. Separate the halves of the transmitter with a �at,
thin object inserted into the slot on the side or
back of the transmitter.
2. Remove the old battery. Do not use a metal object.
3. Insert the new battery, positive side facing down.
Replace with a CR2032 or equivalent battery.
4. Put the transmitter back together tightly.
2-9
Page 86 of 432
Ignition Positions
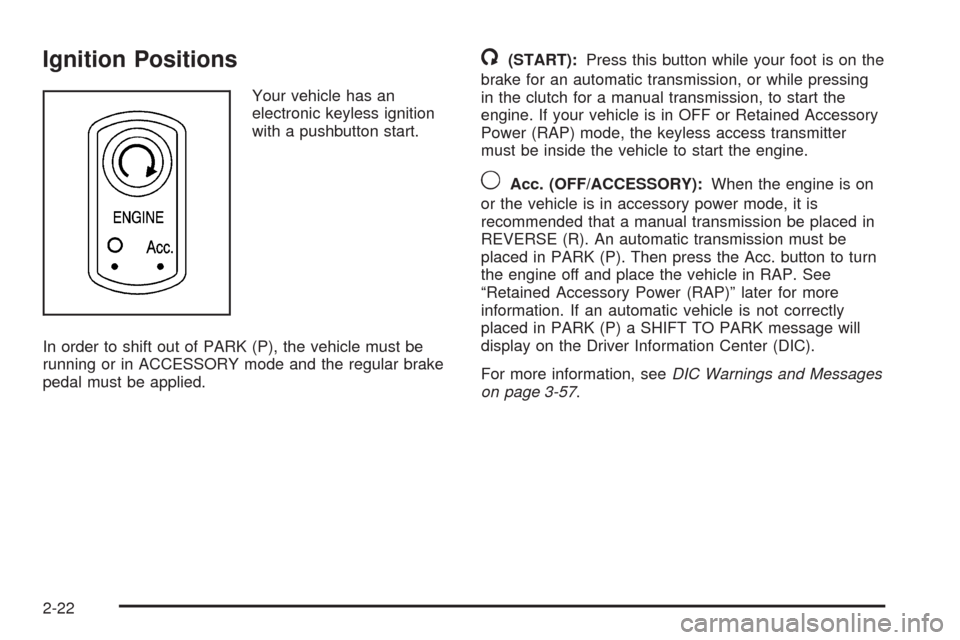
Your vehicle has an
electronic keyless ignition
with a pushbutton start.
In order to shift out of PARK (P), the vehicle must be
running or in ACCESSORY mode and the regular brake
pedal must be applied.
/(START):Press this button while your foot is on the
brake for an automatic transmission, or while pressing
in the clutch for a manual transmission, to start the
engine. If your vehicle is in OFF or Retained Accessory
Power (RAP) mode, the keyless access transmitter
must be inside the vehicle to start the engine.
9Acc. (OFF/ACCESSORY):When the engine is on
or the vehicle is in accessory power mode, it is
recommended that a manual transmission be placed in
REVERSE (R). An automatic transmission must be
placed in PARK (P). Then press the Acc. button to turn
the engine off and place the vehicle in RAP. See
“Retained Accessory Power (RAP)” later for more
information. If an automatic vehicle is not correctly
placed in PARK (P) a SHIFT TO PARK message will
display on the Driver Information Center (DIC).
For more information, seeDIC Warnings and Messages
on page 3-57.
2-22
Page 89 of 432
Your vehicle has a Computer-Controlled Cranking
System. This feature assists in starting the engine and
protects components. Once cranking has been
initiated, the engine continues cranking for a few
seconds or until the vehicle starts. If the engine does
not start, cranking automatically stops after 15 seconds
to prevent cranking motor damage. To prevent gear
damage, this system also prevents cranking if the
engine is already running.
Notice:The engine is designed to work with the
electronics in the vehicle. If electrical parts or
accessories are added, you could change the way
the engine operates. Before adding electrical
equipment, check with your dealer/retailer. If you
do not, the engine might not perform properly.
Any resulting damage would not be covered by the
vehicle warranty.Stopping Your Engine
If your vehicle has an automatic transmission, move the
shift lever to PARK (P) and press and hold the Acc.
(Off/Accessory) button, located on the instrument panel,
until the engine shuts off. If the shift lever is not in
PARK (P), the engine shuts off and the vehicle goes
into the Accessory Mode. The DIC displays SHIFT TO
PARK. Once the shifter is moved to PARK (P), the
vehicle turns off. If your vehicle has a manual
transmission, it is recommended that you move the
shift lever to REVERSE (R) and set the parking
brake after you turn off the engine by pressing the
Acc. (Off/Accessory) button.
If the keyless access transmitter is not detected inside
the vehicle when it is turned to off, the DIC displays
NO FOB – OFF OR RUN?.
SeeDIC Warnings and Messages on page 3-57for
more information.
2-25
Page 91 of 432
REVERSE (R):Use this gear to back up.
Notice:Shifting to R (Reverse) while the vehicle is
moving forward could damage the transmission.
The repairs would not be covered by the vehicle
warranty. Shift to R (Reverse) only after the vehicle
is stopped.
To rock your vehicle back and forth to get out of snow,
ice, or sand without damaging your transmission,
seeIf Your Vehicle is Stuck in Sand, Mud, Ice, or Snow
on page 4-23.
NEUTRAL (N):In this position, your engine does not
connect with the wheels. To restart when you are
already moving, use NEUTRAL (N) only. If your vehicle
needs towing, seeTowing Your Vehicle on page 4-29.
{CAUTION:
Shifting into a drive gear while the engine is
running at high speed is dangerous. Unless
your foot is �rmly on the brake pedal, the
vehicle could move very rapidly. You could
lose control and hit people or objects. Do not
shift into a drive gear while the engine is
running at high speed.Notice:Shifting out of P (Park) or N (Neutral) with
the engine running at high speed may damage
the transmission. The repairs would not be covered
by the vehicle warranty. Be sure the engine is
not running at high speed when shifting the vehicle.
DRIVE (D):This position is for normal driving.
It provides the best fuel economy for your vehicle.
If you need more power for passing, and you are:
Going less than about 35 mph (56 km/h), push the
accelerator pedal about halfway down.
Going about 35 mph (56 km/h) or more, push the
accelerator all the way down.
Downshifting the transmission in slippery road conditions
could result in skidding, see “Skidding” underLoss of
Control on page 4-13.
SPORT MODE (S):When in SPORT MODE (S), the
transmission will work as an automatic until you use the
Manual Paddle Shift Controls, which activates the
driver manual gear selection. See Manual Paddle Shift
later in this section. While in automatic SPORT
MODE (S), the transmission computer determines when
the vehicle is being driven in a competitive manner
and will select and hold the transmission in lower gears
and have more noticeable upshifts for sportier vehicle
performance.
2-27
Page 92 of 432
Manual Paddle Shift
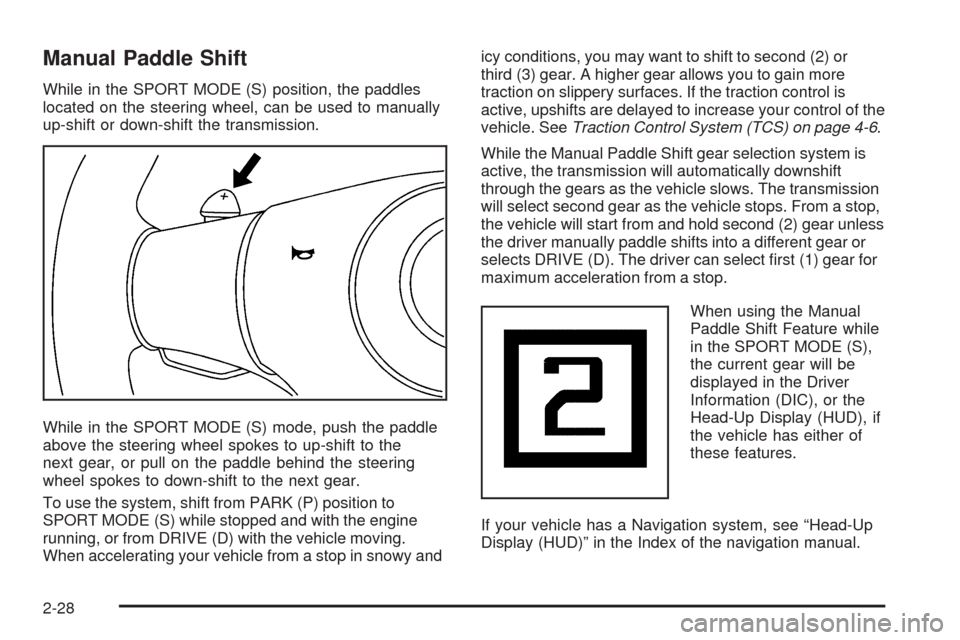
While in the SPORT MODE (S) position, the paddles
located on the steering wheel, can be used to manually
up-shift or down-shift the transmission.
While in the SPORT MODE (S) mode, push the paddle
above the steering wheel spokes to up-shift to the
next gear, or pull on the paddle behind the steering
wheel spokes to down-shift to the next gear.
To use the system, shift from PARK (P) position to
SPORT MODE (S) while stopped and with the engine
running, or from DRIVE (D) with the vehicle moving.
When accelerating your vehicle from a stop in snowy andicy conditions, you may want to shift to second (2) or
third (3) gear. A higher gear allows you to gain more
traction on slippery surfaces. If the traction control is
active, upshifts are delayed to increase your control of the
vehicle. SeeTraction Control System (TCS) on page 4-6.
While the Manual Paddle Shift gear selection system is
active, the transmission will automatically downshift
through the gears as the vehicle slows. The transmission
will select second gear as the vehicle stops. From a stop,
the vehicle will start from and hold second (2) gear unless
the driver manually paddle shifts into a different gear or
selects DRIVE (D). The driver can select �rst (1) gear for
maximum acceleration from a stop.
When using the Manual
Paddle Shift Feature while
in the SPORT MODE (S),
the current gear will be
displayed in the Driver
Information (DIC), or the
Head-Up Display (HUD), if
the vehicle has either of
these features.
If your vehicle has a Navigation system, see “Head-Up
Display (HUD)” in the Index of the navigation manual.
2-28
Page 101 of 432
Mirrors
Automatic Dimming Rearview Mirror
with OnStar
®and Compass
The vehicle may have an automatic dimming rearview
mirror with OnStar®, a compass and map lamps.
Three OnStar®buttons are at the bottom of the mirror.
SeeOnStar®System on page 2-43for more
information on the services OnStar®provides.
Mirror Operation
The mirror automatically changes to reduce glare from
headlamps behind you. A time delay feature prevents
rapid changing from the day to night positions while
driving under lights and through traffic.
P(On/Off):The automatic dimming feature is
activated when the vehicle is started. The automatic
dimming feature is turned on or off by pressing
this button located on the lower part of the mirror. Press
and hold the button for up to three seconds to turn
this feature on or off.
T(Indicator Light):This light will turn on when the
automatic dimming feature is active.
Map Lamps
The mirror has map lamps located at the bottom of the
mirror. To manually turn the lamps on or off, press
the button next to each lamp.
Compass Operation
The mirror has an eight-point compass display in the
bottom of the mirror face.
When the ignition and the compass feature are on,
the compass will show two character boxes for
approximately two seconds. After two seconds, the
mirror will display the current compass heading.
For example, NE is displayed for north-east.
Compass Calibration
If after two seconds the display does not show a
compass heading, there may be a strong magnetic �eld
interfering with the compass. Such interference may
be caused by a magnetic antenna mount, note
pad holder or similar object. If the letter C appears in
the compass window, the compass needs calibration.
The mirror compass can be calibrated by driving
the vehicle in circles at 5 mph (8 km/h) or less until the
display reads a direction.
The compass can be placed in calibration mode by
pressing and holding the left map light button until
a C appears on the compass display.
2-37