Page 89 of 152

Navigation System89
System Set-up
Unverified Area Routing
When driving to your destination, you
have the choice of using or not using
“unverified” roads. You make this
choice in Setup screen (second). The
next few pages contain an example of a
route to a destinatio n in an unverified
area explaining the routing differences
found in unverified areas.
With Unverified Area Routing Off ,
the system tries to use verified roads
whenever possible. In this example,
since only verified streets are used, it
created a longer rout e than necessary.
With Unverified Area Routing On ,
the route is shorter, but consists of
unverified (light co lored) streets that
may not be accurate. Because the streets
are unverified, there may be errors in
street location, name, or address range.
Additional caution is recommended in
these areas. Always obey posted traffic
restrictions.
Because both routes bypass or use
unverified streets, an initial Disclaimer
screen is provided. It is recommended
that you stop and review the map. Unverified Area Routing “Off” Unverified Area Routing “On”
NOTE:
Unverified roads are shown only when
viewing the map in the 1/20, 1/8, and
1/4 mile map scales, or the 80, 200, and
400 meter map scales.
2008 TL
Page 90 of 152
90Navigation System
With Unverified Area Routing Off ,
the driver chose to take a shortcut, and
avoid the long route. The moment you
enter an unverified street, a caution box
appears on the screen, and is read by the
voice. This lets you know that you are
about to enter an unverified area and
that you will be following a dotted
“vector line” that points to your
destination.
With Unverified Area Routing On ,
a caution box appear s on the screen and
is read by the voice. In this case you will
be presented with a dashed blue/pink
line instead of the regular blue route
line. You cannot assume that all
guidance is appropriate. This is your
signal to pay attention to posted traffic
restrictions.
In both cases, when you actually enter
the unverified street, a short caution will
remind you. You will see and hear this
short caution message whenever you
enter unverified areas. Unverified Area Routing “Off” Unverified Area Routing “On”
System Set-up
2008 TL
Page 91 of 152

Navigation System91
System Set-up
With Unverified Area Routing Off ,
you are presented with a blue “vector
line” that always points to the
destination. You must manually choose
streets from the map that will lead to
your destination. No guidance is
provided, and there ar e no directions to
the destination.
With Unverified Area Routing On ,
a blue/pink route line is shown for
unverified segmen ts. Voice guidance
commands in unverified areas always
end with “if possible.” This is your
signal that you should use additional
caution, and obey all traffic restrictions.
The maneuver window “arrow” shows
any portions of unverified turns in blue/
pink dashes.
These guidance maneuvers are only a
suggestion. You should always confirm
that the maneuver is possible. A
direction list is also provided that shows
any unverified roads in a blue color,
with pink arrows pointing to the next
maneuver. Unverified Area Routing “Off”
NOTE:
There are no Voice and Directions
buttons shown on the screen. With
Unverified Area Routing “Off,” no
Direction List is provided.
Unverified Area Routing “On”
2008 TL
Page 92 of 152

92Navigation System
Edit Avoid Area
This function allows you to select areas
you wish to avoid when calculating a
route to your destination. You can select
up to five areas to avoid. You may wish
to set up an “avoid area” to route around
long term road construction, closures, or
any area you wish to avoid. If you enter
a route that takes you through or into an
“avoid area,” a pop-up box will warn
you that your route takes you into one of
these areas. However, you can still
choose destinations in an avoided area.
When you select Edit, for the Setup
item “Edit Avoid Area,” the following
list screen is displayed. You can select
New Area, or select (by
touch) one of your existing areas to
modify. If you choose New Area, the
following screen is displayed:
Say or select Edit Name, and use the
keyboard to enter the name on the Enter
avoid area name screen (19 characters
max). Say or select
Done to return to the
previous screen. Say or select Edit
Area , to create the area to be avoided.
The following screen appears.
Either select Address or Map Input
on the Enter avoid area by screen.
Each choice provides a slightly different
way to locate the approximate map
display for drawing the area you wish to
avoid.
System Set-up
2008 TL
Page 93 of 152
.")
Navigation System93
System Set-up
After selecting the choice, a map screen
will be displayed.
Use the ZOOM buttons to select the map
scale (available scales are 1/20, 1/8, and
1/4 mile scales).
Use the joystick to move the crosshairs
(red circle) to the desired start point and
push in the joystick to “set” the start
point. Then move the joystick in a
straight or diagonal direction to
encompass the area to be avoided. NOTE:
The maximum size of the “Avoid area”
is 1/4 of the navigation display screen
regardless of the map scale setting.
The selected area will be displayed as a
shaded box with an orange border. Push
in on the joystick to set the end point of
the avoided area. To “re-draw” the area,
touch
Cancel and repeat the area
selection process. If your selected area
contains a freeway, the system will
prompt you with a pop-up box saying,
“Do you want to avoid freeways?” Answering “No” allo
ws you to enter a
route through an avoided area on a
freeway, and skip the “Avoid area
caution box.” See Pop-ups and
Disclaimers on page65.
Say or select Done to return to the Edit
area screen. When you return, the
“Vicinity” field is automatically filled in
by the system. Re-edit the area “Name”
if desired. Select Done on the Edit
avoid area screen to finish editing.
Your new avoided ar ea will now appear
on the “Avoid area” list screen, and be
viewable on the map screen.
2008 TL
Page 94 of 152

94Navigation System
NOTE:
You can select areas to avoid, however you cannot select roads or
areas that you want the system to use
for routing.
If you are drawing a box around a road as an area to avoid, ensure the
following: When you draw the box,
make sure that the road or portion of
a road that you encircled includes an
intersection. For instance, in the
example below, highway 213 will be
avoided, but Van Ness will not be
avoided because it lacks an
intersection in the enclosed box.Edit Waypoint Search Area
When driving on route to your
destination, you can select a temporary
destination “waypoint” (marked with a
small flag on the map) along your route
for gas, a restaurant, or other POI. When
you resume your trip from the
“waypoint,” the syst em continues the
trip to your original destination. To use
this feature, see Waypoints on page66.
This Setup item allows you to select the
distance from your highlighted route
line (on either side of your route), that
the system will search for a “waypoint.”
From the Routing & Guidance screen,
select Edit for “Edit Waypoint Search
Area,” and then choose the desired
search distance for either “On
Freeways” or “On Surface Street.” The diagram below shows how the
system handles the search for “Places
Along the Route” or “Places Around the
Destination” (see
Waypoints on
page66).
System Set-up
2008 TL
Page 95 of 152

Navigation System95
System Set-up
For “Places along the route,” the system
looks in front of yo u within a corridor
width specified by your values for “On
Freeways” or “On Surface Street.”
The system checks the upcoming area,
based on your input.
For “Places around the destination,” the
system searches outwards in a spiral
from the destination. In this case,
specific search values are not needed;
the matches are displayed in order of
distance from destination.
NOTE:
These settings do not affect the search
range used for the voice commands like,
“Find nearest gas station,” that are
also available wh en viewing the map
screen.Guidance Mode
Allows you to select the guidance
display mode: Single Screen or Split
Screen .
To get to Guidance Mode from the
Setup screen, select in sequence,
“More”, “Routing & Guidance”, and
“Guidance Mode”.
The factory default is Single Screen.
NOTE:
The Guidance Mode can also be
selected on the Icon Selection screen.
See Showing Icons on the Map on
page61.
Vehicle
From the Setup screen (second), say or
select Vehicle and the following screen
appears:
Off-road Tracking
With this On, the system will provide
white off-road tracking dots
(“breadcrumbs”) on the map screen
whenever you drive into an area where
the map does not show any roads.
See Map Screen Legend on page18.
2008 TL
Page 96 of 152

96Navigation System
After you have traveled approximately
1/2 mile away from a mapped road, the
system will display a series of white
dots on the map screen to show the path
you have traveled. This is provided so
you can follow the dots to backtrack to
the mapped road you originally left.
Tracking continues until you reach a
mapped road. See Off-road Tracking on
page63.
Tracking is shown only in the 1/20, 1/8,
1/4, and 1/2 mile, or the 80, 200, 400,
and 800 meter scales. Use the ZOOM
buttons to change the scales if
necessary.
NOTE:
To clear existing dots, turn this feature
off and exit Setup. To re-enable this
feature, return to Setup and turn it on
again.Correct Vehicle Position
The system relies on satellites for
positioning information. Buildings,
tunnels, and other objects can block or
reflect these signals, requiring the
system to use “dead reckoning” to
determine your location and direction.
This can sometimes lead to small errors
in positioning, such as showing you on
an adjacent street.
NOTE:
Using this function to adjust vehicle
position is not recommended. When the
system acquires a GPS signal, it will
automatically place the vehicle in the
correct location. If you choose to do this, follow these
steps:
1. Stop the vehicle.
2. Select
Adjust, and the system will
display a map adjustment screen.
3. Use the ZOOM buttons and the
joystick to move the location
arrowhead to the correct location.
Touch the arrow buttons on the
bottom of the screen to rotate the
direction arrows so the vehicle
position is pointing in the correct
direction.
System Set-up
2008 TL
 1
1 2
2 3
3 4
4 5
5 6
6 7
7 8
8 9
9 10
10 11
11 12
12 13
13 14
14 15
15 16
16 17
17 18
18 19
19 20
20 21
21 22
22 23
23 24
24 25
25 26
26 27
27 28
28 29
29 30
30 31
31 32
32 33
33 34
34 35
35 36
36 37
37 38
38 39
39 40
40 41
41 42
42 43
43 44
44 45
45 46
46 47
47 48
48 49
49 50
50 51
51 52
52 53
53 54
54 55
55 56
56 57
57 58
58 59
59 60
60 61
61 62
62 63
63 64
64 65
65 66
66 67
67 68
68 69
69 70
70 71
71 72
72 73
73 74
74 75
75 76
76 77
77 78
78 79
79 80
80 81
81 82
82 83
83 84
84 85
85 86
86 87
87 88
88 89
89 90
90 91
91 92
92 93
93 94
94 95
95 96
96 97
97 98
98 99
99 100
100 101
101 102
102 103
103 104
104 105
105 106
106 107
107 108
108 109
109 110
110 111
111 112
112 113
113 114
114 115
115 116
116 117
117 118
118 119
119 120
120 121
121 122
122 123
123 124
124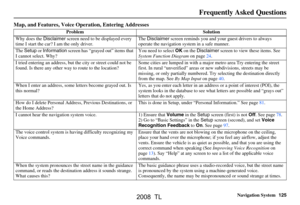 125
125 126
126 127
127 128
128 129
129 130
130 131
131 132
132 133
133 134
134 135
135 136
136 137
137 138
138 139
139 140
140 141
141 142
142 143
143 144
144 145
145 146
146 147
147 148
148 149
149 150
150 151
151