Page 33 of 74
5-4
5
OPERATION AND IMPORTANT RIDING POINTS
EAU17212
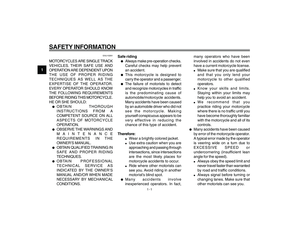
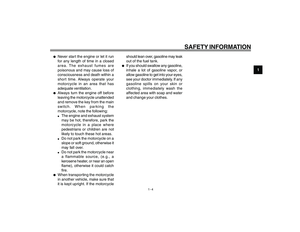
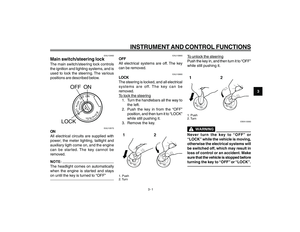
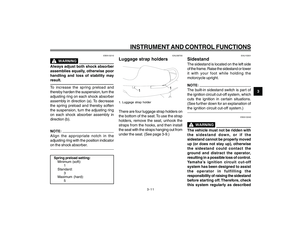
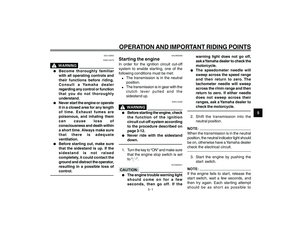
ParkingWhen parking, stop the engine, and then
remove the key from the main switch.
EWA10310
l
l l
l
l
Since the engine and exhaust
system can become very hot,
park in a place where
pedestrians or children are not
likely to touch them.
l
l l
l
l
Do not park on a slope or on soft
ground, otherwise the vehicle
may overturn.
ECA10380
Never park in an area where there are
fire hazards such as grass or other
flammable materials.
cap 5.pmd 24/1/2007, 14:37
4
Page 34 of 74

6-1
6
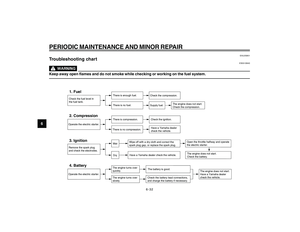
PERIODIC MAINTENANCE AND MINOR REPAIR
EAU17240
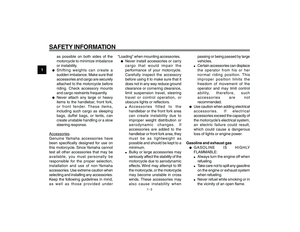
Safety is an obligation of the owner.
Periodic inspection, adjustment and
lubrication will keep your vehicle in the
safest and most efficient condition
possible. The most important points of
inspection, adjustment, and lubrication
are explained on the following pages.
The intervals given in the periodic
maintenance and lubrication chart
should be simply considered as a
general guide under normal riding
conditions. However, DEPENDING ON
THE WEATHER, TERRAIN,
GEOGRAPHICAL LOCATION, AND
INDIVIDUAL USE, THE
MAINTENANCE INTERVALS MAY
NEED TO BE SHORTENED.
EWA10320
If you are not familiar with
maintenance work, have a Yamaha
dealer do it for you.
EAU17390
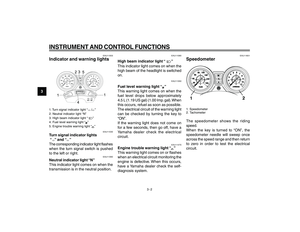
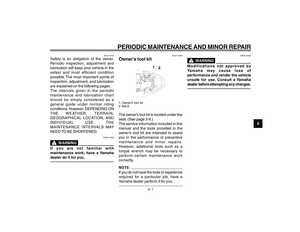
Owner’s tool kit1. Owner’s tool kit
2. BandThe owner’s tool kit is located under the
seat. (See page 3-9.)
The service information included in this
manual and the tools provided in the
owner’s tool kit are intended to assist
you in the performance of preventive
maintenance and minor repairs.
However, additional tools such as a
torque wrench may be necessary to
perform certain maintenance work
correctly.If you do not have the tools or experience
required for a particular job, have a
Yamaha dealer perform it for you.
EWA10350
Modifications not approved by
Yamaha may cause loss of
performance and render the vehicle
unsafe for use. Consult a Yamaha
dealer before attempting any changes.
cap 6.pmd24/1/2007, 14:37
1
Page 35 of 74
6-2
6
PERIODIC MAINTENANCE AND MINOR REPAIR
EAU17707
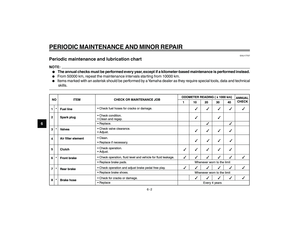
Periodic maintenance and lubrication chartl
l l
l
l
The annual checks must be performed every year, except if a kilometer-based maintenance is performed instead.
l
From 50000 km, repeat the maintenance intervals starting from 10000 km.
l
Items marked with an asterisk should be performed by a Yamaha dealer as they require special tools, data and technical
skills.
cap 6.pmd 24/1/2007, 14:37
2
Page 36 of 74
6-3
6
PERIODIC MAINTENANCE AND MINOR REPAIR
cap 6.pmd24/1/2007, 14:37
3
Page 37 of 74
6-4
6
PERIODIC MAINTENANCE AND MINOR REPAIR
cap 6.pmd24/1/2007, 14:37
4
Page 38 of 74
6-5
6
PERIODIC MAINTENANCE AND MINOR REPAIR
EAU18660
l
The air filter needs more frequent service if you are riding in unusuall\
y wet or dusty areas.
l
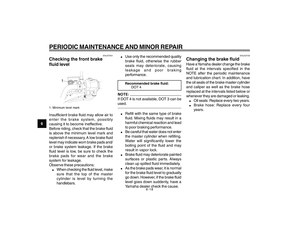
Hydraulic brake servicel
Regularly check and, if necessary, correct the brake fluid level.
l
Every two years replace the internal components of the brake master cylinder and caliper, and change the brake
fluid.
l
Replace the brake hoses every four years and if cracked or damaged.
cap 6.pmd24/1/2007, 14:37
5
Page 39 of 74
6-6
6
PERIODIC MAINTENANCE AND MINOR REPAIR
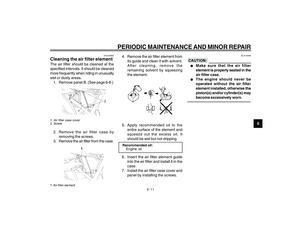
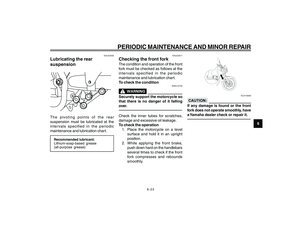
EAU18721
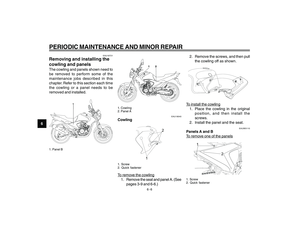
Removing and installing the
cowling and panelsThe cowling and panels shown need to
be removed to perform some of the
maintenance jobs described in this
chapter. Refer to this section each time
the cowling or a panel needs to be
removed and installed.
1
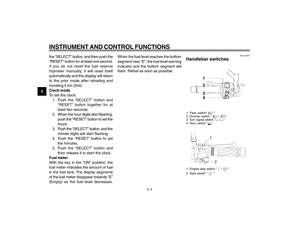
1. Panel B
12
1. Cowling
2. Panel A
EAU19040
Cowling
2
1
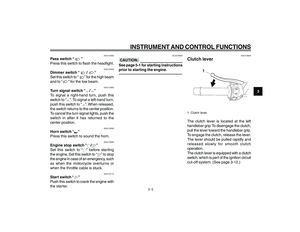
1. Screw
2. Quick fastenerTo remo
ve the co
wling
1. Remove the seat and panel A. (See pages 3-9 and 6-6.) 2. Remove the screws, and then pull
the cowling off as shown.
To install the co
wling
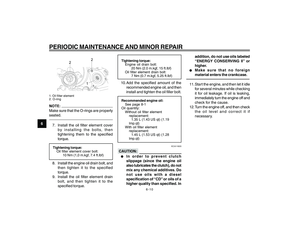
1. Place the cowling in the original position, and then install the
screws.
2. Install the panel and the seat.
EAUW0110
Panels A and BTo remo
ve one of the panels
1
2
1. Screw
2. Quick fastener
cap 6.pmd 24/1/2007, 14:37
6
Page 40 of 74

2. Remove the screws, and then pullthe panel to the outside as shown.To install the panel1. Place the panel in the orig")
6-7
6
PERIODIC MAINTENANCE AND MINOR REPAIR
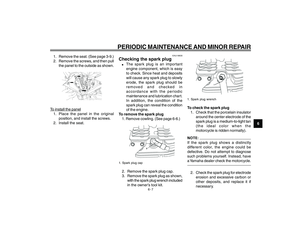
1. Remove the seat. (See page 3-9.)
2. Remove the screws, and then pullthe panel to the outside as shown.To install the panel1. Place the panel in the original position, and install the screws.
2. Install the seat.
EAU19630
Checking the spark plugl
The spark plug is an important
engine component, which is easy
to check. Since heat and deposits
will cause any spark plug to slowly
erode, the spark plug should be
removed and checked in
accordance with the periodic
maintenance and lubrication chart.
In addition, the condition of the
spark plug can reveal the condition
of the engine.
To remove the spark plug 1. Remove cowling. (See page 6-6.)
1. Spark plug cap2. Remove the spark plug cap.
3. Remove the spark plug as shown, with the spark plug wrench included
in the owner’s tool kit.
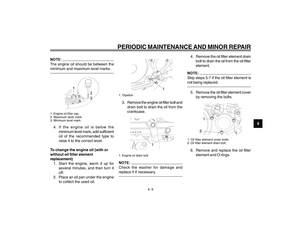
1. Spark plug wrenchTo check the spark plug1. Check that the porcelain insulator around the center electrode of the
spark plug is a medium-to-light tan
(the ideal color when the
motorcycle is ridden normally).If the spark plug shows a distinctly
different color, the engine could be
defective. Do not attempt to diagnose
such problems yourself. Instead, have
a Yamaha dealer check the motorcycle.2. Check the spark plug for electrodeerosion and excessive carbon or
other deposits, and replace it if
necessary.
cap 6.pmd 24/1/2007, 14:37
7