Page 202 of 268

2007 Volvo XC90
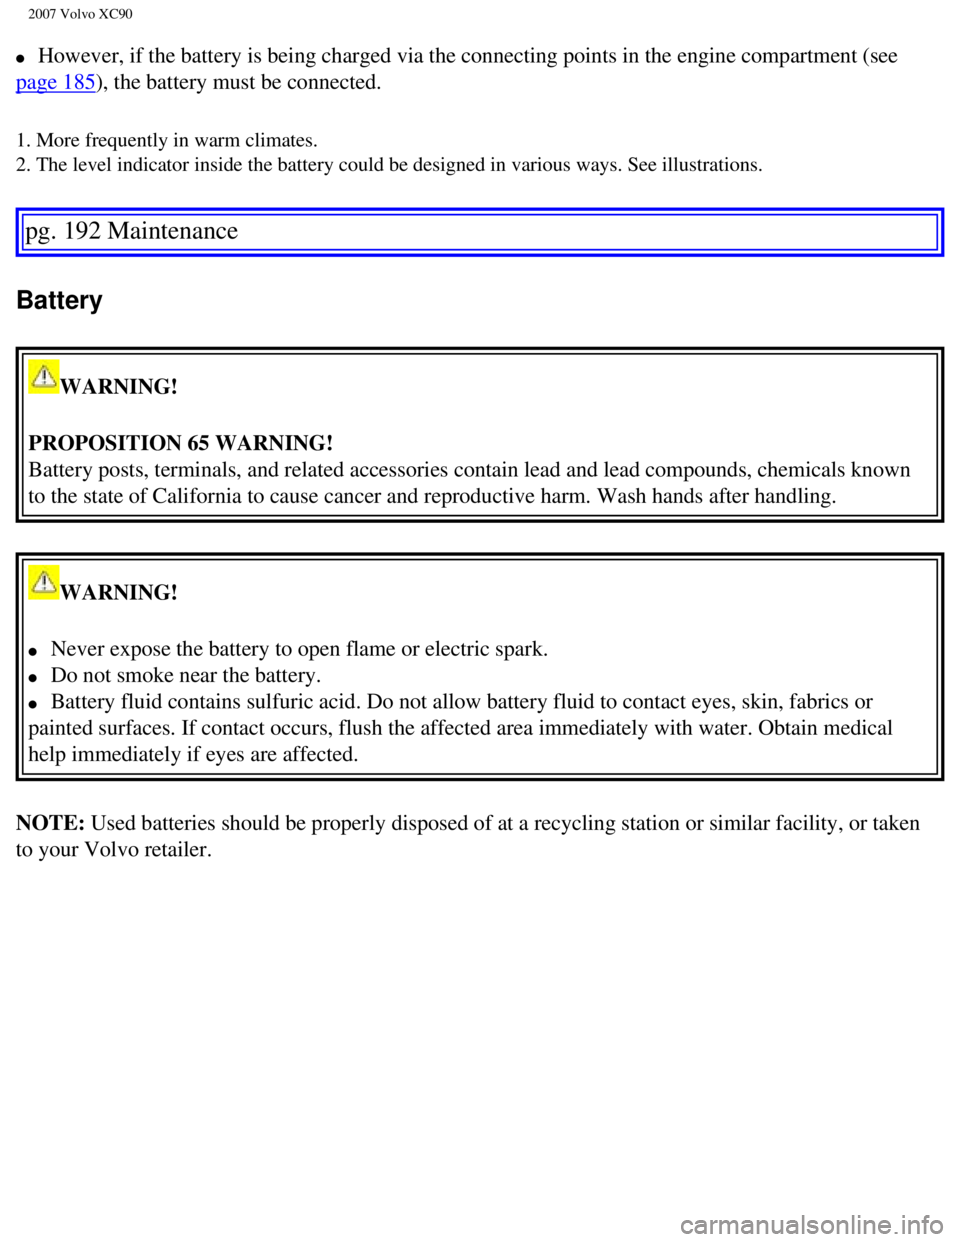
l However, if the battery is being charged via the connecting points in th\
e engine compartment (see
page 185), the battery must be connected.
1. More frequently in warm climates.
2. The level indicator inside the battery could be designed in various w\
ays. See illustrations.
pg. 192 Maintenance
Battery
WARNING!
PROPOSITION 65 WARNING!
Battery posts, terminals, and related accessories contain lead and lead \
compounds, chemicals known
to the state of California to cause cancer and reproductive harm. Wash h\
ands after handling.
WARNING!
l Never expose the battery to open flame or electric spark.
l Do not smoke near the battery.
l Battery fluid contains sulfuric acid. Do not allow battery fluid to cont\
act eyes, skin, fabrics or
painted surfaces. If contact occurs, flush the affected area immediately\
with water. Obtain medical
help immediately if eyes are affected.
NOTE: Used batteries should be properly disposed of at a recycling station or\
similar facility, or taken
to your Volvo retailer.
file:///K|/ownersdocs/2007/2007_XC90/07xc90_09.htm (16 of 37)12/30/200\
6 5:53:50 PM
Page 205 of 268

2007 Volvo XC90
NOTE: After the battery has been disconnected or replaced, lock and unlock th\
e vehicle with the central
locking system's remote control to reactivate such features as the power\
windows, moonroof, courtesy
lighting, etc.
WARNING!
Ventilation hose:
l The battery generates hydrogen gas, which is flammable and explosive. Th\
e battery is fitted with a
ventilation hose which vents hydrogen gas out of the battery compartment\
through a ventilation
opening in the bottom of this compartment. If the battery must be replac\
ed, it is essential that the
ventilation hose is properly connected to the battery and that it is rou\
ted through the ventilation
opening provided (see illustration).
l Be sure the ventilation hose is free of debris.
l Only use replacement batteries equipped with a ventilation hose. Consult\
your Volvo retailer.
pg. 194 Maintenance
Replacing bulbs
When replacing bulbs, keep the following points in mind:
l Never touch the glass of bulbs with your fingers. Grease and oils from y\
our fingers vaporize in the
heat and will leave a deposit on the reflector, which will damage it.
l The optional Active Bi-Xenon headlight bulbs contain trace amounts of me\
rcury. These bulbs should
always be disposed of by an authorized Volvo retailer.
l The following bulbs should only be replaced by a trained and qualified V\
olvo service technician:
- Active Bi-Xenon headlights,
- Courtesy (dome) lighting,
- Reading lights,
- Glove compartment lights
- Turn signals and courtesy lights in the side door mirrors
- High-mounted brake lights
file:///K|/ownersdocs/2007/2007_XC90/07xc90_09.htm (19 of 37)12/30/200\
6 5:53:50 PM
Page 206 of 268
2007 Volvo XC90
Replacing high/low beams/turn signal/parking light bulbs
The entire lamp housing must be lifted out when replacing these bulbs.
To lift out the lamp housing:
- Switch off the ignition.
- Open the hood.
- Pull up the retaining pins (see the illustration above).
- Lift out the lamp housing.
WARNING!
Active Bi-Xenon headlights (option) - due to the high voltage used by \
these headlights, these bulbs
should only be replaced by an authorized Volvo service technician.
pg. 195 Maintenance
Replacing bulbs
file:///K|/ownersdocs/2007/2007_XC90/07xc90_09.htm (20 of 37)12/30/200\
6 5:53:50 PM
Page 215 of 268

2007 Volvo XC90
Fuses
Replacing fuses
If an electrical component fails to function, it is possible that a fuse\
has blown.
The fuse boxes are located in four different places:
l Relays/fuse box in the engine compartment
l Fuse box in the passenger compartment, behind the plastic cover
l Fuse box in the passenger compartment, on the edge of the dashboard
l Fuse box in the cargo compartment.
A label on the inside of each cover indicates the amperage and the elect\
rical components that are
connected to each fuse.
The easiest way to see if a fuse is blown is to remove it. Pull the fuse\
straight out. If a fuse is difficult to
remove, you will find a special fuse removal tool (and several extra fu\
ses) in the passenger compartment
fuse box on the driver's end of dashboard. From the side, examine the cu\
rved metal wire (see the
illustration above) to see if it is broken. If so, put in a new fuse of\
the same color and amperage
(written on the fuse). Spare fuses are stored in the fuse box in the e\
ngine compartment and the passenger
compartment. If fuses burn out repeatedly, have the electrical system in\
spected by an authorized Volvo
retailer.
WARNING!
Never use fuses with higher amperage than those stated on the following \
pages. Doing so could
overload the vehicle's electrical system.
pg. 202 Maintenance
file:///K|/ownersdocs/2007/2007_XC90/07xc90_09.htm (29 of 37)12/30/200\
6 5:53:50 PM
Page 227 of 268
2007 Volvo XC90
7-seat, 8-cyl, AWD 2930
lbs 1330 kg
1. Permissible axle weight or gross vehicle weight must never be exceede\
d.
Permissible axle weight,
rear
1 USA
Canada
5-seat, 6-cyl, FWD 3060 lbs -
5-seat, 6-cyl, AWD 3150 lbs 1430 kg
5-seat, 8-cyl, AWD 3150 lbs 1430 kg
7-seat, 6-cyl, FWD 3170 lbs -
7-seat, 6-cyl, AWD 3240 lbs 1470 kg
7-seat, 8-cyl, AWD 3240 lbs 1470 kg
Curb weight
5-seat, FWD 4290-4400
lbs -
5-seat, AWD 4420-4655
lbs 2020-2130 kg
7-seat, FWD 4475-4570
lbs -
7-seat, AWD 4605-4820
lbs 2110-2160 kg
Max. roof load 220 lbs 100 kg
Trailer weight, w/o brakes 1650 lbs 750 kg
Trailer weights, with brakes See the table on
page 137
Max. tongue weight See the table on
page 137
WARNING!
When adding accessories, equipment, luggage and other cargo to your vehi\
cle, the total capacity
weight must not be exceeded.
pg. 210 Specifications
file:///K|/ownersdocs/2007/2007_XC90/07xc90_10.htm (4 of 10)12/30/2006\
5:53:52 PM
Page 229 of 268

2007 Volvo XC90
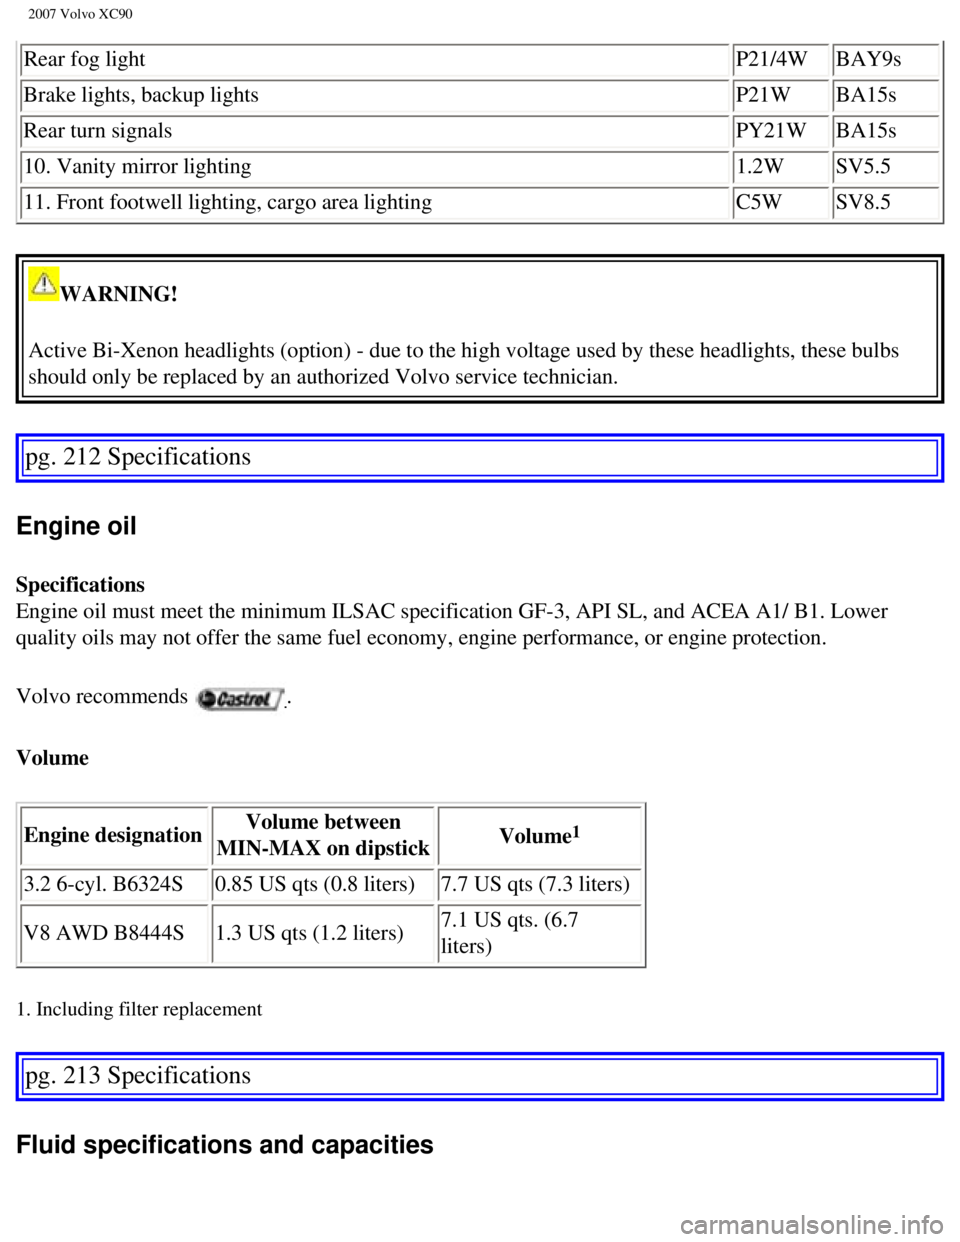
Rear fog lightP21/4W BAY9s
Brake lights, backup lights P21W BA15s
Rear turn signals PY21W BA15s
10. Vanity mirror lighting 1.2W SV5.5
11. Front footwell lighting, cargo area lighting C5W SV8.5
WARNING!
Active Bi-Xenon headlights (option) - due to the high voltage used by \
these headlights, these bulbs
should only be replaced by an authorized Volvo service technician.
pg. 212 Specifications
Engine oil
Specifications
Engine oil must meet the minimum ILSAC specification GF-3, API SL, and A\
CEA A1/ B1. Lower
quality oils may not offer the same fuel economy, engine performance, or\
engine protection.
Volvo recommends
.
Volume
Engine designation Volume between
MIN-MAX on dipstick Volume
1
3.2 6-cyl. B6324S
0.85 US qts (0.8 liters) 7.7 US qts (7.3 liters)
V8 AWD B8444S 1.3 US qts (1.2 liters) 7.1 US qts. (6.7
liters)
1. Including filter replacement
pg. 213 Specifications
Fluid specifications and capacities
file:///K|/ownersdocs/2007/2007_XC90/07xc90_10.htm (6 of 10)12/30/2006\
5:53:52 PM
Page 248 of 268

2007 Volvo XC90
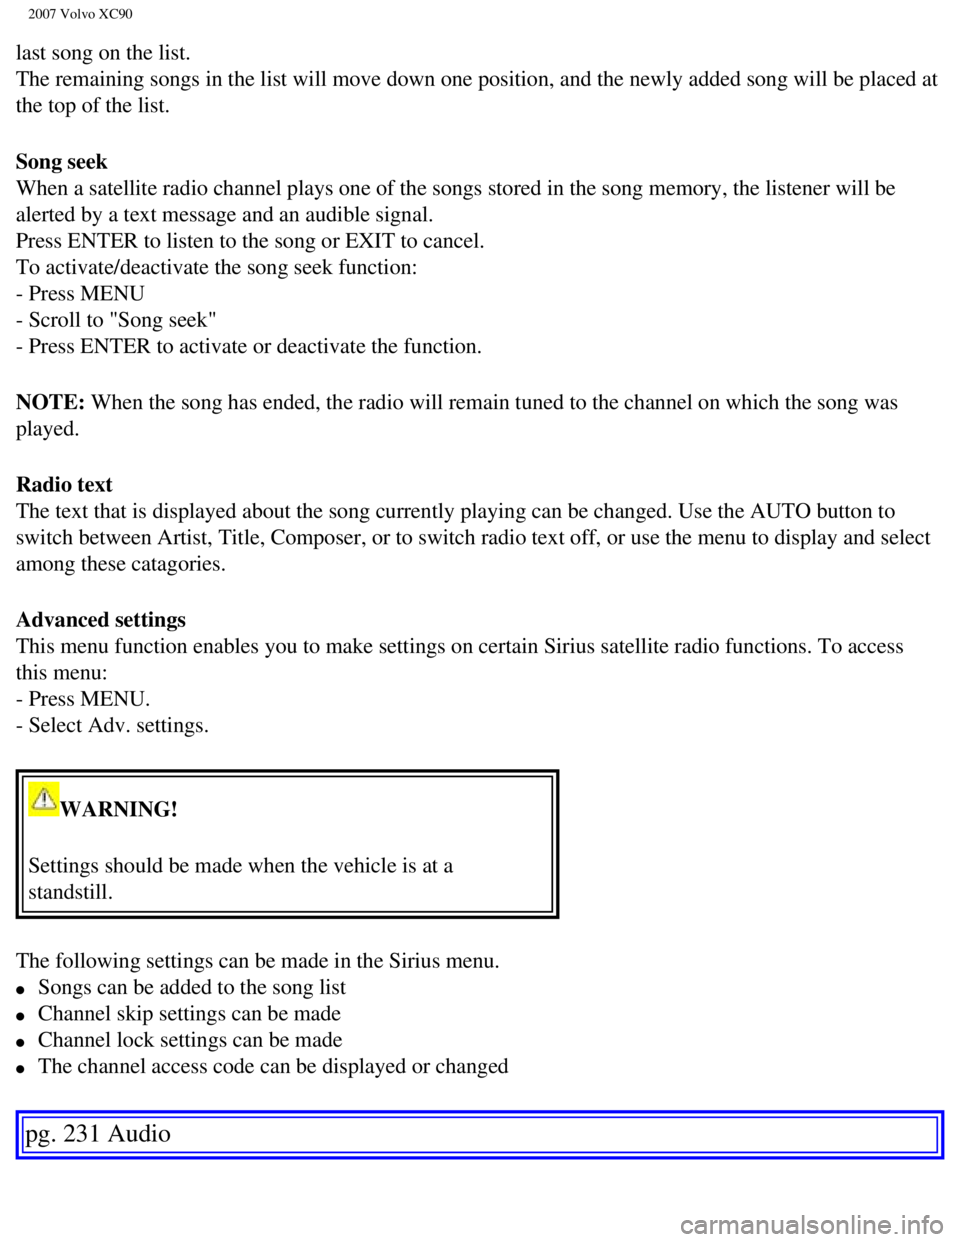
last song on the list.
The remaining songs in the list will move down one position, and the new\
ly added song will be placed at
the top of the list.
Song seek
When a satellite radio channel plays one of the songs stored in the song\
memory, the listener will be
alerted by a text message and an audible signal.
Press ENTER to listen to the song or EXIT to cancel.
To activate/deactivate the song seek function:
- Press MENU
- Scroll to "Song seek"
- Press ENTER to activate or deactivate the function.
NOTE: When the song has ended, the radio will remain tuned to the channel on \
which the song was
played.
Radio text
The text that is displayed about the song currently playing can be chang\
ed. Use the AUTO button to
switch between Artist, Title, Composer, or to switch radio text off, or \
use the menu to display and select
among these catagories.
Advanced settings
This menu function enables you to make settings on certain Sirius satell\
ite radio functions. To access
this menu:
- Press MENU.
- Select Adv. settings.
WARNING!
Settings should be made when the vehicle is at a
standstill.
The following settings can be made in the Sirius menu.
l Songs can be added to the song list
l Channel skip settings can be made
l Channel lock settings can be made
l The channel access code can be displayed or changed
pg. 231 Audio
file:///K|/ownersdocs/2007/2007_XC90/07xc90_11.htm (15 of 26)12/30/200\
6 5:53:54 PM
Page 257 of 268

2007 Volvo XC90
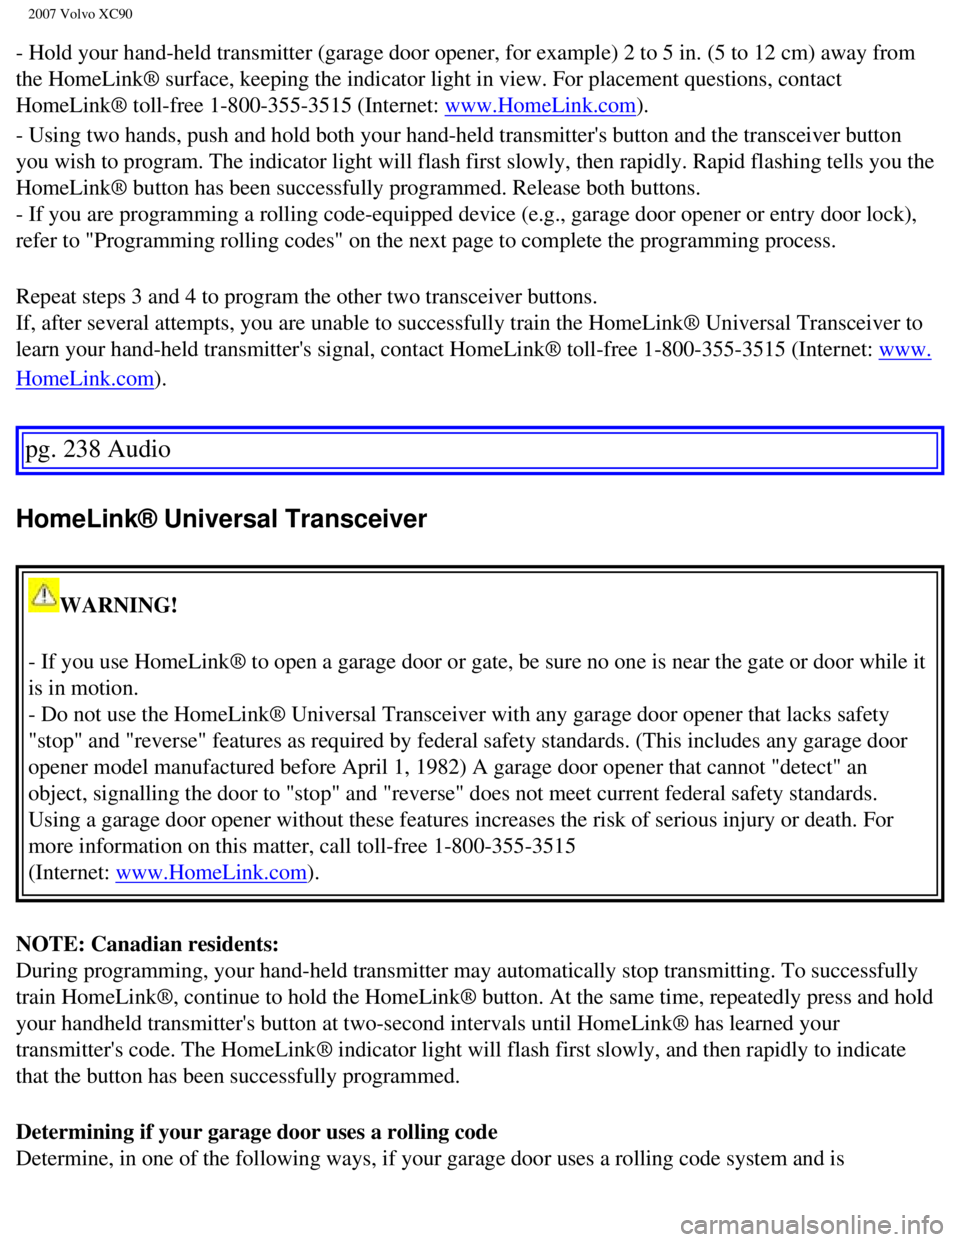
- Hold your hand-held transmitter (garage door opener, for example) 2 \
to 5 in. (5 to 12 cm) away from
the HomeLink® surface, keeping the indicator light in view. For place\
ment questions, contact
HomeLink® toll-free 1-800-355-3515 (Internet:
www.HomeLink.com).
- Using two hands, push and hold both your hand-held transmitter's butto\
n and the transceiver button
you wish to program. The indicator light will flash first slowly, then r\
apidly. Rapid flashing tells you the
HomeLink® button has been successfully programmed. Release both butto\
ns.
- If you are programming a rolling code-equipped device (e.g., garage d\
oor opener or entry door lock),
refer to "Programming rolling codes" on the next page to complete the pr\
ogramming process.
Repeat steps 3 and 4 to program the other two transceiver buttons.
If, after several attempts, you are unable to successfully train the Hom\
eLink® Universal Transceiver to
learn your hand-held transmitter's signal, contact HomeLink® toll-fre\
e 1-800-355-3515 (Internet:
www.
HomeLink.com).
pg. 238 Audio
HomeLink® Universal Transceiver
WARNING!
- If you use HomeLink® to open a garage door or gate, be sure no one \
is near the gate or door while it
is in motion.
- Do not use the HomeLink® Universal Transceiver with any garage door\
opener that lacks safety
"stop" and "reverse" features as required by federal safety standards. (\
This includes any garage door
opener model manufactured before April 1, 1982) A garage door opener th\
at cannot "detect" an
object, signalling the door to "stop" and "reverse" does not meet curren\
t federal safety standards.
Using a garage door opener without these features increases the risk of \
serious injury or death. For
more information on this matter, call toll-free 1-800-355-3515
(Internet:
www.HomeLink.com).
NOTE: Canadian residents:
During programming, your hand-held transmitter may automatically stop tr\
ansmitting. To successfully
train HomeLink®, continue to hold the HomeLink® button. At the sam\
e time, repeatedly press and hold
your handheld transmitter's button at two-second intervals until HomeLin\
k® has learned your
transmitter's code. The HomeLink® indicator light will flash first sl\
owly, and then rapidly to indicate
that the button has been successfully programmed.
Determining if your garage door uses a rolling code
Determine, in one of the following ways, if your garage door uses a roll\
ing code system and is
file:///K|/ownersdocs/2007/2007_XC90/07xc90_11.htm (24 of 26)12/30/200\
6 5:53:54 PM