Page 51 of 208
Parking lights
The front and rear parking lights can be turned on even when the ignition is switched off.
Turn switch (1) to position .
The license plate lights also illuminate when the parking lights are switched on.
Headlights
1. Turn the ignition key to position II.
2. The low beam headlights (daytime running lights) illuminate automatically, except when the light switch (1) is in
position
1.
NOTE
See page 60
for information on switching between high and low beams.
Fog lights
Front fog lights (option)
The front fog lights can be used in combination with either the headlights or the parking lights.
1. Turn the ignition key to position II.
2. Press button 3 to turn on the front fog lights.
An indicator light in the button illuminates when the front fog lights are on.
1On Canadian models, the daytime running lights will remain on with the light switch in this position.
Rear fog light
ProCarManuals.com
Page 52 of 208

The single rear fog light is located in the driver's side taillight cluster.
The rear fog light will only function in combination with the high/low beam headlights or the optional front fog lights.
1. Turn the ignition key to position II.
2. Press button 5 to turn on the rear fog light.
An indicator light in the button illuminates when the rear fog light is on.
NOTE
The rear fog light is considerably brighter than the normal taillights and should be used only when conditions such as
fog, rain, snow, smoke or dust reduce visibility for other vehicles to less than 500 ft. (150 meters).
59 02 Instruments and controls
Lighting panel
Instrument panel lighting
The instrument panel lighting illuminates when the ignition is in position II and the light switch (1) is in either position
or .
NOTE
To make it easier to read the odometer, trip odometer, clock, and ambient temperature, these gauges illuminate when
the vehicle is unlocked and when the key has been removed from the ignition switch. The lighting will go out when
the vehicle is locked.
Move the thumb wheel (2) up to increase brightness or down to decrease brightness.
Unlocking the fuel filler door
With the ignition switched off, press button 4 to unlock the fuel filler door. Please note that the fuel filler door will
remain unlocked until the car begins to move forward.
An audible click will be heard when the fuel filler door re-locks.
60 02 Instruments and controls
Left-side steering wheel lever
Lever positions
ProCarManuals.com
Page 53 of 208

1. Turn signals, lane change position
2. Turn signals, position for normal turns
3. High beam flash
4. Toggle between high and low beams, Home Safe lighting
Turn signals
When turning
Move the lever as far up or down as possible (to position 2) to start the turn signals. The turn signals will be cancelled
automatically by the movement of the steering wheel, or the lever can be returned to its initial position by hand.
When changing lanes
The driver can automatically flash the turn signals 3 times by:
Moving the turn signal lever up or down to position 1 and releasing it.
Moving the lever up or down to position 2 and immediately back to its original position.
NOTE
This automatic flashing sequence can be interrupted by immediately moving the lever in the opposite direction.
If the turn signal indicator flashes faster than normal, check for a burned-out turn signal bulb.
High/low beam headlights
Continuous high beams
1. Turn the ignition key to position II.
2. With the light switch (1) in position
, (see page 58) pull the turn signal lever toward the steering wheel (position
4) to toggle between high and low beams.
High beam flash
1. Turn the ignition key to position II.
2. Pull the turn signal lever to position
3. The high beams will remain on until the lever is released.
Home safe lighting
ProCarManuals.com
Page 54 of 208

When you leave your car at night, you can make use of the home safe lighting function to illuminate the area in front
of the car.
1. Remove the key from the ignition switch.
2. Pull the direction indicator lever as far as possible towards the steering wheel (to position 4) and release it.
3. Exit the car and lock the doors.
The headlights and parking lights will illuminate and remain on for 30
1, 60 or 90 seconds. The time interval can be
changed according to your preferences by using the Personal Settings function, see page 74
for more information.
1 Factory setting
61 02 Instruments and controls
Trip computer
Trip computer (option)
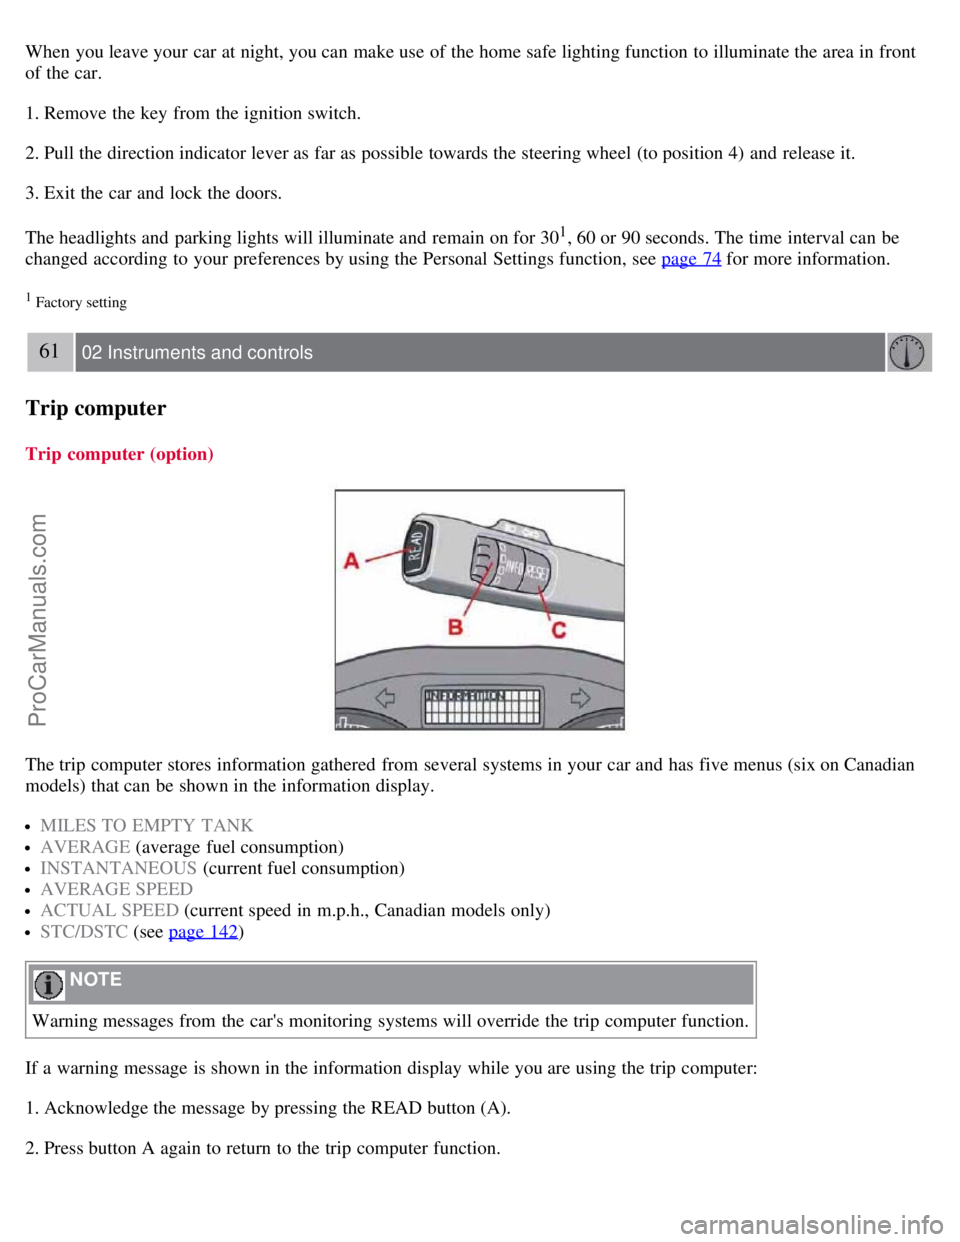
The trip computer stores information gathered from several systems in your car and has five menus (six on Canadian
models) that can be shown in the information display.
MILES TO EMPTY TANK
AVERAGE (average fuel consumption)
INSTANTANEOUS (current fuel consumption)
AVERAGE SPEED
ACTUAL SPEED (current speed in m.p.h., Canadian models only)
STC/DSTC (see page 142)
NOTE
Warning messages from the car's monitoring systems will override the trip computer function.
If a warning message is shown in the information display while you are using the trip computer:
1. Acknowledge the message by pressing the READ button (A).
2. Press button A again to return to the trip computer function.
ProCarManuals.com
Page 59 of 208

The rain sensor regulates windshield wiper speed according to the amount of water on the windshield. The sensitivity
of the rain sensor is adjusted by moving the thumb wheel (C in the illustration on the previous page) up (the wipers
will sweep the windshield more frequently) or down (the wipers will sweep the windshield less frequently).
On/Off
To activate the rain sensor:
1. Switch on the ignition.
2. Put the windshield wiper lever in position 0.
3. Press button B (see the illustration on the previous page). The rain sensor symbol will appear in the lower display.
The rain sensor can be deactivated by:
Pressing button (B).
or
Moving the windshield wiper lever down.
NOTE
The rain sensor function will remain activated if the lever is briefly moved up to activate the "manual sweep"
function.
CAUTION
The rain sensor should be deactivated when washing the car in an automatic car wash, etc. If the rain sensor function
is left on, the wipers will start inadvertently in the car wash and could be damaged.
The rain sensor is automatically deactivated:
When the key is removed from the ignition.
Five minutes after the ignition is switched off if the key is left in the ignition.
C - Thumb wheel
The thumb wheel is used to set the wiper interval when intermittent wiping is selected, or the sensitivity to the amount
of rain on the windshield when the rain sensor is selected. Move the wheel upward or downward to increase/decrease
wiper speed when the intermittent function is selected, or to increase/decrease the optional rain sensor's sensitivity
ProCarManuals.com
Page 62 of 208

Pull up the parking brake lever up firmly to its full extent.
Ashtrays/cigarette lighter
The auxiliary sockets can also be used for cigarette lighters. Ashtrays and lighters are available as accessories. Please
contact your Volvo retailer.
68 02 Instruments and controls
Power windows
Operation
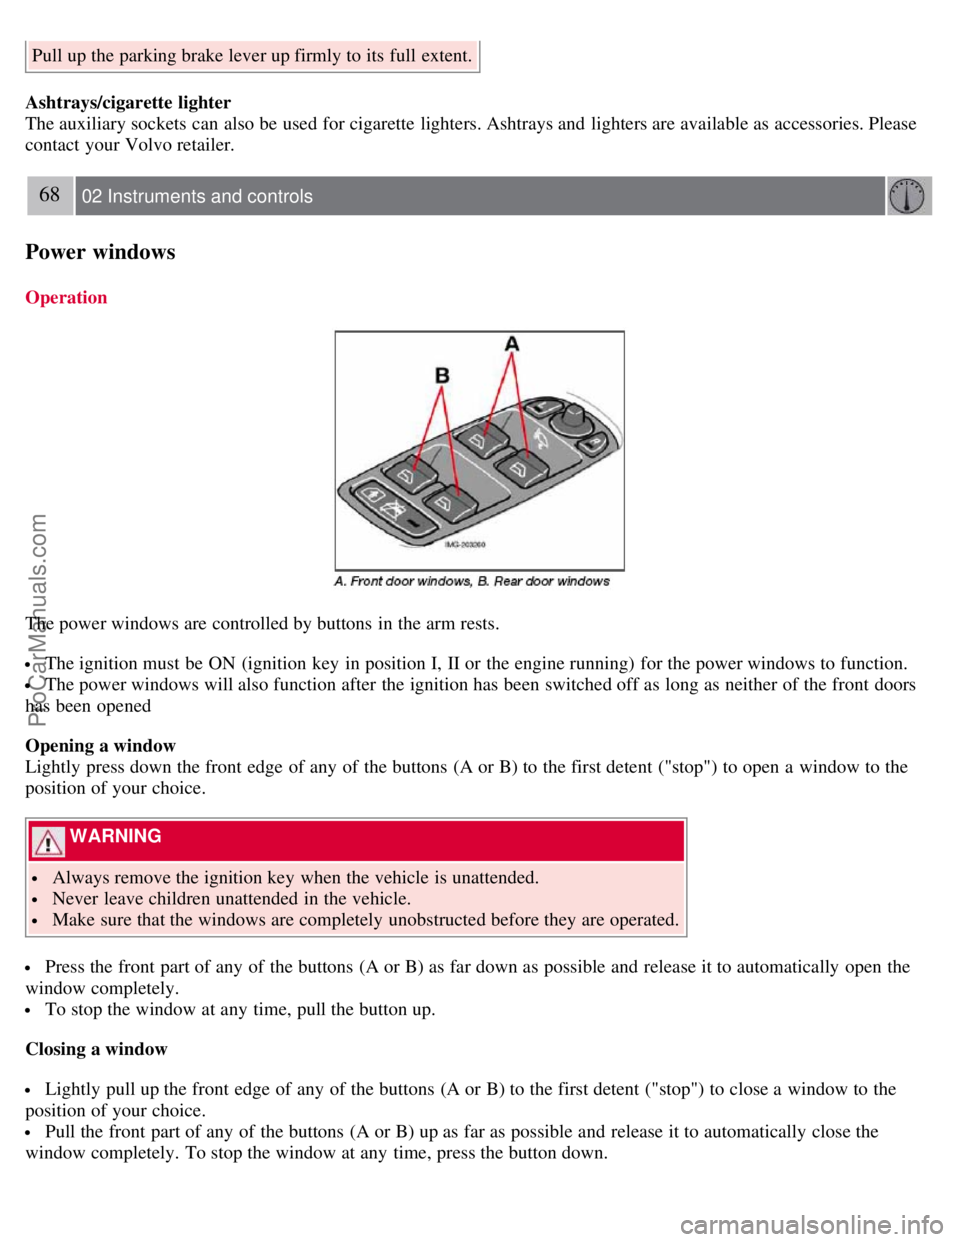
The power windows are controlled by buttons in the arm rests.
The ignition must be ON (ignition key in position I, II or the engine running) for the power windows to function.
The power windows will also function after the ignition has been switched off as long as neither of the front doors
has been opened
Opening a window
Lightly press down the front edge of any of the buttons (A or B) to the first detent ("stop") to open a window to the
position of your choice.
WARNING
Always remove the ignition key when the vehicle is unattended.
Never leave children unattended in the vehicle.
Make sure that the windows are completely unobstructed before they are operated.
Press the front part of any of the buttons (A or B) as far down as possible and release it to automatically open the
window completely.
To stop the window at any time, pull the button up.
Closing a window
Lightly pull up the front edge of any of the buttons (A or B) to the first detent ("stop") to close a window to the
position of your choice.
Pull the front part of any of the buttons (A or B) up as far as possible and release it to automatically close the
window completely. To stop the window at any time, press the button down.
ProCarManuals.com
Page 67 of 208
mirrors will automatically move to the position that they were in when the doors were most recently locked with the
same remote control.
WARNING
The mirrors should always be adjusted prior to driving. Objects seen in the passenger's side wide -angle door mirror
are closer than they appear to be.
72 02 Instruments and controls
Power moonroof (option)
Operating the moonroof
To operate the moonroof, the ignition key must first be turned to the intermediate or drive position (position I, II or the
engine running). The moonroof can be opened in two ways:
A. Tilt position
B. Sliding moonroof
1. Auto open
2. Manual open
3. Manual close
ProCarManuals.com
Page 71 of 208

Information
VIN number - The VIN (Vehicle Identification Number) is the car's unique identity number.
Number of Keys - the number of keys registered for the car is displayed here.
Climate functions
Blower speed in AUTO mode - the blower speed can be set to AUTO mode in models equipped with ECC. Choose
between "Low", "Normal" and "High".
Timer for recirculation - when the timer is active, the air recirculates in the car for 3- 12 minutes depending on the
ambient temperature. Select On/Off depending on whether the recirculation timer is to be active or not.
Keyless locking and unlocking (option as available)
The following alternatives can be selected for locking and unlocking the doors and trunk:
All doors - all doors are locked or unlocked at the same time.
Doors on the same side - front and rear doors on the same side are unlocked together.
Both front doors - both front doors are unlocked together.
One front door - either of the front doors can be unlocked separately1.
Reset to factory settings
Use this alternative to return to the default climate system settings.
1Factory default
76 02 Instruments and controls
Home Link® Universal Transceiver (option)
Introduction
HomeLink1 is a system that can be programmed to learn the codes of three different remote controlled-devices (for
example, a garage door opener, remote lighting, entry gate). HomeLink's sun visor-mounted transceiver, powered by
your car's electrical system, may then be used in place of your handheld remote controls. The HomeLink transceiver
consists of three programmable buttons and an indicator light.
1 HomeLink is a registered trademark of Johnson Controls, Intl.
© JCI, All rights reserved
ProCarManuals.com