2007 VOLVO S40 key
[x] Cancel search: keyPage 124 of 208

N is the neutral position. The engine can be started, but no gear is selected. Apply the
136 06 Starting and driving
Automatic transmission
parking brake when the car is stationary with the gear selector in N .
NOTE
If the gear selector is in the Neutral position and the car has been at a standstill for at least 3 seconds (regardless of
whether the engine is running or not), the gear selector will be locked in Neutral.
In order to move the gear selector to another position:
1. Turn the ignition key to position II (if the engine is not already running).
2. Depress the brake pedal.
3. Move the gear selector to the desired position.
D - Drive
D is the normal driving position. The Drive position offers 5 forward gears
1.The car automatically shifts between the
various forward gears, based on the level of acceleration and speed. The car must be at a standstill when shifting to
position D from position R .
1 T5 models have 6 forward gears.
Manual shifting - Geartronic
The manual shifting mode (Geartronic) can be selected at any time to manually select forward gears, including while
the car is moving.
NOTE
Reverse, Neutral, and Park cannot be selected in Geartronic mode.
To access the ( M)anual shifting position from Drive ( D), move the gear selector to the right to M.
To return to the ( D)rive position from M , move the gear selector to the left.
While driving
If you select the M position while driving, the gear that was being used in the Drive position will also initially be
selected in the M position.
Move the gear selector forward (toward "+") to shift to a higher gear or rearward (toward "-") to shift to a lower
gear.
If you hold the gear selector toward "-", the transmission will downshift one gear at a time and will utilize the
braking power of the engine. If the current speed is too high for using a lower gear, the downshift will not occur until
the speed has decreased enough to allow the lower gear to be used.
If you slow to a very low speed, the transmission will automatically shift down.
W - Winter/Wet driving mode - enhanced vehicle traction
ProCarManuals.com
Page 125 of 208

Mode W reduces torque at the wheels, which helps improve traction when starting off on a slippery surface.
Press the button near the base of the gear selector to engage/disengage this driving mode.
A "W" will be displayed in the instrument panel when Winter/Wet driving mode is engaged.
Mode W will only function if the gear selector is in the Drive (D) position.
Once underway, turn off mode W to improve vehicle performance and fuel economy.
Cold starts (turbo engines)
When driving before the engine has reached its normal operating temperature, the transmission will shift up at slightly
higher engine speeds to heat the three-way catalytic converter as quickly as possible.
137 06 Starting and driving
Automatic transmission
Kickdown
Automatic shift to a lower gear (kickdown) is achieved by depressing the accelerator pedal fully and briskly. An
upshift will occur when approaching the top speed for a particular gear or by releasing the accelerator pedal slightly.
Kickdown can be used for maximum acceleration or when passing at highway speeds.
NOTE
The gear selector must be in the D (Drive) position for kickdown to function.
138 06 Starting and driving
Shiftlock override
Overriding the shiftlock system
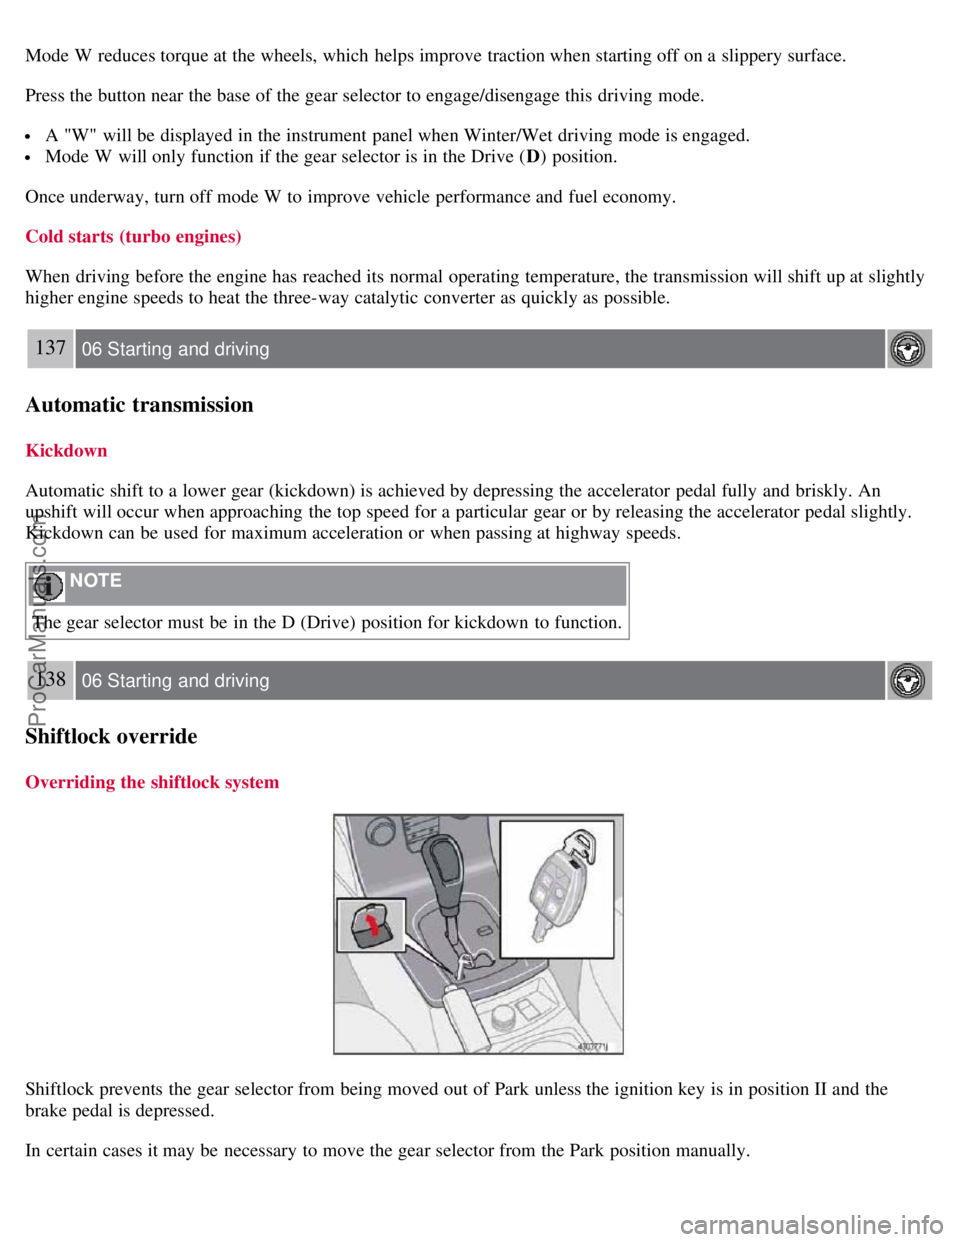
Shiftlock prevents the gear selector from being moved out of Park unless the ignition key is in position II and the
brake pedal is depressed.
In certain cases it may be necessary to move the gear selector from the Park position manually.
ProCarManuals.com
Page 126 of 208

To manually override the Shiftlock system:
1. Apply the parking brake.
2. Depress the brake pedal.
3. There is a small cover below P-R-N-D on the gear selector panel. Open the rear edge of the panel.
4. Insert the key blade (see page 109
) into the opening and press it down until it bottoms.
5. With the key blade pressed down, move the gear selector out of the P position.
139 06 Starting and driving
All Wheel Drive (option)
All Wheel Drive (AWD) - general information
Your Volvo can be equipped with permanent All Wheel Drive (option), which means that power is distributed
automatically between the front and rear wheels. Under normal driving conditions, most of the engine's power is
directed to the front wheels. However, if there is any tendency for the front wheels to spin, an electronically controlled
coupling distributes power to the wheels that have the best traction.
Tire dimensions
Volvo recommends that you always drive on tires of the same brand, size, construction (radial), tread pattern, load-,
speed-, traction- , temperature-, and treadwear rating. Never drive on mixed tires, except for brief periods when the
temporary spare tire is in use.
Always use properly inflated tires of correct dimensions. Tire size and inflation pressures are shown on a placard
located on the driver's side B-pillar (the structural member at the side of the vehicle, at the rear of the driver's door
opening). See also the tire inflation pressure tables beginning on page 158
.
Temporary Spare
The temporary spare tire is for temporary, low-speed, short-distance use only. Replace it with a full-sized tire as soon
as possible. Do not drive on the temporary spare at speeds above 50 m.p.h. (80 km/h) or for distances greater than 50
miles (80 km).
Never install snow chains on a temporary spare.
140 06 Starting and driving
Brake system
Brake circuit malfunction
The brake system is a hydraulic system consisting of two separate brake circuits. If a problem should occur in one of
these circuits, it is still possible to stop the vehicle with the other brake circuit.
If the brake pedal must be depressed farther than normal and requires greater foot pressure, the stopping distance will
be longer.
A warning light in the instrument panel will light up to warn the driver that a fault has occurred.
ProCarManuals.com
Page 131 of 208

The system has been temporarily switched off due to high brake temperature. "TRACTION CONTROL
TEMPORARILY OFF" will be displayed. The system will automatically switch on again when the brakes have cooled.
WARNING
The stability system is intended to help improve driving safety. It supplements, but can never replace, the driver's
judgement and responsibility when operating the vehicle. Speed and driving style should always be adapted to traffic
and road conditions.
144 06 Starting and driving
Towing
Emergency towing
The towing eyelet is located under the floor of the cargo area. This eyelet must be screwed into the positions provided
on the right sides of either the front or rear bumper (see illustrations).
To attach the towing eyelet:
1. Use a coin or screwdriver to pry open the lower edge of the cover.
2. Screw the towing eyelet in place first by hand and then using the tire iron until it is securely in place.
After the vehicle has been towed, the eyelet should be removed and returned to the tool bag. Press the cover back into
position.
Towing a vehicle with all four wheels on the ground
WARNING
Volvo does not recommend towing a disabled vehicle behind another vehicle. Significant difficulty in steering and
braking, combined with unfavorable weather, traffic, and road conditions may make it impossible to maintain vehicle
control.
1. Apply the parking brake.
2. Insert the key into the ignition to unlock the steering wheel. The steering wheel must be unlocked. With the engine
off and the vehicle at a standstill, great effort will be required to turn the steering wheel.
ProCarManuals.com
Page 132 of 208

WARNING
Towing a vehicle with a locked steering wheel will make the vehicle impossible to steer.
3. Turn the ignition key to position II.
4. Place the gear selector in neutral. For vehicles with automatic transmissions, follow instruction on page 138
,
"Shiftlock override" to allow the gear selector to be moved from the Park position.
5. Keep firm pressure on the brake pedal while releasing the parking brake.
6. When towing has been completed, return the gear selector to Park (automatic) or Reverse (manual) and apply the
parking brake.
The following points should also be observed:
Never exceed 50 mph (80 km/h) . Never exceed local towing speed limits and heed all local towing restrictions.
Never tow farther than 50 miles (80 km) .
Keep the tow rope taut at all times while the vehicle is in motion.
The disabled vehicle should be towed in the forward direction only.
145 06 Starting and driving
Towing
WARNING
Never allow a vehicle to be towed without a driver behind the wheel of the disabled vehicle.
Never remove the key from the ignition while the vehicle is moving. The steering wheel could lock, making it
impossible to steer the vehicle.
When the engine is not running, steering resistance and the effort needed to apply the brakes will be great.
Never attempt to tow a vehicle with a dead battery at night.
CAUTION
Check with state and local authorities before attempting this type of towing, as vehicles being towed are subject to
regulations regarding maximum towing speed, length and type of towing device, lighting, marker flags, etc.
Never attempt to push- or tow-start a vehicle with a dead battery. This would inject unburned fuel into the three-
way catalytic converter(s), causing overheating, backfiring, and damage. See page 146
for instructions on jump
starting the vehicle.
Towing vehicles with front wheel drive
ProCarManuals.com
Page 169 of 208

Battery
Battery maintenance
Driving habits and conditions, climate, the number of starts, etc., all affect the service life and function of the battery. In
order for your battery to perform satisfactorily, keep the following in mind:
Check the fluid level in each cell in the battery every 24 months or every 15,0001 miles (24,000 km), whichever is
sooner. The fluid should be at the level shown in the illustrations above (A). Do not overfill.
1More frequently in warm climates.
Use a screw driver to open the caps or cover and a flashlight to inspect the level.
If necessary, add distilled water. The level should never be above the indicator (A).
The fluid level should be checked if the battery has been recharged.
After inspection, be sure the cap over each battery cell or the cover is securely in place.
Check that the battery cables are correctly connected and properly tightened.
Never disconnect the battery when the engine is running, or when the key is in the ignition. This could damage the
vehicle's electrical system.
The battery should be disconnected from the vehicle when a battery charger is used directly on the battery.
WARNING
PROPOSITION 65 WARNING!
Battery posts, terminals, and related accessories contain lead and lead compounds, chemicals known to the state of
California to cause cancer and reproductive harm. Wash hands after handling.
194 09 Maintenance and servicing
ProCarManuals.com
Page 170 of 208

Battery
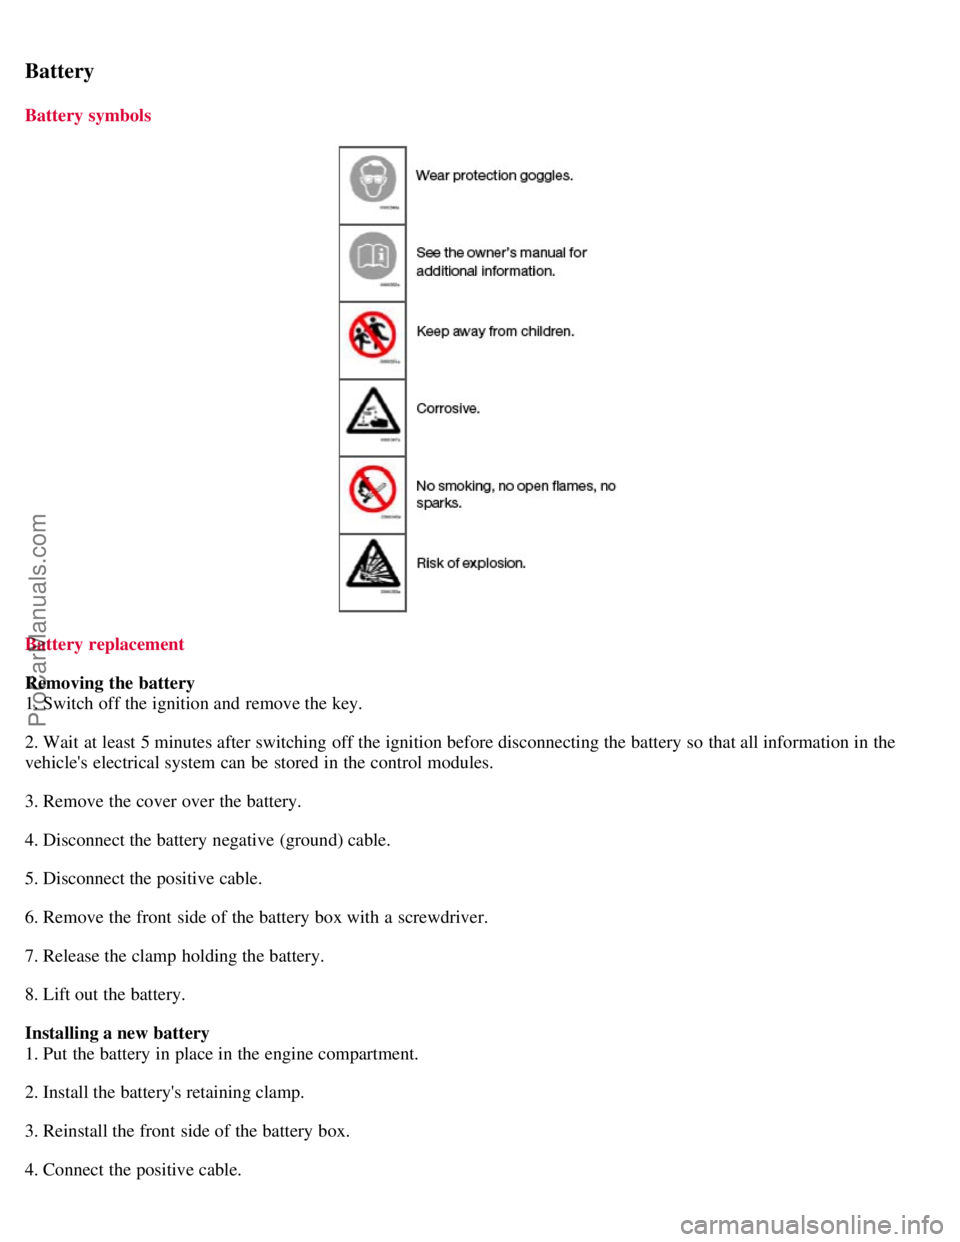
Battery symbols
Battery replacement
Removing the battery
1. Switch off the ignition and remove the key.
2. Wait at least 5 minutes after switching off the ignition before disconnecting the battery so that all information in the
vehicle's electrical system can be stored in the control modules.
3. Remove the cover over the battery.
4. Disconnect the battery negative (ground) cable.
5. Disconnect the positive cable.
6. Remove the front side of the battery box with a screwdriver.
7. Release the clamp holding the battery.
8. Lift out the battery.
Installing a new battery
1. Put the battery in place in the engine compartment.
2. Install the battery's retaining clamp.
3. Reinstall the front side of the battery box.
4. Connect the positive cable.
ProCarManuals.com
Page 172 of 208

- High-mounted brake lights
- Bi -Xenon headlights
196 09 Maintenance and servicing
Replacing front bulbs
Removing the headlight housing
The entire headlight housing must be lifted out when replacing the high/low beam, parking light, turn signal, and side
marker bulbs. To lift out the housing:
1. Remove the key from the ignition and turn the headlight switch to position 0.
2. Open the hood.
3. Pull up the headlight housing's retaining pin (1)
4. Pull the headlight housing to one side and then forward (2).
5. Disconnect the wiring connector.
6. Lift out the headlight housing and place it on a soft surface to avoid scratching the lens.
After the defective bulb has been replaced, reinsert the housing in the reverse order. Check that the retaining pin is
correctly inserted.
WARNING
Bi -Xenon headlights (option) - due to the high voltage used by these headlights, these bulbs should only be replaced by
an authorized Volvo service technician.
Low beam bulb
ProCarManuals.com