2007 VOLVO S40 four wheel drive
[x] Cancel search: four wheel drivePage 60 of 208

when the this function is activated.
66 02 Instruments and controls
Steering wheel adjustment, Hazard warning flashers
Steering wheel adjustment
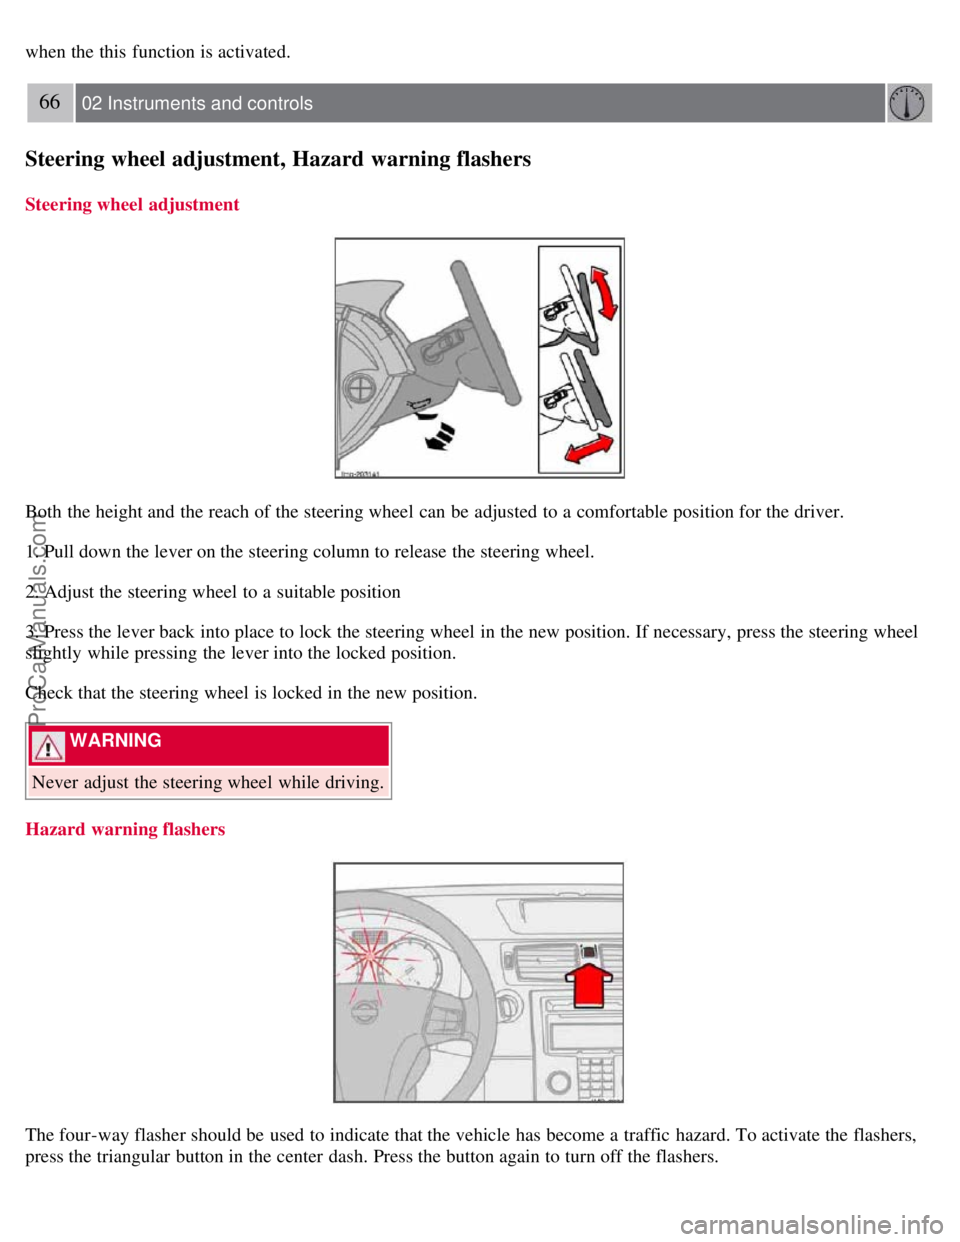
Both the height and the reach of the steering wheel can be adjusted to a comfortable position for the driver.
1. Pull down the lever on the steering column to release the steering wheel.
2. Adjust the steering wheel to a suitable position
3. Press the lever back into place to lock the steering wheel in the new position. If necessary, press the steering wheel
slightly while pressing the lever into the locked position.
Check that the steering wheel is locked in the new position.
WARNING
Never adjust the steering wheel while driving.
Hazard warning flashers
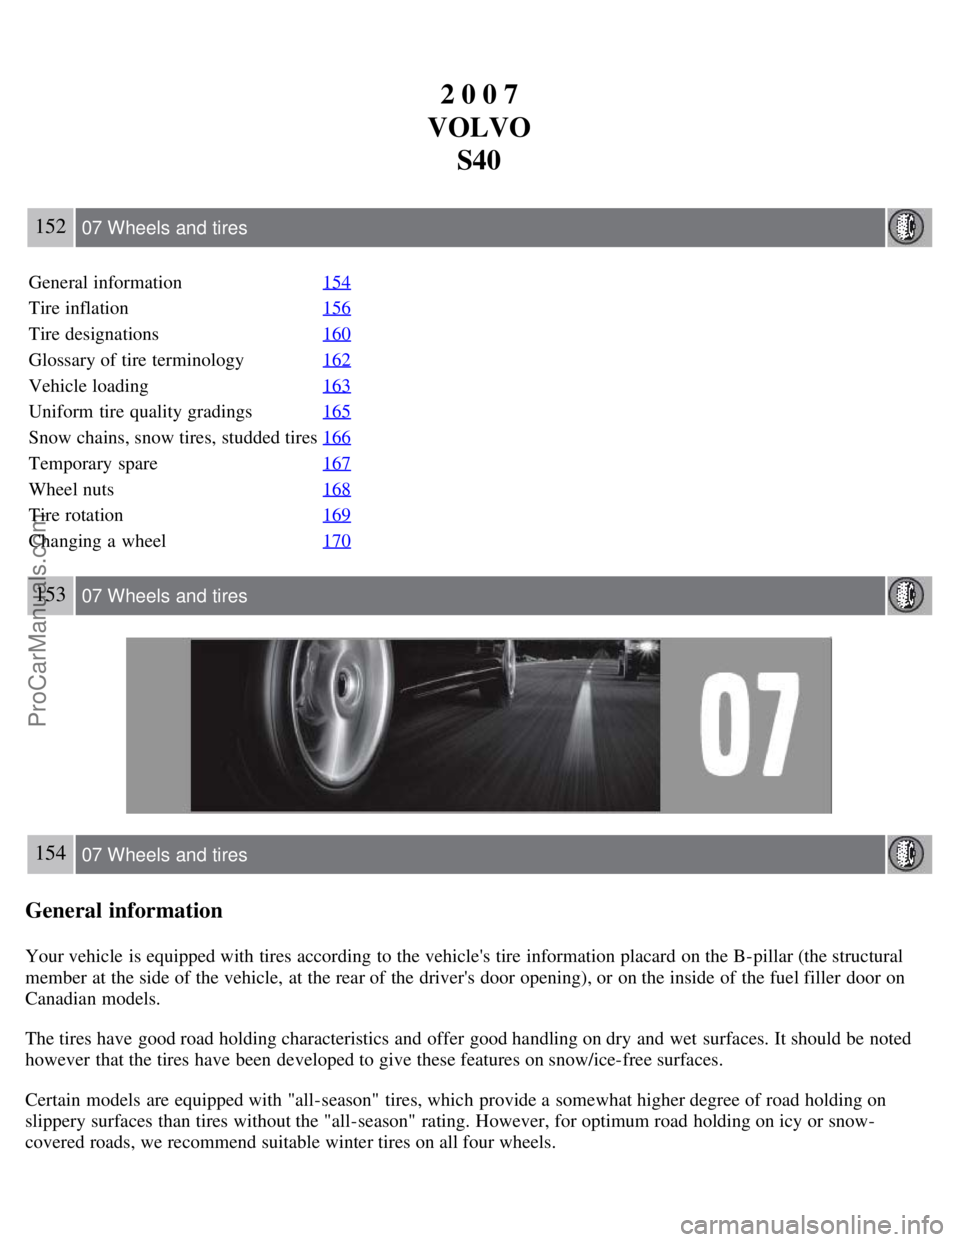
The four-way flasher should be used to indicate that the vehicle has become a traffic hazard. To activate the flashers,
press the triangular button in the center dash. Press the button again to turn off the flashers.
ProCarManuals.com
Page 112 of 208

Volvo recommends the use of snow tires on all four wheels for winter driving - see the chapter "Wheels and tires."
To prevent the washer fluid reservoir from freezing, add washer solvents containing antifreeze (see age 188 for the
location of the washer fluid reservoir). This is important since dirt is often splashed on the windshield during winter
driving, requiring the frequent use of the washers and wipers. Volvo Washer Solvent should be diluted as follows:
Down to 14° F (-10° C): 1 part washer solvent and 4 parts water Down to 5° F (-15° C): 1 part washer solvent and 3
parts water Down to 0° F (- 18° C): 1 part washer solvent and 2 parts water Down to -18° F (-28° C): 1 part washer
solvent and 1 part water.
Use Volvo Teflon Lock Spray in the locks.
NOTE
Avoid using de -icing sprays as they can cause damage to the locks.
Conserving electrical current
Keep the following in mind to help minimize battery drain:
When the engine is not running, avoid turning the ignition key to position II. Many electrical systems (the audio
system, the optional navigation system, power windows, etc) will function with the ignition key in position I. This
position reduces drain on the battery.
Please keep in mind that using systems, accessories, etc that consume a great deal of current when the engine is not
running could result in the battery being completely drained.
The optional 12-volt socket in the cargo area provides electrical current even with the ignition switched off, which
drains the battery.
NOTE
If the ignition is switched on, a warning message will be displayed in the text window in the instrument panel
when the battery charge is low.
An energy conserving function designed into the vehicle's electrical system will switch off certain functions or
reduce the load on the battery by, e.g., reducing the audio system's volume.
Before a long distance trip
It is always worthwhile to have your vehicle checked at a Volvo retailer before driving long distances. Your retailer
will also be able to supply you with bulbs, fuses, spark plugs and wiper blades for your use in the event that problems
occur.
As a minimum, the following items should be checked before any long trip:
Check that engine runs smoothly and that fuel consumption is normal.
Check for fuel, oil, and fluid leakage
Have the transmission oil level checked1.
Check condition of drive belts.
Check state of the battery's charge.
Examine tires carefully (the spare tire as well), and replace those that are worn. Check tire pressures.
The brakes, front wheel alignment, and steering gear should be checked by your Volvo retailer only.
Check all lights, including high beams.
Reflective warning triangles are legally required in some states/provinces.
Have a word with your Volvo retailer if you intend to drive in countries where it may be difficult to obtain the
correct fuel.
Consider your destination. If you will be driving through an area where snow or ice are likely to occur, consider
snow tires.
ProCarManuals.com
Page 131 of 208

The system has been temporarily switched off due to high brake temperature. "TRACTION CONTROL
TEMPORARILY OFF" will be displayed. The system will automatically switch on again when the brakes have cooled.
WARNING
The stability system is intended to help improve driving safety. It supplements, but can never replace, the driver's
judgement and responsibility when operating the vehicle. Speed and driving style should always be adapted to traffic
and road conditions.
144 06 Starting and driving
Towing
Emergency towing
The towing eyelet is located under the floor of the cargo area. This eyelet must be screwed into the positions provided
on the right sides of either the front or rear bumper (see illustrations).
To attach the towing eyelet:
1. Use a coin or screwdriver to pry open the lower edge of the cover.
2. Screw the towing eyelet in place first by hand and then using the tire iron until it is securely in place.
After the vehicle has been towed, the eyelet should be removed and returned to the tool bag. Press the cover back into
position.
Towing a vehicle with all four wheels on the ground
WARNING
Volvo does not recommend towing a disabled vehicle behind another vehicle. Significant difficulty in steering and
braking, combined with unfavorable weather, traffic, and road conditions may make it impossible to maintain vehicle
control.
1. Apply the parking brake.
2. Insert the key into the ignition to unlock the steering wheel. The steering wheel must be unlocked. With the engine
off and the vehicle at a standstill, great effort will be required to turn the steering wheel.
ProCarManuals.com
Page 139 of 208

2 0 0 7
VOLVO S40
152 07 Wheels and tires
General information 154
Tire inflation156
Tire designations160
Glossary of tire terminology162
Vehicle loading163
Uniform tire quality gradings165
Snow chains, snow tires, studded tires166
Temporary spare167
Wheel nuts168
Tire rotation169
Changing a wheel170
153 07 Wheels and tires
154 07 Wheels and tires
General information
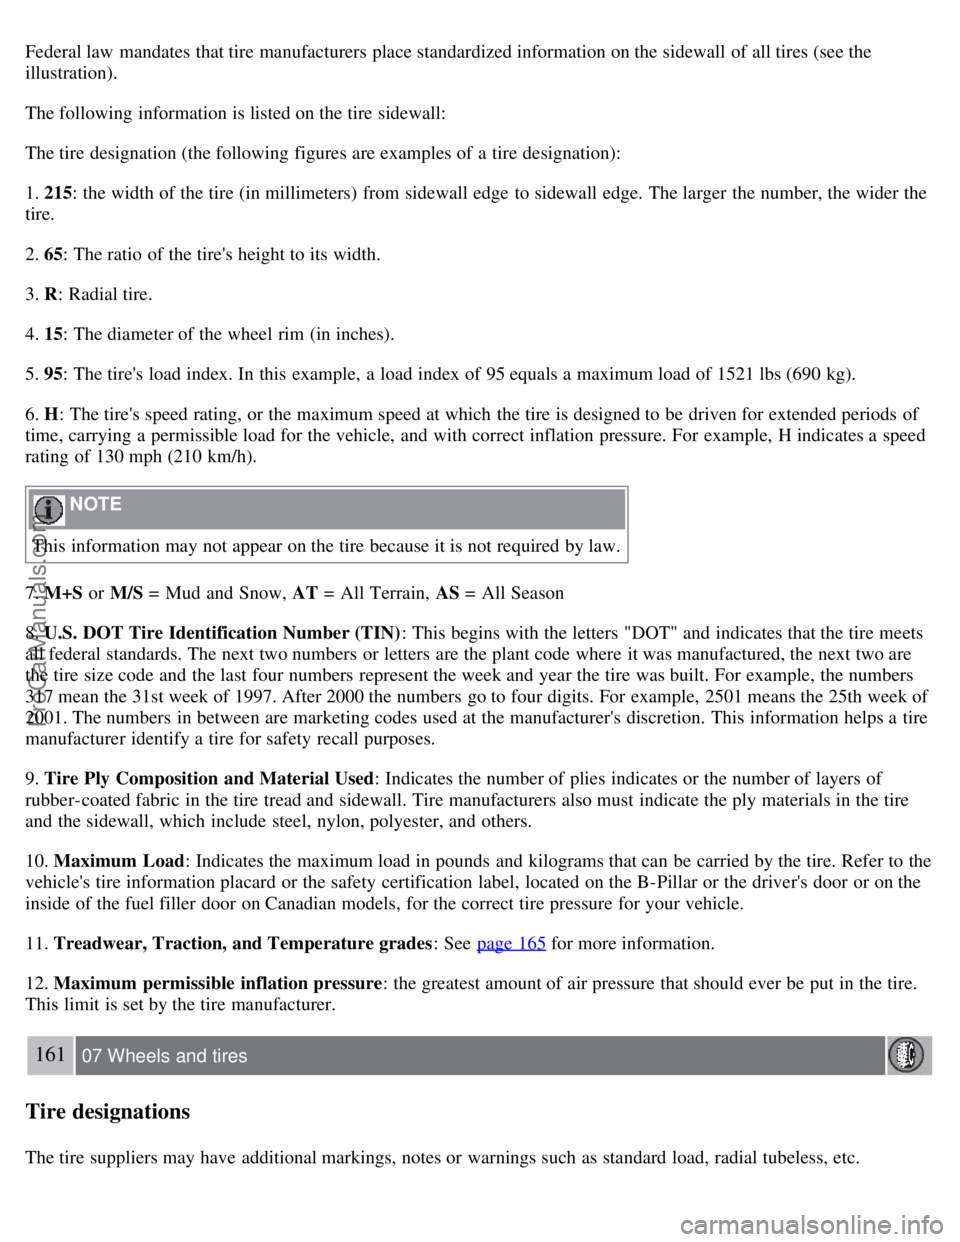
Your vehicle is equipped with tires according to the vehicle's tire information placard on the B-pillar (the structural
member at the side of the vehicle, at the rear of the driver's door opening), or on the inside of the fuel filler door on
Canadian models.
The tires have good road holding characteristics and offer good handling on dry and wet surfaces. It should be noted
however that the tires have been developed to give these features on snow/ice-free surfaces.
Certain models are equipped with "all-season" tires, which provide a somewhat higher degree of road holding on
slippery surfaces than tires without the "all-season" rating. However, for optimum road holding on icy or snow-
covered roads, we recommend suitable winter tires on all four wheels.
ProCarManuals.com
Page 145 of 208

Federal law mandates that tire manufacturers place standardized information on the sidewall of all tires (see the
illustration).
The following information is listed on the tire sidewall:
The tire designation (the following figures are examples of a tire designation):
1. 215: the width of the tire (in millimeters) from sidewall edge to sidewall edge. The larger the number, the wider the
tire.
2. 65: The ratio of the tire's height to its width.
3. R: Radial tire.
4. 15: The diameter of the wheel rim (in inches).
5. 95: The tire's load index. In this example, a load index of 95 equals a maximum load of 1521 lbs (690 kg).
6. H : The tire's speed rating, or the maximum speed at which the tire is designed to be driven for extended periods of
time, carrying a permissible load for the vehicle, and with correct inflation pressure. For example, H indicates a speed
rating of 130 mph (210 km/h).
NOTE
This information may not appear on the tire because it is not required by law.
7. M+S or M/S = Mud and Snow, AT = All Terrain, AS = All Season
8. U.S. DOT Tire Identification Number (TIN) : This begins with the letters "DOT" and indicates that the tire meets
all federal standards. The next two numbers or letters are the plant code where it was manufactured, the next two are
the tire size code and the last four numbers represent the week and year the tire was built. For example, the numbers
317 mean the 31st week of 1997. After 2000 the numbers go to four digits. For example, 2501 means the 25th week of
2001. The numbers in between are marketing codes used at the manufacturer's discretion. This information helps a tire
manufacturer identify a tire for safety recall purposes.
9. Tire Ply Composition and Material Used : Indicates the number of plies indicates or the number of layers of
rubber-coated fabric in the tire tread and sidewall. Tire manufacturers also must indicate the ply materials in the tire
and the sidewall, which include steel, nylon, polyester, and others.
10. Maximum Load : Indicates the maximum load in pounds and kilograms that can be carried by the tire. Refer to the
vehicle's tire information placard or the safety certification label, located on the B-Pillar or the driver's door or on the
inside of the fuel filler door on Canadian models, for the correct tire pressure for your vehicle.
11. Treadwear, Traction, and Temperature grades : See page 165
for more information.
12. Maximum permissible inflation pressure : the greatest amount of air pressure that should ever be put in the tire.
This limit is set by the tire manufacturer.
161 07 Wheels and tires
Tire designations
The tire suppliers may have additional markings, notes or warnings such as standard load, radial tubeless, etc.
ProCarManuals.com
Page 149 of 208

Snow chains, snow tires, studded tires
Snow chains
Snow chains can be used on your Volvo with the following restrictions:
Snow chains should be installed on front wheels only. Use only Volvo approved snow chains.
If accessory, aftermarket or "custom" tires and wheels are installed and are of a size different than the original tires
and wheels, chains in some cases CANNOT be used. Sufficient clearances between chains and brakes, suspension and
body components must be maintained.
Some strap -on type chains will interfere with brake components and therefore CANNOT be used.
All Wheel Drive models: Snow chains should only be installed on the front wheels. Only chains adapted for AWD
models should be used.
Consult your Volvo retailer for additional snow chain information.
CAUTION
Check local regulations regarding the use of snow chains before installing.
Always follow the chain manufacturer's installation instructions carefully. Install chains as tightly as possible and
retighten periodically.
Never exceed the chain manufacturer's specified maximum speed limit. (Under no circumstances should you
exceed 31 mph (50 km/h).
Avoid bumps, holes or sharp turns when driving with snow chains.
The handling of the vehicle can be adversely affected when driving with chains. Avoid fast or sharp turns as well
as locked wheel braking.
Snow tires, studded tires
Tires for winter use:
Owners who live in or regularly commute through areas with sustained periods of snow or icy driving conditions are
strongly advised to fit suitable winter tires to help retain the highest degree of traction.
It is important to install winter tires on all four wheels to help retain traction during cornering, braking, and
accelerating. Failure to do so could reduce traction to an unsafe level or adversely affect handling.
Do not mix tires of different design as this could also negatively affect overall tire road grip.
Winter tires wear more quickly on dry roads in warm weather. They should be removed when the winter driving
season has ended.
Studded tires should be run-in 300-600 miles (500-1000 km) during which the car should be driven as smoothly as
possible to give the studs the opportunity to seat properly in the tires. The tires should have the same rotational
direction throughout their entire lifetime.
NOTE
Please consult state or provincial regulations restricting the use of studded winter tires before installing such tires.
167 07 Wheels and tires
Temporary spare
Temporary spare
ProCarManuals.com