2007 VOLVO S40 audio
[x] Cancel search: audioPage 4 of 208

09 Maintenance and servicing
Volvo maintenance184
Maintaining your car185
Hood and engine compartment187
Engine oil189
Fluids190
Wiper blades192
Battery193
Bulbs195
Replacing front bulbs196
Replacing taillight bulbs200
Replacing interior bulbs201
Fuses202
10 Audio
Audio functions 210
Radio functions213
Sirius satellite radio (option or
retailer-installed accessory)215
CD player/CD changer (option)
219
Audio menu223
11 Specifications
Label information226
Dimensions and weights228
Engine oil231
Engine specifications233
Electrical system234
Volvo programs236
6 01 Safety
General information
Shiftlock (automatic transmission)
When your car is parked, the gear selector is locked in the Park ( P) position. To release the selector from this position,
turn the ignition key to position II (or start the engine), depress the brake pedal, press the button on the front side of the
gear selector and move the selector from Park ( P).
Keylock (automatic transmission)
When the ignition is switched off, the gear selector must be in the Park ( P) position before the key can be removed
from the ignition switch.
Anti-lock Brake System (ABS)
The ABS system in your car performs a selfdiagnostic test when the vehicle first reaches the speed of approximately
12 mph (20 km/h). The brake pedal will pulsate several times and a sound may be audible from the ABS control
module. This is normal.
Fuel filler door
Press the button on the light switch panel when the car is at a standstill to open the fuel filler door.
Fuel filler cap
After refueling, close the fuel filler cap by turning it clockwise until it clicks into place. If this cap is not closed tightly
or if the engine is running when the car is refueled, the Malfunction Indicator Lamp ("Check Engine" light) may
indicate a fault.
Points to keep in mind
Before you operate your vehicle for the first time, please familiarize yourself with the new-engine oil consumption
information on page 189
. You should also be familiar with the information found in the chapters "Instruments and
controls," and "Starting and driving."
Information contained in the balance of the manual is extremely useful and should be read after operating the
vehicle for the first time.
The manual is structured so that it can be used for reference. For this reason, it should be kept in the vehicle for
ProCarManuals.com
Page 7 of 208

has not tested, or if you allow accessories to be installed by someone unfamiliar with your car.
Damage caused by unapproved or improperly installed accessories may not be covered by your new car warranty.
See your Warranty and Service Records Information booklet for more warranty information. Volvo assumes no
responsibility for death, injury, or expenses that may result from the installation of non-genuine accessories.
Driver distraction
Driver distraction results from driver activities that are not directly related to controlling the car in the driving
environment. Your new Volvo is, or can be, equipped with many feature- rich entertainment and communication
systems. These include hands-free cellular telephones, navigation systems, and multipurpose audio systems. You may
also own other portable electronic devices for your own convenience. When used properly and safely, they enrich the
driving experience. Improperly used, any of these could cause a distraction.
For all of these systems, we want to provide the following warning that reflects the strong Volvo concern for your
safety:
Never use these devices or any feature of your vehicle in a way that distracts you from the task of driving safely.
Distraction can lead to a serious accident.
In addition to this general warning, we offer the following guidance regarding specific newer features that may be
found in your vehicle:
Never use a hand -held cellular telephone while driving. Some jurisdictions prohibit cellular telephone use by a
driver while the vehicle is moving.
If your car is equipped with a navigation system, set and make changes to your travel itinerary only with the vehicle
parked.
Never program your audio system while the vehicle is moving. Program radio presets with the vehicle parked, and
use your programmed presets to make radio use quicker and simpler.
Never use portable computers or personal digital assistants while the vehicle is moving.
A driver has a responsibility to do everything possible to ensure his or her own safety and the safety of passengers in
the vehicle and others sharing the roadway. Avoiding distractions is part of that responsibility.
Contents | Top of Page
ProCarManuals.com
Page 41 of 208

47 02 Instruments and controls
Instrument overview
1. Steering wheel adjustment66
2. Hood opener187
3. Controls in front doors(see inset illustration at next page)
4. Left steering wheel lever60
5. Lighting panel58
6. Door open handle and locking button115
7. Climate system air vent84
8. Side window air vent84
9. Cruise control63
10. Horn, airbag18
11. Main instrument panel49
12. Audio controls (option)211
13. Right steering wheel lever64
14. Ignition switch128
15. Moonroof control (option)72
16. Not in use
17. Movement detector (option), alarm sensor118
18. Courtesy lighting switch97
19. Driver's side reading light97
20. Passenger's side reading light97
21. Seat belt reminder53
ProCarManuals.com
Page 42 of 208

22. Rear-view mirror70
23. Display for climate control, personal settings, and audio system74/210
24. Audio system 210
25. Controls for personal settings and audio system74/210
26. Controls for climate system 85/87
27. Gear selector, manual 133-134
Gear selector, automatic135
28. Hazard warning flashers66
29. Door open handle, and locking button115
30. Glove compartment100/116
31. Parking brake 67
32. 12-volt socket57
33. Not in use
34. Not in use
48 02 Instruments and controls
Instrument overview
Control panel in driver's door
1. Lockout switch for rear windows68
2. Power windows68
3. Door mirror button, driver's side71
4. Door mirror adjustment control71
5. Door mirror button, passenger's side71
49 02 Instruments and controls
Instrument panel
Instrument panel
ProCarManuals.com
Page 70 of 208

Personal settings can be made for some of the car's functions, such as the central locking system, climate control, and
the audio system. Please refer to the audio information beginning on page 210
for more information on the audio
functions that can be adjusted. The settings are presented in the display (A).
To access the menu and adjust settings:
1. Press MENU (B).
2. Scroll to "Car Settings" using the menu navigation control (E).
3. Press ENTER (D).
4. Select an alternative using the menu navigation control (E).
5. Confirm your selection by pressing ENTER.
To exit the menu:
Press EXIT (C).
Available settings
Lock confirmation light
When the car is locked/unlocked with the remote control, the direction indicators can be selected to flash to confirm
the action. The alternatives On/Off are available for both locking and unlocking.
Autolock
When the car starts to move, the doors and trunk can be locked automatically. The alternatives On/Off are available.
NOTE
Pulling the handle twice on a door unlocks and opens that door.
Unlock
There are two alternatives for unlocking:
1. Global (All doors) - unlocks all doors and the trunk with one press on the remote control.
2. Two Step (Two-stage unlocking) - This alternative unlocks the driver's door with one press on the remote control. A
second press unlocks the passenger's door and the trunk.
75 02 Instruments and controls
Personal settings
Approach lighting
This alternative determines the length of time for which the car's lights will remain on when the Approach light button
on the central locking system's remote control is pressed. Intervals of 30/60/90 seconds may be selected. See page 107
for more information.
Home safe lighting
This alternative determines the length of time for which the car's lights will remain on when the high beam lever on the
steering column is pulled toward the wheel with the ignition switched off. Intervals of 30/60/90 seconds may be
selected. See page 60
for information on using this function.
ProCarManuals.com
Page 112 of 208

Volvo recommends the use of snow tires on all four wheels for winter driving - see the chapter "Wheels and tires."
To prevent the washer fluid reservoir from freezing, add washer solvents containing antifreeze (see age 188 for the
location of the washer fluid reservoir). This is important since dirt is often splashed on the windshield during winter
driving, requiring the frequent use of the washers and wipers. Volvo Washer Solvent should be diluted as follows:
Down to 14° F (-10° C): 1 part washer solvent and 4 parts water Down to 5° F (-15° C): 1 part washer solvent and 3
parts water Down to 0° F (- 18° C): 1 part washer solvent and 2 parts water Down to -18° F (-28° C): 1 part washer
solvent and 1 part water.
Use Volvo Teflon Lock Spray in the locks.
NOTE
Avoid using de -icing sprays as they can cause damage to the locks.
Conserving electrical current
Keep the following in mind to help minimize battery drain:
When the engine is not running, avoid turning the ignition key to position II. Many electrical systems (the audio
system, the optional navigation system, power windows, etc) will function with the ignition key in position I. This
position reduces drain on the battery.
Please keep in mind that using systems, accessories, etc that consume a great deal of current when the engine is not
running could result in the battery being completely drained.
The optional 12-volt socket in the cargo area provides electrical current even with the ignition switched off, which
drains the battery.
NOTE
If the ignition is switched on, a warning message will be displayed in the text window in the instrument panel
when the battery charge is low.
An energy conserving function designed into the vehicle's electrical system will switch off certain functions or
reduce the load on the battery by, e.g., reducing the audio system's volume.
Before a long distance trip
It is always worthwhile to have your vehicle checked at a Volvo retailer before driving long distances. Your retailer
will also be able to supply you with bulbs, fuses, spark plugs and wiper blades for your use in the event that problems
occur.
As a minimum, the following items should be checked before any long trip:
Check that engine runs smoothly and that fuel consumption is normal.
Check for fuel, oil, and fluid leakage
Have the transmission oil level checked1.
Check condition of drive belts.
Check state of the battery's charge.
Examine tires carefully (the spare tire as well), and replace those that are worn. Check tire pressures.
The brakes, front wheel alignment, and steering gear should be checked by your Volvo retailer only.
Check all lights, including high beams.
Reflective warning triangles are legally required in some states/provinces.
Have a word with your Volvo retailer if you intend to drive in countries where it may be difficult to obtain the
correct fuel.
Consider your destination. If you will be driving through an area where snow or ice are likely to occur, consider
snow tires.
ProCarManuals.com
Page 183 of 208

2 0 0 7
VOLVO S40
208 10 Audio
Audio functions 210
Radio functions213
Sirius satellite radio (option or retailer-installed accessory)215
CD player/CD changer (option)219
Audio menu223
209 10 Audio
210 10 Audio
Audio functions
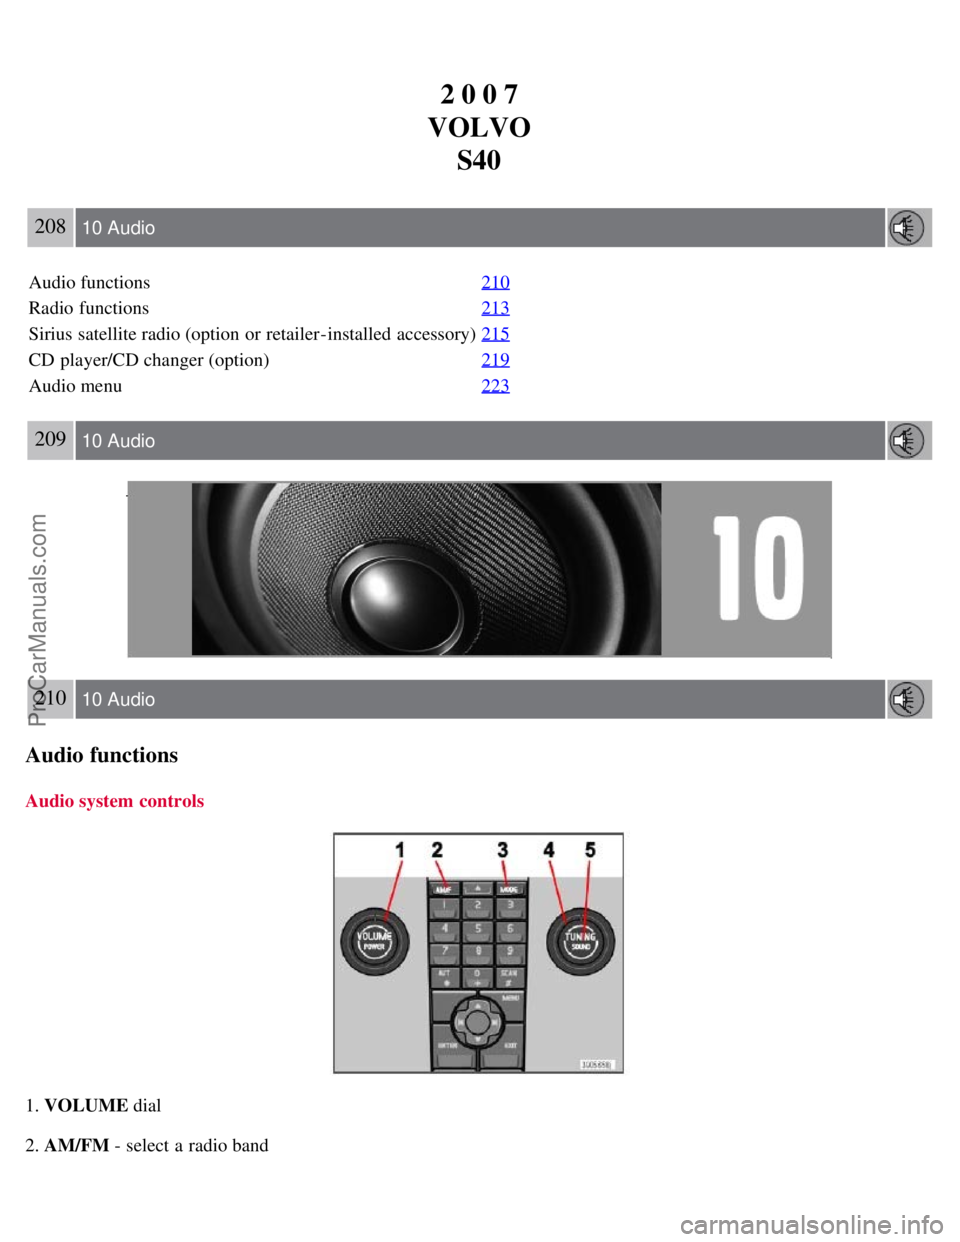
Audio system controls
1. VOLUME dial
2. AM/FM - select a radio band
ProCarManuals.com
Page 184 of 208

3. MODE - select a sound source
4. TUNING dial
5. SOUND button
Selecting a sound source
Press AM/FM (2) repeatedly to toggle between FM1, FM2, and AM.
Press MODE (3) repeatedly to toggle between the CD player and the optional external sound source AUX or the
optional Sirius satellite radio.
The currently selected sound source will be shown in the display.
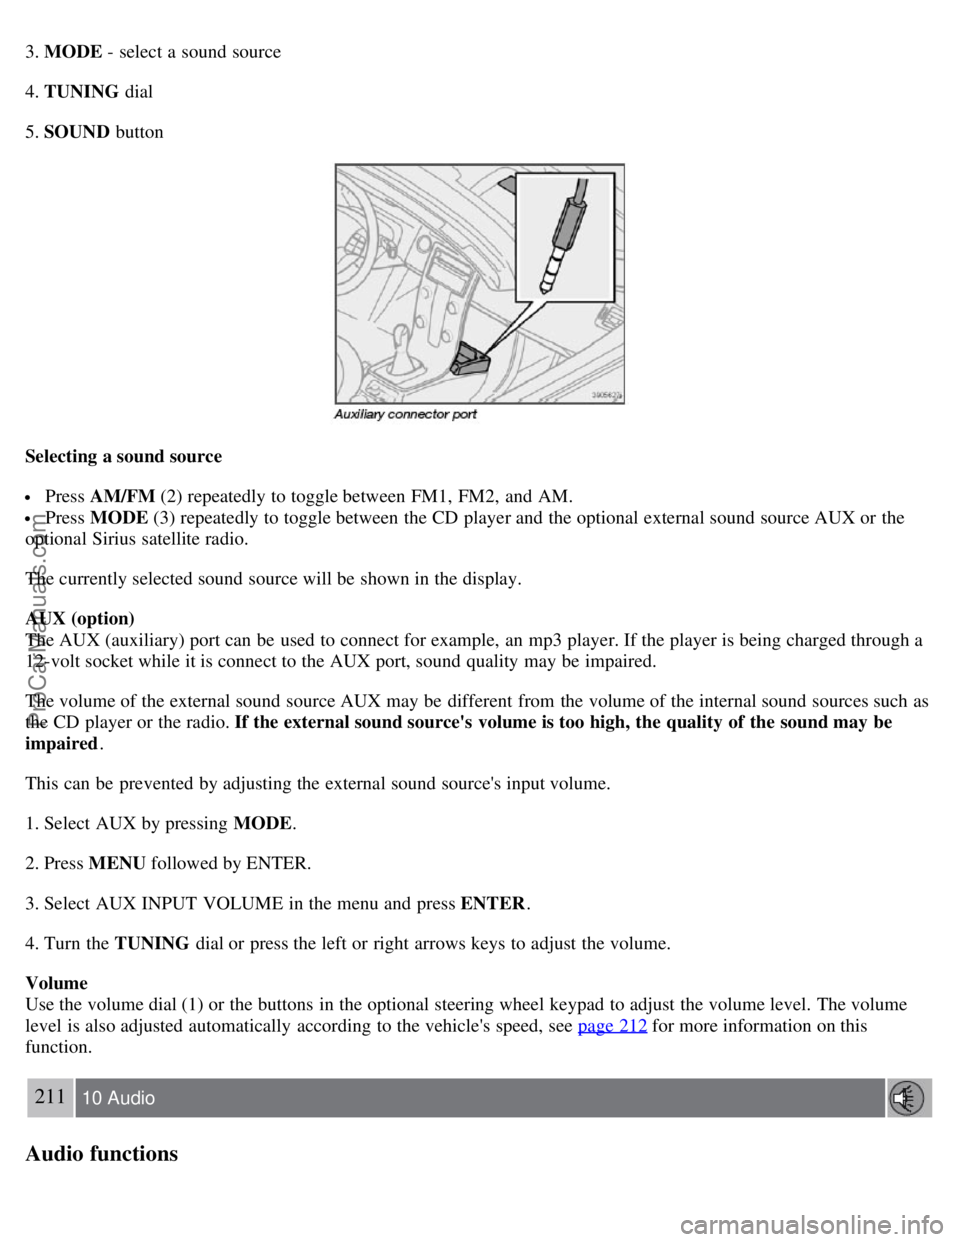
AUX (option)
The AUX (auxiliary) port can be used to connect for example, an mp3 player. If the player is being charged through a
12-volt socket while it is connect to the AUX port, sound quality may be impaired.
The volume of the external sound source AUX may be different from the volume of the internal sound sources such as
the CD player or the radio. If the external sound source's volume is too high, the quality of the sound may be
impaired .
This can be prevented by adjusting the external sound source's input volume.
1. Select AUX by pressing MODE .
2. Press MENU followed by ENTER.
3. Select AUX INPUT VOLUME in the menu and press ENTER .
4. Turn the TUNING dial or press the left or right arrows keys to adjust the volume.
Volume
Use the volume dial (1) or the buttons in the optional steering wheel keypad to adjust the volume level. The volume
level is also adjusted automatically according to the vehicle's speed, see page 212
for more information on this
function.
211 10 Audio
Audio functions
ProCarManuals.com