2007 VOLVO S40 reset
[x] Cancel search: resetPage 7 of 208

has not tested, or if you allow accessories to be installed by someone unfamiliar with your car.
Damage caused by unapproved or improperly installed accessories may not be covered by your new car warranty.
See your Warranty and Service Records Information booklet for more warranty information. Volvo assumes no
responsibility for death, injury, or expenses that may result from the installation of non-genuine accessories.
Driver distraction
Driver distraction results from driver activities that are not directly related to controlling the car in the driving
environment. Your new Volvo is, or can be, equipped with many feature- rich entertainment and communication
systems. These include hands-free cellular telephones, navigation systems, and multipurpose audio systems. You may
also own other portable electronic devices for your own convenience. When used properly and safely, they enrich the
driving experience. Improperly used, any of these could cause a distraction.
For all of these systems, we want to provide the following warning that reflects the strong Volvo concern for your
safety:
Never use these devices or any feature of your vehicle in a way that distracts you from the task of driving safely.
Distraction can lead to a serious accident.
In addition to this general warning, we offer the following guidance regarding specific newer features that may be
found in your vehicle:
Never use a hand -held cellular telephone while driving. Some jurisdictions prohibit cellular telephone use by a
driver while the vehicle is moving.
If your car is equipped with a navigation system, set and make changes to your travel itinerary only with the vehicle
parked.
Never program your audio system while the vehicle is moving. Program radio presets with the vehicle parked, and
use your programmed presets to make radio use quicker and simpler.
Never use portable computers or personal digital assistants while the vehicle is moving.
A driver has a responsibility to do everything possible to ensure his or her own safety and the safety of passengers in
the vehicle and others sharing the roadway. Avoiding distractions is part of that responsibility.
Contents | Top of Page
ProCarManuals.com
Page 26 of 208

Never attempt to repair the vehicle yourself or to reset the electrical system after the vehicle has displayed
CRASH MODE SEE MANUAL. This could result in injury or improper system function.
Restoring the vehicle to normal operating mode should only be done by a trained and qualified Volvo service
technician.
After CRASH MODE SEE MANUAL has been displayed, if you detect the odor of fuel vapor, or see any signs of
fuel leakage, do not attempt to start the vehicle. Leave the vehicle immediately.
Attempting to start the vehicle
If damage to the vehicle is minor and there is no fuel leakage, you may attempt to start the vehicle. To do so:
1. Remove the ignition key or optional keyless drive start control (see page 131
).
2. Reinsert the key or start control in the ignition switch. The vehicle will then attempt to reset CRASH MODE to
normal mode.
3. Try to start the vehicle.
Moving the vehicle
If the electrical system is able to reset system status to normal (CRASH MODE SEE MANUAL will no longer be
displayed), the vehicle may be moved carefully from its present position, if for example, it is blocking traffic. It
should, however, not be moved farther than is absolutely necessary.
WARNING
Even if the vehicle appears to be drivable after CRASH MODE has been set, it should not be driven or towed
(pulled by another vehicle). There may be concealed damage that could make it difficult or impossible to control.
The vehicle should be transported on a flatbed tow truck to a trained and qualified Volvo service technician for
inspection/ repairs.
30 01 Safety
Child safety
Children should be seated safely
Volvo recommends the proper use of restraint systems for all occupants including children. Remember that, regardless
of age and size, a child should always be properly restrained in a car.
Your car is also equipped with ISOFIX/LATCH attachments, which make it more convenient to install child seats.
Some restraint systems for children are designed to be secured in the vehicle by lap belts or the lap portion of a lap-
shoulder belt. Such child restraint systems can help protect children in cars in the event of an accident only if they are
used properly. However, children could be endangered in a crash if the child restraints are not properly secured in the
vehicle. Failure to follow the installation instructions for your child restraint can result in your child striking the
vehicle's interior in a sudden stop.
Holding a child in your arms is NOT a suitable substitute for a child restraint system. In an accident, a child held in a
person's arms can be crushed between the vehicle's interior and an unrestrained person. The child could also be injured
by striking the interior, or by being ejected from the vehicle during a sudden maneuver or impact. The same can also
happen if the infant or child rides unrestrained on the seat. Other occupants should also be properly restrained to help
reduce the chance of injuring or increasing the injury of a child.
All states and provinces have legislation governing how and where children should be carried in a car. Find out the
ProCarManuals.com
Page 43 of 208

1. Speedometer
2. Turn signal, left
3. Warning symbol - See the following pages for additional information.
4. Information display - The display presents information and warning messages, the ambient temperature, and the
clock, etc. When the ambient temperature is between 23° and 36°F (-5° and +2°C), a snowflake symbol is shown in
the display. This symbol serves as a warning for possible slippery road surfaces. Please note that this symbol does not
indicate a fault with your car. At low speeds, or when the car is not moving, the temperature readings may be slightly
higher than the actual ambient temperature.
5. Information symbol - See the next pages for additional information.
6. Turn signal, right
7. Tachometer - Shows engine speed in thousands of revolutions per minute (rpm). Do not drive continuously with the
needle in the red area of the dial, which indicates maximum allowable engine rpm range. Instead, shift to a higher gear
or slow the vehicle down. The engine management system will automatically prevent excessively high engines speeds.
This will be noticeable as a pronounced unevenness in engine speed.
8. Indicator and warning symbols
9. The fuel tank holds approximately 15.9 US gallons (60 liters). When a warning light in the gauge comes on, there
are approximately 2.1 US gallons (8 liters) of fuel remaining in the tank
1.
10. Trip odometer reset button - The trip odometers are used to measure short distances. Press the button briefly to
1Models with All Wheel Drive have a tank volume of 15 US gallons (57 liters). Models with engine code 39 have a fuel tank capacity of 14 US
gallons (53 liters). This code is the 6th and 7th digits from the left in your vehicle's VIN number. See page 226
for the location of the VIN plate.
50 02 Instruments and controls
Instrument panel
switch between the odometer for the car's total mileage and the two trip odometers, T1 and T2. A long press (more
than 2 seconds) resets the currently selected trip odometer.
11. Function display - This window displays information on functions such as the odometer, trip odometers, optional
rain sensor, and cruise control.
ProCarManuals.com
Page 55 of 208

Controls
The trip computer functions can be accessed by twisting INFO (B) one step at a time in either direction. Twisting a
final time returns you to the original function.
The trip computer can be reset (average fuel consumption and average speed will be erased from system memory) by
pressing RESET (C) for at least five seconds.
MILES TO EMPTY TANK
This function shows the approximate distance that can be driven on the fuel remaining in the tank. This calculation is
based on average fuel consumption during the last 20 miles (30 km) of driving and the amount of fuel remaining in the
tank when the reading was taken. When the driving distance on current fuel reserve is less than 12 miles (20 km), "----
" will be displayed in the information display.
AVERAGE
This value indicates fuel consumption since the last time the trip computer was reset (by pressing RESET, button C).
When the engine is switched off, information on fuel consumption is stored and remains in system memory until the
RESET (button C) is pressed again.
INSTANTANEOUS
This value indicates the current fuel consumption, based on readings taken once per second. When the car is not
moving, "----" will be displayed.
AVERAGE SPEED
This value indicates average speed since the last time the trip computer was reset (by pressing RESET, button C).
When the engine is switched off, information on average speed is stored and remains in system memory until the
RESET (button C) is pressed again.
62 02 Instruments and controls
Trip computer
ACTUAL SPEED (Canadian models only)
This function provides the driver with an instantaneous conversion of the car's current speed from km/h to m.p.h.
NOTE
Trip computer readings may vary slightly depending on the circumference of the tires on the car, tire inflation, or
driving style.
63 02 Instruments and controls
Cruise control
Engaging the cruise control function
ProCarManuals.com
Page 71 of 208

Information
VIN number - The VIN (Vehicle Identification Number) is the car's unique identity number.
Number of Keys - the number of keys registered for the car is displayed here.
Climate functions
Blower speed in AUTO mode - the blower speed can be set to AUTO mode in models equipped with ECC. Choose
between "Low", "Normal" and "High".
Timer for recirculation - when the timer is active, the air recirculates in the car for 3- 12 minutes depending on the
ambient temperature. Select On/Off depending on whether the recirculation timer is to be active or not.
Keyless locking and unlocking (option as available)
The following alternatives can be selected for locking and unlocking the doors and trunk:
All doors - all doors are locked or unlocked at the same time.
Doors on the same side - front and rear doors on the same side are unlocked together.
Both front doors - both front doors are unlocked together.
One front door - either of the front doors can be unlocked separately1.
Reset to factory settings
Use this alternative to return to the default climate system settings.
1Factory default
76 02 Instruments and controls
Home Link® Universal Transceiver (option)
Introduction
HomeLink1 is a system that can be programmed to learn the codes of three different remote controlled-devices (for
example, a garage door opener, remote lighting, entry gate). HomeLink's sun visor-mounted transceiver, powered by
your car's electrical system, may then be used in place of your handheld remote controls. The HomeLink transceiver
consists of three programmable buttons and an indicator light.
1 HomeLink is a registered trademark of Johnson Controls, Intl.
© JCI, All rights reserved
ProCarManuals.com
Page 88 of 208

Three different seating positions can be stored in the seat's memory. The memory buttons are located on the outboard
side of the driver's seat (see the illustration above). The following example explains how memory button 1 can be
programmed. Buttons 2 and 3 can be programmed in the same way.
To program (store) a seat position in memory button 1:
1. Adjust the seat to the desired position (see the instructions above).
96 04 Interior
Front seats
2. Press and hold down the "M" (Memory) button.
3. With the "M" button depressed, press memory button 1 to store the seat's current position.
To move the seat to the position that it was in when memory button 1 was programmed, press and hold down button 1
until the seat stops moving.
As a safety precaution, the seat will stop automatically if the button is released before the seat has reached the preset
position.
Central locking system remote control and driver's seat memory
The remote control transmitter can also be equipped with an optional function that controls the electrically operated
driver's seat in the following way:
1. Adjust the seat to the desired position.
2. When you leave the car, lock it using the remote control.
3. The next time the driver's door is unlocked with the same remote control and that door is opened within 2 minutes,
the driver's seat and side door mirrors will automatically move to the position that they were in when the doors were
most recently locked with the same remote control.
NOTE
The memory function in the remote control operates independently of the memory function in the seat.
WARNING
ProCarManuals.com
Page 129 of 208

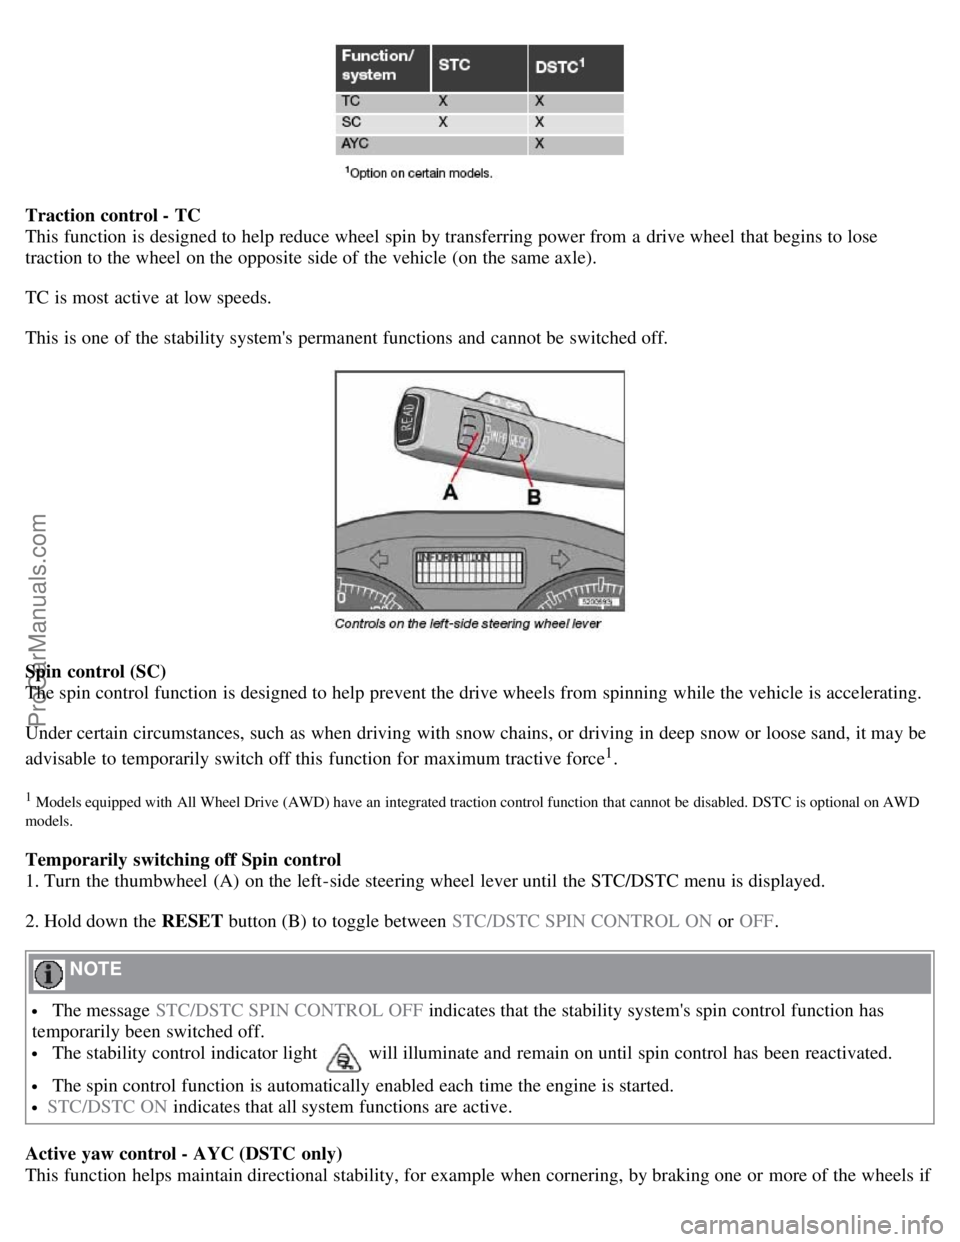
Traction control - TC
This function is designed to help reduce wheel spin by transferring power from a drive wheel that begins to lose
traction to the wheel on the opposite side of the vehicle (on the same axle).
TC is most active at low speeds.
This is one of the stability system's permanent functions and cannot be switched off.
Spin control (SC)
The spin control function is designed to help prevent the drive wheels from spinning while the vehicle is accelerating.
Under certain circumstances, such as when driving with snow chains, or driving in deep snow or loose sand, it may be
advisable to temporarily switch off this function for maximum tractive force
1.
1 Models equipped with All Wheel Drive (AWD) have an integrated traction control function that cannot be disabled. DSTC is optional on AWD
models.
Temporarily switching off Spin control
1. Turn the thumbwheel (A) on the left-side steering wheel lever until the STC/DSTC menu is displayed.
2. Hold down the RESET button (B) to toggle between STC/DSTC SPIN CONTROL ON or OFF.
NOTE
The message STC/DSTC SPIN CONTROL OFF indicates that the stability system's spin control function has
temporarily been switched off.
The stability control indicator light will illuminate and remain on until spin control has been reactivated.
The spin control function is automatically enabled each time the engine is started.
STC/DSTC ON indicates that all system functions are active.
Active yaw control - AYC (DSTC only)
This function helps maintain directional stability, for example when cornering, by braking one or more of the wheels if
ProCarManuals.com
Page 185 of 208

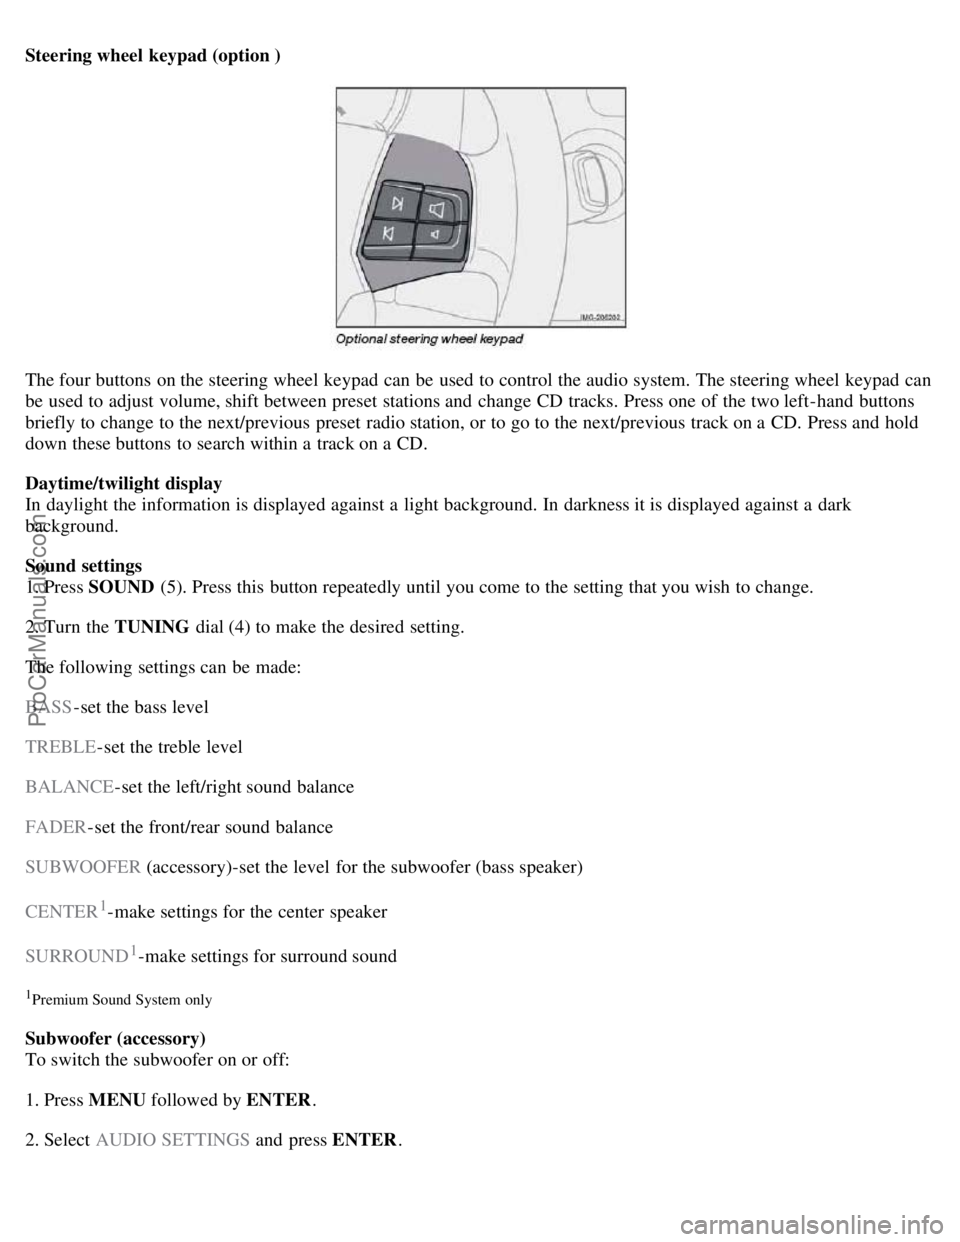
Steering wheel keypad (option )
The four buttons on the steering wheel keypad can be used to control the audio system. The steering wheel keypad can
be used to adjust volume, shift between preset stations and change CD tracks. Press one of the two left-hand buttons
briefly to change to the next/previous preset radio station, or to go to the next/previous track on a CD. Press and hold
down these buttons to search within a track on a CD.
Daytime/twilight display
In daylight the information is displayed against a light background. In darkness it is displayed against a dark
background.
Sound settings
1. Press SOUND (5). Press this button repeatedly until you come to the setting that you wish to change.
2. Turn the TUNING dial (4) to make the desired setting.
The following settings can be made:
BASS -set the bass level
TREBLE -set the treble level
BALANCE -set the left/right sound balance
FADER -set the front/rear sound balance
SUBWOOFER (accessory)-set the level for the subwoofer (bass speaker)
CENTER
1-make settings for the center speaker
SURROUND
1-make settings for surround sound
1Premium Sound System only
Subwoofer (accessory)
To switch the subwoofer on or off:
1. Press MENU followed by ENTER .
2. Select AUDIO SETTINGS and press ENTER.
ProCarManuals.com