2007 SUZUKI FORENZA lock
[x] Cancel search: lockPage 140 of 225
4-16 DRIVING YOUR VEHICLE
85Z03-03E
TowingTowing Your VehicleConsult your SUZUKI dealer or a profes-
sional towing service if you need to have
your disabled vehicle towed.
If you want to tow your vehicle behind
another vehicle for recreational purposes
(such as behind a motorhome), see the fol-
lowing section, “Recreational Vehicle Tow-
ing”.Recreational Vehicle TowingRecreational vehicle towing means towing
your vehicle behind another vehicle – such
as behind a motorhome. The two most
common types of recreational vehicle tow-
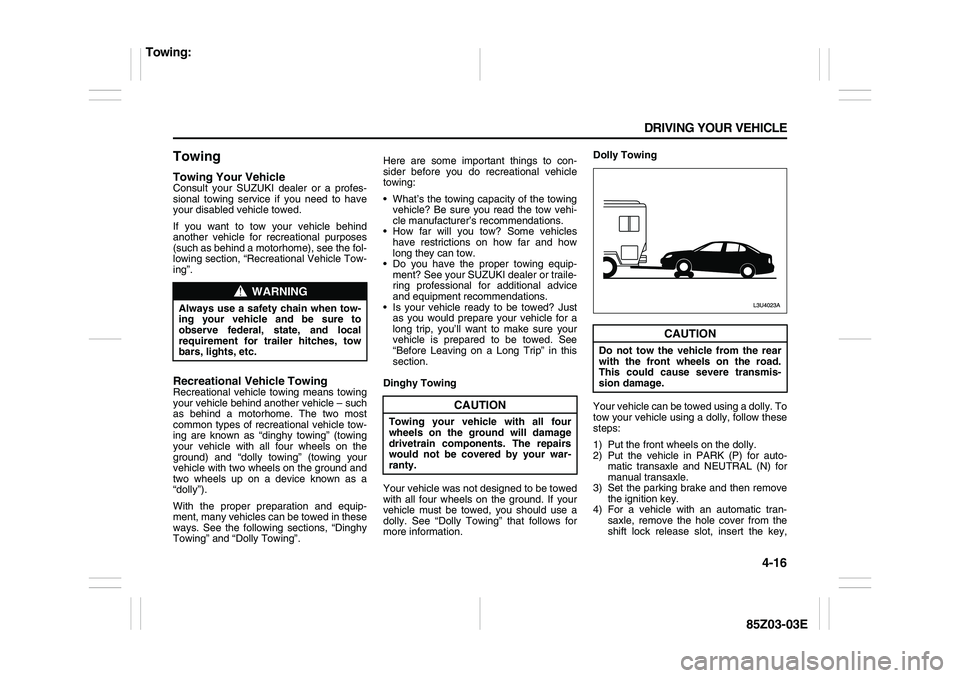
ing are known as “dinghy towing” (towing
your vehicle with all four wheels on the
ground) and “dolly towing” (towing your
vehicle with two wheels on the ground and
two wheels up on a device known as a
“dolly”).
With the proper preparation and equip-
ment, many vehicles can be towed in these
ways. See the following sections, “Dinghy
Towing” and “Dolly Towing”.Here are some important things to con-
sider before you do recreational vehicle
towing:
What’s the towing capacity of the towing
vehicle? Be sure you read the tow vehi-
cle manufacturer’s recommendations.
How far will you tow? Some vehicles
have restrictions on how far and how
long they can tow.
Do you have the proper towing equip-
ment? See your SUZUKI dealer or traile-
ring professional for additional advice
and equipment recommendations.
Is your vehicle ready to be towed? Just
as you would prepare your vehicle for a
long trip, you’ll want to make sure your
vehicle is prepared to be towed. See
“Before Leaving on a Long Trip” in this
section.
Dinghy Towing
Your vehicle was not designed to be towed
with all four wheels on the ground. If your
vehicle must be towed, you should use a
dolly. See “Dolly Towing” that follows for
more information.Dolly Towing
Your vehicle can be towed using a dolly. To
tow your vehicle using a dolly, follow these
steps:
1) Put the front wheels on the dolly.
2) Put the vehicle in PARK (P) for auto-
matic transaxle and NEUTRAL (N) for
manual transaxle.
3) Set the parking brake and then remove
the ignition key.
4) For a vehicle with an automatic tran-
saxle, remove the hole cover from the
shift lock release slot, insert the key,
WARNING
Always use a safety chain when tow-
ing your vehicle and be sure to
observe federal, state, and local
requirement for trailer hitches, tow
bars, lights, etc.
CAUTION
Towing your vehicle with all four
wheels on the ground will damage
drivetrain components. The repairs
would not be covered by your war-
ranty.
CAUTION
Do not tow the vehicle from the rear
with the front wheels on the road.
This could cause severe transmis-
sion damage.
Towing:
Page 147 of 225
5-3 SERVICE AND APPEARANCE CARE
85Z03-03E
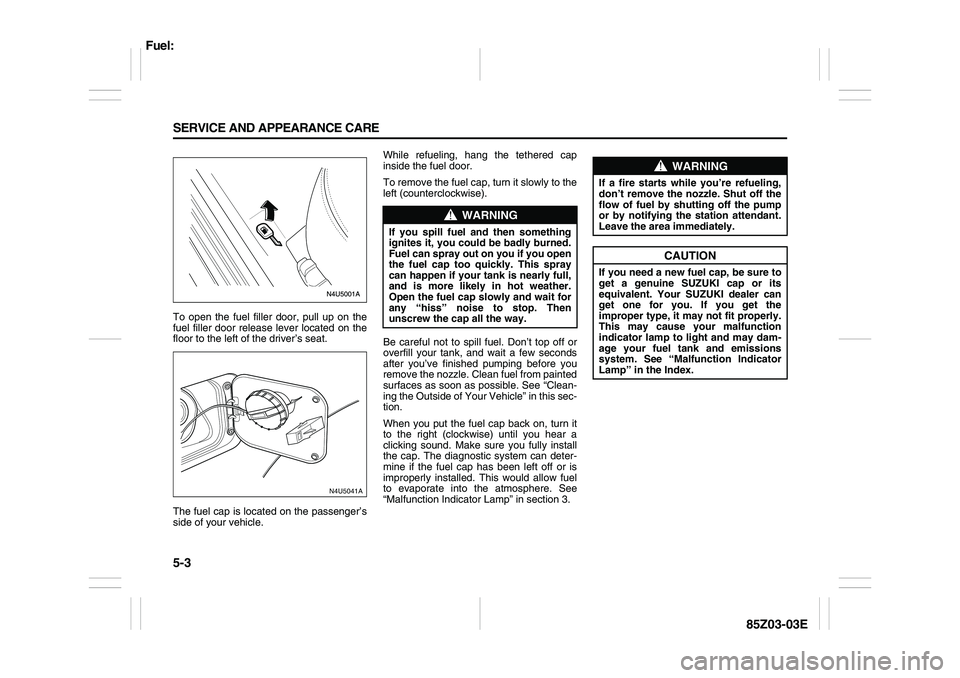
To open the fuel filler door, pull up on the
fuel filler door release lever located on the
floor to the left of the driver’s seat.
The fuel cap is located on the passenger’s
side of your vehicle.While refueling, hang the tethered cap
inside the fuel door.
To remove the fuel cap, turn it slowly to the
left (counterclockwise).
Be careful not to spill fuel. Don’t top off or
overfill your tank, and wait a few seconds
after you’ve finished pumping before you
remove the nozzle. Clean fuel from painted
surfaces as soon as possible. See “Clean-
ing the Outside of Your Vehicle” in this sec-
tion.
When you put the fuel cap back on, turn it
to the right (clockwise) until you hear a
clicking sound. Make sure you fully install
the cap. The diagnostic system can deter-
mine if the fuel cap has been left off or is
improperly installed. This would allow fuel
to evaporate into the atmosphere. See
“Malfunction Indicator Lamp” in section 3.
N4U5041A
WARNING
If you spill fuel and then something
ignites it, you could be badly burned.
Fuel can spray out on you if you open
the fuel cap too quickly. This spray
can happen if your tank is nearly full,
and is more likely in hot weather.
Open the fuel cap slowly and wait for
any “hiss” noise to stop. Then
unscrew the cap all the way.
WARNING
If a fire starts while you’re refueling,
don’t remove the nozzle. Shut off the
flow of fuel by shutting off the pump
or by notifying the station attendant.
Leave the area immediately.
CAUTION
If you need a new fuel cap, be sure to
get a genuine SUZUKI cap or its
equivalent. Your SUZUKI dealer can
get one for you. If you get the
improper type, it may not fit properly.
This may cause your malfunction
indicator lamp to light and may dam-
age your fuel tank and emissions
system. See “Malfunction Indicator
Lamp” in the Index.
Fuel:
Page 150 of 225

5-6 SERVICE AND APPEARANCE CARE
85Z03-03E
Engine Compartment OverviewWhen you open the hood on the engine, you’ll see the following:
A. Engine Air Cleaner/Filter
B. Engine Oil Filler Cap
C. Brake/Clutch Fluid Reservoir
D. Engine Coolant Surge Tank
E. Underhood Fuse BlockF. Battery
G. Windshield Washer Fluid Reservoir
H. Power Steering Fluid Reservoir
I. Engine Oil Dipstick
N5U5007A
A
B
D
EG
H
I
F
C
Checking Things Under the Hood:
Page 160 of 225
5-16 SERVICE AND APPEARANCE CARE
85Z03-03E
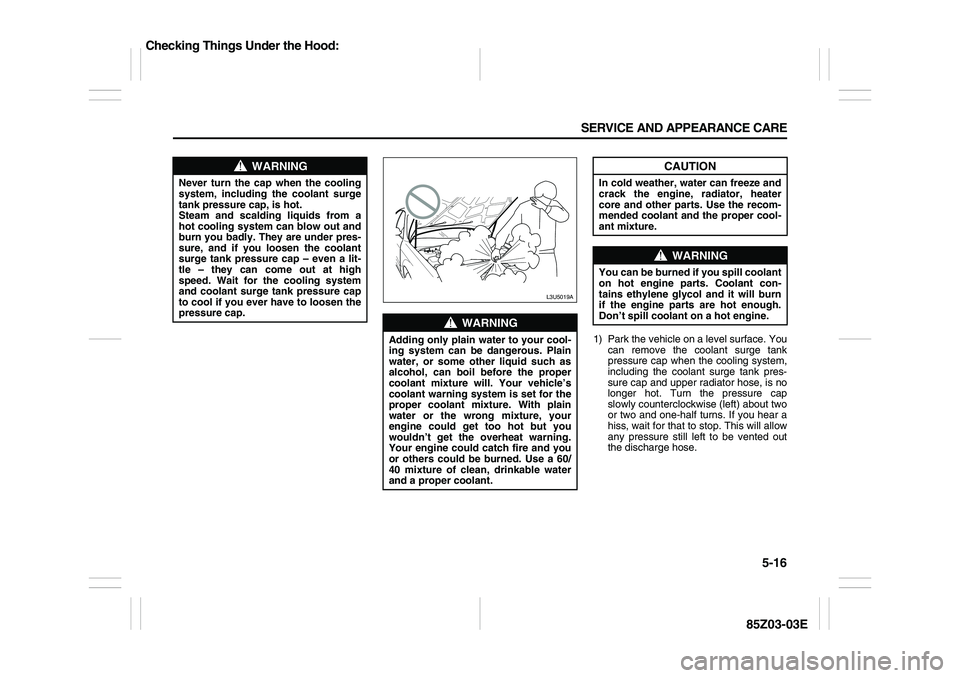
1) Park the vehicle on a level surface. You
can remove the coolant surge tank
pressure cap when the cooling system,
including the coolant surge tank pres-
sure cap and upper radiator hose, is no
longer hot. Turn the pressure cap
slowly counterclockwise (left) about two
or two and one-half turns. If you hear a
hiss, wait for that to stop. This will allow
any pressure still left to be vented out
the discharge hose.
WARNING
Never turn the cap when the cooling
system, including the coolant surge
tank pressure cap, is hot.
Steam and scalding liquids from a
hot cooling system can blow out and
burn you badly. They are under pres-
sure, and if you loosen the coolant
surge tank pressure cap – even a lit-
tle – they can come out at high
speed. Wait for the cooling system
and coolant surge tank pressure cap
to cool if you ever have to loosen the
pressure cap.
WARNING
Adding only plain water to your cool-
ing system can be dangerous. Plain
water, or some other liquid such as
alcohol, can boil before the proper
coolant mixture will. Your vehicle’s
coolant warning system is set for the
proper coolant mixture. With plain
water or the wrong mixture, your
engine could get too hot but you
wouldn’t get the overheat warning.
Your engine could catch fire and you
or others could be burned. Use a 60/
40 mixture of clean, drinkable water
and a proper coolant.
L3U5019A
CAUTION
In cold weather, water can freeze and
crack the engine, radiator, heater
core and other parts. Use the recom-
mended coolant and the proper cool-
ant mixture.
WARNING
You can be burned if you spill coolant
on hot engine parts. Coolant con-
tains ethylene glycol and it will burn
if the engine parts are hot enough.
Don’t spill coolant on a hot engine.
Checking Things Under the Hood:
Page 168 of 225
5-24 SERVICE AND APPEARANCE CARE
85Z03-03E
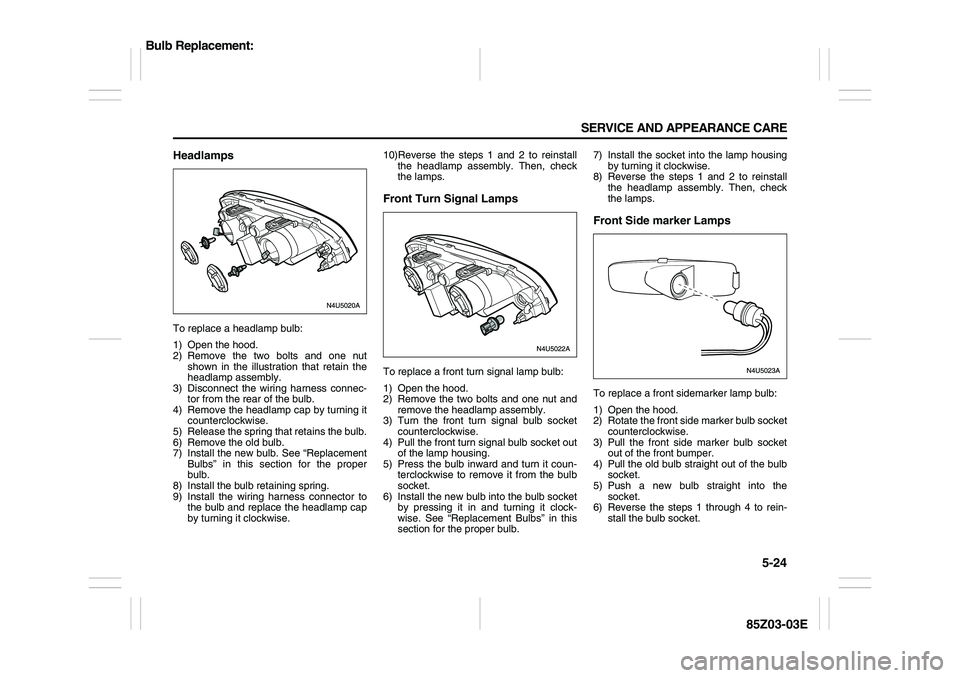
HeadlampsTo replace a headlamp bulb:
1) Open the hood.
2) Remove the two bolts and one nut
shown in the illustration that retain the
headlamp assembly.
3) Disconnect the wiring harness connec-
tor from the rear of the bulb.
4) Remove the headlamp cap by turning it
counterclockwise.
5) Release the spring that retains the bulb.
6) Remove the old bulb.
7) Install the new bulb. See “Replacement
Bulbs” in this section for the proper
bulb.
8) Install the bulb retaining spring.
9) Install the wiring harness connector to
the bulb and replace the headlamp cap
by turning it clockwise.10)Reverse the steps 1 and 2 to reinstall
the headlamp assembly. Then, check
the lamps.
Front Turn Signal LampsTo replace a front turn signal lamp bulb:
1) Open the hood.
2) Remove the two bolts and one nut and
remove the headlamp assembly.
3) Turn the front turn signal bulb socket
counterclockwise.
4) Pull the front turn signal bulb socket out
of the lamp housing.
5) Press the bulb inward and turn it coun-
terclockwise to remove it from the bulb
socket.
6) Install the new bulb into the bulb socket
by pressing it in and turning it clock-
wise. See “Replacement Bulbs” in this
section for the proper bulb.7) Install the socket into the lamp housing
by turning it clockwise.
8) Reverse the steps 1 and 2 to reinstall
the headlamp assembly. Then, check
the lamps.
Front Side marker LampsTo replace a front sidemarker lamp bulb:
1) Open the hood.
2) Rotate the front side marker bulb socket
counterclockwise.
3) Pull the front side marker bulb socket
out of the front bumper.
4) Pull the old bulb straight out of the bulb
socket.
5) Push a new bulb straight into the
socket.
6) Reverse the steps 1 through 4 to rein-
stall the bulb socket.
Bulb Replacement:
Page 169 of 225
5-25 SERVICE AND APPEARANCE CARE
85Z03-03E
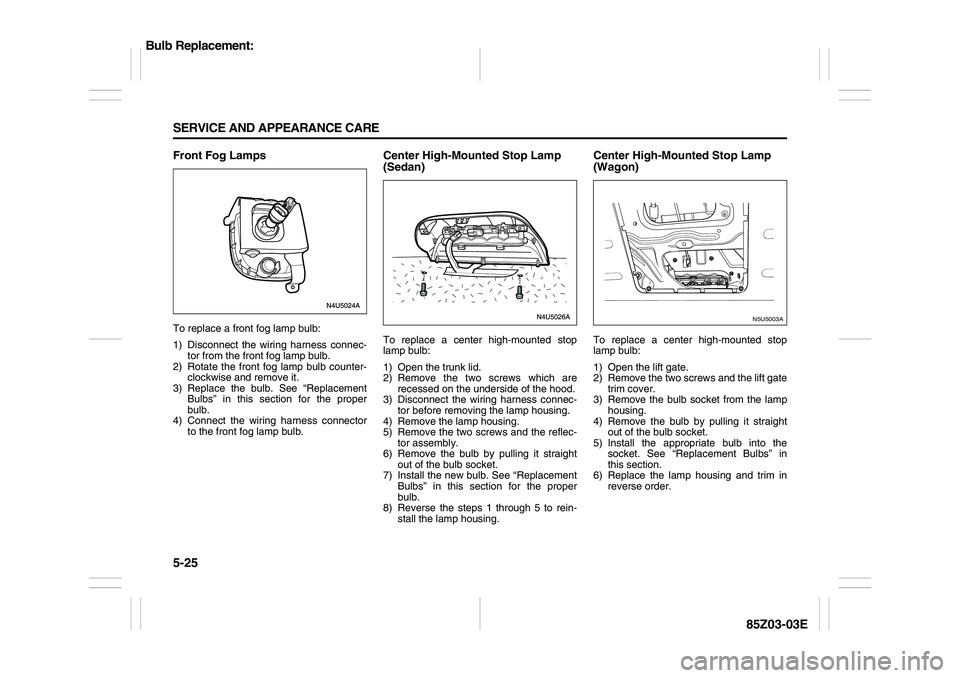
Front Fog LampsTo replace a front fog lamp bulb:
1) Disconnect the wiring harness connec-
tor from the front fog lamp bulb.
2) Rotate the front fog lamp bulb counter-
clockwise and remove it.
3) Replace the bulb. See “Replacement
Bulbs” in this section for the proper
bulb.
4) Connect the wiring harness connector
to the front fog lamp bulb.
Center High-Mounted Stop Lamp
(Sedan)To replace a center high-mounted stop
lamp bulb:
1) Open the trunk lid.
2) Remove the two screws which are
recessed on the underside of the hood.
3) Disconnect the wiring harness connec-
tor before removing the lamp housing.
4) Remove the lamp housing.
5) Remove the two screws and the reflec-
tor assembly.
6) Remove the bulb by pulling it straight
out of the bulb socket.
7) Install the new bulb. See “Replacement
Bulbs” in this section for the proper
bulb.
8) Reverse the steps 1 through 5 to rein-
stall the lamp housing.
Center High-Mounted Stop Lamp
(Wagon)To replace a center high-mounted stop
lamp bulb:
1) Open the lift gate.
2) Remove the two screws and the lift gate
trim cover.
3) Remove the bulb socket from the lamp
housing.
4) Remove the bulb by pulling it straight
out of the bulb socket.
5) Install the appropriate bulb into the
socket. See “Replacement Bulbs” in
this section.
6) Replace the lamp housing and trim in
reverse order.
N5U5003A
Bulb Replacement:
Page 170 of 225
5-26 SERVICE AND APPEARANCE CARE
85Z03-03E
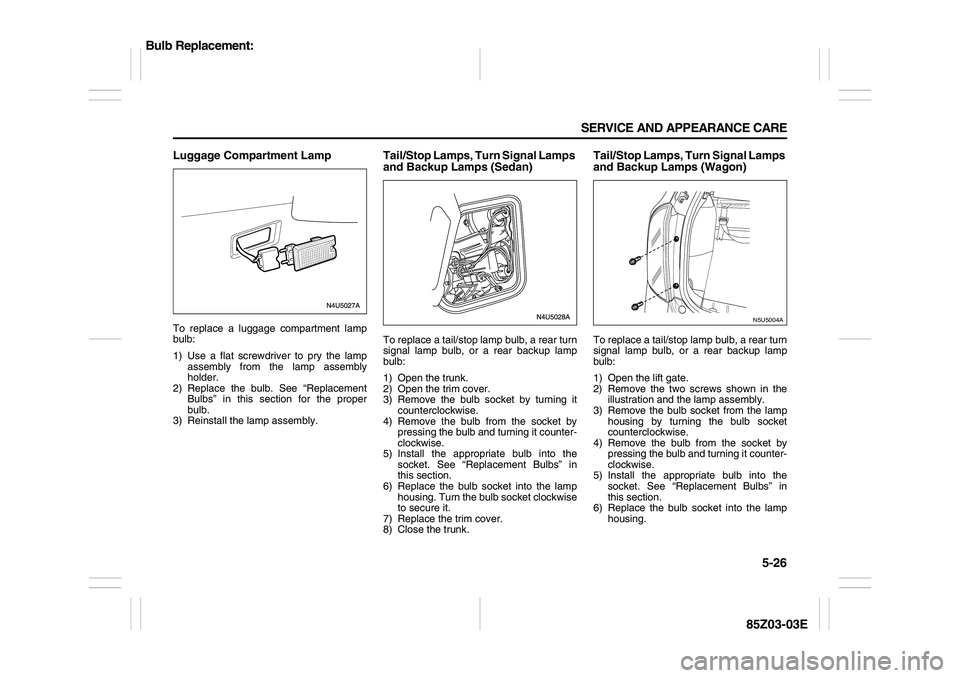
Luggage Compartment LampTo replace a luggage compartment lamp
bulb:
1) Use a flat screwdriver to pry the lamp
assembly from the lamp assembly
holder.
2) Replace the bulb. See “Replacement
Bulbs” in this section for the proper
bulb.
3) Reinstall the lamp assembly.
Tail/Stop Lamps, Turn Signal Lamps
and Backup Lamps (Sedan)To replace a tail/stop lamp bulb, a rear turn
signal lamp bulb, or a rear backup lamp
bulb:
1) Open the trunk.
2) Open the trim cover.
3) Remove the bulb socket by turning it
counterclockwise.
4) Remove the bulb from the socket by
pressing the bulb and turning it counter-
clockwise.
5) Install the appropriate bulb into the
socket. See “Replacement Bulbs” in
this section.
6) Replace the bulb socket into the lamp
housing. Turn the bulb socket clockwise
to secure it.
7) Replace the trim cover.
8) Close the trunk.
Tail/Stop Lamps, Turn Signal Lamps
and Backup Lamps (Wagon)To replace a tail/stop lamp bulb, a rear turn
signal lamp bulb, or a rear backup lamp
bulb:
1) Open the lift gate.
2) Remove the two screws shown in the
illustration and the lamp assembly.
3) Remove the bulb socket from the lamp
housing by turning the bulb socket
counterclockwise.
4) Remove the bulb from the socket by
pressing the bulb and turning it counter-
clockwise.
5) Install the appropriate bulb into the
socket. See “Replacement Bulbs” in
this section.
6) Replace the bulb socket into the lamp
housing.
N5U5004A
Bulb Replacement:
Page 171 of 225
5-27 SERVICE AND APPEARANCE CARE
85Z03-03E
7) Replace the lamp housing into the vehi-
cle using the two screws removed ear-
lier.
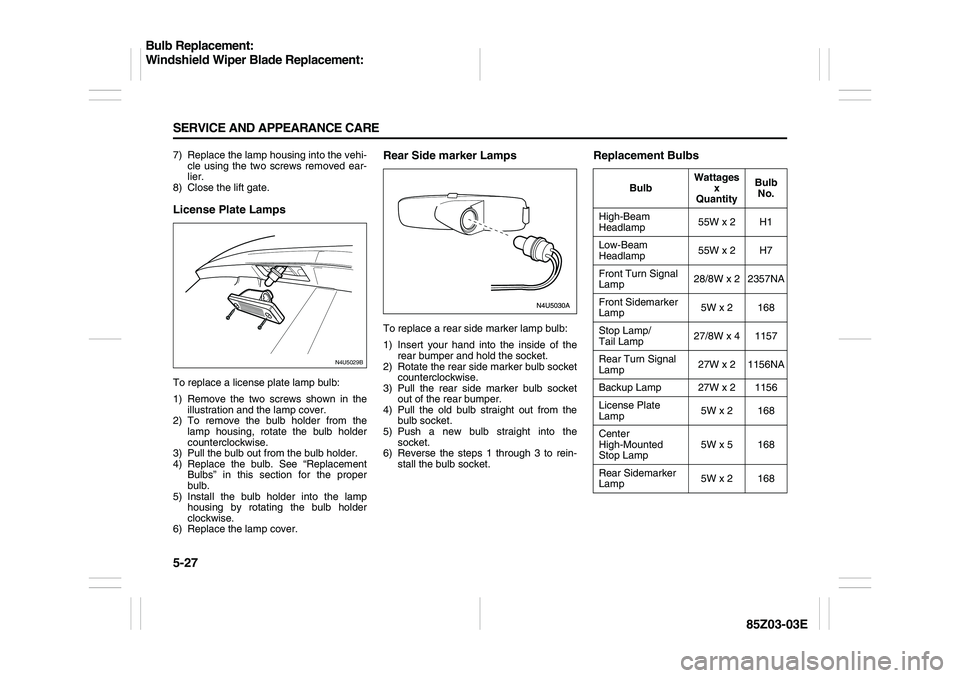
8) Close the lift gate.License Plate LampsTo replace a license plate lamp bulb:
1) Remove the two screws shown in the
illustration and the lamp cover.
2) To remove the bulb holder from the
lamp housing, rotate the bulb holder
counterclockwise.
3) Pull the bulb out from the bulb holder.
4) Replace the bulb. See “Replacement
Bulbs” in this section for the proper
bulb.
5) Install the bulb holder into the lamp
housing by rotating the bulb holder
clockwise.
6) Replace the lamp cover.
Rear Side marker LampsTo replace a rear side marker lamp bulb:
1) Insert your hand into the inside of the
rear bumper and hold the socket.
2) Rotate the rear side marker bulb socket
counterclockwise.
3) Pull the rear side marker bulb socket
out of the rear bumper.
4) Pull the old bulb straight out from the
bulb socket.
5) Push a new bulb straight into the
socket.
6) Reverse the steps 1 through 3 to rein-
stall the bulb socket.
Replacement Bulbs
N4U5029B
BulbWattages
x
QuantityBulb
No.
High-Beam
Headlamp55W x 2 H1
Low-Beam
Headlamp55W x 2 H7
Front Turn Signal
Lamp28/8W x 2 2357NA
Front Sidemarker
Lamp5W x 2 168
Stop Lamp/
Tail Lamp27/8W x 4 1157
Rear Turn Signal
Lamp27W x 2 1156NA
Backup Lamp 27W x 2 1156
License Plate
Lamp5W x 2 168
Center
High-Mounted
Stop Lamp5W x 5 168
Rear Sidemarker
Lamp5W x 2 168
Bulb Replacement:
Windshield Wiper Blade Replacement: