2007 SUZUKI FORENZA lock
[x] Cancel search: lockPage 93 of 225
3-17 INSTRUMENT PANEL
85Z03-03E
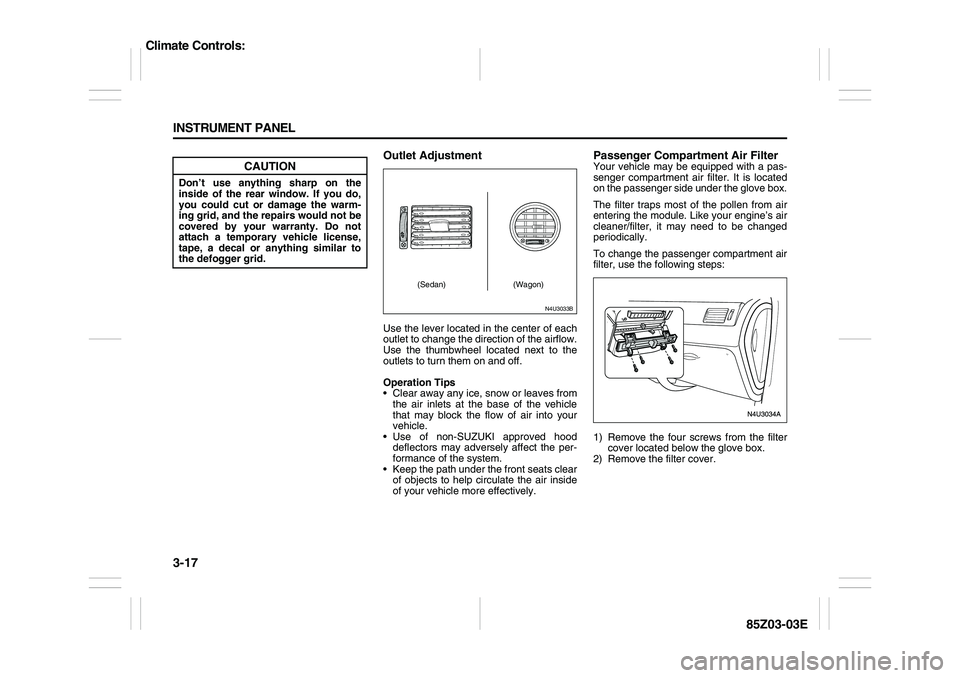
Outlet AdjustmentUse the lever located in the center of each
outlet to change the direction of the airflow.
Use the thumbwheel located next to the
outlets to turn them on and off.
Operation Tips
Clear away any ice, snow or leaves from
the air inlets at the base of the vehicle
that may block the flow of air into your
vehicle.
Use of non-SUZUKI approved hood
deflectors may adversely affect the per-
formance of the system.
Keep the path under the front seats clear
of objects to help circulate the air inside
of your vehicle more effectively.
Passenger Compartment Air FilterYour vehicle may be equipped with a pas-
senger compartment air filter. It is located
on the passenger side under the glove box.
The filter traps most of the pollen from air
entering the module. Like your engine’s air
cleaner/filter, it may need to be changed
periodically.
To change the passenger compartment air
filter, use the following steps:
1) Remove the four screws from the filter
cover located below the glove box.
2) Remove the filter cover.
CAUTION
Don’t use anything sharp on the
inside of the rear window. If you do,
you could cut or damage the warm-
ing grid, and the repairs would not be
covered by your warranty. Do not
attach a temporary vehicle license,
tape, a decal or anything similar to
the defogger grid.
N4U3033B
(Sedan) (Wagon)
Climate Controls:
Page 97 of 225
3-21 INSTRUMENT PANEL
85Z03-03E
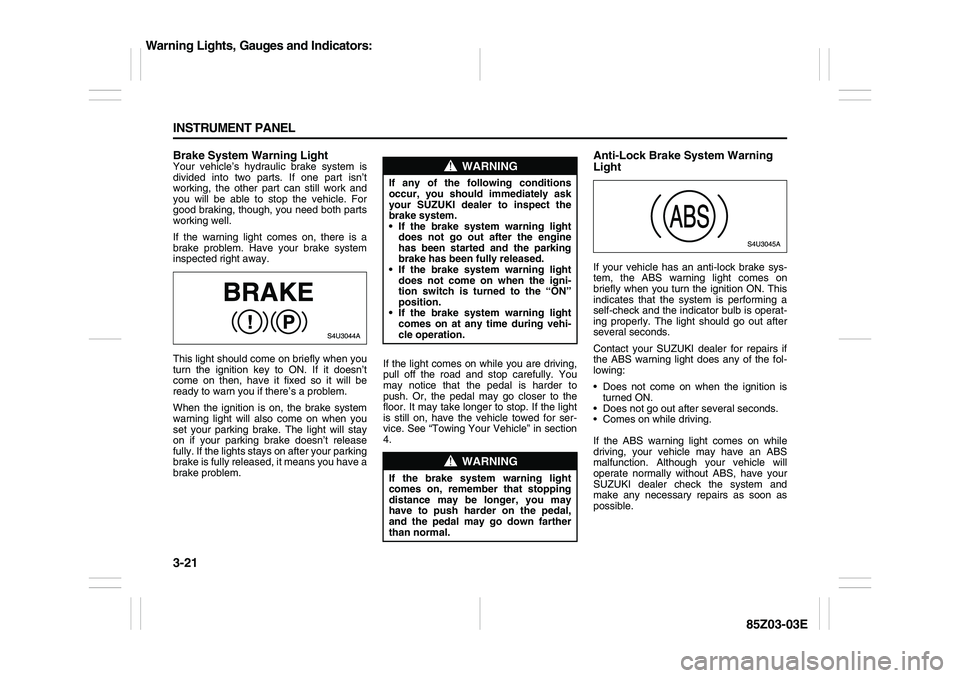
Brake System Warning LightYour vehicle’s hydraulic brake system is
divided into two parts. If one part isn’t
working, the other part can still work and
you will be able to stop the vehicle. For
good braking, though, you need both parts
working well.
If the warning light comes on, there is a
brake problem. Have your brake system
inspected right away.
This light should come on briefly when you
turn the ignition key to ON. If it doesn’t
come on then, have it fixed so it will be
ready to warn you if there’s a problem.
When the ignition is on, the brake system
warning light will also come on when you
set your parking brake. The light will stay
on if your parking brake doesn’t release
fully. If the lights stays on after your parking
brake is fully released, it means you have a
brake problem.If the light comes on while you are driving,
pull off the road and stop carefully. You
may notice that the pedal is harder to
push. Or, the pedal may go closer to the
floor. It may take longer to stop. If the light
is still on, have the vehicle towed for ser-
vice. See “Towing Your Vehicle” in section
4.
Anti-Lock Brake System Warning
LightIf your vehicle has an anti-lock brake sys-
tem, the ABS warning light comes on
briefly when you turn the ignition ON. This
indicates that the system is performing a
self-check and the indicator bulb is operat-
ing properly. The light should go out after
several seconds.
Contact your SUZUKI dealer for repairs if
the ABS warning light does any of the fol-
lowing:
Does not come on when the ignition is
turned ON.
Does not go out after several seconds.
Comes on while driving.
If the ABS warning light comes on while
driving, your vehicle may have an ABS
malfunction. Although your vehicle will
operate normally without ABS, have your
SUZUKI dealer check the system and
make any necessary repairs as soon as
possible.
WARNING
If any of the following conditions
occur, you should immediately ask
your SUZUKI dealer to inspect the
brake system.
If the brake system warning light
does not go out after the engine
has been started and the parking
brake has been fully released.
If the brake system warning light
does not come on when the igni-
tion switch is turned to the “ON”
position.
If the brake system warning light
comes on at any time during vehi-
cle operation.
WARNING
If the brake system warning light
comes on, remember that stopping
distance may be longer, you may
have to push harder on the pedal,
and the pedal may go down farther
than normal.
Warning Lights, Gauges and Indicators:
Page 102 of 225

3-26 INSTRUMENT PANEL
85Z03-03E
Door Ajar LightThis light will stay on until all doors are
closed and completely latched.
If the key is in the ignition while the driver’s
door is open, you will also hear a warning
chime.
Make sure that all doors are completely
closed and this light is out before driving.Trunk Ajar LightThis light will come on when the trunk is
not completely closed.
Make sure that the trunk is completely
closed and this light is out before driving.
Daytime Running Lamps Indicator
LightThis light will come on when the Daytime
Running Lamps (DRL) are on.
See “Daytime Running Lamps (DRL)”
under “Exterior Lamps” in this section for
further information on the DRL system.Passenger Air Bag Off IndicatorThe passenger air bag off indicator
appears in the clock display located in the
center of the instrument panel.
When the ignition key is turned to ON or
START, the passenger air bag off indicator
will light for several seconds as a system
check. Then, after several more seconds, if
the words “PASSENGER AIR BAG OFF”
remain lit, it means that the passenger
sensing system has turned off the rightfront passenger’s frontal air bag and side
air bag. See “Passenger Sensing System”
in Section 1 for more on this, including
important safety information.
Tire Pressure Monitoring System
Warning LightThe light comes on when the tire pressure
monitoring system detects that one or
more of your tires is significantly under-
inflated. This light will also come on for a
few seconds and then go off when you turn
the ignition to ON. This indicates that the
S4U2029AN5U3005A
S5U3002AN5U1002AS
PASSENGER
AIR BAG OFF
WARNING
If the air bag readiness light in the
instrument panel cluster ever comes
on and stays on, it means that some-
thing may be wrong with the air bag
system. If this ever happens, have the
vehicle serviced promptly, because
an adult-size person sitting in the
right front passenger’s seat may not
have the protection of the frontal air
bag and side air bag. See “Air Bag
Readiness Light” in this section.
L5U3012A
Warning Lights, Gauges and Indicators:
Audio System:
Page 107 of 225

3-31 INSTRUMENT PANEL
85Z03-03E
PLAYING THE RADIO
Power/Volume knob (1):
Press this knob to turn the system on and
off.
Turn the Power/Volume knob clockwise or
counterclockwise to increase or decrease
the volume.
Press this button for a short time to MUTE
the radio. Press the button again to cancel
MUTE.
Finding a Station
AM button (2):
Press this button to switch to an AM sta-
tion. The display will show the selection.
FM button (3):
Press this button to switch to an FM sta-
tion. The display will show the selection.
TUNE button (4):
Press this button to select radio stations.
(Manual tuning)
Press the up arrows to increase the fre-
quency.
Press the down arrows to decrease the fre-
quency.
The frequency of the AM band changes
10 kHz each time and the frequency of the
FM band changes 200 kHz each time.
SEEK button (5):
Press this button to search for and select
receivable radio stations. (Seek tuning)
To search for the next receivable higher
station, press the up arrows. To search for the previous receivable lower
station, press the down arrows.
SCAN/AST button (6):
Press this button to scan radio stations.
(Scan tuning)
Scan
The radio will go to a station, play for a few
seconds, and then go on to the next sta-
tion. Press this button again to stop scan-
ning.
The radio will only scan stations with a
strong signal that are in the selected band.
Automatic Store
Press and hold this button to use Auto
Store.
FM1’s 6 preset stations with the strongest
signal in the region can be automatically
stored. The display will show “AUTO
SCANNING”, and “SCANNING” will flash
on display.
Stored stations will flash for a short time on
display in sequence. Once the stations are
stored, the radio will switch to FM-A and
the first preset station will begin to play.
FM-A will appear on the display when lis-
tening to the automatically stored stations.
Press the AM or FM button to stop auto-
matic store.Preset station buttons (7):
Setting Preset Stations
Up to 36 stations (six FM1, six FM2, six
FM-A and six AM1, six AM2, six AM-A),
can be programmed on the six numbered
preset buttons, by performing the following
steps:
1) Turn the radio on.
2) Press the AM or FM button to select
FM1, FM2, FM-A, AM1, AM2 or AM-A.
3) Tune in the desired station.
4) Press and hold one of the six numbered
preset buttons.
The preset button number (Display:
CH#1 ~ CH#6) will flash on the display
when the station has been set. When-
ever that numbered preset button is
pressed, the memorized station will
return.
5) Repeat the previous four steps for each
preset button.
Page 112 of 225
3-36 INSTRUMENT PANEL
85Z03-03E
AUX Mode
Press this button to listen to the audio con-
tents from other devices; Walkman, Porta-
ble CD Player, Portable MP3 Player, i-pod,
XM receiver, etc.
1) Connect the output port of the device to
the aux jack of the head unit with an
aux connector.
2) Turn the device on.
3) Press this button.
If you want to control the volume level, use
the volume buttons of the head unit or the
device.
Using the Auxiliary Input Jack
Your radio system has an auxiliary input
jack located on the lower right side of the
faceplate. This is not an audio output; do
not plug a headphone set into the front
auxiliary input jack. You can however, con-
nect an external audio device such as an
iPod, laptop computer, MP3 player, CD
changer, or cassette tape player, etc. to the
auxiliary input jack for use as another
source for audio listening.
The auxiliary input jack will also accept cell
phone connectors. Plug the cell phone
connector into the auxiliary input jack to
hear the other side of a cell phone’s con-
versation through the vehicle sound sys-
tem.
Drivers are encouraged to set up their por-
table audio player while the vehicle isparked. See Defensive Driving for more
information on driver distraction.
To use a portable audio player, connect a
3.5 mm (1/8 inch) cable to the radio’s front
auxiliary input jack. When a device is con-
nected, press the radio CD/AUX button as
needed to begin playing audio from the
device over the car speakers.
CD/AUX (CD/Auxiliary) button (9):
Press this button once to play a CD while a
portable audio device is playing. Press this
button a second time and the system will
begin playing audio from the connected
portable audio player. Once in this mode,
“Auxinput” will appear on the display. If the
auxiliary jack does not detect the presence
of an output jack, the aux mode will be pre-
vented from coming up.
Power/Volume knob (1):
Turn this knob clockwise or counterclock-
wise to increase or decrease the volume of
the portable player. You may need to make
additional volume adjustments from the
portable device if the volume does not go
loud or soft enough.
STEERING WHEEL REMOTE OPER-
ATION (if equipped in the vehicle)Power Button
Press this button to turn the system on and
off. Press this button for a short time to
MUTE the sound. Press the button again
to cancel MUTE.
Volume Up Button
Press this button to increase the volume
level.
Volume Down Button
Press this button to decrease the volume
level.
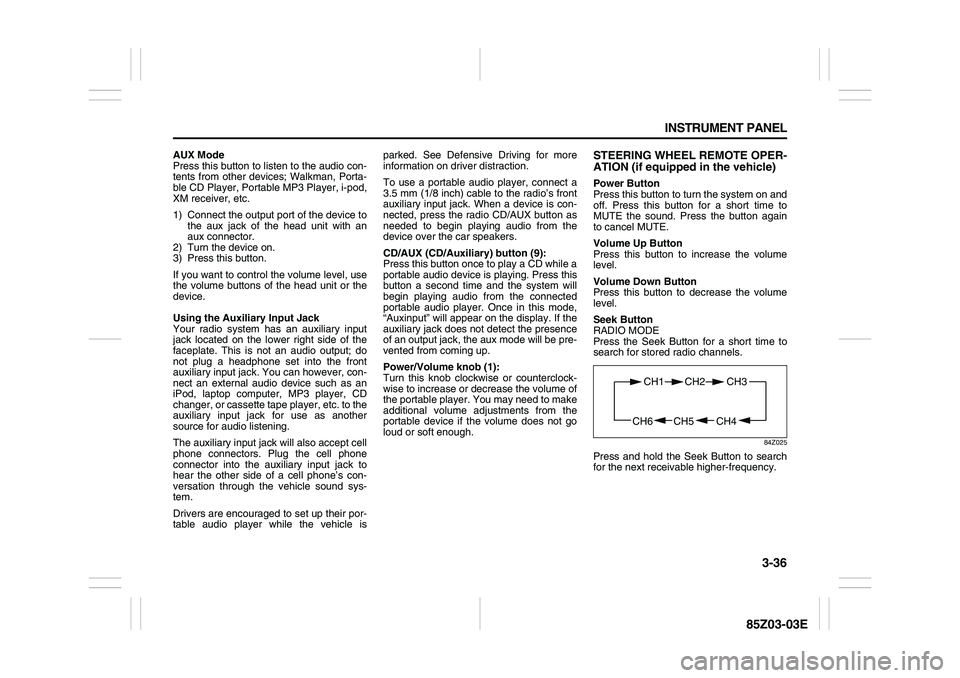
Seek Button
RADIO MODE
Press the Seek Button for a short time to
search for stored radio channels.
84Z025
Press and hold the Seek Button to search
for the next receivable higher-frequency.
CH4 CH5
CH1 CH2
CH6
CH3
Page 114 of 225

3-38 INSTRUMENT PANEL
85Z03-03E
PLAYING THE RADIO
Power/Volume knob (1):
Press this knob to turn the system on and
off.
Turn the Power/Volume knob clockwise or
counterclockwise to increase or decrease
the volume.
Press this button for a short time to MUTE
the radio. Press the button again to cancel
MUTE.
Finding a Station
AM button (2):
Press this button to switch to an AM sta-
tion. The display will show the selection.
FM button (3):
Press this button to switch to an FM sta-
tion. The display will show the selection.
TUNE button (4):
Press this button to select radio stations.
(Manual tuning)
Press the up arrows to increase the fre-
quency.
Press the down arrows to decrease the fre-
quency.
The frequency of the AM band changes
10 kHz each time and the frequency of the
FM band changes 200 kHz each time.
SEEK button (5):
Press this button to search for and select
receivable radio stations. (Seek tuning)
To search for the next receivable higher
station, press the up arrows. To search for the previous receivable lower
station, press the down arrows.
SCAN/AST button (6):
Press this button to scan radio stations.
(Scan tuning)
Scan
The radio will go to a station, play for a few
seconds, and then go on to the next sta-
tion. Press this button again to stop scan-
ning.
The radio will only scan stations with a
strong signal that are in the selected band.
Automatic Store
Press and hold this button to use Auto
Store.
FM1’s 6 preset stations with the strongest
signal in the region can be automatically
stored. The display will show “AUTO
SCANNING”, and “SCANNING” will flash
on display.
Stored stations will flash for a short time on
display in sequence. Once the stations are
stored, the radio will switch to FM-A and
the first preset station will begin to play.
FM-A will appear on the display when lis-
tening to the automatically stored stations.
Press the AM or FM button to stop auto-
matic store.Preset station buttons (7):
Setting Preset Stations
Up to 36 stations (six FM1, six FM2, six
FM-A and six AM1, six AM2, six AM-A),
can be programmed on the six numbered
preset buttons, by performing the following
steps:
1) Turn the radio on.
2) Press the AM or FM button to select
FM1, FM2, FM-A, AM1, AM2 or AM-A.
3) Tune in the desired station.
4) Press and hold one of the six numbered
preset buttons.
The preset button number (Display:
CH#1 ~ CH#6) will flash on the display
when the station has been set. When-
ever that numbered preset button is
pressed, the memorized station will
return.
5) Repeat the previous four steps for each
preset button.
Page 119 of 225
3-43 INSTRUMENT PANEL
85Z03-03E
CD Messages
CHECK CD:
If this message appears on the display
and/or the CD comes out, it could be for
one of the following reasons:
It is very hot. When the temperature
returns to normal, the CD will play.
You are driving on a very rough road.
When the road becomes smoother, the
CD will play.
The CD is dirty, scratched, wet, or
upside down.
The air is very humid. If so, wait about an
hour and try again.
The format of the CD may not be com-
patible. See “MP3/WMA Format” earlier
in this section.
There may have been a problem while
burning the CD.
The label may be caught in the CD
player.
If the CD is not playing correctly, for any
other reason, try a known good CD.
If any error occurs repeatedly or if an error
cannot be corrected, contact your SUZUKI
dealer. If the radio displays an error mes-
sage, write it down and provide it to your
SUZUKI dealer when reporting the prob-
lem.AUX Mode
Press this button to listen to the audio con-
tents from other devices; Walkman, Porta-
ble CD Player, Portable MP3 Player, i-pod,
XM receiver, etc.
1) Connect the output port of the device to
the aux jack of the head unit with an
aux connector.
2) Turn the device on.
3) Press this button.
If you want to control the volume level, use
the volume buttons of the head unit or the
device.
Using the Auxiliary Input Jack
Your radio system has an auxiliary input
jack located on the lower right side of the
faceplate. This is not an audio output; do
not plug a headphone set into the front
auxiliary input jack. You can however, con-
nect an external audio device such as an
iPod, laptop computer, MP3 player, CD
changer, or cassette tape player, etc. to the
auxiliary input jack for use as another
source for audio listening.
The auxiliary input jack will also accept cell
phone connectors. Plug the cell phone
connector into the auxiliary input jack to
hear the other side of a cell phone’s con-
versation through the vehicle sound sys-
tem.
Drivers are encouraged to set up their por-
table audio player while the vehicle isparked. See Defensive Driving for more
information on driver distraction.
To use a portable audio player, connect a
3.5 mm (1/8 inch) cable to the radio’s front
auxiliary input jack. When a device is con-
nected, press the radio CD/AUX button as
needed to begin playing audio from the
device over the car speakers.
CD/AUX (CD/Auxiliary) button (9):
Press this button once to play a CD while a
portable audio device is playing. Press this
button a second time and the system will
begin playing audio from the connected
portable audio player. Once in this mode,
“Auxinput” will appear on the display. If the
auxiliary jack does not detect the presence
of an output jack, the aux mode will be pre-
vented from coming up.
Power/Volume knob (1):
Turn this knob clockwise or counterclock-
wise to increase or decrease the volume of
the portable player. You may need to make
additional volume adjustments from the
portable device if the volume does not go
loud or soft enough.
Page 122 of 225
3-46 INSTRUMENT PANEL
85Z03-03E
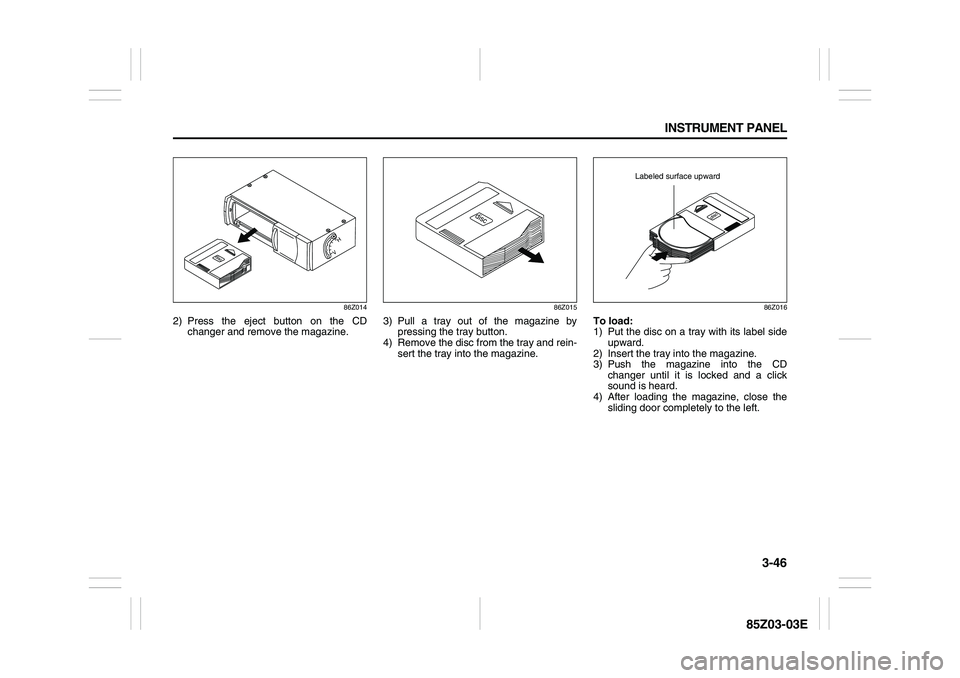
86Z014
2) Press the eject button on the CD
changer and remove the magazine.
86Z015
3) Pull a tray out of the magazine by
pressing the tray button.
4) Remove the disc from the tray and rein-
sert the tray into the magazine.
86Z016
To load:
1) Put the disc on a tray with its label side
upward.
2) Insert the tray into the magazine.
3) Push the magazine into the CD
changer until it is locked and a click
sound is heard.
4) After loading the magazine, close the
sliding door completely to the left.
Labeled surface upward