2007 SUZUKI FORENZA lock
[x] Cancel search: lockPage 184 of 225

5-40 SERVICE AND APPEARANCE CARE
85Z03-03E
The following steps will tell you how to use
the jack to change a tire.Removing the Spare Tire and Tools
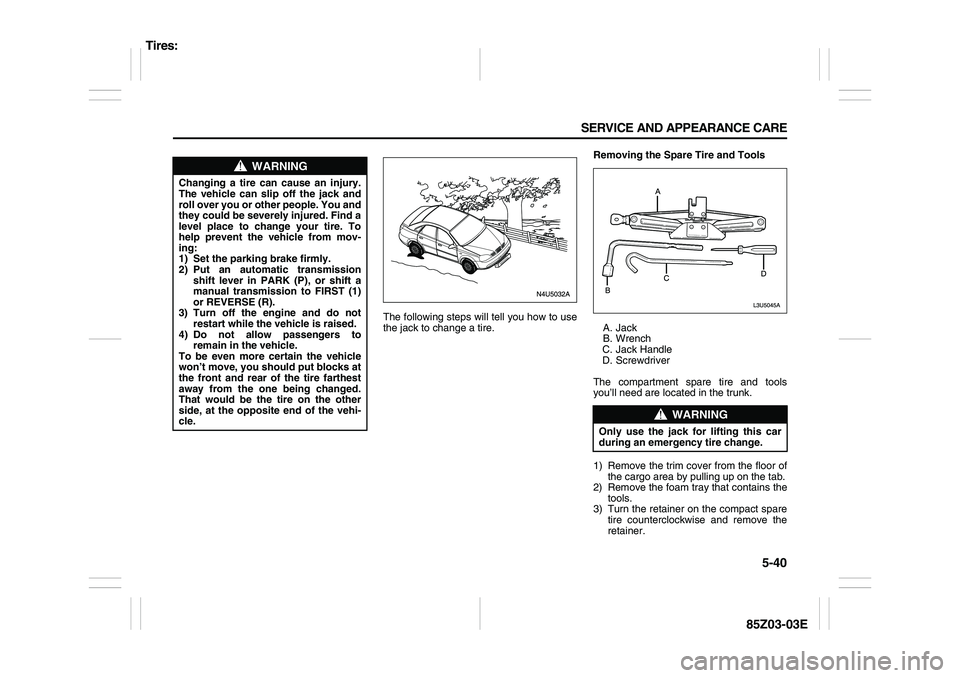
A. Jack
B. Wrench
C. Jack Handle
D. Screwdriver
The compartment spare tire and tools
you’ll need are located in the trunk.
1) Remove the trim cover from the floor of
the cargo area by pulling up on the tab.
2) Remove the foam tray that contains the
tools.
3) Turn the retainer on the compact spare
tire counterclockwise and remove the
retainer.
WARNING
Changing a tire can cause an injury.
The vehicle can slip off the jack and
roll over you or other people. You and
they could be severely injured. Find a
level place to change your tire. To
help prevent the vehicle from mov-
ing:
1) Set the parking brake firmly.
2) Put an automatic transmission
shift lever in PARK (P), or shift a
manual transmission to FIRST (1)
or REVERSE (R).
3) Turn off the engine and do not
restart while the vehicle is raised.
4) Do not allow passengers to
remain in the vehicle.
To be even more certain the vehicle
won’t move, you should put blocks at
the front and rear of the tire farthest
away from the one being changed.
That would be the tire on the other
side, at the opposite end of the vehi-
cle.
WARNING
Only use the jack for lifting this car
during an emergency tire change.
Tires:
Page 185 of 225

5-41 SERVICE AND APPEARANCE CARE
85Z03-03E
4) Remove the compact spare tire. See
“Compact Spare Tire” in this section for
more information.
5) Remove the jack, jack handle and the
wheel wrench. The jack is located in the
cargo area. Turn the jack retainer,
located on the right side of the jack,
counterclockwise to release it. The jack
handle and the wheel wrench are
located inside the foam tray.
In case of the Wagon models, do the fol-
lowing:
1) Open the floor cover by pulling the han-
dle upward.
2) Lift the floor tray.
3) Release the prop from its retainer and
put the prop into the slot.
4) Turn the retainer on the compact spare
tire counterclockwise and remove the
retainer.5) Remove the compact spare tire. See
“Compact Spare Tire” in this section for
more information.
6) To access the tools, pull the strap on
the tool box cover upward. The tools
are located inside the foam tray.
Removing the Flat Tire and Installing
the Spare Tire
1) If your vehicle is equipped with wheel
covers, loosen the 4 plastic caps by
hand with the aid of the wheel wrench
and remove the wheel cover.
2) Then use the wheel wrench to loosen
all the wheel nuts. Don’t remove them
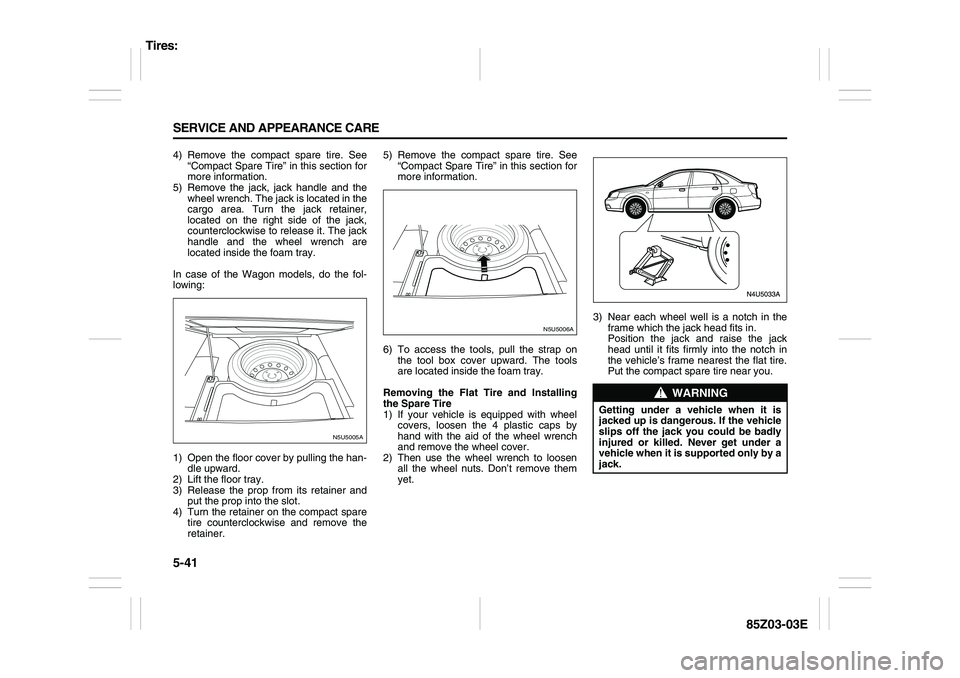
yet.3) Near each wheel well is a notch in the
frame which the jack head fits in.
Position the jack and raise the jack
head until it fits firmly into the notch in
the vehicle’s frame nearest the flat tire.
Put the compact spare tire near you.
N5U5005A
N5U5006A
WARNING
Getting under a vehicle when it is
jacked up is dangerous. If the vehicle
slips off the jack you could be badly
injured or killed. Never get under a
vehicle when it is supported only by a
jack.
Tires:
Page 186 of 225

5-42 SERVICE AND APPEARANCE CARE
85Z03-03E
4) Insert the jack handle and the wheel
wrench into the jack.
5) Raise the vehicle by turning the jack
handle clockwise. Raise the vehicle far
enough off the ground so there is
enough room for the compact spare tire
to fit underneath the wheel well.
6) Remove all of the wheel nuts by turning
them counterclockwise.
7) Remove the flat tire.8) Remove any rust or dirt from the wheel
bolts, mounting surfaces and spare
wheel.9) Place the compact spare tire on the
wheel-mounting surface.
10)Reinstall the wheel nuts with the
rounded end of the nuts toward the
wheel. Tighten each wheel nut by turn-
ing it clockwise with your hand until the
wheel is held against the hub.
11)Lower the vehicle by turning the wheel
handle counterclockwise. Lower the
jack completely.
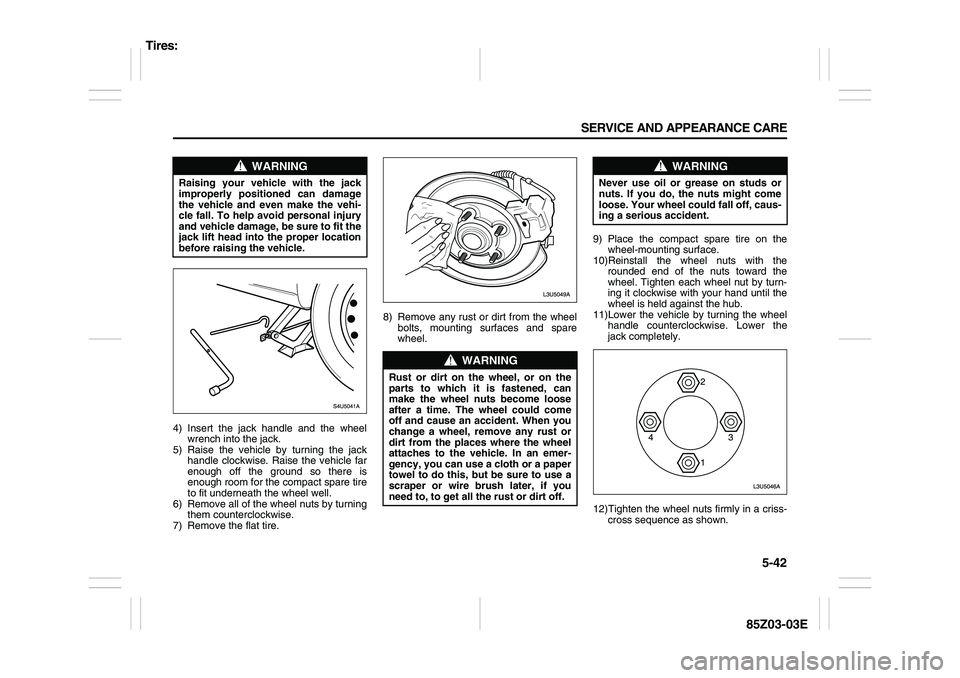
12)Tighten the wheel nuts firmly in a criss-
cross sequence as shown.
WARNING
Raising your vehicle with the jack
improperly positioned can damage
the vehicle and even make the vehi-
cle fall. To help avoid personal injury
and vehicle damage, be sure to fit the
jack lift head into the proper location
before raising the vehicle.
WARNING
Rust or dirt on the wheel, or on the
parts to which it is fastened, can
make the wheel nuts become loose
after a time. The wheel could come
off and cause an accident. When you
change a wheel, remove any rust or
dirt from the places where the wheel
attaches to the vehicle. In an emer-
gency, you can use a cloth or a paper
towel to do this, but be sure to use a
scraper or wire brush later, if you
need to, to get all the rust or dirt off.
WARNING
Never use oil or grease on studs or
nuts. If you do, the nuts might come
loose. Your wheel could fall off, caus-
ing a serious accident.
Tires:
Page 187 of 225

5-43 SERVICE AND APPEARANCE CARE
85Z03-03E
Don’t try to put a wheel cover on your com-
pact spare tire. It won’t fit. Store the wheel
cover in the trunk until you have the flat tire
repaired or replaced.Storing the Flat Tire and Tools
Store the flat tire in the compact spare tire
compartment. Place the tire in the com-
partment, then secure the retainer. Store
the jack in its housing in the cargo area.
Secure the jack by turning the retainer
clockwise. Store the tools securely in the
foam tray and place the tray on top of the
tire. Replace the trim cover.
Storing the Spare Tire and Tools
The compact spare tire is for temporary
use only. Replace the compact spare tire
with a full-size tire as soon as you can. See
“Compact Spare Tire” in this section.
WARNING
Incorrect wheel nuts or improperly
tightened wheel nuts can cause the
wheel to come loose and even come
off. This could lead to an accident. Be
sure to use the correct wheel nuts. If
you have to replace them, be sure to
get new SUZUKI original equipment
wheel nuts. Stop somewhere as soon
as you can and have the nuts tight-
ened with a torque wrench to the
proper torque specification. See
“Capacities and Specifications” in
the Index for the wheel nut torque
specification.
CAUTION
Improperly tightened wheel nuts can
lead to brake pulsation and rotor
damage. To avoid expensive brake
repairs, evenly tighten the wheel nuts
in the proper sequence and to the
proper torque specification. See
“Capacities and Specifications” in
the index for the wheel nut torque
specification.
CAUTION
If you install a full-size tire rather than
your compact spare tire, reinstall the
wheel cover as follows:
1) Put the wheel cover on the full-
size tire.
2) Fasten the 4 plastic caps snugly
by hand.
3) Tighten the caps by turning them
an additional 90° with the wheel
wrench.
– The proper tightening torque is a
maximum of 5.9 lb-ft (8 N·m).
– Tightening to the improper
torque can cause damage to the
plastic caps.
CAUTION
Wheel covers will not fit on your com-
pact spare. If you try to put a wheel
cover on the compact spare, you
could damage the cover or the spare.
WARNING
Improperly storing a jack, a tire, or
other equipment in the passenger
compartment of the vehicle could
cause injury. In a sudden stop or col-
lision, loose equipment could strike
someone. Store all these items in the
proper place.
WARNING
Storing a jack, a tire, or other equip-
ment in the passenger compartment
of the vehicle could cause injury. In a
sudden stop or collision, loose
equipment could strike someone.
Store all these in the proper place.
Appearance Care:
Page 193 of 225

5-49 SERVICE AND APPEARANCE CARE
85Z03-03E
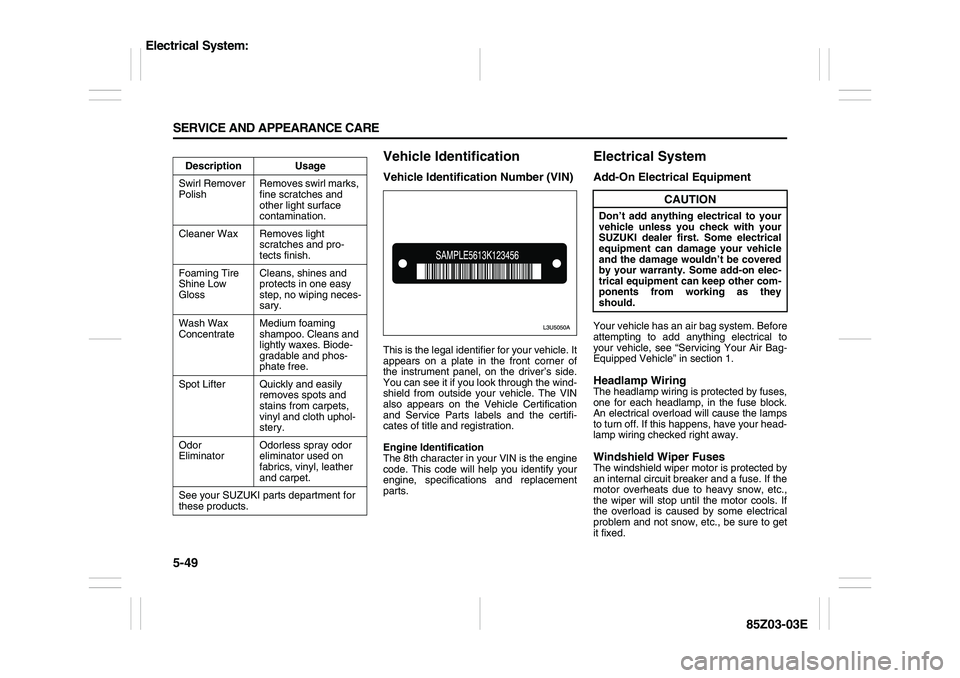
Vehicle IdentificationVehicle Identification Number (VIN)This is the legal identifier for your vehicle. It
appears on a plate in the front corner of
the instrument panel, on the driver’s side.
You can see it if you look through the wind-
shield from outside your vehicle. The VIN
also appears on the Vehicle Certification
and Service Parts labels and the certifi-
cates of title and registration.
Engine Identification
The 8th character in your VIN is the engine
code. This code will help you identify your
engine, specifications and replacement
parts.
Electrical SystemAdd-On Electrical EquipmentYour vehicle has an air bag system. Before
attempting to add anything electrical to
your vehicle, see “Servicing Your Air Bag-
Equipped Vehicle” in section 1.Headlamp WiringThe headlamp wiring is protected by fuses,
one for each headlamp, in the fuse block.
An electrical overload will cause the lamps
to turn off. If this happens, have your head-
lamp wiring checked right away.Windshield Wiper FusesThe windshield wiper motor is protected by
an internal circuit breaker and a fuse. If the
motor overheats due to heavy snow, etc.,
the wiper will stop until the motor cools. If
the overload is caused by some electrical
problem and not snow, etc., be sure to get
it fixed. Description Usage
Swirl Remover
PolishRemoves swirl marks,
fine scratches and
other light surface
contamination.
Cleaner Wax Removes light
scratches and pro-
tects finish.
Foaming Tire
Shine Low
GlossCleans, shines and
protects in one easy
step, no wiping neces-
sary.
Wash Wax
ConcentrateMedium foaming
shampoo. Cleans and
lightly waxes. Biode-
gradable and phos-
phate free.
Spot Lifter Quickly and easily
removes spots and
stains from carpets,
vinyl and cloth uphol-
stery.
Odor
EliminatorOdorless spray odor
eliminator used on
fabrics, vinyl, leather
and carpet.
See your SUZUKI parts department for
these products.
CAUTION
Don’t add anything electrical to your
vehicle unless you check with your
SUZUKI dealer first. Some electrical
equipment can damage your vehicle
and the damage wouldn’t be covered
by your warranty. Some add-on elec-
trical equipment can keep other com-
ponents from working as they
should.
Electrical System:
Page 194 of 225

5-50 SERVICE AND APPEARANCE CARE
85Z03-03E
Power Windows and Other Power
OptionsCircuit breakers in the fuse block protect
the power windows and other power
accessories. When the current load is too
heavy, the circuit breaker opens, protecting
the circuit until the problem is fixed or goes
away.Fuses and Circuit BreakersThe wiring circuits in your vehicle are pro-
tected from short circuits by a combination
of fuses, circuit breakers and fusible ther-
mal links in the wiring itself.
Look at the silver-colored band inside the
fuse. If the band is broken or melted,
replace the fuse. Be sure you replace a
bad fuse with a new one of the identical
size and rating.
There are spare fuses provided in the
engine compartment fuse block. If you ever
have a problem on the road and don’t have
a spare fuse, you can borrow one that has
the same amperage. Just pick a feature of
your vehicle that you can get along without
– like the radio or cigarette lighter – and
use its fuse, if it is the correct amperage.
Replace it as soon as you can.
There are two fuse blocks in your vehicle:
the instrument panel fuse block and the
engine compartment fuse block.
There is a fuse puller located on the
engine compartment fuse block. It can beused to easily remove fuses from the fuse
block.
Instrument Panel Fuse Block
The instrument panel fuse block is located
on the end of the instrument panel on the
driver’s side of the vehicle. To access the
fuses, open the fuse panel door by pulling
the door out.
To reinstall the door, first insert the rear
edge of the fuse panel door, then push the
front of the door into the end of the instru-
ment panel to secure it.
N5U5001B
10A
AIRBAG25A
WPR10A
RADIO/CLK
10A
ECM10A
AIRBAG15A
AUX LTR
15ATRN SIG LAMPS
10A
ABS15A
LT R
10A
CLSTR
BTSI10A
BCK/UP
15A
A/C
CLK 10A
TCM10A
RKE
10A
ENG FUSE BOX
DRL
15A
HAZRD
LAMPS
20A
HVAC15A
RKE15A
RADIO
15A
S/ROOF10A
DLC10A
SPARE
Electrical System:
Page 195 of 225

5-51 SERVICE AND APPEARANCE CARE
85Z03-03E
Engine Compartment Fuse Block
The engine compartment fuse block is
located on the driver’s side of the vehicle,
near the battery. See “Engine Compart-
ment Overview” in this section for more
information on location.
To access the fuses, press in the side flaps
to release the cover.
To reinstall the cover, push until it is
secure. Fuses Usages
AIRBAG Air Bag
WPR Wiper
RADIO/CLK Radio/Clock
ECMEngine Control
Module
AIRBAGOccupation Classifi-
cation Sensor
AUX LTR Extra Jack
TRN SIG LAMPS Turn Signal Lamps
ABSAntilock Brake
System
LTR Cigar Lighter
CLSTR, BTSICluster, BTSI
Solenoid
RKERemote keyless
Entry
BCK/UP Back-up
BLANK Not Used
TCMTransmission
Control Module
Fuses Usages
ENG FUSE BOX,
DRLEngine Fuse box,
Daytime Running
Light
HAZRD LAMPS Hazard Lamps
A/C, CLK A/C Switch, Clock
HVACHeating, Ventilation
and Air Conditioning
RKERemote Keyless
Entry
RADIO Radio
S/ROOF Sunroof
DLC Data link Connector
SPARE Spare
Electrical System:
Page 197 of 225

5-53 SERVICE AND APPEARANCE CARE
85Z03-03E
Fuses Usages
HEAD LAMPS Head Lamp
ECMEngine Control
Module
I/P FUSEInstrument Panel
Fuse
FUEL PUMP Fuel Pump
A/C Air Conditioning
HORN Horn
HI BEAMHead Lamp
High-Beam
DRIVER’S PWR
WNDWDriver’s Power
Window
STOP LAMPS Stop Lamps
DR/LCK Door Lock
MIR HTD Heated Mirror
FRT FOG Front Fog
ILLUM LTLicense Plate Lamp,
Parking Lamp Left
INJ Injector
Fuses Usages
ENG SNSREVAP Canister Purge
Solenoid, HO2S,
Cooling Fan Relay,
CMP Sensor
LOW BEAM LTHead Lamp
Low-Beam Left
ILLUM RTIllumination
Circuit, Parking Lamp
Right
LOW BEAM RTHead Lamp
Low-Beam Right
SPARE Spare
SPARE Spare
SPARE Spare
BATT PWR Battery Power
ABSAntilock Brake
System
HVAC BLWR HVAC Blower
IGN 2 Ignition 2
IGN 1 Ignition 1
FUSE PLR Fuse Puller
COOL FAN LOW Cooling Fan Low
Fuses Usages
DEFOG Defog
COOL FAN HI Cooling Fan High
PWR WNDW Power Window
Relays Usages
COOL FAN LOW Cooling Fan Low
FRT FOG Front Fog
ILLUM Illumination Relay
A/C CMPRSRAir Conditioning
Compressor
HORN Horn
DEFOG Defog
FUEL PUMP Fuel Pump
MAIN Main Relay
COOL FAN HI Cooling Fan High
PWR WNDW Power Window
HEAD LAMPS Headlamp Relay
Capacities and Specifications: