2007 SUZUKI FORENZA alarm
[x] Cancel search: alarmPage 50 of 225

2-2 FEATURES AND CONTROLS
85Z03-03E
Check the distance. You may be too far
from your vehicle. You may need to
stand closer during rainy or snowy
weather.
Check the location. Other vehicles or
objects may be blocking the signal. Take
a few steps to the left or right, hold the
transmitter higher, and try again.
Check to determine if battery replace-
ment is necessary. See “Battery
Replacement” under Remote Keyless
Entry System Operation in this section.
If you are still having trouble, see your
SUZUKI dealer or a qualified technician
for service.
Remote Keyless Entry System
OperationThe following functions are available if your
vehicle has the remote keyless entry sys-
tem:
(LOCK):
Press this button to lock all of the doors. If
all of the doors and the trunk are closed,
the hazard lamps will flash once and the
horn will chirp to indicate that locking has
occurred. The theft-deterrent system will
activate and the security indicator located
on the driver’s door lock will flash.
(UNLOCK):
Press this button to unlock all of the doors.
If all of the doors and the trunk are closed,
the hazard lamps will flash twice to indicate
that unlocking has occurred. The theft-
deterrent system will deactivate and thesecurity indicator located on the driver’s
door lock will turn off.
If a door is not opened or if the engine is
not started within 30 seconds after press-
ing Unlock on the remote keyless entry
transmitter, all of the doors will automati-
cally relock and the theft-deterrent system
will reactivate.
(TRUNK): Sedan model
Press this button for about 1 second to
open the trunk.
(PANIC): Wagon model
Press this button to turn on the panic alarm
feature. The hazard lamps will flash and
the panic alarm will stay on for about 28
seconds unless you press the Panic button
again.
The LED (A) on the transmitter will flash
when the transmitter button is pressed.
The Lock, Unlock and Trunk buttons will
not operate and the theft-deterrent system
will not activate while the key is in the igni-
tion.
Matching Transmitter(s) to Your Vehicle
Each remote keyless entry transmitter is
coded to prevent another transmitter from
unlocking your vehicle. If a transmitter is
lost or stolen, a replacement can be pur-
chased through your SUZUKI dealer.
Remember to bring any remaining trans-
mitters with you when you go to your
N4U2002B
(A)
(A)
(Sedan) (Wagon)
Keys:
Page 58 of 225

2-10 FEATURES AND CONTROLS
85Z03-03E
Theft-Deterrent SystemsVehicle theft is big business, especially in
some cities. Although your vehicle has a
number of theft-deterrent features, we
know that nothing we put on it can make it
impossible to steal.Theft-Deterrent SystemYour vehicle may have a theft-deterrent
system.
Arming the System
To arm the system, do the following:
1) Turn the ignition switch to the LOCK
and remove the key from the ignition. If
the key is inserted in the ignition switch,
the transmitter will not operate the theft-
deterrent system.
2) Close the doors, the windows, the
hood, and the trunk. Make sure the win-
dows are closed, as the system can be
activated even if the windows are open.
3) Lock the doors using the remote key-
less entry transmitter. The transmitter
must be used to activate the theft-deter-
rent system.
– The LED on the transmitter will flash
once.
– All of the doors will lock.
– The hazard warning lamps will flash
once and the horn will chirp.
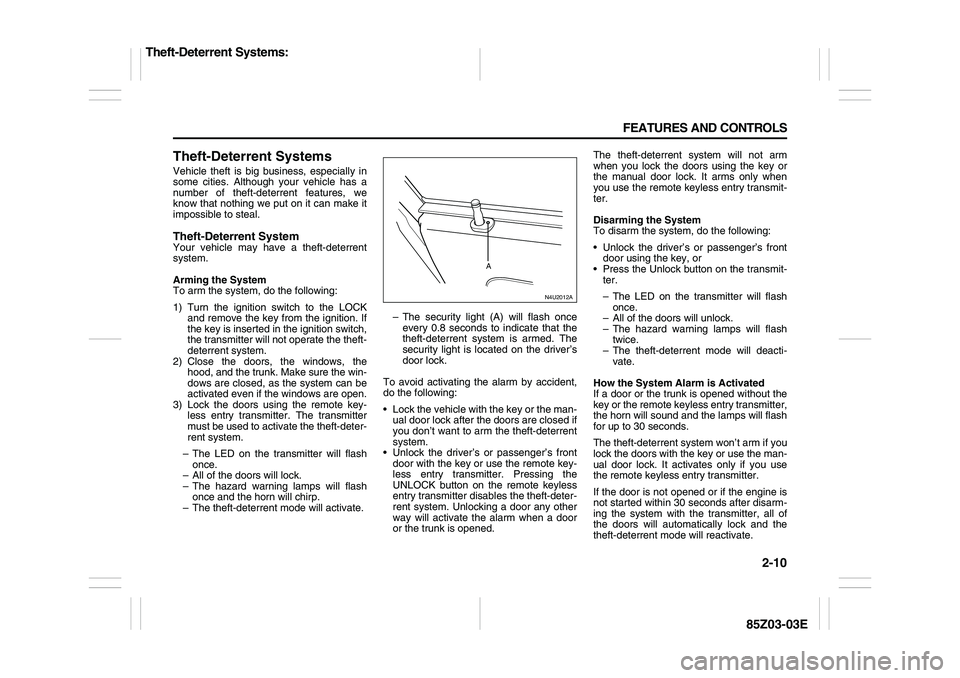
– The theft-deterrent mode will activate.– The security light (A) will flash once
every 0.8 seconds to indicate that the
theft-deterrent system is armed. The
security light is located on the driver’s
door lock.
To avoid activating the alarm by accident,
do the following:
Lock the vehicle with the key or the man-
ual door lock after the doors are closed if
you don’t want to arm the theft-deterrent
system.
Unlock the driver’s or passenger’s front
door with the key or use the remote key-
less entry transmitter. Pressing the
UNLOCK button on the remote keyless
entry transmitter disables the theft-deter-
rent system. Unlocking a door any other
way will activate the alarm when a door
or the trunk is opened.The theft-deterrent system will not arm
when you lock the doors using the key or
the manual door lock. It arms only when
you use the remote keyless entry transmit-
ter.
Disarming the System
To disarm the system, do the following:
Unlock the driver’s or passenger’s front
door using the key, or
Press the Unlock button on the transmit-
ter.
– The LED on the transmitter will flash
once.
– All of the doors will unlock.
– The hazard warning lamps will flash
twice.
– The theft-deterrent mode will deacti-
vate.
How the System Alarm is Activated
If a door or the trunk is opened without the
key or the remote keyless entry transmitter,
the horn will sound and the lamps will flash
for up to 30 seconds.
The theft-deterrent system won’t arm if you
lock the doors with the key or use the man-
ual door lock. It activates only if you use
the remote keyless entry transmitter.
If the door is not opened or if the engine is
not started within 30 seconds after disarm-
ing the system with the transmitter, all of
the doors will automatically lock and the
theft-deterrent mode will reactivate.
N4U2012A
A
Theft-Deterrent Systems:
Page 59 of 225

2-11 FEATURES AND CONTROLS
85Z03-03E
How to Turn Off the System Alarm
If the system alarm is active, it can be
deactivated using the following methods:
Press the Lock or Unlock button on the
remote keyless entry transmitter.
Unlock the driver’s or passenger’s front
door using the key.
Otherwise, the alarm will automatically
stop after 30 seconds. The system will
then lock the doors and reactivate the
theft-deterrent system.
How to Detect a Tamper Condition
If the hazard lamps flash once when the
Lock or Unlock button on your transmitter
is pressed, that means the theft-security
system alarm was triggered while you
were away.
Daily Inspection ChecklistBefore Driving1) Make sure that windows, mirrors, lights
and reflectors are clean and unob-
structed.
2) Visually check the tires for the following
points:
– the depth of the tread groove
– abnormal wear, cracks and damage
– loose wheel nuts
– existence of foreign material such as
nails, stones, etc.
Refer to “Tires” in the “SERVICE AND
APPEARANCE CARE” section for details.
3) Look for oil or other fluid leaks.
NOTE:
It is normal for water to drip from the air
conditioning system after use.
4) Make sure the hood is fully closed and
latched.
5) Check the headlights, turn signal lights,
brake lights and horn for proper opera-
tion.
6) Lock all doors.
7) Adjust the seat and adjustable head
restraints (if equipped).
8) Check the brake pedal.
9) Adjust the mirrors.
10)Make sure that you and all passengers
have properly fastened your safety
belts.11)Make sure that all warning lights come
on as the key is turned to the “ON” or
“START” position.
12)Check all gauges.
13)Make sure that the BRAKE light turns
off when the parking brake is released.
Once a week, or each time you fill your fuel
tank, perform the following under-hood
checks:
1) Engine oil level
2) Coolant level
3) Brake fluid level
4) Power steering (if equipped) fluid level
5) Windshield washer fluid level
6) Hood latch operation
Pull the hood release handle inside the
vehicle. Make sure that you cannot
open the hood all the way without
releasing the secondary latch. Be sure
to close the hood securely after check-
ing for proper latch operation. See the
item “Lubricate Locks, Hinges & Hood
Latch” under “Chassis and Body” in the
“MAINTENANCE SCHEDULE” section
for the lubrication schedule.
WARNING
Make sure the hood is fully closed
and latched before driving. If it is not,
it can fly up unexpectedly during
driving, obstructing your view and
resulting in an accident.
Theft-Deterrent Systems:
Daily Inspection Checklist:
Page 94 of 225

3-18 INSTRUMENT PANEL
85Z03-03E
3) Remove the old passenger compart-
ment air filter.
4) Then reverse the steps to install the
new air filter.
Ensure that the new filter is inserted in
the proper orientation.
Warning Lights, Gauges and
IndicatorsThis section describes the warning lights
and gauges that may be on your vehicle.
The pictures will help you locate them.
Warning lights and gauges can signal that
something is wrong before it becomes seri-
ous enough to cause an expensive repair
or replacement. Paying attention to your
warning lights and gauges could also save
you or others from injury.
Warning lights come on when there may
be or is a problem with one of your vehi-
cle’s functions. As you will see in the
details on the next few pages, some warn-
ing lights come on briefly when you start
the engine just to let you know they’re
working. If you are familiar with this sec-
tion, you should not be alarmed when this
happens.
Gauges can indicate when there may be or
is a problem with one of your vehicle’s
functions. Often gauges and warning lights
work together to let you know when there’s
a problem with your vehicle.
When one of the warning lights comes on
and stays on when you are driving, or
when one of the gauges shows there may
be a problem, check the gauge that tells
you what to do about it. Please follow this
manual’s advice. Waiting to do repairs can
be costly – and even dangerous. So pleaseget to know your warning lights and
gauges. They’re a big help.
Instrument Panel ClusterYour instrument panel cluster is designed
to let you know at a glance how your vehi-
cle is running. You’ll know how fast you’re
going, how much fuel you’re using and
many other things you’ll need to drive
safely and economically.
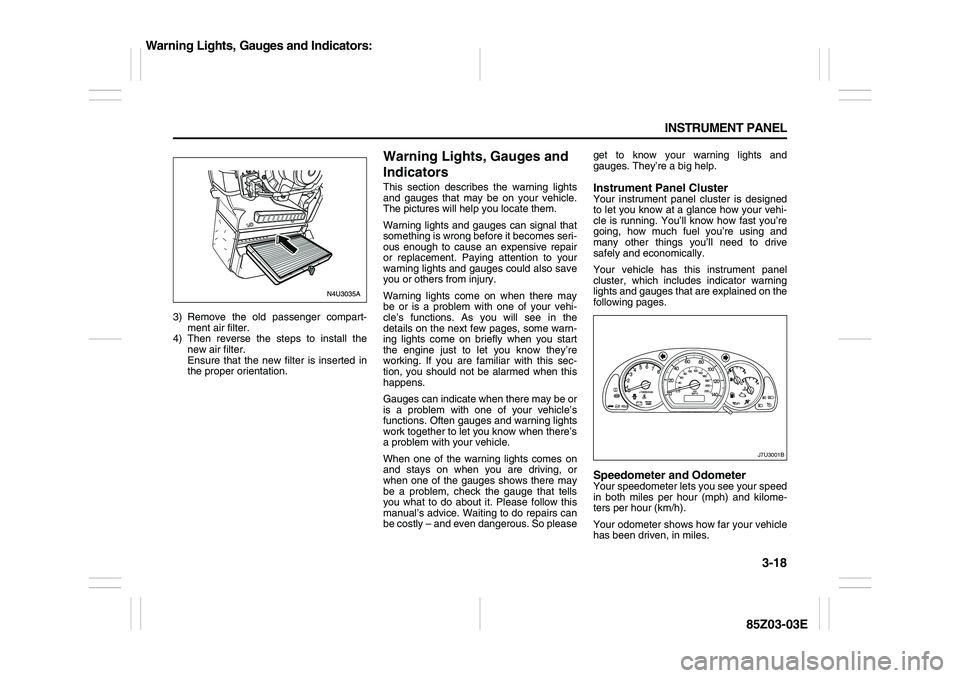
Your vehicle has this instrument panel
cluster, which includes indicator warning
lights and gauges that are explained on the
following pages.Speedometer and OdometerYour speedometer lets you see your speed
in both miles per hour (mph) and kilome-
ters per hour (km/h).
Your odometer shows how far your vehicle
has been driven, in miles.
J7U3001B
Warning Lights, Gauges and Indicators: